
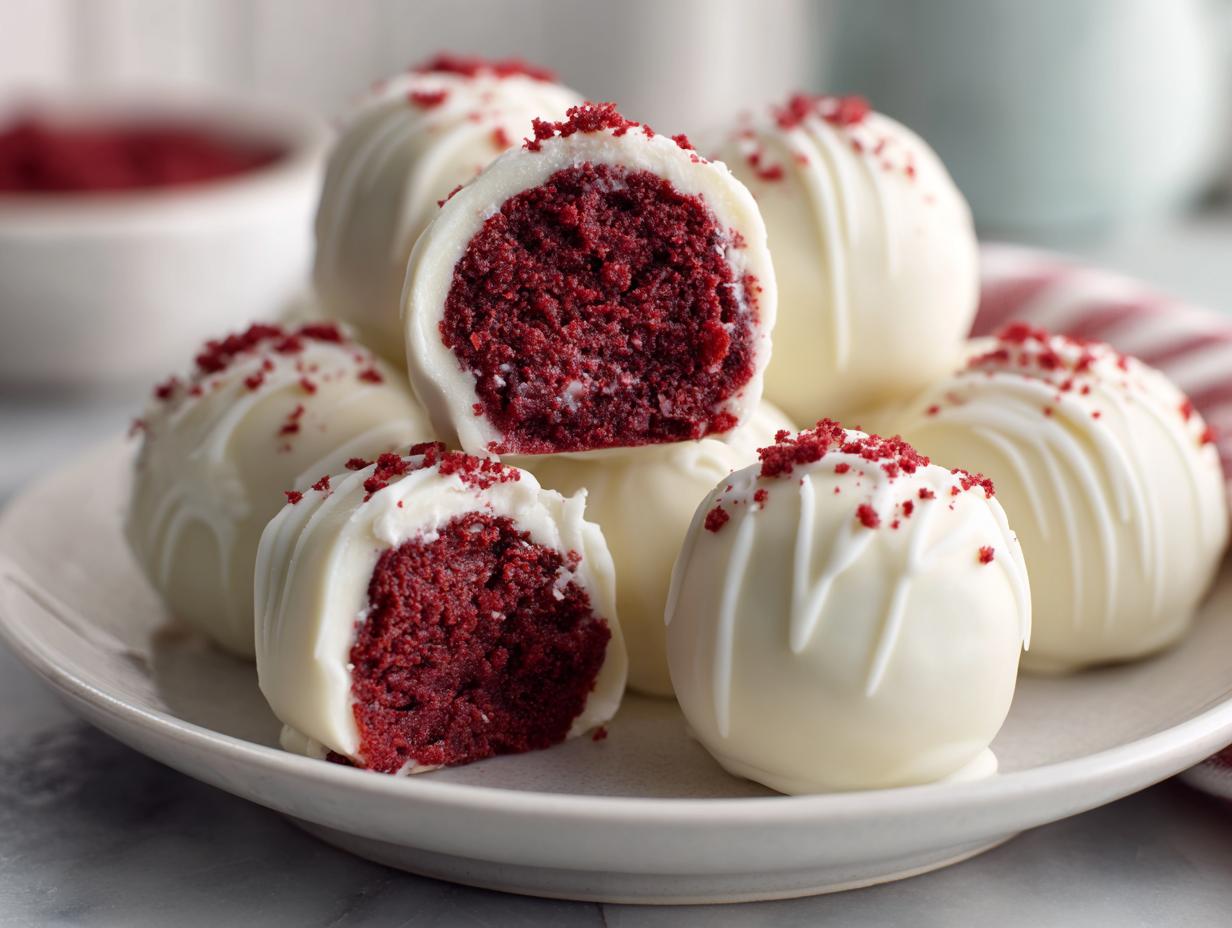
We all have those times, right? You need a show-stopping, deep-red, incredibly decadent dessert, but you barely have the time to breathe, let alone bake something from scratch! That’s exactly why I developed this recipe for Red Velvet Cake Balls. Forget spending hours in the oven; these are gloriously simple, absolutely no-bake, and use a fantastic shortcut that keeps them perfectly fudgy. My goal here at Little Kitchen Diary is to get real, delicious food on your table without adding stress, and these truffles nail that promise. They’re the ultimate bite-sized sweet that always gets rave reviews.

- Why This Easy Red Velvet Cake Balls Recipe Works for Busy Lives
- Gathering Your Ingredients for Red Velvet Cake Balls
- Step-by-Step Instructions: Making No Bake Red Velvet Balls
- Tips for Perfect Party Desserts Red Velvet
- Storage and Make-Ahead for Bite Sized Red Velvet Desserts
- Variations on Red Velvet Cake Bites
- Frequently Asked Questions About Red Velvet Cake Balls
- Approximate Nutritional Data for These Indulgent Desserts
- Share Your Homemade Red Velvet Cake Balls Creations
- Approximate Nutritional Data for These Indulgent Desserts
- Share Your Homemade Red Velvet Cake Balls Creations
Why This Easy Red Velvet Cake Balls Recipe Works for Busy Lives
Listen, I get it. Life is hectic, but that doesn’t mean we have to miss out on incredible desserts. I developed this version of Easy Red Velvet Cake Balls because sometimes you just need results fast, without sacrificing that classic, rich flavor. Trust me, these are the ultimate shortcut stars for any holiday event or last-minute party!
- Zero Oven Time: Since we skip baking the cake entirely and just use an already baked mix, these are pure ‘no bake’ magic from the moment the box opens. That’s huge when your oven is already full of dinner!
- The Cake Mix Hack is Real: Using a boxed Red Velvet cake mix is my secret weapon for instant moisture and that signature flavor profile. It gives you a perfect base every single time, no measuring flour needed.
- Cream Cheese Frosting Glue: The store-bought cream cheese frosting is the binder that turns dry crumbs into rich, truffle-like centers. It’s fast, it’s tangy, and it’s essential for that classic cake ball texture.
- Party Perfection: Because they are bite-sized and coat beautifully in chocolate, these look incredibly fancy when you set them out. They are absolute showstoppers for Valentine’s Day or just a weeknight treat, and they are so easy to transport!
If you love recipes that cut corners without flavor sacrifice, you should seriously check out my guide to the easiest 3-ingredient Oreo fudge recipe too. It lives in the same fast-and-furious dessert category!
Gathering Your Ingredients for Red Velvet Cake Balls
Okay, getting started is the easiest part, honestly! Since we are relying on a few store-bought heroes here, you don’t need to hunt down specialty items. Everything you need for the fudgy center is usually found right in your standard grocery aisle. The magic starts with a box of cake, a tub of frosting, and something shiny for the outside.
You’ll need one box of the Red Velvet Cake Mix—make sure it’s the standard 15.25 oz size. Then, grab a full, 16 oz container of store-bought Cream Cheese Frosting. Resist the urge only to use half; we use all of it! Finally, we wrap these little jewels in white chocolate; grab about 12 ounces of melting wafers or candy melts. That’s the core trio for our Cream Cheese Frosting Cake Balls.
Ingredient Notes and Substitutions for Cream Cheese Frosting Cake Balls
Since this recipe is designed for speed, I lean heavily on the shortcuts, but you still have room to tweak things. If you made a small red velvet cake from scratch instead of using the mix, that’s totally fine! Just make sure it’s dense, not crumbly like an airy layer cake. You’ll want roughly 4 cups of finely crumbled cake base.
The frosting is key. While store-bought is lightning fast, if you have an extra ten minutes, making a quick cream cheese frosting from scratch makes a huge difference in richness. However, if you use the canned stuff, just make sure it’s room temperature but still quite thick—if it’s too runny, your balls won’t hold their shape when you roll them.
A final note on the outside: while white chocolate is classic and lets that red interior really pop against the pale coating, please don’t feel stuck! Milk chocolate melts beautifully too, and dark chocolate gives these little bites a wonderful, mature balance against the sweet cake center. Oh, and grab some festive sprinkles while you’re at it—they make them look extra special for parties, especially if you’re making them for Valentine Desserts!
Step-by-Step Instructions: Making No Bake Red Velvet Balls
Alright, this is where the real magic happens, and I promise you, it is sneaky easy because we are skipping that whole oven routine. The key to successful, non-messy No Bake Red Velvet Balls is patience in two very specific spots: cooling the cake completely, and chilling the mixture thoroughly before dipping. If you rush those steps, you end up with chocolate soup!
We start by treating the cake mix like a regular cake—bake it, let it go totally cold, and then smash it into dust. Then comes the binding, where we mix in all that tangy cream cheese frosting until it feels like playdough. Once rolled, we firm them up so they’re ready to handle the chocolate bath. It’s a straightforward path to amazing White Chocolate Dipped Treats.
Baking and Crumbing the Cake Base
First things first, even though it’s “no-bake” in the final sense, we need a baked cake base. You follow the box directions for a sheet cake—don’t use a bundt or layers, those dry out too fast! Once it’s done, you absolutely must let it cool down. I mean, rock concert cold. If it’s lukewarm, the frosting melts away, and it gets sticky and impossible.
Once it’s cool, grab your biggest bowl. You need to crumble that entire unfrosted cake. Really get in there with your hands and crush it until it’s finer than sand. Seriously, I pick out any big chunks or the very dark, crusty edges—we want soft, vibrant red crumbs for the best fudgy center.
Mixing the Fudgy Red Velvet Cake Balls Center
Now for the fun part where it starts looking like candy dough! Take that entire tub of cream cheese frosting (yep, the whole thing!) and dump it right onto your fine cake crumbs. Grab a heavy spoon or, better yet, just dig your clean hands in there. You need to mix this until everything is uniformly combined. No white streaks from the frosting should be showing.
When it’s ready, it should feel soft but firm enough that you can squeeze a piece between your fingers, and it holds its shape perfectly. That’s your cue to start rolling! Measure out small, even portions—about one inch is perfect—and gently roll them between your palms. Uniform size helps everything coat evenly later on. Place those little balls onto a sheet lined with parchment paper.
Chilling and Preparing the White Chocolate Dipped Treats
I can’t stress this enough: Chilling is mandatory, not optional! Put that sheet pan full of rolled balls into the refrigerator for at least 30 minutes. If you skip this, the warm cake mixture hits the melted chocolate, and BAM—your balls disintegrate right off the fork. Chill them hard so they are solid!
While they are chilling, get your chocolate ready (Step 6). I use microwave-safe bowls for the white chocolate wafers. Melt them in short bursts—start with 30 seconds, stir well, then 20-second intervals, stirring vigorously between each one. You want it perfectly smooth and runny, with no lumps hiding in the bottom. If you try to rush the microwaving, the chocolate will seize up, and trust me, nobody wants a gritty coating on their White Chocolate Dipped Treats.
Coating and Setting the Red Velvet Truffles
Time for the grand finale! Take your nice, firm balls out of the fridge. Dip one chilled cake ball completely into the warm, melted white chocolate. Use a fork to gently lower it in. Lift it out, tap the fork lightly against the side of the bowl to let the excess drip off—you don’t want big chocolate puddles forming around the base.
Place it immediately back on the parchment paper. If you want that extra festive look, now is the time to toss on sprinkles before the shell sets! Use a second fork to gently slide the finished ball onto the paper. Let these Red Velvet Truffles sit at room temperature until the chocolate is completely firm. If you’re in a rush, pop them back in the fridge for just 10 minutes until they are hard to the touch.

Tips for Perfect Party Desserts Red Velvet
When you’re dealing with something this decadent destined for a crowd—the best Party Desserts Red Velvet offers—you want everything to look flawless, especially that chocolate shell. I’ve definitely learned some hard lessons the hard way creating these, and I want to save you the same frustration!
I remember one of my first big batches before I truly understood the chilling step. I rushed the dipping because company was due any minute. The balls were too soft, and when I dipped them, they instantly melted into the white chocolate, creating these sad, amorphous blobs instead of neat little spheres. It looked like a chocolate volcano erupted! That’s when I realized the chilling step isn’t just a suggestion; it’s the foundation holding the whole operation together.
Here are the tricks I use now to guarantee that smooth, gorgeous finish:
- Keep the Coating Thin: When you dip the cold ball, you want to use a fork and let the excess chocolate drip off completely before you place it back on the parchment. If the chocolate is too thick on the bottom, it creates that little *foot* or puddle that looks sloppy. A gentle tap or wiggle on the fork helps settle the coating evenly.
- Control Your Chocolate Temperature: If your white chocolate gets too hot, it thickens strangely and can crack when it dries! If you notice it getting stiff or separating while you’re working through a big batch, take it off the heat or out of the microwave for about a minute and give it a really good stir. You need it flowing easily, not gloopy. For more guidance on getting dipping chocolate just right, check out how I handle coatings in my cheese ball recipe, where coating texture is also crucial.
- Dusting Fast: If you are using sprinkles or any decoration, you MUST add them immediately after the ball comes out of the melted chocolate. The second the chocolate hardens, the sprinkles won’t stick! It forces you to work in small batches, which is actually better for maintaining the dipping consistency anyway.
- If It’s Still Too Soft: If you tried chilling the mixture and it’s still feeling too sticky to roll neatly—maybe your frosting was just super soft—don’t despair! Pop the bowl back in the freezer for just 10 minutes. You don’t want it rock solid, just firm enough to handle without leaving deep fingerprints. You can find more great baking inspiration over at Basics with Bails if you want another perspective on rolling techniques!
Storage and Make-Ahead for Bite Sized Red Velvet Desserts
One of the best things about making **Bite Sized Red Velvet Desserts** is that you can absolutely make them ahead of time! Honestly, they are often better the next day because the cake crumbs have time to really absorb the moisture from that cream cheese frosting. Planning ahead for parties is my favorite kind of sanity saver, and these deliver big time.
You’ve got a couple of great options here, whether you need them ready for a gathering on the weekend or you want to keep a secret stash hidden away for emergencies—which, let’s be real, is just a craving, right? Since these are essentially truffles coated in a candy shell, we need to treat them gently.
- Refrigeration Secrets: Once the white chocolate coating is completely set, you can absolutely store these in the fridge. I like to keep them in a single layer in an airtight container. If you have to stack them, put a sheet of parchment paper between the layers. They stay wonderfully moist and delicious like this for about a full week.
- The Freezer Test: Yes! These freeze like a dream. If you are preparing for a big holiday event, you can make these two to three weeks ahead of time. You’ll want to arrange them in a freezer-safe airtight container, again using parchment paper between any layers.
- Thawing Safely: When you pull them out, don’t leave them on the counter because the condensation will sweat the chocolate coating right off! Pull them into the fridge first for about 12 hours to thaw slowly. Then, let them sit on the counter for an hour before serving. This helps the chocolate stay crisp instead of getting drippy.
I’ve had such good luck making giant batches of things like this ahead of time. It’s the same reason I always prep my no-bake treats early; it takes the pressure off baking day! If you need more ideas for making grab-and-go snacks early, you might want to look at my tips for no-bake granola bars recipe—totally different flavors, but the same make-ahead philosophy applies!
Variations on Red Velvet Cake Bites
While this recipe delivers the perfect, simple version of Red Velvet Cake Balls, I always love having a little room to play around! Once you’ve mastered the basic technique of cake crunch plus cream cheese frosting equals perfect rollable dough, you can start experimenting. It’s so much fun to customize these beautiful, bite-sized treats depending on the holiday or who you happen to be making them for.
The easiest way to switch things up is by changing the outer coating. If you are tired of white chocolate, swap it out! Dark chocolate gives your Red Velvet Cake Bites a deeper, more intense pairing with the tangy cake interior. Milk chocolate is always comforting, too. Just treat the melting process exactly the same way.
I’ve seen some absolutely gorgeous variations, and here are a few that I think truly elevate these little guys from simple party treat to gourmet indulgence:
- The Cheesecake Swirl: This is a popular one people ask about constantly! To make Red Velvet Cheesecake Bites, simply soften about 4 ounces of plain cream cheese and mix that directly into your crumbled cake mix *before* you add the container of frosting. It makes the center incredibly rich and almost cheesecake-like. It might feel a little softer, so make sure you chill it for a solid hour before rolling!
- A Little Kick: For the adults at the party, try spiking the mixture slightly. Once your cake crumbs and frosting are combined, stir in maybe a tablespoon or two of bourbon or dark rum. It deepens the cocoa flavor beautifully, especially if you are going the dark chocolate route! For more ideas on balancing rich desserts, check out my thoughts on rich flavors when making apple cheesecake bars.
- Extract Boost: Sometimes I add a small drop—just a tiny one—of almond extract when mixing the center. It highlights the vanilla notes in the cake mix and makes the flavor profile feel a little more complex. Remember, extracts are strong, so start small!
If you want to see how another amazing home cook switches things up, Amelia over at Dang That’s Sweet has a fantastic guide on Red Velvet Truffles that shows off some beautiful decorating options if you feel like getting fancy!

Frequently Asked Questions About Red Velvet Cake Balls
I know when I first started making these, I had a million little questions buzzing around my head about the shortcuts and the best approach. You want to nail that perfect texture for your Holiday Cake Balls! Here are the most common things folks ask me about getting these Bite Sized Sweets just right.
Can I skip the baking step entirely and use dry cake mix?
Oh gosh, please don’t try that! You absolutely need a baked cake base, even if it’s from a mix. Dry cake mix sitting in the bowl won’t crumble right, and it certainly won’t act like a proper crumb base. The whole point of this **Easy Dessert Recipe** is that you bake one simple sheet cake, let it cool, and *then* we use that cooked, slightly sweetened cake as the foundation. Baking is non-negotiable here, but it’s fast!
What if I don’t have cream cheese frosting ready? Can I use regular vanilla frosting?
You *can* use vanilla frosting, but honestly, you’re sacrificing the key flavor note! The tang from the cream cheese frosting is what cuts through the sweetness of the cake and the outer white chocolate shell. It’s what turns a cake pop into a magnificent **Red Velvet Truffle**. If you don’t have a tub already, make a fast batch of homemade cream cheese frosting—it’s just cream cheese, butter, a little vanilla, and powdered sugar until it’s thick. It makes all the difference in elevating these to Indulgent Desserts.
Can I substitute the Red Velvet Cake Mix with another flavor?
You certainly can switch up the flavor profile, but then they aren’t really *Red Velvet Cake Balls* anymore, are they? If you use chocolate cake mix, you get a decadent chocolate truffle. If you use yellow cake mix, you get a delicious vanilla truffle! For holidays or parties where red is essential, stick to the RV mix. If you’re craving a change, though, I often use my secret for a quick fruit cake alternative when I need something different; you can find my tips for a moist fruit cake recipe if you want to try a completely different classic flavor base!
Why is my white chocolate coating cracking when it sets?
This is almost always a temperature issue. The chocolate coating cracks because the cold cake ball underneath shocks the warm coating, causing it to contract too quickly! To fix this, make sure your cake balls are well-chilled—borderline frosty—but let your melted chocolate cool down just a bit before dipping. You want it warm and fluid, but not scorching hot. A slightly cooler dip onto a very cold center prevents that awful shattering when you bite into your **Chocolate Covered Cake Balls**.
Approximate Nutritional Data for These Indulgent Desserts
Look, these are rich because they are supposed to be! They are little bites of pure joy, not exactly salad ingredients. That said, since we are using a cake mix shortcut, it helps keep the ingredient list short. These values are estimates based on using a standard boxed mix, store-bought cream cheese frosting, and white chocolate candy melts. Please remember these are always approximate, especially since portion size varies based on how big you roll your balls!
- Serving Size: 1 ball
- Calories: About 220
- Sugar: Around 20g
- Fat: Roughly 14g
- Carbohydrates: About 23g
- Protein: About 2g
They are definitely on the more indulgent side of the spectrum, which is perfect for a holiday treat or a special Party Treat!
Share Your Homemade Red Velvet Cake Balls Creations
I truly hope you loved making these as much as I enjoy sharing them with you! Hearing about your successes—maybe you nailed the white chocolate dip on the first try, or perhaps the kids loved rolling the dough—that’s the best part of running Little Kitchen Diary. When you try this recipe for Red Velvet Cake Balls, please let me know how it went!
Drop a rating down below; it really helps others see what a lifesaver this recipe is for Festive Red Treats! And if you snap a picture of these gorgeous little Bite Sized Sweets, please tag me on social media. Seeing your creations is what keeps my own kitchen buzzing with inspiration. Can’t wait to hear all about your beautiful, no-bake results!
Approximate Nutritional Data for These Indulgent Desserts
Look, these are rich because they are supposed to be! They are little bites of pure joy, not exactly salad ingredients. That said, since we are using a cake mix shortcut, it helps keep the ingredient list short. These values are estimates based on using a standard boxed mix, store-bought cream cheese frosting, and white chocolate candy melts. Please remember these are always approximate, especially since portion size varies based on how big you roll your balls!
- Serving Size: 1 ball
- Calories: About 220
- Sugar: Around 20g
- Fat: Roughly 14g
- Carbohydrates: About 23g
- Protein: About 2g
They are definitely on the more indulgent side of the spectrum, which is perfect for a holiday treat or a special Party Treat!
Share Your Homemade Red Velvet Cake Balls Creations
I truly hope you loved making these as much as I enjoy sharing them with you! Hearing about your successes—maybe you nailed the white chocolate dip on the first try, or perhaps the kids loved rolling the dough—that’s the best part of running Little Kitchen Diary. When you try this recipe for Red Velvet Cake Balls, please let me know how it went!
Drop a rating down below; it really helps others see what a lifesaver this recipe is for Festive Red Treats! And if you snap a picture of these gorgeous little Bite Sized Sweets, please tag me on social media. Seeing your creations is what keeps my own kitchen buzzing with inspiration. Can’t wait to hear all about your beautiful, no-bake results! If you want to read more about my journey and why I share these simple finds, check out my About Page!
PrintEasy No-Bake Red Velvet Cake Balls with Cream Cheese Frosting
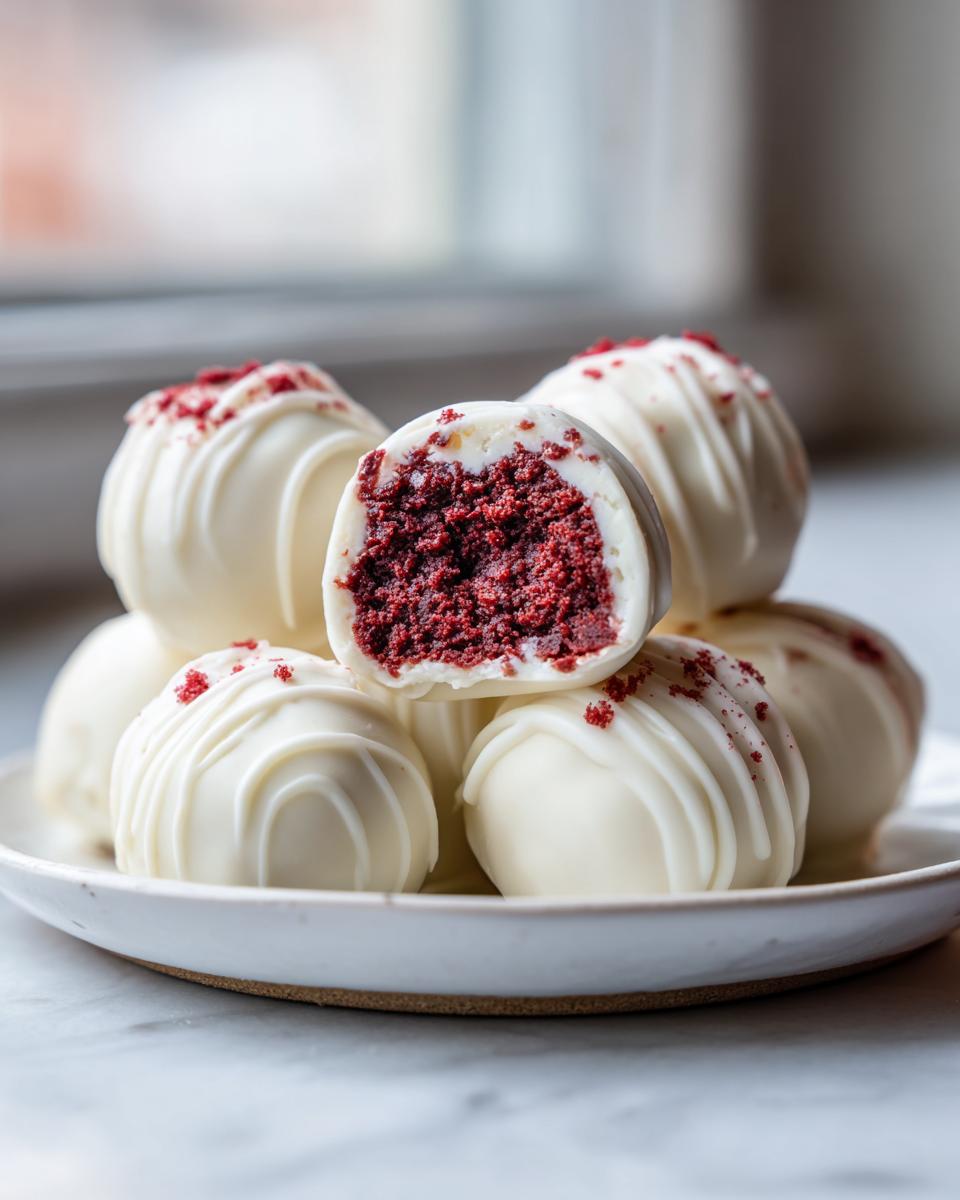
Make these simple, bite-sized Red Velvet Cake Balls using a cake mix shortcut. They feature a rich, fudgy center made with cream cheese frosting and are coated in smooth white chocolate. These are perfect party desserts or holiday treats.
- Prep Time: 25 min
- Cook Time: 30 min
- Total Time: 55 min
- Yield: 24 servings 1x
- Category: Dessert
- Method: No-Bake
- Cuisine: American
- Diet: Vegetarian
Ingredients
- 1 box (15.25 oz) Red Velvet Cake Mix
- 1 container (16 oz) Cream Cheese Frosting (store-bought or homemade)
- 12 ounces White Chocolate Melting Wafers or Candy Melts
- Optional: Red or white sprinkles for decoration
Instructions
- Prepare the cake according to the package directions for a sheet cake, omitting any oil or water listed if using a standard recipe that calls for frosting later. Let the cake cool completely.
- Crumble the cooled cake completely into fine crumbs in a large bowl. Discard any overly browned edges.
- Add the entire container of cream cheese frosting to the cake crumbs. Mix with a sturdy spoon or clean hands until the mixture is fully combined and holds together when squeezed.
- Roll the mixture into small, uniform balls, about 1 inch in diameter. Place the balls on a baking sheet lined with parchment paper.
- Chill the cake balls in the refrigerator for at least 30 minutes to firm them up. This step prevents them from falling apart when dipping.
- Melt the white chocolate wafers according to package directions, usually in a microwave-safe bowl in 30-second intervals, stirring until smooth.
- Dip each chilled cake ball into the melted white chocolate, ensuring it is fully coated. Use a fork or dipping tool to lift it out, allowing excess chocolate to drip back into the bowl.
- Place the dipped ball back onto the parchment-lined sheet. Immediately add sprinkles, if using, before the chocolate sets.
- Allow the chocolate coating to set completely at room temperature, or speed up the process by chilling them again briefly.
Notes
- For a shortcut, use a boxed cake mix and store-bought frosting. This makes the recipe fast and easy.
- If you prefer a richer flavor, use homemade cream cheese frosting instead of canned.
- If the mixture is too soft to roll, add a tablespoon or two of powdered sugar until it firms up slightly.
- You can substitute white chocolate with milk or dark chocolate for dipping.
- These Red Velvet Truffles freeze well for later enjoyment.
Nutrition
- Serving Size: 1 ball
- Calories: 220
- Sugar: 20
- Sodium: 150
- Fat: 14
- Saturated Fat: 8
- Unsaturated Fat: 6
- Trans Fat: 0.5
- Carbohydrates: 23
- Fiber: 0.5
- Protein: 2
- Cholesterol: 25