
Ever get that craving for something truly decadent, but you just cannot face turning on the oven or spending an entire afternoon in the kitchen? I totally get it. Life moves fast, but that doesn’t mean dessert has to be boring! That’s exactly why I’m sharing what I call my ultimate rescue recipe: the Easiest 3-Ingredient Oreo Fudge. Here at Little Kitchen Diary, my whole goal is making sure delicious food fits into real, busy lives. This oreo fudge is the perfect example of that philosophy in action. It’s rich, it’s intensely cookie-loaded, and honestly, it feels way more complicated than it actually is. Trust me, this one’s a lifesaver.
- Why This 3 Ingredient Dessert is Your New Favorite Oreo Fudge
- Gathering Ingredients for Your Creamy Fudge Squares
- Step-by-Step Guide to Making Perfect Oreo Fudge
- Tips for Success with Your Homemade Candy
- Serving Suggestions for This Quick Dessert Idea
- Storage and Reheating Instructions for Leftover Oreo Fudge
- Frequently Asked Questions About Oreo Fudge
- Estimated Nutritional Data for This Family Favorite Fudge
- Share Your Experience Making This Oreo Fudge
Why This 3 Ingredient Dessert is Your New Favorite Oreo Fudge
When I first introduced this recipe, people were skeptical. Three ingredients? Fudge? Yep! This easy fudge recipe is pure magic because it delivers ultimate richness without any fuss. It’s totally a no bake fudge dream.
- Incredibly fast prep time—less than 10 minutes!
- Sets up perfectly in the fridge; no stovetop fuss needed.
- That creamy texture we all crave from real homemade candy.
The Simplicity of Our Shortcut Fudge Recipe
I call this a shortcut fudge recipe because who needs complicated steps when you have white chocolate and condensed milk doing all the heavy lifting? There’s zero baking involved, which is a lifesaver on hot summer days or when I’ve procrastinated too long before a party. This is the quickest quick dessert idea I always turn to when the cravings hit hard.
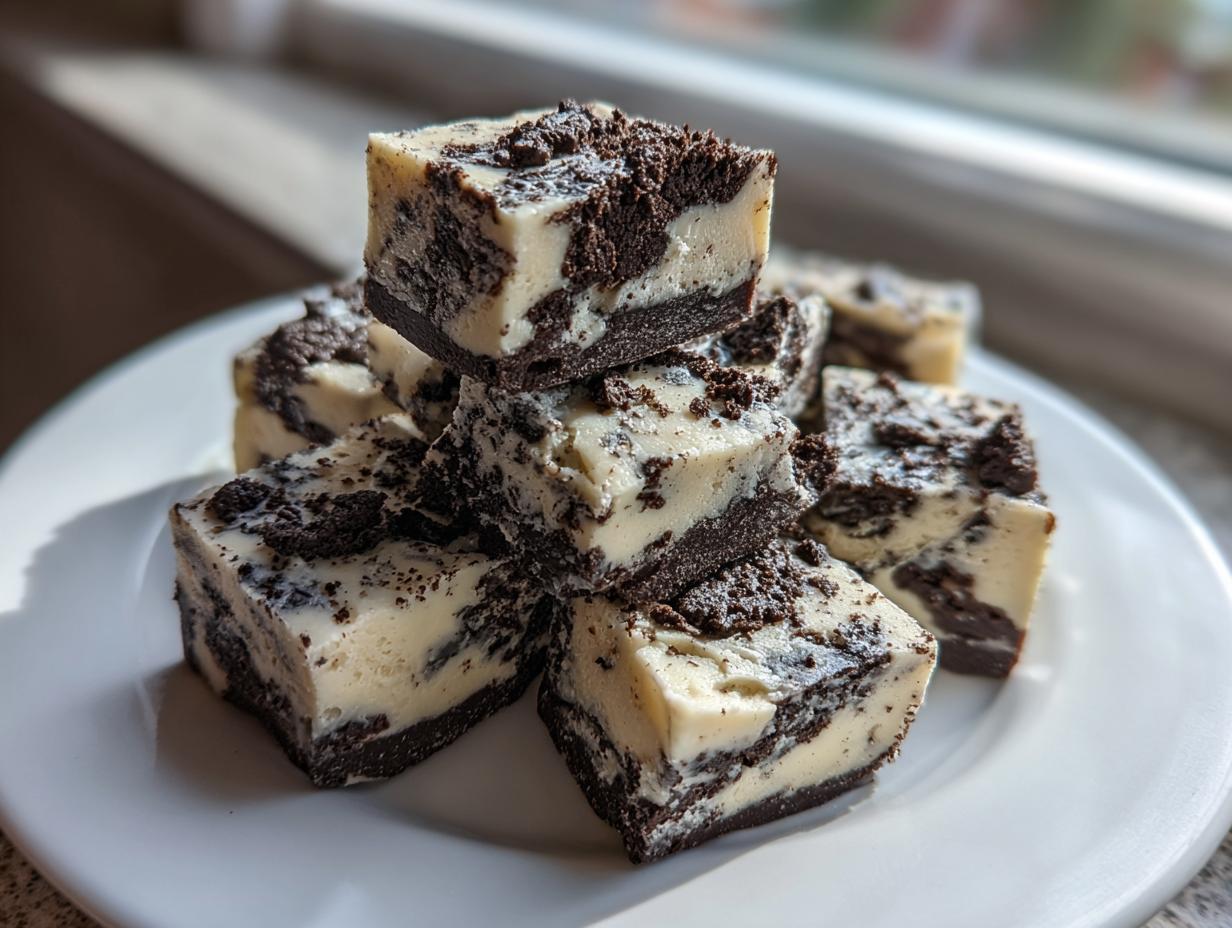
Gathering Ingredients for Your Creamy Fudge Squares
Okay, assembling this cookies and cream fudge is almost as fun as eating it, mostly because there are just three things you need! Seriously, stock up, and you are ready for instant dessert success. Because this is such a simple formula—it relies entirely on the quality and the measurement of those three items. Get them right, and you’re golden.
Here’s what you’ll need on hand for your batch of creamy fudge squares:
- One (14 ounce) can of sweetened condensed milk—don’t grab evaporated milk, that’s a totally different beast!
- Two full cups of white chocolate chips.
- Three cups of Oreos, crushed up nice and good.
That’s it! No scary steps, no obscure vanilla extracts. Just good, honest ingredients ready to make some magic.
Ingredient Notes and Substitutions for Oreo Fudge
Even with only three things, there are a couple of tricks I stick to for the ultimate oreo fudge. First, the chocolate chips. Don’t skimp here, folks! You want good quality white chocolate chips. If you use waxy, cheap chips, your melt will be lumpy and sad, and that messes up the whole smooth texture we are aiming for in this white chocolate fudge.
Next up: the Oreos! I always use the whole cookie—the chocolate wafer and the cream center. That filling helps bind things together perfectly when melted. When you crush them, you should aim for fine crumbs, but leave a good handful of larger, jagged chunks. Those bigger pieces are what give you that satisfying crunch in every bite of your crushed oreo treats. I usually pulse mine in the food processor five or six times—just enough to break them down without turning them into black dust.
Step-by-Step Guide to Making Perfect Oreo Fudge
Alright, here is where the magic happens, and trust me, it’s less about cooking and more about assembly! Getting this oreo fudge done right is all about careful melting and gentle folding. Since we aren’t using the oven, our main concern is making sure that white chocolate base is silky smooth before we introduce those cookie crumbs. No rushing this part, but don’t worry—it still comes together faster than you think!
Preparing the Pan and Melting the White Chocolate Fudge Base
First things first: the pan prep! Grab an 8×8 inch dish. This is critical: line it with parchment paper, making sure you leave a good overhang on two opposite sides. Think of it as little handles you can grab later to lift the whole block out in one piece. Now, for the chocolate. Put your white chocolate chips in a sturdy, microwave-safe bowl. Never melt white chocolate on high power; it burns instantly and gets gritty, which ruins the whole idea of simple chocolate fudge! I microwave mine at 50% power, stirring every 30 seconds until it’s just barely starting to melt. Then, just stir gently until the residual heat smooths out the rest. That’s the secret to not scorching it!
Combining Ingredients and Setting the Simple Chocolate Fudge
Once your chocolate is smooth as glass, pour in the entire can of sweetened condensed milk. Stir until every bit of the chocolate and milk are friends—it will look thick and glossy. Now, gently fold in those crushed Oreos. You don’t want to beat them in; you want to *fold* them so you don’t deflate all the air from the chocolate mixture. Press that lovely, crumbly fudge mixture firmly and evenly into your lined pan. You want a nice, flat top for those gorgeous creamy fudge squares.
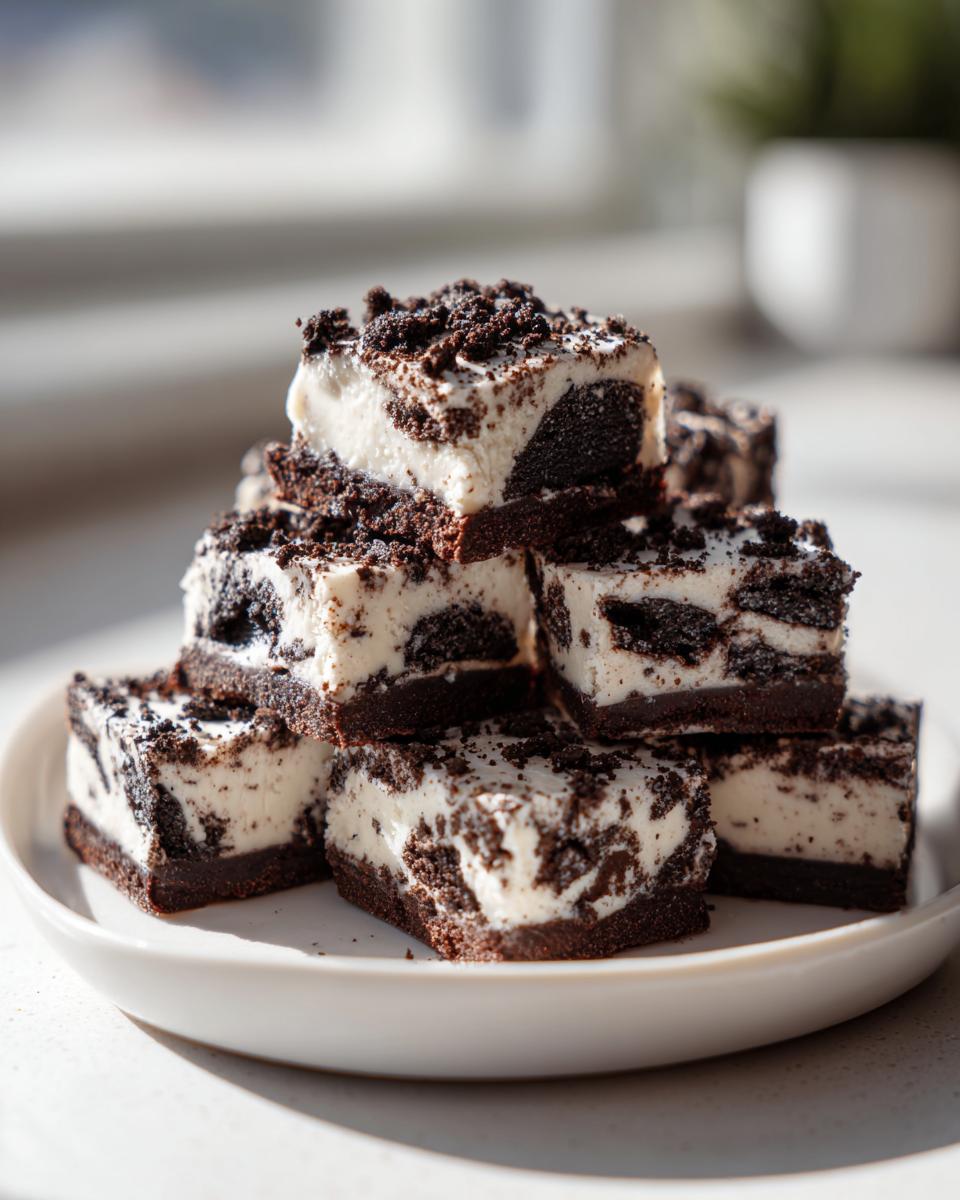
Cover it up and send it to the fridge. You need to let this set up for at least two hours. Patience is key here, remember? If you try to slice it early, it’s just going to smear everywhere. After those two hours, you can lift it right out using those parchment handles and slice it up!
Tips for Success with Your Homemade Candy
Making this homemade candy is honestly a joy because it’s so hard to mess up, but I want your batch of oreo fudge to be absolutely rockstar level perfect. A few small tweaks I learned early on can make the difference between good fudge and mind-blowingly good fudge. Seriously, pay attention to the chocolate melt—it’s the make-or-break moment!
When it comes to the white chocolate, if you see it start to look grainy or clumpy while you’re melting it, that means it’s seized up. Oops! It happens if it gets too hot or if even a teeny drop of water gets in there. Don’t panic! You still might save it. Take it out immediately and stir in one teaspoon of neutral oil—vegetable or canola works great. It often smooths right back out, but this is why I preach using low microwave power for just 30 seconds at a time!
Also, remember what I said about those cookies? Don’t over-process them! You want texture, not powder. If you use the food processor, pulse it lightly. If you’re going old-school like my dad used to do, put them in a sturdy zip-top bag, seal it tight, and just give them a good whack with a rolling pin until you have nice, rough pieces. That variance in size is what makes these oreo fudge squares irresistible. Those big chunks give you that wonderful crunch against the creamy base.
Finally, when you press the mixture into the pan, use a lightly greased spatula or the back of a measuring cup. Pressing it firmly ensures there aren’t any air pockets trapped inside your fudge block that could make it crumble when you slice it. A good, solid press leads to those perfectly neat, sliceable creamy fudge squares we are aiming for!
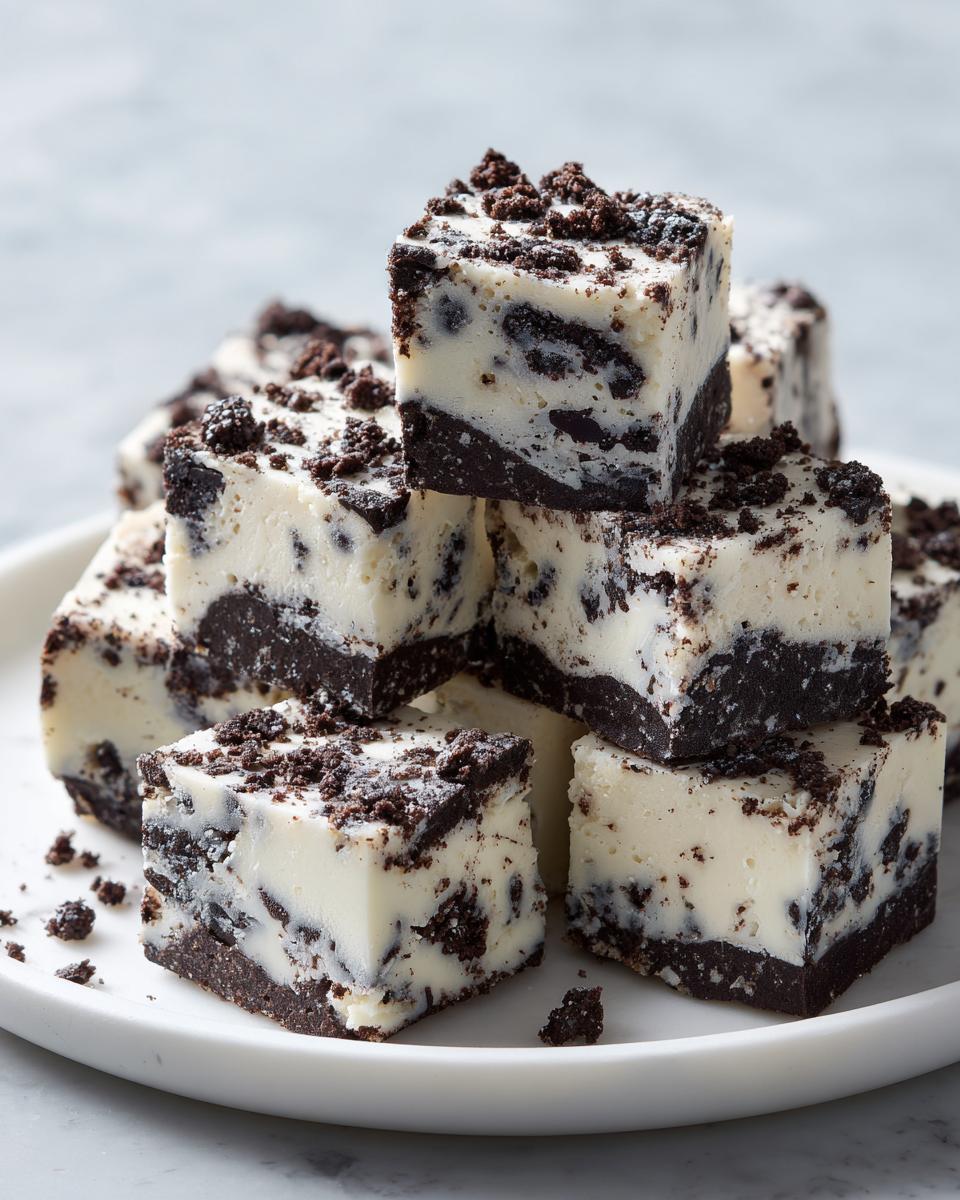
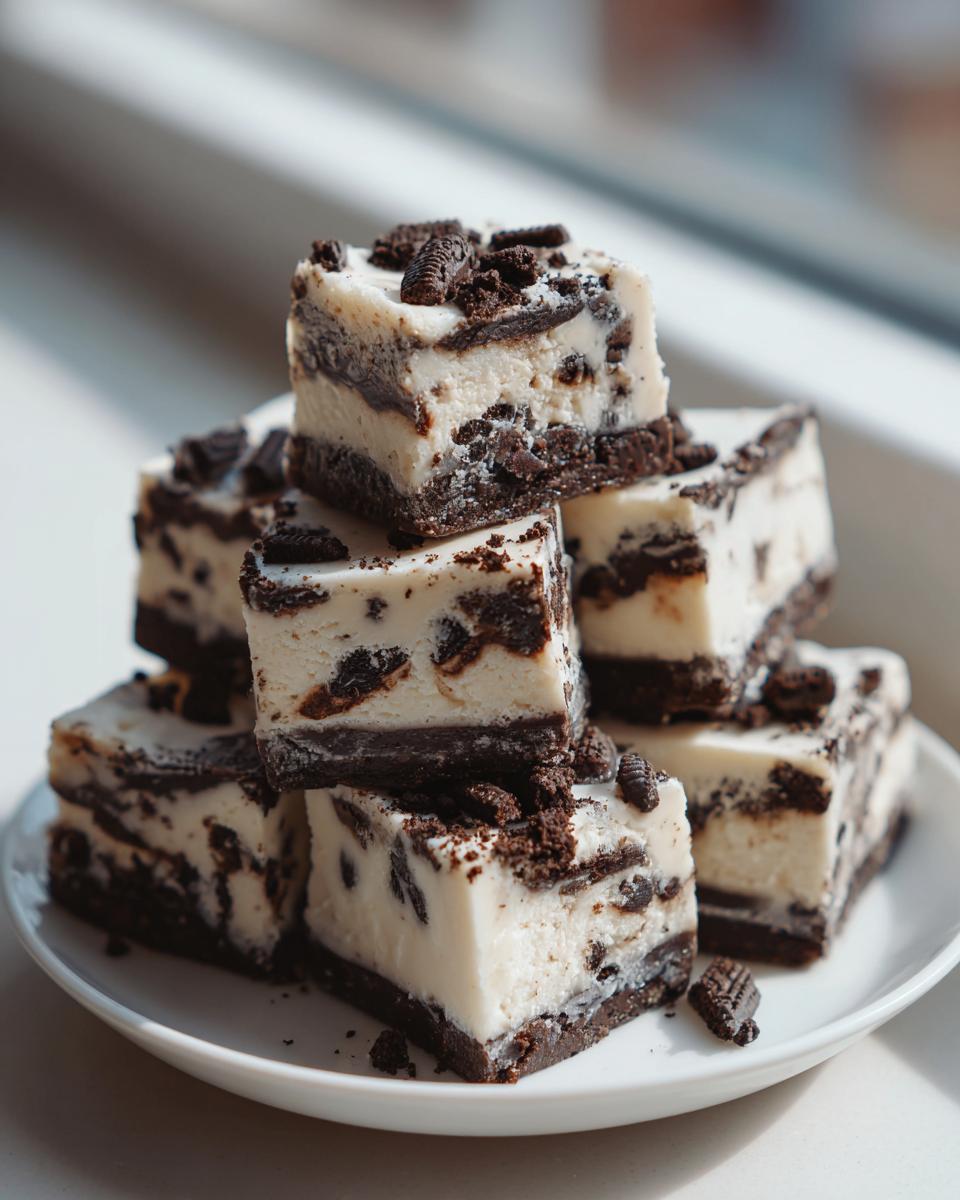
Serving Suggestions for This Quick Dessert Idea
So, you’ve got this beautiful block of rich, creamy oreo fudge setting up in the fridge. Now what? Presentation matters, even for something as simple as three-ingredient candy! You don’t want people slicing off huge, uneven hunks when you serve them up.
The best way to present this is definitely as small, neat squares. Since this fudge is incredibly rich because of that condensed milk and chocolate base—it goes a long, long way! I usually aim for about 36 little bites out of an 8×8 pan. Think two-bite luxury, not a massive slab. When you lift that block out using your parchment paper handles, let it sit on a cutting board for just five minutes at room temperature. This makes the slicing much cleaner.
Then, pile those perfect crushed oreo treats onto a simple white platter. They look fantastic purely on their own, but if you’re serving them up for a holiday spread or when company drops by unexpectedly, here are a few pairings that I love:
- For Coffee Time: A small square of this fudge next to a strong cup of freshly brewed coffee cuts through that intense sweetness just right.
- As a Party Platter Filler: This definitely works as the ‘chocolate centerpiece’ when surrounded by things that are a little less sweet, like some fresh strawberries or perhaps my lemon poppy seed muffins if you baked earlier in the day.
- Quick Gifting: If you’ve made these for a holiday fudge gift, just arrange them in cute cellophane bags tied with a ribbon. They look instantly professional, even though you spent maybe five minutes making them!
Remember, the beauty of this easy fudge recipe is its versatility. It tastes amazing just pulled straight from the cold fridge, so don’t overthink the serving setup. Simple is best!
Storage and Reheating Instructions for Leftover Oreo Fudge
Now, if you happen to have any leftovers of this wonderful oreo fudge—which I honestly doubt, but hope for your sake you do!—storing it is super simple. Since this is a no-bake confection, the main thing we are protecting is that perfectly creamy texture we worked so hard to achieve by melting that white chocolate just right.
You definitely don’t need to worry about reheating this one, which is another great benefit of using condensed milk as the base! Fudge is best enjoyed cool or at room temperature, but never hot. If you try to warm it up, you’re just going to end up with a sweet puddle, and that defeats the purpose of making neat little creamy fudge squares, right?
For keeping things fresh, I rely on the refrigerator. Place your cut pieces into a truly airtight container. If you want to be extra careful about keeping those Oreo crumbs from getting soft, you can place a small sheet of wax paper between layers of fudge before sealing the lid. That little barrier keeps everything looking good as new.
Stored in an airtight container in the fridge, this simple chocolate fudge will stay absolutely perfect for about a week. I’ve kept it longer, but honestly, it rarely lasts that long in my house! If you’re making a huge batch for gifting during the holidays, you absolutely *can* freeze it. Wrap the whole block or individual squares tightly in plastic wrap, and then tuck that into a freezer bag. It keeps really well for up to two months frozen, and you just thaw it overnight in the fridge when you’re ready!
Frequently Asked Questions About Oreo Fudge
I knew you’d have questions! When you rely on such a simple recipe—only three ingredients!—sometimes people worry about substitutions or minor issues. Don’t sweat it; I’ve dealt with every tiny hiccup you can imagine while perfecting this oreo fudge. Let’s dive into the most common things I see pop up!
Can I make this Oreo Fudge without white chocolate?
That is the number one question I get! Here’s the deal: the white chocolate is non-negotiable if you want this specific amazing, creamy set that defines our easy fudge recipe. It acts as the primary binder when mixed with the condensed milk. If you use milk or dark chocolate chips instead, you’ll get something closer to a dense brownie or truffle bar texture, not the classic, pale, buttery-sweet simple chocolate fudge we are making here.
If you really want to change the flavor profile, butterscotch chips work surprisingly well as a substitute—they melt similarly and create a gorgeous caramelly base. But if you skip the chocolate entirely, you’ll need a different recipe altogether, probably involving powdered sugar and milk, which is a whole different ballgame!
How do I get perfect Crushed Oreo Treats texture?
This is so important for achieving that perfect bite! You absolutely want to use the whole Oreo cookie—the dark wafer *and* that sweet cream filling. Don’t try to scrape the cream out; that filling helps give the final fudge its luxurious, soft quality.
For crushing? My food processor is my best friend here. I pulse it maybe 5 or 6 times. You’re aiming for a mix where there are still some noticeable little rocky bits—that’s what makes it a great crushed oreo treats experience! If you run it too long, it turns into dust that virtually disappears into the white chocolate. If you don’t have a processor, put the cookies in a heavy-duty zip-top bag, press the air out, and use a rolling pin or the flat side of a heavy pan to crush them by hand. Either way, stop before they turn into fine powder!
What if my white chocolate seized up when I tried to melt it?
Ugh, silicone failure! This almost always happens if even a tiny drop of water gets into the bowl, and it makes the chocolate instantly seize up and look grainy. Don’t throw it out yet! Immediately take the bowl off the heat. Grab about a teaspoon of neutral oil—vegetable or canola—and stir, stir, stir it into the seized chocolate. It sounds crazy, but the oil often helps smooth out the fats and can bring the texture back to something usable for our no bake fudge. If it’s salvageable, hurry up and mix it with the condensed milk before it cools too much!
Can I use less condensed milk to make this lighter?
Please, please don’t try to adjust the amount of sweetened condensed milk! This isn’t just a sweetener; it’s the primary structure for this easy fudge recipe. If you cut back, the fudge will never set properly, even after hours in the fridge. It will remain gooey and sticky. The fat ratio between the condensed milk and the melted white chocolate is exactly what creates those beautiful, sliceable creamy fudge squares. Keep it on hand and use the whole can!
Estimated Nutritional Data for This Family Favorite Fudge
Now, I have to give you the standard disclaimer here because I am Ethan Carter, a passionate home cook, not a registered dietitian! This is just my best guess based on standard measurements from the ingredients list provided. If you’re tracking macros super strictly, you might want to plug in your specific brand versions, but for everyday baking, this gives you a really good idea of what you’re dealing with when you whip up this family favorite fudge.
When you break this rich oreo fudge down into approximately 36 squares, here are the estimated nutritional facts:
- Serving Size: 1 square
- Calories: Right around 180—which is a perfect little rich bite!
- Sugar: About 22g (it is fudge, after all, packed with that condensed milk sweetness!)
- Fat: Roughly 9g total, with 6g being saturated fat from the white chocolate and dairy.
- Protein: Typically 2g per square.
- Sodium: Very low, around 85mg.
See? Not too bad for something that tastes like it came straight out of a gourmet candy shop, right? These numbers really show you just how quick and easy this recipe is while still delivering that indulgent satisfaction we look for in a simple chocolate fudge. Don’t worry too much about the details; just enjoy the fact that you made it yourself with just three things!
Share Your Experience Making This Oreo Fudge
I’ve shared all my little secrets for getting this oreo fudge absolutely perfect, from melting the tricky white chocolate to making sure you get those great chunks of cookie in every bite. But honestly, the best part of running Little Kitchen Diary is seeing YOU bring these recipes into your own kitchens!
So, when you whip up a batch of this amazingly easy, no-bake treat, I really, really want to know how it went! Did it set up perfectly the first time around? Were you tempted to eat the whole thing standing over the counter, or did you manage to save some for the family?
Please take a minute and hop down to the comments section below. Leave me your rating—did this earn a 5-star spot in your recipe collection? And if you snapped a picture of your beautiful, creamy fudge squares, tag me on social media! I love seeing your results, especially when you’re practicing up for the holidays and making up a batch as a potential holiday fudge gift!
Every success story you share encourages me to keep digging through my own kitchen notes to bring you more wonderfully practical, unbelievably delicious recipes like this one. Don’t forget to save this recipe link somewhere easy to find for when that next crazy-good craving strikes—you’ll thank yourself later when you need a quick dessert idea in under 15 minutes!
PrintEasiest 3-Ingredient Oreo Fudge

Make this creamy, rich Oreo fudge using only three simple ingredients. This no-bake recipe is quick to prepare and perfect for a fast dessert or homemade candy gift.
- Prep Time: 10 min
- Cook Time: 0 min
- Total Time: 2 hr 10 min
- Yield: About 36 squares 1x
- Category: Dessert
- Method: No Bake
- Cuisine: American
- Diet: Vegetarian
Ingredients
- 1 (14 ounce) can sweetened condensed milk
- 2 cups white chocolate chips
- 3 cups crushed Oreo cookies (about 24 cookies)
Instructions
- Line an 8×8 inch baking pan with parchment paper, leaving an overhang on the sides for easy removal. Lightly grease the paper.
- Place the white chocolate chips in a microwave-safe bowl. Microwave on 50% power for 30-second intervals, stirring well after each interval, until the chips are completely melted and smooth.
- Stir the sweetened condensed milk into the melted white chocolate until fully combined.
- Fold in the crushed Oreo cookies until they are evenly distributed throughout the mixture.
- Press the fudge mixture evenly into the prepared baking pan.
- Refrigerate for at least 2 hours, or until the fudge is firm enough to slice.
- Use the parchment paper overhang to lift the fudge out of the pan. Cut into small squares before serving.
Notes
- For best results, crush the Oreos finely, but leave some small chunks for texture.
- You can substitute dark chocolate chips for white chocolate chips for a different flavor profile, but the texture will be slightly different.
- Store leftover fudge in an airtight container in the refrigerator for up to one week.
Nutrition
- Serving Size: 1 square
- Calories: 180
- Sugar: 22g
- Sodium: 85mg
- Fat: 9g
- Saturated Fat: 6g
- Unsaturated Fat: 3g
- Trans Fat: 0g
- Carbohydrates: 24g
- Fiber: 0g
- Protein: 2g
- Cholesterol: 10mg