
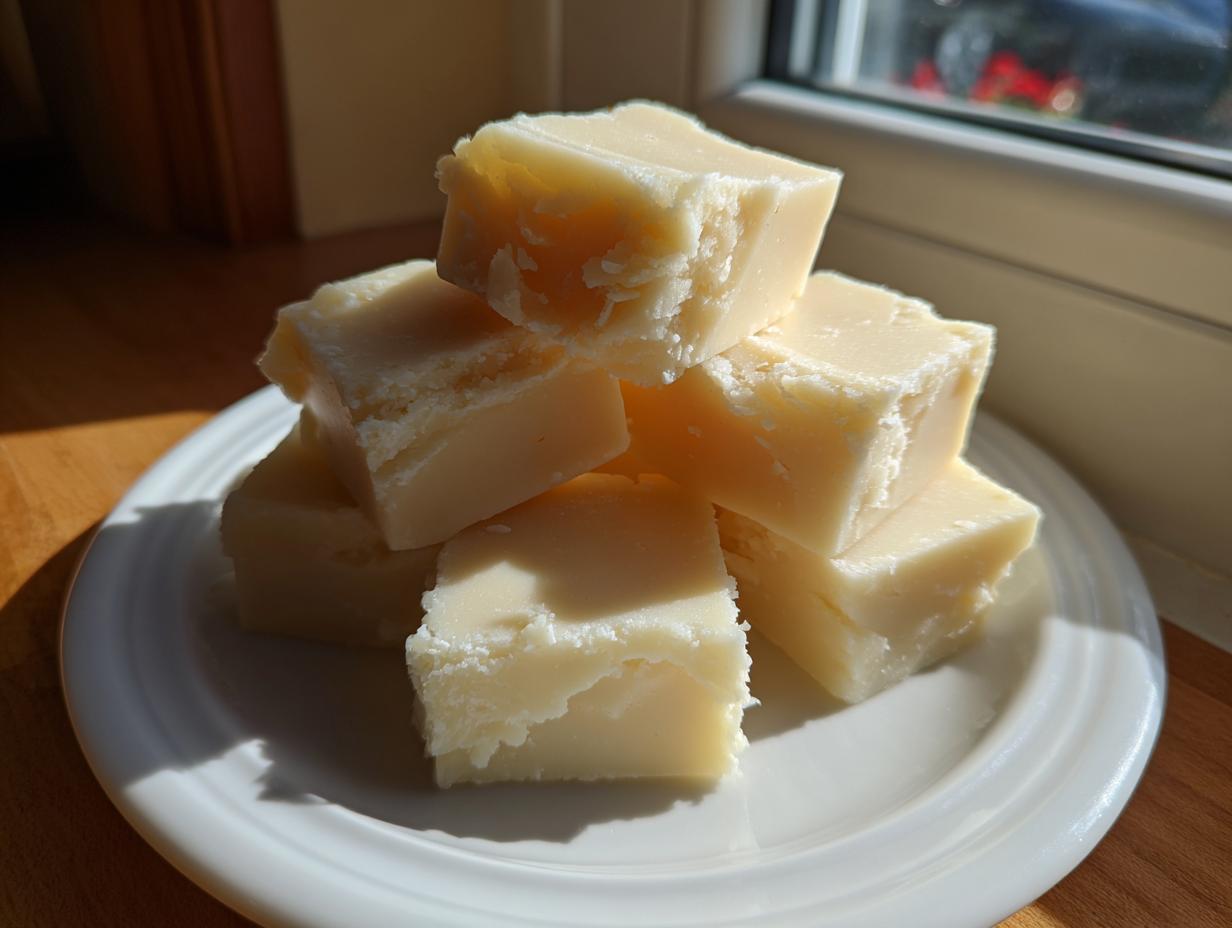
If you ever thought making candy was complicated, put down that sticky candy thermometer right now! Seriously, I get it—candy making can be intimidating, but that’s just not the case when it comes to fudge. I learned the hard way during my journey back to reliable home cooking that simple recipes are usually the best ones. That is why I’m thrilled to share what I consider the absolute best, guaranteed creamy, 3-ingredient, no-bake white chocolate fudge recipe. This homemade white fudge is pure magic, and it’s going to be your new go-to for everything from quick weeknight treats to holiday gifting.
- Why This Creamy white chocolate fudge Recipe Works Every Time
- Gathering Ingredients for Your white chocolate fudge recipe
- Step-by-Step Instructions for Easy white chocolate fudge
- Tips for Perfect white chocolate fudge Success
- Customizing Your white chocolate fudge with Add-Ins
- Making white chocolate fudge for Gifting and Holidays
- Storage and Reheating Instructions for Homemade white fudge
- Frequently Asked Questions About This simple fudge recipe
- Share Your Sweet Dessert Squares Creations
Why This Creamy white chocolate fudge Recipe Works Every Time
Look, I love old-school candy making, but when life is busy, I need results that are fast and foolproof. This wonderful sweet dessert squares recipe is the real deal, and here’s why I trust it when I need a quick hit of sweet goodness.
- It uses only three core ingredients; you probably have them right now!
- It’s completely no bake white chocolate fudge—no candy thermometer required, ever.
- The specific ratio of ingredients guarantees that rich, creamy white chocolate fudge texture we’re all chasing.
- It’s designed specifically to reduce the risk of white chocolate seizing up on you.
Quick Preparation: The Ultimate no bake white chocolate fudge
This candy really shines in the minimal time it takes to put together. With just 10 minutes of prep and about 2 minutes in the microwave, you’re done with the active work. Honestly, the hardest part is waiting for it to chill! If you need a fast holiday candy, this no bake white chocolate fudge is the answer for when you’re short on time.
Achieving that Melt in Your Mouth Fudge Texture
That velvety smooth finish everyone raves about isn’t luck; it’s chemistry! Because we rely on sweetened condensed milk reacting perfectly with melted white chocolate, you get that lush, dense square. It truly is a melt in your mouth fudge experience. Trust me, once you try this simple fudge recipe, you won’t bother with anything else.
Gathering Ingredients for Your white chocolate fudge recipe
The beauty of this white chocolate fudge recipe is how short the list is! I always keep these three things stocked because you never know when a chocolate craving will strike. When you shop, try to grab the best bag of white chocolate chips you can find; the quality really impacts how smooth this turns out, especially since it’s one of only three components.
- 1 (14 ounce) can sweetened condensed milk
- 3 cups white chocolate chips (good quality recommended)
- 1 teaspoon vanilla extract
Ingredient Clarity and Quality Notes
This is where we build trust and avoid problems! I cannot stress this enough: make absolutely sure your sweetened condensed milk is at room temperature, or even slightly warm. If it’s too cold, that immediate temperature shock with the hot chocolate will make your mixture seize up faster than you can grab a spatula. Also, that tip about using high-quality chips? It’s non-negotiable for that melt in your mouth fudge feel. You can see more tips on picking the right chocolate for this recipe over here at the best white chocolate chips for fudge.
Step-by-Step Instructions for Easy white chocolate fudge
Okay, buckle up, because these microwave fudge instructions are the reason this recipe is so forgiving. We need very little active time, but we must respect the white chocolate! The entire process moves quickly, so make sure everything is ready before you start melting anything.
Preparing the Pan and Melting the Chocolate
First things first: grab an 8×8 inch pan and line it with parchment paper. You want those ends hanging over the side—this makes lifting the whole block of candy out later so much easier. Lightly grease that parchment paper, just to be safe. Next, put your three cups of chips into a microwave-safe bowl.
Here’s where you have to be gentle. Microwave in 30-second bursts. Don’t walk away! After each burst, stir it vigorously. If you see just a few little lumps left, take it out and keep stirring until those lumps melt away from the residual heat. If you scorch white chocolate, it’s ruined, so I always pull it out when it looks *almost* melted. That’s the secret to keeping it smooth, trust me. If you prefer a different type of easy treat, I have another great no-bake favorite that uses similar microwave tricks.
Combining and Setting Your creamy white chocolate fudge
Once you have that perfectly smooth, shiny melted chocolate base, pour in that room-temperature milk and the vanilla. Stir gently—we don’t want to incorporate a ton of air here. We’re aiming for dense and creamy, not cakey, so just mix until it’s one uniform color. Pour that lovely mixture into your prepared pan and spread it out evenly. Then, hide it in the fridge for at least two hours. Patience during chilling is essential if you want those perfect, clean-cut squares later!
Tips for Perfect white chocolate fudge Success
Even though this is the easiest white chocolate fudge recipe in the world, knowing a few little secrets makes the difference between good fudge and *great* fudge. For me, these little reminders are the key vanilla fudge secrets that ensure I get that perfect, velvety, never-gritty texture every single time I make these sweet dessert squares.
Remember how I stressed using room-temperature condensed milk? That’s half the battle won! Proper ingredient temperature is crucial when you are working with minimal ingredients because there’s nothing else in the mixture to stabilize it if something goes wrong.
Troubleshooting Common Fudge Issues
Let’s be honest, the biggest fear when melting white chocolate—which is notoriously temperamental—is that it’s going to seize. Seizing means the chocolate goes from smooth and glossy to a thick, grainy, unusable lump. It usually happens for two major reasons: overheating or shocking it with cold liquid.
Because we use short microwaving increments and only stir until *almost* melted, we defeat the overheating issue. By ensuring your sweetened condensed milk isn’t straight from the back of the fridge, it won’t shock the melted chocolate. If you follow those two rules, you’ve effectively bypassed the main dangers of quick candy making and ensured you get that beautiful, smooth slab of creamy white chocolate fudge ready for cutting.
Customizing Your white chocolate fudge with Add-Ins
Once you’ve mastered the basic three-ingredient wonder, you realize this base is just begging to be dressed up! I love making variations, especially when the holidays roll around. Since this white chocolate fudge mixture is so cooperative, you can gently fold in all sorts of goodies right before it goes into the pan
Think about creating a stunning cranberry white chocolate swirl by folding in some dried cranberries, or maybe even trying a caramel ribbon fudge by drizzling a layer of thick caramel across the top just before chilling. People always ask me about getting creative, and my answer is always yes! You can find some inspiration for beautiful combinations over at Creamy White Chocolate Cranberry Fudge Dessert Idea.
Ideas for raspberry white fudge recipe Twists
If you’re feeling fruity, a raspberry white fudge recipe is fantastic. I usually recommend adding freeze-dried raspberries—they crush easily and give a huge burst of flavor without adding too much extra wetness to the mix. For Christmas, you can’t beat crushing up some peppermint candies right in the bag and stirring them in; they look festive and give a quick cooling bite!
For something truly decadent, try folding in chunks of homemade shortbread or even white chocolate sandwich cookies. It gives you a delightful crunch that contrasts perfectly with the smooth fudge. If you’ve made my apple-cheesecake-bars, you know I love layering flavors, and this fudge is no exception!
Making white chocolate fudge for Gifting and Holidays
Honestly, this white chocolate fudge is one of my absolute favorite holiday fudge recipes because it looks so elegant but takes virtually no effort. When you’re making something that’s going to be given away or set out on a big platter, presentation matters so much! Since this sets up so firmly, it’s practically begging to be turned into beautiful sweet dessert squares.
Once it’s fully chilled and you’ve used those parchment paper slings to lift it out, get a nice, sharp, thin knife. Wipe the blade with a warm, damp cloth between cuts—this trick keeps your edges super clean and prevents dragging, which is especially important if you’ve added any ribbons or swirls.
If you’re preparing this for last-minute fudge for gifting—which I do all the time—wrap the little squares tightly in wax paper or parchment first. Then, stack them neatly in a decorative tin or a small box lined with tissue paper. Because the flavor is so buttery and pure, it feels really special, almost like homemade gourmet candy. For Valentine’s Day especially, a light dusting of pink sanding sugar right before chilling makes it look like you worked for hours, which you totally didn’t! You can see how I dress up other easy goodies for the holidays in my post about Christmas Poke Cake.
For a more romantic touch, look at how beautiful the White Chocolate Valentine Fudge turns out—a little red coloring or some heart sprinkles really transforms this simple base into something perfect for sharing that sweetness around.
Storage and Reheating Instructions for Homemade white fudge
One of the best parts about this white chocolate fudge recipe is that it stores so well! Since this is a quick candy and doesn’t have some of the stabilizers found in commercial versions, how you store your homemade white fudge is really important for keeping that perfect, creamy texture we worked so hard for.
The good news is that fudge lasts a long time! I always keep mine in an airtight container. You can just stack the squares, but if you’re worried about them sticking together after a few days, throw down a sheet of parchment paper between layers. That keeps your beautiful cuts neat and tidy.

Where should you keep it? The fridge is definitely the best place, especially in warmer months, unless your kitchen stays quite cool. Stored properly in the refrigerator in that sealed container, your fudge stays delicious for easily two to three weeks. Seriously, two weeks! If you take it out when eating, give it about 15 minutes on the counter to return to that perfect, soft-but-firm texture before you bite in.
And reheating? Don’t even worry about it! This isn’t something you need to warm up. If it feels a little too hard straight from the fridge, just let it sit on the counter for a few minutes. That little bit of time helps it soften just enough to get that lovely, velvety smooth feel again.
Frequently Asked Questions About This simple fudge recipe
I always get so many great questions after people try this recipe for the first time, which usually means they’re hooked! It’s totally normal to have a few doubts when you realize how ridiculously easy making a fantastic white chocolate fudge can be. Here are the things I hear most often from folks trying out this simple fudge recipe for the first time.
Can I substitute the white chocolate chips in this white chocolate fudge recipe?
You certainly can, but you need to be careful! Chips are formulated to hold their shape during baking, which is great for cookies but sometimes causes them to seize just a tiny bit when melted down for fudge. If you have high-quality white chocolate baking bars (like Ghirardelli or Callebaut), those melt down into an even smoother, richer base for your creamy white chocolate fudge. If you stick with chips, just make sure they are fresh and treat them gently in the microwave!
Is this a true two ingredient fudge?
That’s a sneaky but important question! Technically, yes, the base for many of the quickest candies out there is just chocolate and sweetened condensed milk—that’s technically two ingredient fudge. However, I insist on adding a teaspoon of vanilla extract because it really wakes up the flavor profile and keeps it from tasting one-note sweet. So, while you can get away with just two sticky things, I highly recommend the vanilla for the best taste experience!
Can I use the stovetop instead of the microwave for melting?
Absolutely, you can use a double boiler, which is a very traditional way to handle chocolate! If you prefer that method, just set a heat-safe bowl over a saucepan simmering gently with about an inch of water—make sure the bottom of the bowl *doesn’t* touch the water. Stir the chocolate constantly until it’s smooth. It takes a little longer than the microwave, but it gives you incredible control. If you are using the stovetop, I wrote a little guide on working with different types of chocolate you might find helpful over on my post about chocolate zucchini muffins.
How long does this quick candy making actually take to set?
The active work is done in under 15 minutes, easily! But you really have to honor the chilling time to get those beautiful squares. I always tell people to budget at least two hours minimum in the refrigerator. If you rush this step, your fudge will slump and smear when you cut it, and nobody wants sad, messy fudge! For best results, I usually put it in the fridge right after dinner and it’s perfectly firm by bedtime.
Share Your Sweet Dessert Squares Creations
Now that you’ve got your hands on the easiest and creamiest white chocolate fudge ever made, I truly hope you love it as much as I do! These little sweet dessert squares are just begging to be shared with the world. I poured my heart into streamlining this recipe so it would fit perfectly into a busy life, and I’d absolutely love to hear how it performed in your kitchen.
Did it set up perfectly firm? Did you manage to keep your hands out of the pan while it was chilling? Let me know! Please take a moment to leave a rating right here on the recipe card below and share any notes you have in the comments section. Telling me about your experience—especially any mix-ins you tried—helps everyone who visits this space.
If you snap a picture of your perfectly swirled or studded fudge squares, please feel free to tag me on social media! It honestly makes my entire week to see how my favorite simple recipes inspire your own kitchens. You can read a little more about my personal journey and philosophy here at the Little Kitchen Diary. Happy making!
PrintBest Ever Creamy 3-Ingredient White Chocolate Fudge
Make velvety, melt-in-your-mouth white chocolate fudge using only three simple ingredients. This no-fail recipe is quick, requires no baking, and delivers a creamy texture perfect for holiday treats or gifting.
- Prep Time: 10 min
- Cook Time: 2 min
- Total Time: 2 hours 12 min
- Yield: 36 servings 1x
- Category: Dessert
- Method: Microwave
- Cuisine: American
- Diet: Vegetarian
Ingredients
- 1 (14 ounce) can sweetened condensed milk
- 3 cups white chocolate chips (good quality recommended)
- 1 teaspoon vanilla extract
Instructions
- Prepare an 8×8 inch baking pan by lining it with parchment paper, leaving an overhang on two sides to lift the fudge out later. Lightly grease the parchment paper.
- Place the white chocolate chips in a microwave-safe bowl.
- Microwave the white chocolate chips in 30-second intervals, stirring well after each interval, until the chips are almost completely melted. Be careful not to overheat, as white chocolate seizes easily.
- Remove the bowl from the microwave. Stir the chips until they are smooth. If small lumps remain, microwave for another 10 seconds, then stir until smooth.
- Pour the sweetened condensed milk and vanilla extract into the melted white chocolate. Stir gently until the mixture is fully combined and smooth. Do not overmix.
- Pour the fudge mixture into the prepared baking pan and spread it evenly.
- Refrigerate for at least 2 hours, or until the fudge is firm enough to cut.
- Use the parchment overhang to lift the fudge out of the pan. Place it on a cutting board and cut into small squares.
Notes
- For the creamiest texture, use room temperature sweetened condensed milk. Cold milk can cause the chocolate to seize.
- If you want to add mix-ins like dried cranberries or crushed cookies, gently fold them into the mixture just before spreading it into the pan.
- For the best results, use high-quality white chocolate chips, as lower quality chips may contain stabilizers that prevent smooth melting.
Nutrition
- Serving Size: 1 square
- Calories: 145
- Sugar: 18
- Sodium: 35
- Fat: 7
- Saturated Fat: 4
- Unsaturated Fat: 3
- Trans Fat: 0
- Carbohydrates: 20
- Fiber: 0
- Protein: 2
- Cholesterol: 10