
Some days, you just need chocolate. Not just a little bit, but a deep, sweeping, deeply satisfying chocolate fix that only a truly decadent dessert can provide. That’s exactly what drove me to perfect this chocolate mousse pie. When I started Little Kitchen Diary, I promised myself shortcuts wouldn’t mean sacrificing flavor, and this recipe proves it.
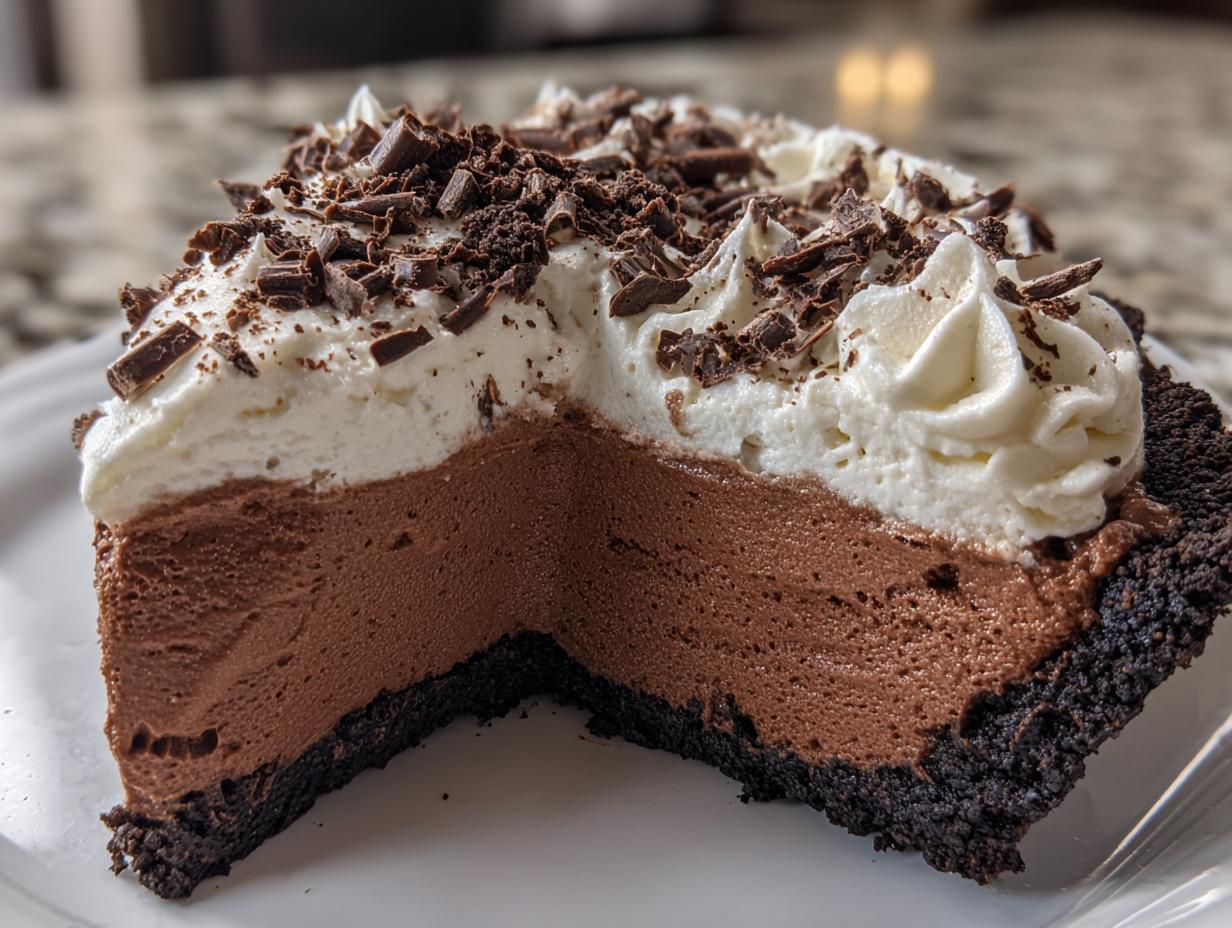
Forget fiddly techniques or turning on your oven when it’s already hot outside—this is the Easy No-Bake Chocolate Mousse Pie with Oreo Crust. It’s incredibly simple, yet manages to be utterly show-stopping. We’re talking about a crunchy, buttery crust holding the silkiest, dreamiest filling you can imagine. It’s the kind of quick chocolate recipes that reminds me why I started cooking again: making joy accessible, even on the busiest weeknights.
- Why This Easy No-Bake chocolate mousse pie is Your New Favorite (E-E-A-T)
- Gathering Ingredients for Your Creamy chocolate pie Recipe
- Step-by-Step Instructions for the No Bake chocolate pie
- Tips for Success Making Your chocolate mousse pie
- Make Ahead dessert and Storage for Your chocolate mousse pie
- Serving Suggestions for This Decadent chocolate dessert
- Frequently Asked Questions About the chocolate mousse pie
- Estimated Nutritional Data for the chocolate mousse pie
- Share Your Silky chocolate pie Creations
Why This Easy No-Bake chocolate mousse pie is Your New Favorite (E-E-A-T)
When I was trying to get back into cooking regularly, I needed recipes that delivered big on flavor without demanding all my time. This chocolate mousse pie is the answer! Honestly, it’s nearly perfect because it takes almost zero effort, and you don’t even have to worry about the oven.
I trust this recipe implicitly because it’s built for real life. It feels incredibly indulgent, but using powerhouse ingredients means you get that classic, creamy chocolate pie recipe result reliably.
- It’s a true ‘no bake chocolate pie’; that’s right, zero oven time required!
- It uses simple pantry staples to create that rich, decadent chocolate dessert flavor we all crave.
- It’s fantastic as a make ahead dessert, meaning one less thing to worry about when company comes over.
- You can find all the components at your regular local grocery store, which I always appreciate. For other simple recipes like this, check out my guide on easy no bake peanut butter bars too!
Quick Prep Time for Your chocolate mousse pie
This is one of my favorite quick chocolate recipes because the active time is so low. We’re talking 20 minutes total to press the crust and mix the filling. Toss it in the fridge, and walk away! It’s perfect when you need something impressive fast.
Achieving a Silky chocolate pie Texture
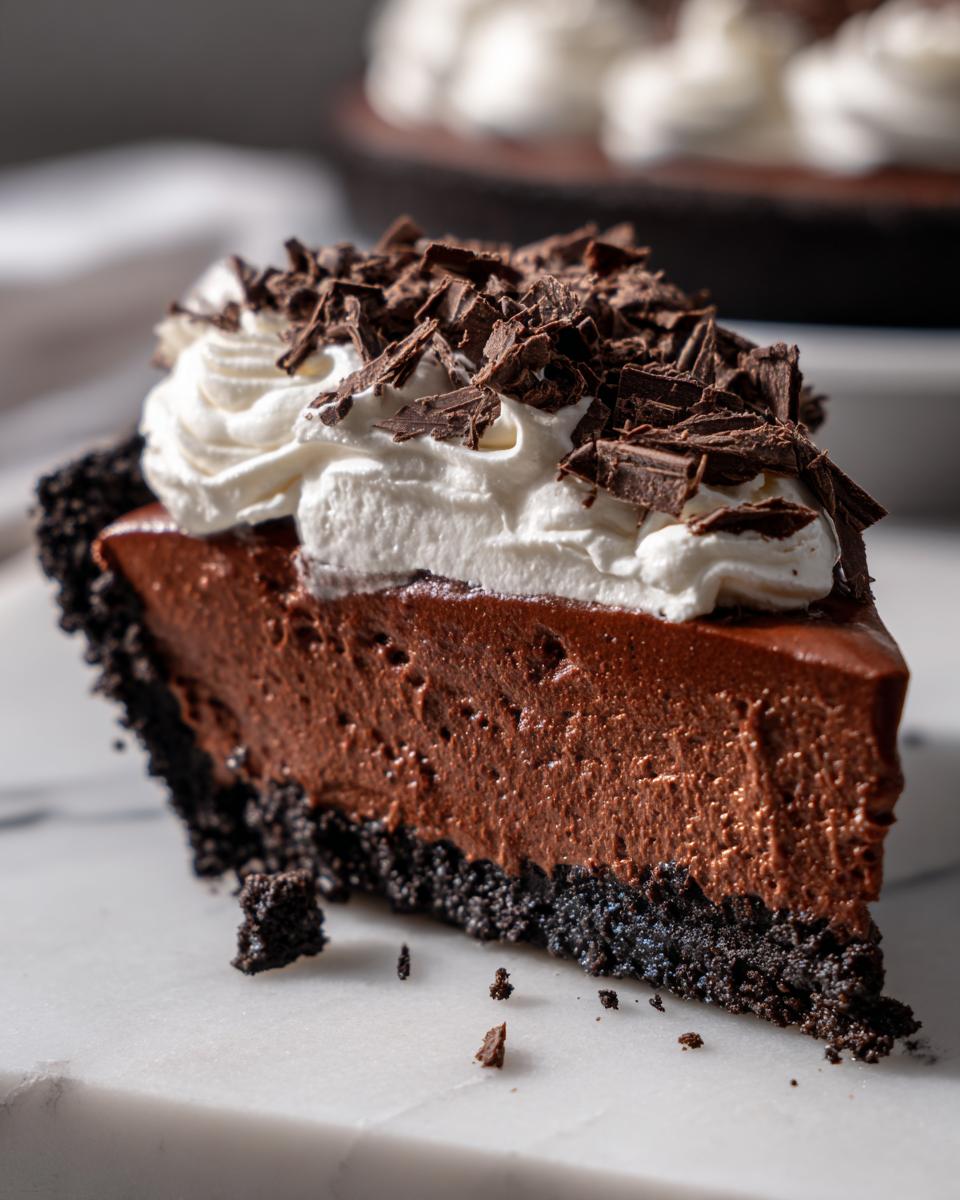
The secret to that gorgeous, melt-in-your-mouth feel is the way we build the filling. The instant pudding mix and that fluffy whipped topping are key players here, giving you that dreamy mousse filling without any fussy tempering. It creates a light, airy cloud surrounding that crunchy crust!
Gathering Ingredients for Your Creamy chocolate pie Recipe
Okay, now that you know how easy this silky chocolate pie is, let’s talk about what you need. The magic of this no bake chocolate pie is that it relies on easy, standard ingredients. When I test recipes for the diary, I always aim for things you don’t have to special order, and this list is perfect for that. Getting the right consistency in the filling depends on making sure your cream cheese is properly softened and your chocolate isn’t too hot!
We’ll break this down into the three main parts: the foundation, the mousse itself, and the final snowy top.
For the Oreo Crust dessert Base
This is arguably the best part because it’s just two ingredients! You’ll need:
- 1 1/2 cups crushed Oreo cookies (Roughly 25 cookies, packed tight!)
- 6 tablespoons unsalted butter, melted. Make sure you measure that butter—it binds everything perfectly.
For the Easy chocolate mousse Filling
This is where all the easy chocolate mousse goodness comes together. Pay attention to the chocolate temperature here, it matters!
- 1 package (8 ounces) cream cheese, softened completely.
- 1 cup powdered sugar.
- 1 teaspoon vanilla extract.
- 1/2 cup cold milk.
- 1 package (3.9 ounces) instant chocolate pudding mix (This is the shortcut hero!).
- Half of your thawed whipped topping (about 4 ounces).
- 4 ounces unsweetened chocolate, melted and then cooled slightly—I mean *slightly*—before folding it in.
For the Whipped Cream Topping recipes Finish
For the final flourish on our chocolate mousse pie, keep it simple!
- The remaining half of the thawed whipped topping (the other 4 ounces).
- Chocolate shavings or extra whipped topping for garnish. Make those shavings fresh if you can; they look so much better!

Step-by-Step Instructions for the No Bake chocolate pie
Alright, let’s get this creamy chocolate pie recipe assembled! Since this is a no-bake situation, timing and texture are everything. We’re working in stages here, so pay attention to where everything needs to rest. Trust me, a little patience during the chilling phase means you get that gorgeous silky chocolate pie everyone raves about.
Preparing and Chilling the Oreo crust dessert
Step one is all about that foundation. Grab your 9-inch pie plate. Mix up those crushed Oreos and the melted butter really well until it looks like damp sand. Now, press it down firmly in the bottom and equally up the sides of that plate. You want it packed tight! Once it’s looking nice and secure, pop the whole thing into the freezer. We want this crust nice and cold while we focus on the filling, so give it at least 15 minutes in there.
Mixing the Dreamy mousse Filling Components
Now for the fun part! Get that softened cream cheese beating until it’s totally smooth—no lumps allowed! Slowly beat in the powdered sugar and vanilla until smooth again. In a separate bowl, whisk your cold milk and the instant pudding mix rapidly for about two minutes until it starts to thicken up. Let that pudding sit for five minutes to do its job. Then, gently fold the pudding into the cream cheese mixture. Next, and this is important for that beautiful easy chocolate mousse texture, gently fold in about half of your thawed whipped topping. Finally, slowly fold in that slightly cooled melted unsweetened chocolate. Remember what I said earlier? Do not overmix! Stop as soon as it’s one beautiful color.
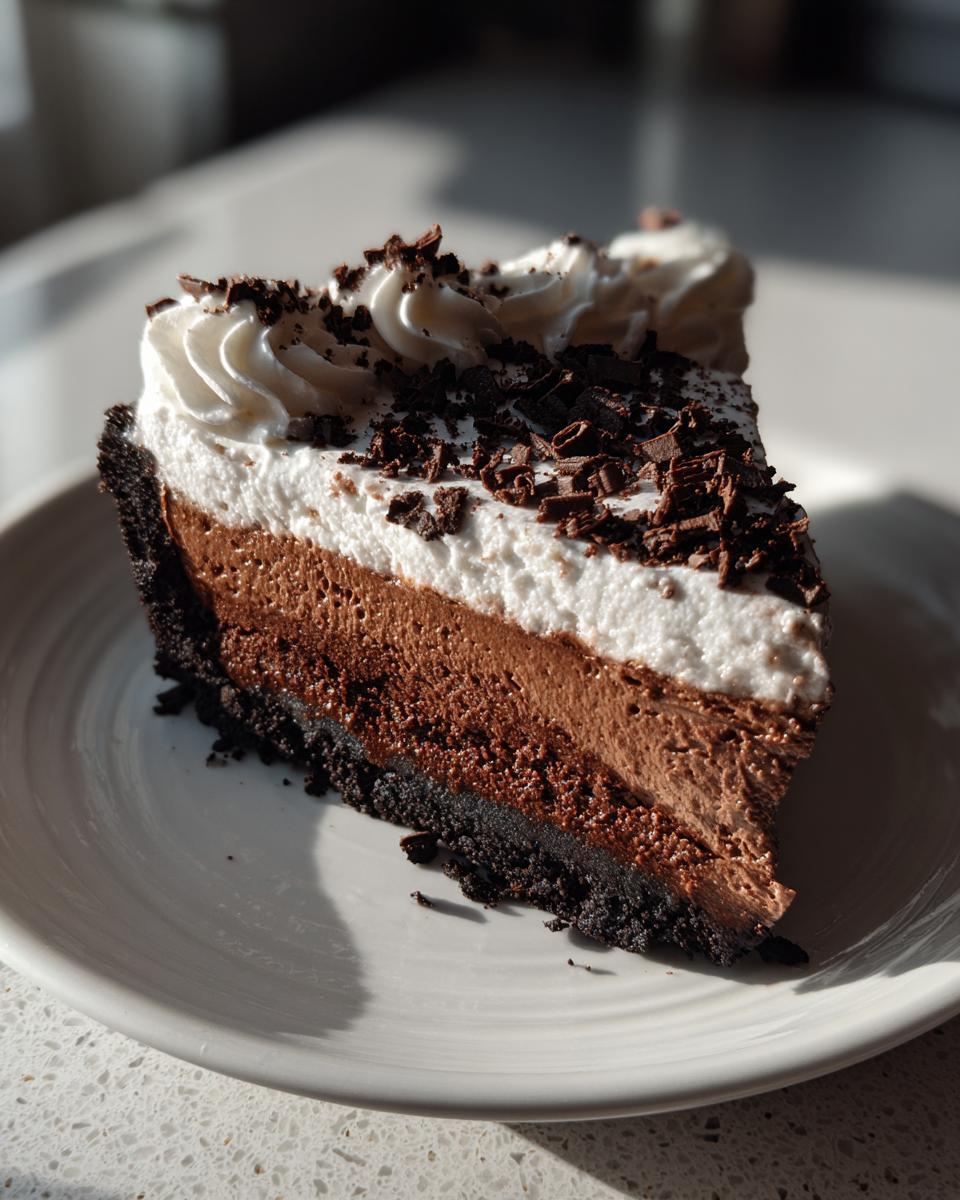
Filling, Chilling, and Garnishing the chocolate mousse pie
Take that chilled Oreo crust out of the freezer. Pour all that lovely chocolate mousse right in and spread it around evenly. Now comes the hardest part: waiting! Cover it loosely so nothing sticks to the top and refrigerate for a minimum of 4 hours. Seriously, 4 hours is the bare minimum if you want this to slice cleanly. Once it’s firm, spread the rest of your whipped topping over the top and dress it up with some chocolate shavings. That’s it! An incredible no bake dessert ready to go.

Tips for Success Making Your chocolate mousse pie
I’ve learned over the years that baking is tricky, but when you’re avoiding the oven like we are here, the main thing that trips people up is texture. My notes attached to this chocolate mousse pie recipe are my battle-tested secrets. These aren’t just random tips; these are the things I absolutely *never* skip when aiming for that perfect, indulgent chocolate treat that sets just right. If you follow these little guidelines, you’re going to get a fantastic slice every time.
I actually went back through my initial attempts when testing this easy chocolate mousse, and the texture just wasn’t there until I respected those cooling times. If you want the best chocolate dessert recipe, pay close attention to how you handle the chocolate!
Temperature Control for the Melted Chocolate
This is a big one for that airy texture we absolutely need. When you melt your unsweetened chocolate, you must, must, must let it cool down a bit before folding it into the mousse. If you dump hot, liquid chocolate into your whipped topping/pudding mix, you’ll deflate all the beautiful air you just whipped into it! That means your silky chocolate pie will turn into a dense fudge puddle instead of a light cloud. Let it cool until it’s just warm to the touch, not hot. This small step ensures you keep that luxurious, light texture.
Crust Variations for Your no bake chocolate pie
While I absolutely love that crunchy Oreo crust—it holds up so well against the creamy filling—sometimes I’m just out of Oreos, or maybe I want something slightly less intense. The good news is, this recipe is totally adaptable! If you’re less keen on the chocolate cookies, you can easily swap them out for graham cracker crumbs. Just use the same amount, and mix that melted butter in the same way. It turns our no bake chocolate pie into something a little lighter—almost like a classic silk pie, but way easier. You can see my thoughts on other simple swaps over on my guide to chocolate chip cookies, which is all about ingredient flexibility!
If you want to see how others made their incredible dessert, I found this gorgeous recipe online that really nailed the presentation, too!
Make Ahead dessert and Storage for Your chocolate mousse pie
This is what makes this chocolate mousse pie a real winner for party planning. It’s absolutely a make ahead dessert! Honestly, I put mine together the day before a dinner party, and it sets beautifully overnight. It gives me one less huge dish to stress about when folks are arriving.
When you store it, just be careful not to press plastic wrap directly onto that lovely whipped cream topping. I usually tent it loosely over the top, or if you haven’t topped it yet, seal it tightly once the mousse has firmed up. It keeps perfectly in the fridge for up to two days. You want to serve this pie cold, too—never let it sit out too long. The texture of that dreamy mousse filling is at its peak right out of the fridge. If you’re looking for more recipes you can prepare ahead of time, I’ve got a whole section on that over here at the make ahead dessert guide. It’s honestly a lifesaver for anyone who hosts!
Serving Suggestions for This Decadent chocolate dessert
Now that we’ve done the hard work of layering this spectacular chocolate mousse pie, the fun part is deciding how to present it! Because the filling is so rich and creamy chocolate pie recipe-perfect, you don’t need a lot of fuss on the side. Simplicity often shines brightest when dealing with such intense chocolate flavor. Remember, keep it cold! That chilled texture is what makes this no bake chocolate pie so refreshing.
When I serve this, I usually go for simple accompaniments that add a little brightness or a textural contrast without fighting the amazing Oreo crust. My go-to suggestion is something tart or slightly fruity to cut through the richness of the silky chocolate pie.
Here are a couple of things that go beautifully on the plate next to a slice:
- A tiny sprig of fresh mint! It adds such a nice, unexpected pop of color against the dark chocolate, and the smell is lovely.
- A lightly sweetened raspberry coulis. Just running fresh raspberries through a fine sieve with a tiny bit of sugar makes a world of difference. It’s elegant and bright!
- A small dollop of slightly tart crème fraîche or Greek yogurt. Again, that slight tang really balances the sweetness of the easy chocolate mousse filling.
If you’re having a grown-up get-together, I sometimes serve this alongside a little digestive alongside it—maybe something citrusy like my easy lemon drop martini recipe. The contrast between the tart drink and the deep chocolate is just divine. Honestly though, even on its own, garnished with those fresh chocolate shavings, this decadent chocolate dessert is a showstopper!
Frequently Asked Questions About the chocolate mousse pie
I always get questions when I share this recipe because people can’t believe how easy something this decadent chocolate dessert can be! Since we rely on a few specific components for that dreamy mousse filling, I wanted to clear up the most common things people ask when they’re trying to make their own version of this easy chocolate mousse.
It’s worth knowing these little details, especially if you’re looking for a reliable quick chocolate recipe that absolutely won’t fail you.
Can I substitute the whipped topping for homemade whipped cream in this chocolate mousse pie?
You absolutely can, and trust me, homemade whipped cream tastes amazing! But here’s the catch: the packaged stuff we use is stabilized, which helps keep that silky chocolate pie texture firm in the fridge. If you use fresh, homemade whipped cream, you need to whip it to stiff peaks and fold it in just like we do with the other half of the topping/filling mix. Keep in mind, without the stabilizers, your chocolate mousse pie might be a little softer and won’t hold up quite as long if it sits out. It’s worth trying both ways to see which of the whipped cream topping recipes you prefer!
How long does this no bake chocolate pie need to chill?
This is non-negotiable time, folks! You absolutely must chill this no bake chocolate pie for a minimum of 4 hours. If you try to slice it at 2 hours, you’re just going to end up with a runny mess. Remember, there’s no oven baking to set the structure—it’s all done in the cold! Giving it the full 4 hours ensures that rich filling firms up into that perfect sliceable but still yielding texture. If you’re making it ahead, 6 to 8 hours is even better, so check out my favorite make ahead dessert tips for planning!
What is the difference between this and a French silk pie variation?
That’s a great question if you love classic desserts! A traditional, high-end French silk pie variation usually involves cooking eggs with sugar and butter (the old-school method) to create the base, which is fantastic but requires more involved technique. My recipe uses instant chocolate pudding mix combined with cream cheese and whipped topping. That makes this version incredibly simple and totally no bake, while still achieving that rich, light, and creamy chocolate pie recipe mouthfeel. You get 90% of the luxury with 10% of the effort!
Estimated Nutritional Data for the chocolate mousse pie
I always believe in being totally transparent with you folks in the Little Kitchen Diary. When you’re making something this wonderfully rich and decadent chocolate dessert, it’s good to know what you’re working with! Now, I have to tell you upfront, the nutritional data I’m sharing below is an *estimate* based on the ingredients list provided. Because brands vary and how much of that gorgeous whipped topping goes on top can change, your final numbers might shift a little bit. But this gives you a solid benchmark for enjoying our chocolate mousse pie!
This data is based on 8 servings, so just keep that in mind when you’re portioning it out. Seriously, a small slice of this silky chocolate pie goes a long way!
- Serving Size: 1 slice
- Calories: 450
- Fat: 30g (Keep an eye on those saturated fats!)
- Carbohydrates: 45g
- Sugar: 35g (Yep, it’s chocolate heaven!)
- Protein: 5g
- Cholesterol: 35mg
It’s certainly an indulgence, but when you’re skipping the oven and making something this phenomenal, I’d say it’s 100% worth every sprinkle! Knowing the components helps you enjoy that easy chocolate mousse without any guilt.
Share Your Silky chocolate pie Creations
And just like that, we’ve reached the end! We’ve made a truly decadent chocolate dessert together, and I hope you’re already dreaming about digging into a slice of this silky chocolate pie. Remember, the goal here at Little Kitchen Diary has always been connecting over food, and that connection doesn’t stop when the recipe ends.
I sincerely hope this easy chocolate mousse recipe makes its way onto your table for your next special occasion—or honestly, just next Tuesday, because you deserve it! I love hearing how our recipes turn out in your unique kitchens. Did you manage to get those chocolate shavings perfect? Did you find the Oreo crust held together beautifully?
I’ve put so much heart into sharing practical, delicious recipes that fit into real life, and reading your feedback is what keeps me going. When you tried this no bake chocolate pie, I’d be thrilled if you came back here and let me know how it went! Did you rate it five stars? Did you try any little tweaks of your own?
Leave a comment below sharing your experience; I read every single one. And if you took a gorgeous picture of your finished creamy chocolate pie recipe, tag us on social media! Seeing those towering, chilled pies fills me with such pride. It proves that simple, home-cooked joy is truly within everyone’s reach. If you want to learn more about my mission and why I started this whole diary thing, check out the About Me page!
PrintEasy No-Bake Chocolate Mousse Pie with Oreo Crust

Make this decadent, silky chocolate mousse pie without turning on your oven. It features a crunchy Oreo crust and a light, airy chocolate filling, perfect for a quick, impressive dessert.
- Prep Time: 20 min
- Cook Time: 0 min
- Total Time: 4 hr 20 min
- Yield: 8 servings 1x
- Category: Dessert
- Method: No-Bake
- Cuisine: American
- Diet: Vegetarian
Ingredients
- 1 1/2 cups crushed Oreo cookies (about 25 cookies)
- 6 tablespoons unsalted butter, melted
- 1 package (8 ounces) cream cheese, softened
- 1 cup powdered sugar
- 1 teaspoon vanilla extract
- 1/2 cup cold milk
- 1 package (3.9 ounces) instant chocolate pudding mix
- 1 container (8 ounces) frozen whipped topping (like Cool Whip), thawed, divided
- 4 ounces unsweetened chocolate, melted and cooled slightly
- Chocolate shavings or extra whipped topping for garnish
Instructions
- Prepare the crust: In a medium bowl, combine the crushed Oreo cookies and melted butter. Press the mixture firmly into the bottom and up the sides of a 9-inch pie plate. Place the crust in the freezer while you prepare the filling.
- Make the cream cheese layer: In a large bowl, beat the softened cream cheese until smooth. Gradually beat in the powdered sugar and vanilla extract until fully combined.
- Prepare the mousse base: In a separate bowl, whisk together the cold milk and instant chocolate pudding mix for two minutes until slightly thickened. Let it sit for five minutes.
- Combine fillings: Gently fold the pudding mixture into the cream cheese mixture. Then, fold in half of the thawed whipped topping until just combined.
- Add chocolate: Slowly fold in the melted and cooled unsweetened chocolate until the filling is uniform in color and texture. Do not overmix.
- Fill the pie: Pour the chocolate mousse filling into the chilled Oreo crust, spreading it evenly.
- Chill: Cover the pie loosely with plastic wrap and refrigerate for at least 4 hours, or until the filling is firm.
- Top and serve: Before serving, spread the remaining half of the whipped topping over the chilled pie. Garnish with chocolate shavings or extra whipped topping. Slice and serve cold.
Notes
- For the best texture, ensure your melted chocolate is cooled slightly before adding it to the mousse base; hot chocolate will deflate the whipped topping.
- You can substitute graham cracker crumbs for the Oreo crust if you prefer a different flavor profile.
- This creamy chocolate pie recipe is an excellent make-ahead dessert; it holds up well in the refrigerator for up to two days.
Nutrition
- Serving Size: 1 slice
- Calories: 450
- Sugar: 35g
- Sodium: 320mg
- Fat: 30g
- Saturated Fat: 18g
- Unsaturated Fat: 12g
- Trans Fat: 0.5g
- Carbohydrates: 45g
- Fiber: 2g
- Protein: 5g
- Cholesterol: 35mg