
When that 3 PM slump hits, or you suddenly realize you promised a dessert for tonight’s gathering, you just need sweet relief, and you need it fast. Forget turning on the oven and dealing with messy baking pans! Seriously, this recipe for peanut butter bars is the absolute hero of my busy week. When I first started Little Kitchen Diary, I was drowning in work emails, and turning on the stove felt like climbing a mountain. This ridiculously simple, rich, no-bake dessert brought the joy right back. It’s creamy, it’s intensely flavored, and you don’t even need a mixer. If you’re looking for that perfect, comforting blend of peanut butter and chocolate that tastes incredibly homemade, you’ve found your forever recipe. You can see how I share these kinds of life-saving discoveries in my guide to other no-bake wonders, but this one is truly special.
- Why You Will Make These Easy Peanut Butter Bars Repeatedly
- Gathering Ingredients for Your Peanut Butter Bars Recipe
- Step-by-Step Instructions for Perfect No Bake Peanut Butter Bars
- Expert Tips for the Best Homemade Peanut Butter Treats
- Storage and Serving Suggestions for Your Decadent PB Chocolate Bars
- Frequently Asked Questions About These Quick Dessert Bars
- Nutritional Estimate for Classic Peanut Butter Bars
- Share Your Sweet Peanut Butter Fix
Why You Will Make These Easy Peanut Butter Bars Repeatedly
I know you’re busy, so let’s cut right to why you need this peanut butter bars recipe in your rotation—like, yesterday. This isn’t just another dessert; it’s a solution! You get massive flavor with almost zero effort. Trust me, these will be your go-to for potlucks, unexpected guests, or just when that sweet craving absolutely needs fixing!
- They are ready to eat faster than your pizza could be delivered.
- The texture feels rich and luxurious, hiding how little work they actually took.
- They taste exactly like that nostalgic treat you loved as a kid, maybe even better!
If you love the idea of fast, delicious snacks, you should definitely check out my tips for quick dips, too, because simplicity rules!
No Oven Required: The Ultimate No Bake Peanut Butter Bars
This is what seals the deal for me. Zero heating element drama! We are talking about purely mixing and pressing ingredients together, then letting the fridge do the heavy lifting. This makes them the perfect entry on any list of No Oven Desserts, especially when the kitchen is already too hot.
Rich, Creamy Texture in Every Bite
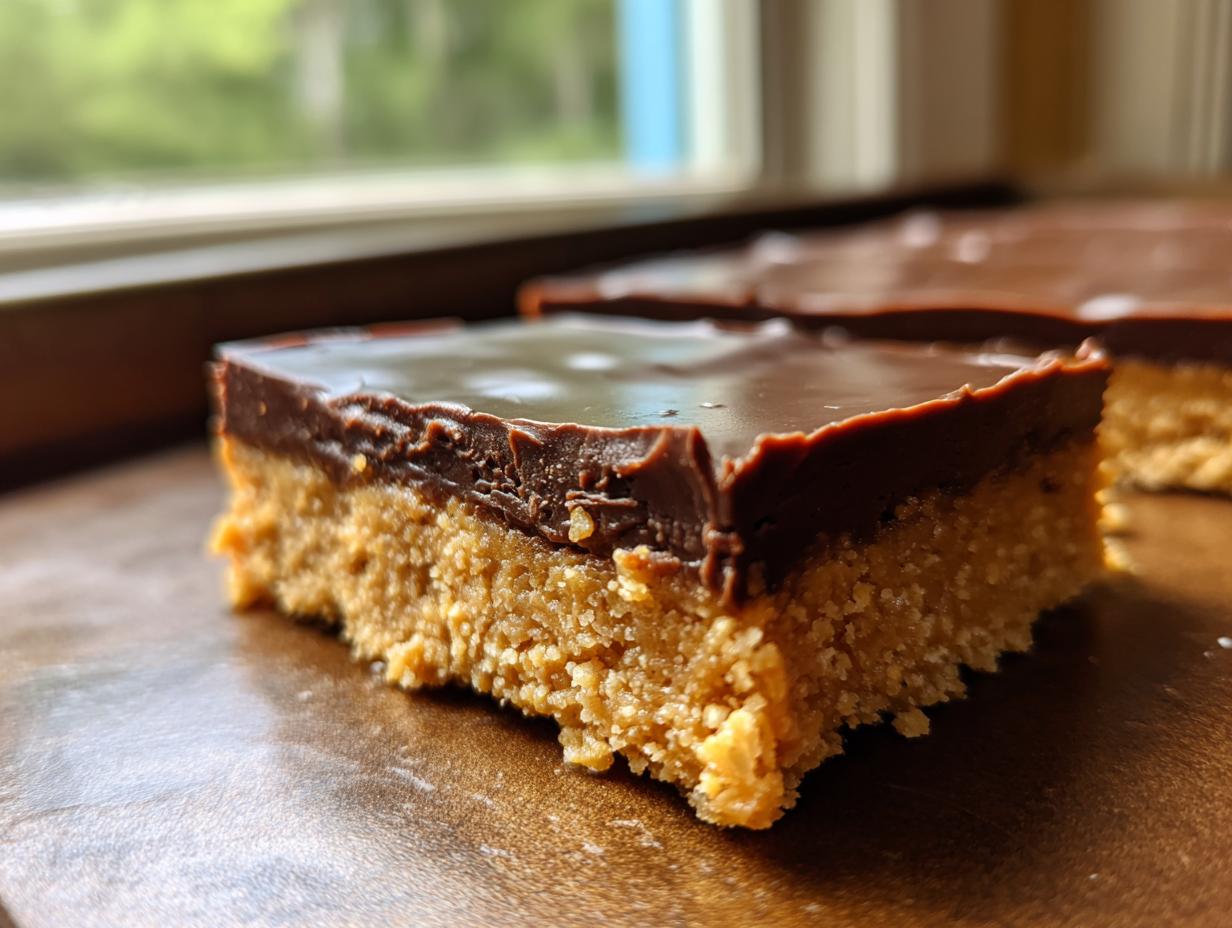
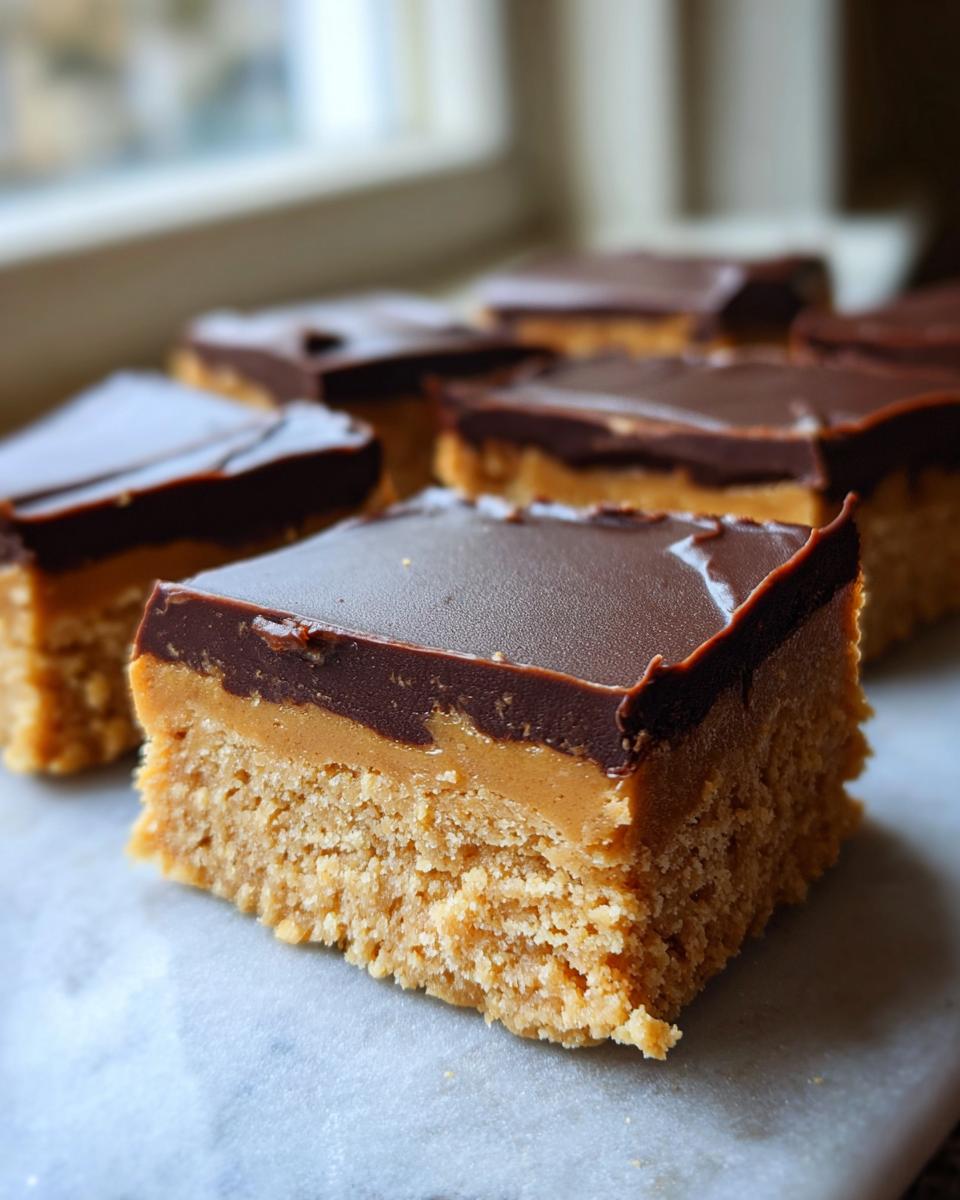
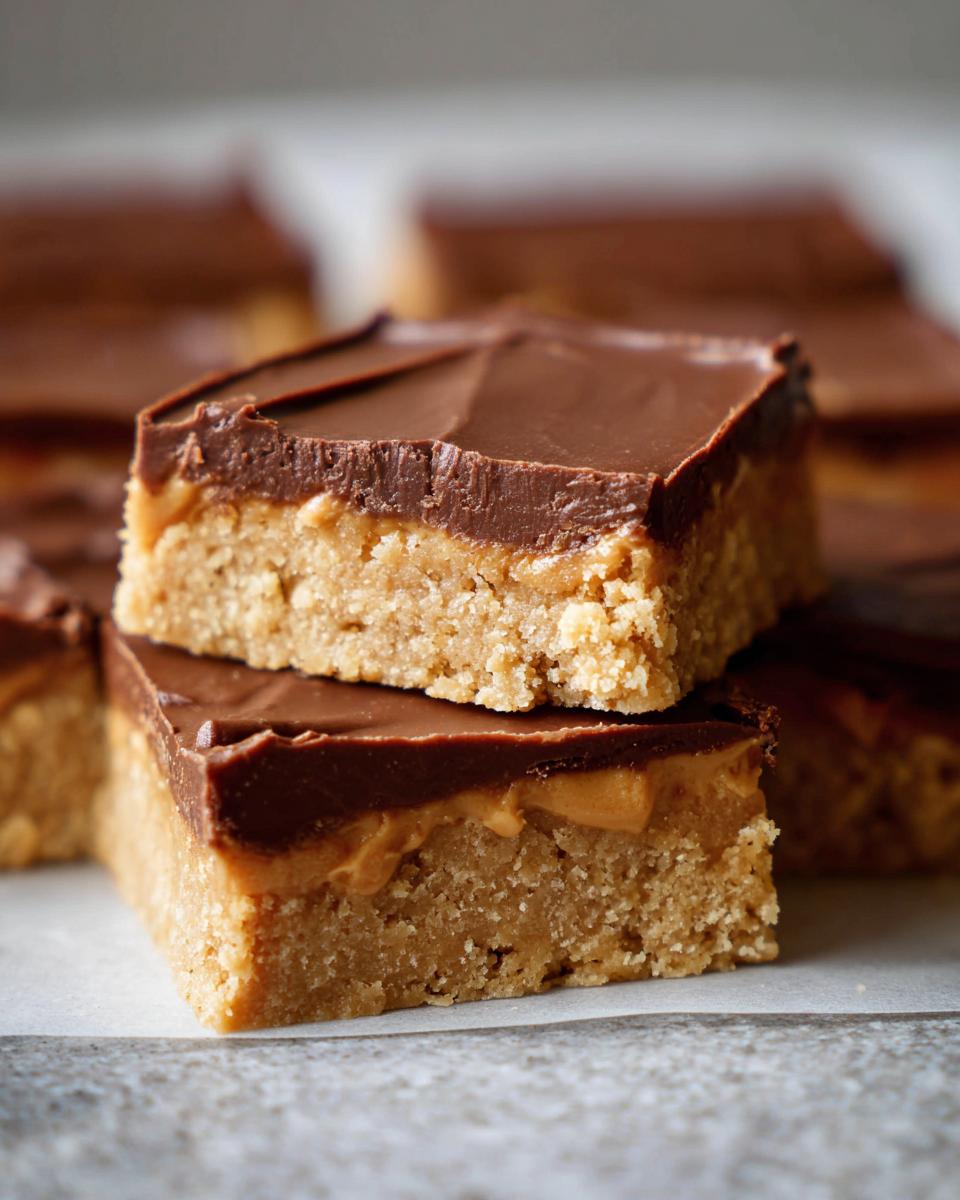
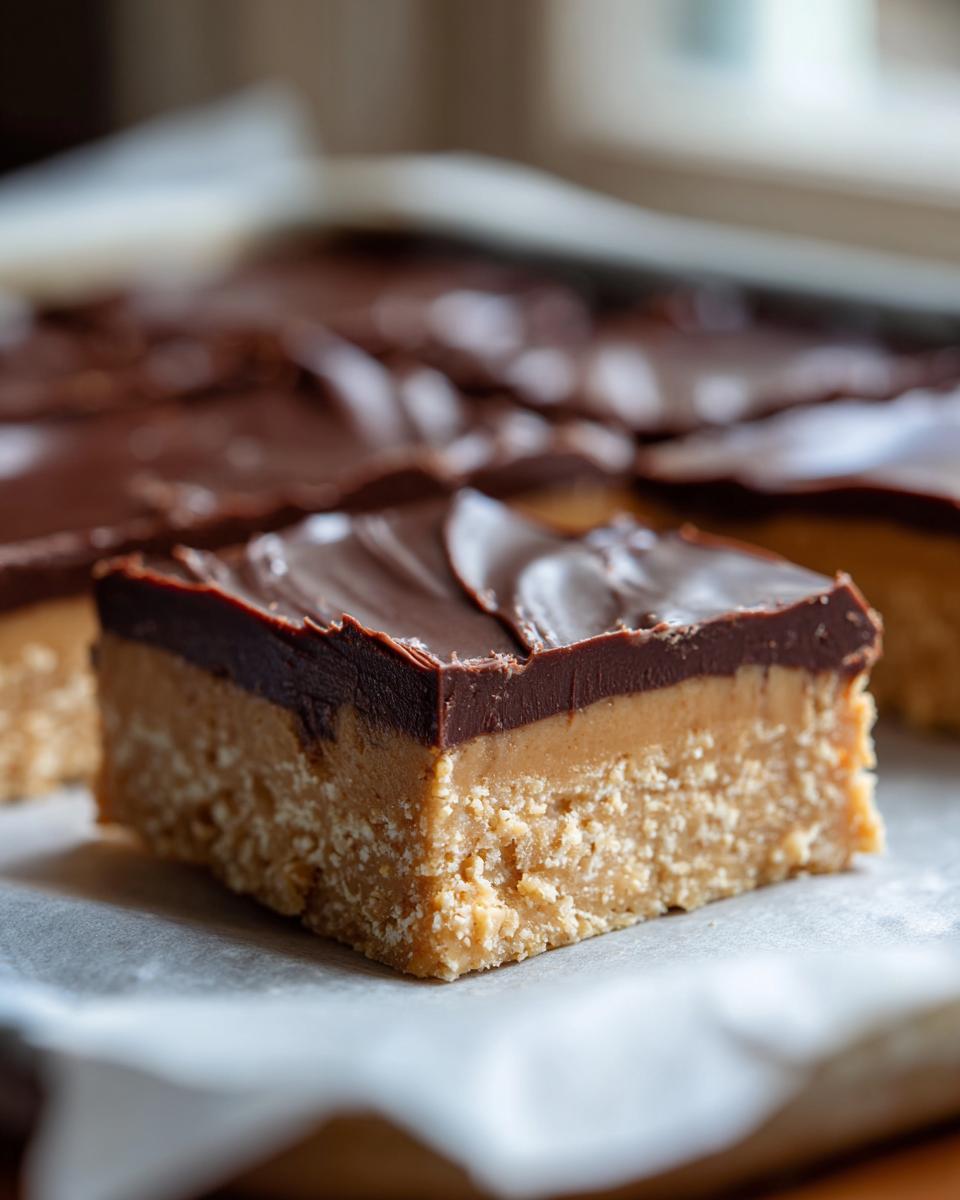
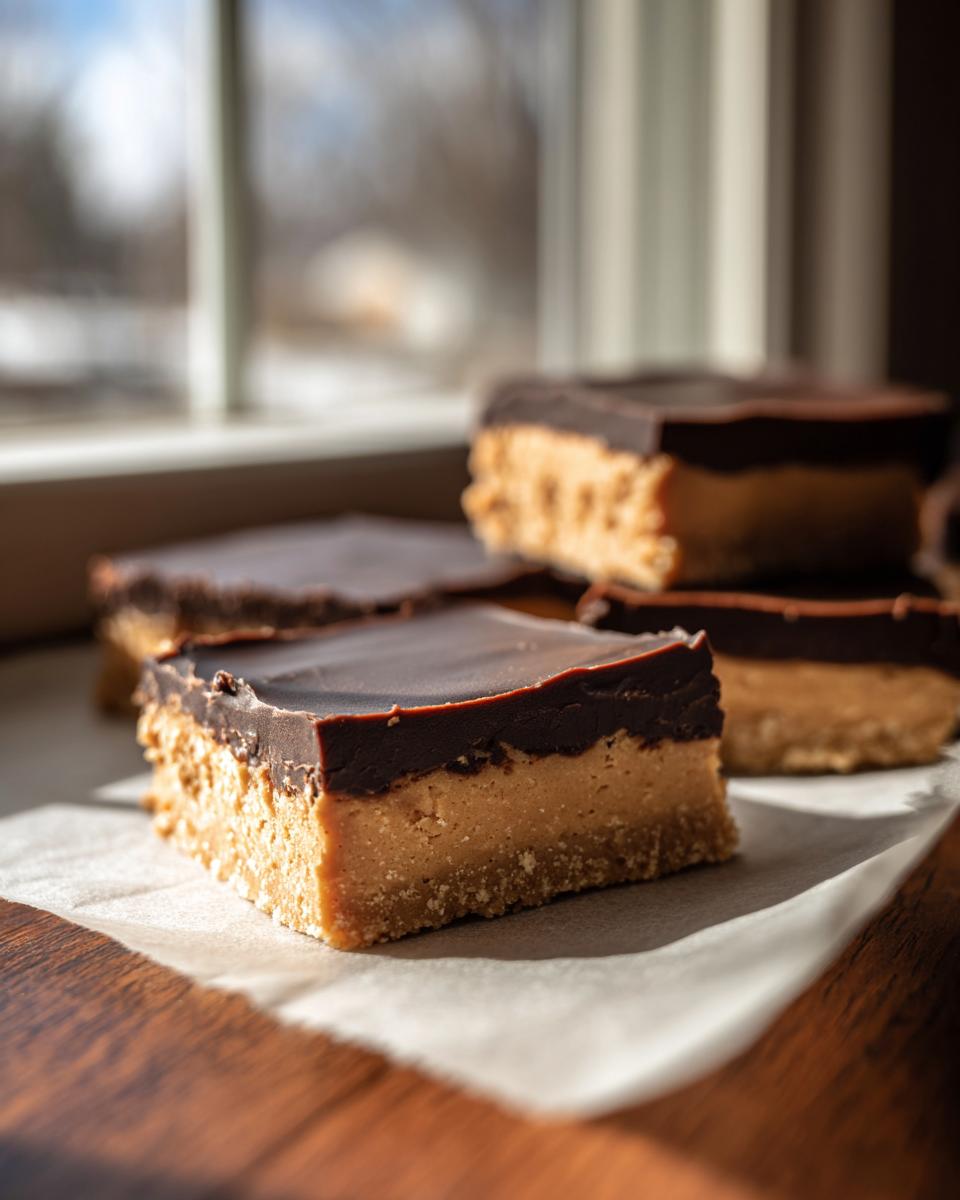
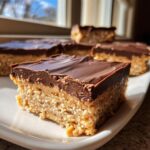
When I say creamy, I mean it. That peanut butter base sets up perfectly—it’s dense without being hard, and it melts slightly in your mouth. The chocolate topping seals in all that deep, satisfying peanut butter flavor. It’s just the right blend of chewy base and smooth, rich coating.
Gathering Ingredients for Your Peanut Butter Bars Recipe
Okay, let’s talk ingredients. Because this is a no-bake recipe, the quality of what you put in really shines through. I’m not asking you to track down anything exotic here—everything you need for these wonderful peanut butter bars can be found at your regular grocery store. In my diary, I always stress that sticking to the recipe, especially when it comes to the type of peanut butter, gives you the best shot at that perfect, creamy result. It shows you’ve done your homework!
For that incredible base, grab these essentials. Remember, we need 2 cups of creamy peanut butter for the main body, so make sure you have a big jar of that on hand!
- 1 cup unsalted butter, melted (This is key to the texture)
- 2 cups powdered sugar
- 2 cups creamy peanut butter
- 1 1/2 cups graham cracker crumbs
Now for the glorious topping! This two-part chocolate layer is what brings it all home. Don’t skimp here; this is where that dense, decadent fudge layer comes from.
- 1 cup semi-sweet chocolate chips
- 1/4 cup creamy peanut butter (Yes, more of the same for the topping!)
I love how simple this list is, especially when you compare it to how delicious the final product turns out. If you’re looking for more simple recipes using pantry staples, you might enjoy my guide on peanut butter rice krispie treats!
Step-by-Step Instructions for Perfect No Bake Peanut Butter Bars
Now for the fun part! Putting these peanut butter bars together is ridiculously simple, and you’ll see why I call them my go-to quick dessert. The key here is organization—get your pan ready, and the mixing goes lightning fast. We want that base perfectly even because that’s what separates a good bar from a truly great one, like the ones I remember from my school days! You want this texture to be just right before we chill everything.
Preparing the Base for Your Creamy Peanut Butter Dessert
First things first, grab an 8×8 inch pan and line it with parchment paper. Make sure that paper hangs over two sides—this is your handle later, so don’t skip making an overhang! Now, in a big bowl, we mix the melted butter, powdered sugar, those 2 cups of creamy peanut butter, and the graham cracker crumbs. Mix it up until it’s completely combined into a thick dough. Don’t worry if it looks crumbly at first; just keep working it until it holds together. Then, really press that mixture firmly and evenly into the bottom of your prepared pan. That’s the foundation for your Creamy Peanut Butter Dessert.
Creating the Silky Chocolate Topping for Chocolate Peanut Butter Bars
This is where the magic really happens for our Chocolate Peanut Butter Bars! Grab a microwave-safe bowl. Toss in your chocolate chips and that last 1/4 cup of peanut butter. Here is the trick: microwave in short bursts—30 seconds at a time—and stir well in between each burst. If you don’t stir, the chocolate will seize up on you, and nobody wants that disaster! Keep going until it’s smooth, glossy, and looks absolutely irresistible. Immediately pour that gorgeous melted chocolate over your peanut butter base and use an offset spatula to spread it right to the edges.
Setting and Slicing Your Simple Dessert Bars
This is the hardest part: waiting! You need to move the pan into the refrigerator and let it chill for at least 2 hours until that chocolate topping is completely firm. If you truly cannot wait—and trust me, I’ve been there—toss them in the freezer for about 30 minutes to speed things up! Once they are set, use those parchment paper overhangs to lift the whole thing out of the pan. Wipe your knife clean between cuts, and slice them into neat squares. These Simple Dessert Bars are always worth the little bit of patience!
For more baking inspiration when you’re short on time, check out my recipe for easy brown sugar cinnamon pear crisp!
Expert Tips for the Best Homemade Peanut Butter Treats
Even though these peanut butter bars are already incredibly easy, I always have a few secrets tucked away to make them absolutely perfect every single time. These little tricks are what separate the good homemade treats from the ones people beg you for at every single gathering. It’s all about maximizing that peanut butter potential!
Achieving That Authentic Reese’s Peanut Butter Bars Flavor
If you want that unmistakable, salty-sweet, perfectly balanced taste—the one that reminds everyone of their favorite candy cup—you have to stick to creamy peanut butter for both the base and the topping. I know some recipes call for crunchy, but for the authentic, smooth experience these bars promise, creamy is the way to go. It ensures that rich, dense consistency without any awkward crunch interruptions.
Techniques for Cutting Clean Peanut Butter Squares
Okay, presentation matters! It’s frustrating to pull a perfectly set bar out of the fridge only to have mushy, messy sides when you cut it. Here is my main piece of advice: let the chocolate set up firmly, maybe even toss it in the freezer for 15 minutes before slicing. Then, take a large, sharp knife and run it under steaming hot water for a few seconds. Wipe it dry quickly, and slice! If the knife sticks, reheat and dry it again. This one simple trick gives you those beautiful, clean edges for perfect peanut butter squares.
These little enhancements make serving these quick French toast replacements even more enjoyable!
Storage and Serving Suggestions for Your Decadent PB Chocolate Bars
The great news about these peanut butter bars is that they actually taste better the next day! Since they are a no-bake dessert, you want to keep them nice and cold to maintain that sturdy, fudgy structure. The best way to store them is definitely in an airtight container in the refrigerator. They keep wonderfully for about three or four days that way, which is great if you’re trying to hide them from the rest of the family!
When it comes to serving these rich treats, simplicity is best. They are intensely sweet and satisfying, so they pair perfectly with something hot and slightly bitter, like a strong cup of coffee or an espresso. My kids usually grab theirs with a tall glass of cold milk, of course. If you’ve chilled them well, they come out almost like a rich peanut butter fudge slice—absolute perfection! Need another easy dessert idea for a similar vibe? You should check out my easy ice cream pie recipe for another quick win.
Frequently Asked Questions About These Quick Dessert Bars
I get lots of questions whenever I post these peanut butter bars because everyone wants that secret to getting them perfectly thick and creamy without baking! Here are a few things folks frequently ask me about converting these Quick Dessert Bars into their dream treat.
Can I use natural peanut butter in this peanut butter bars recipe?
Oh, I really wouldn’t recommend it, honestly. Natural peanut butter—you know, the kind where the oil separates—is tricky for these types of desserts. Because we aren’t baking anything to set the base, that loose oil will cause your peanut butter layer to separate and become greasy or runny in the fridge. You need that stable structure only regular, processed creamy peanut butter can give you for these beautiful Chewy Peanut Butter Slices.
How long do these peanut butter squares last?
Since these are rich and packed with peanut butter fat, they actually hold up really well! If you keep your peanut butter squares stored airtight in the refrigerator, they stay perfectly fresh and fudge-like for about four days. If you happen to have leftovers after that, you can freeze them! They freeze beautifully, just let them thaw on the counter for about 15 minutes before serving again.
For more no-bake ideas that keep well, you might want to look at the recipe for easy apple dumpling crescent rolls—another easy crowd-pleaser!
Nutritional Estimate for Classic Peanut Butter Bars
Now, I’m Ethan, and I have to be upfront: I’m not a nutritionist, so take these numbers with a grain of salt—or maybe a pinch of cocoa powder! These peanut butter bars are certainly a treat, not an everyday health food, but knowing what you’re eating is always smart. These figures are calculated estimates based on the standard ingredients listed for one single bar.
If you’re watching your intake, these numbers give you a good baseline. If you want to see how these dense, delicious bars stack up against my other easy weeknight dinners, use this as your guide!
Here is what the numbers look like for one serving:
- Serving Size: 1 bar
- Calories: 280
- Sugar: 25g (Yes, they are sweet! That’s part of the fun.)
- Sodium: 150mg
- Fat: 18g
- Saturated Fat: 7g
- Carbohydrates: 28g
- Protein: 6g
Remember too, that if you use natural peanut butter or a different type of chocolate, these numbers will shift around a bit. But overall, this gives you a great peek behind the curtain for your favorite decadent PB chocolate bars!
Share Your Sweet Peanut Butter Fix
Well, that’s it! You now have my tried-and-true, ridiculously easy recipe for the best peanut butter bars you will ever make without ever having to touch your oven. They are simple, nostalgic, and exactly what the doctor ordered when you need a quick dessert hit.
Seriously, I need to know what you think! Did you make them for a party? Did you sneak a few squares before anyone else noticed? Head down to the comments section and leave me a star rating so I know how they turned out for you. I love hearing about your twists and turns, too!
If you tried this recipe out, you can always reach out directly through my contact page—though comments are usually faster! I always check in to see if someone else has discovered the magic of these classic bars. If you want to see a similar treat but with a different spin, you might enjoy checking out the approach over at this site for comparison. Happy baking—or, well, happy chilling!
PrintEasy No Bake Chocolate Peanut Butter Bars
Make dessert simple with these easy no bake peanut butter bars. They are creamy, rich, and ready fast for a satisfying sweet treat.
- Prep Time: 15 min
- Cook Time: 0 min
- Total Time: 2 hours 15 min
- Yield: 16 servings 1x
- Category: Dessert
- Method: No Bake
- Cuisine: American
- Diet: Vegetarian
Ingredients
- 1 cup unsalted butter, melted
- 2 cups powdered sugar
- 2 cups creamy peanut butter
- 1 1/2 cups graham cracker crumbs
- 1 cup semi-sweet chocolate chips
- 1/4 cup creamy peanut butter (for topping)
Instructions
- Line an 8×8 inch baking pan with parchment paper, leaving an overhang for easy removal.
- In a large bowl, mix the melted butter, powdered sugar, 2 cups of peanut butter, and graham cracker crumbs until fully combined into a thick dough.
- Press this peanut butter mixture evenly into the bottom of the prepared pan.
- In a microwave-safe bowl, combine the chocolate chips and the remaining 1/4 cup of peanut butter. Microwave in 30-second intervals, stirring between each, until smooth.
- Pour the chocolate mixture over the peanut butter base and spread it into an even layer.
- Refrigerate the bars for at least 2 hours, or until the chocolate topping is firm.
- Use the parchment paper overhang to lift the bars from the pan, then cut into squares before serving.
Notes
- For a Reese’s Peanut Butter Bars flavor, use creamy peanut butter for the base and topping.
- You can chill the bars in the freezer for 30 minutes to speed up the setting time.
- Store leftovers in an airtight container in the refrigerator.
Nutrition
- Serving Size: 1 bar
- Calories: 280
- Sugar: 25g
- Sodium: 150mg
- Fat: 18g
- Saturated Fat: 7g
- Unsaturated Fat: 11g
- Trans Fat: 0g
- Carbohydrates: 28g
- Fiber: 1g
- Protein: 6g
- Cholesterol: 15mg