
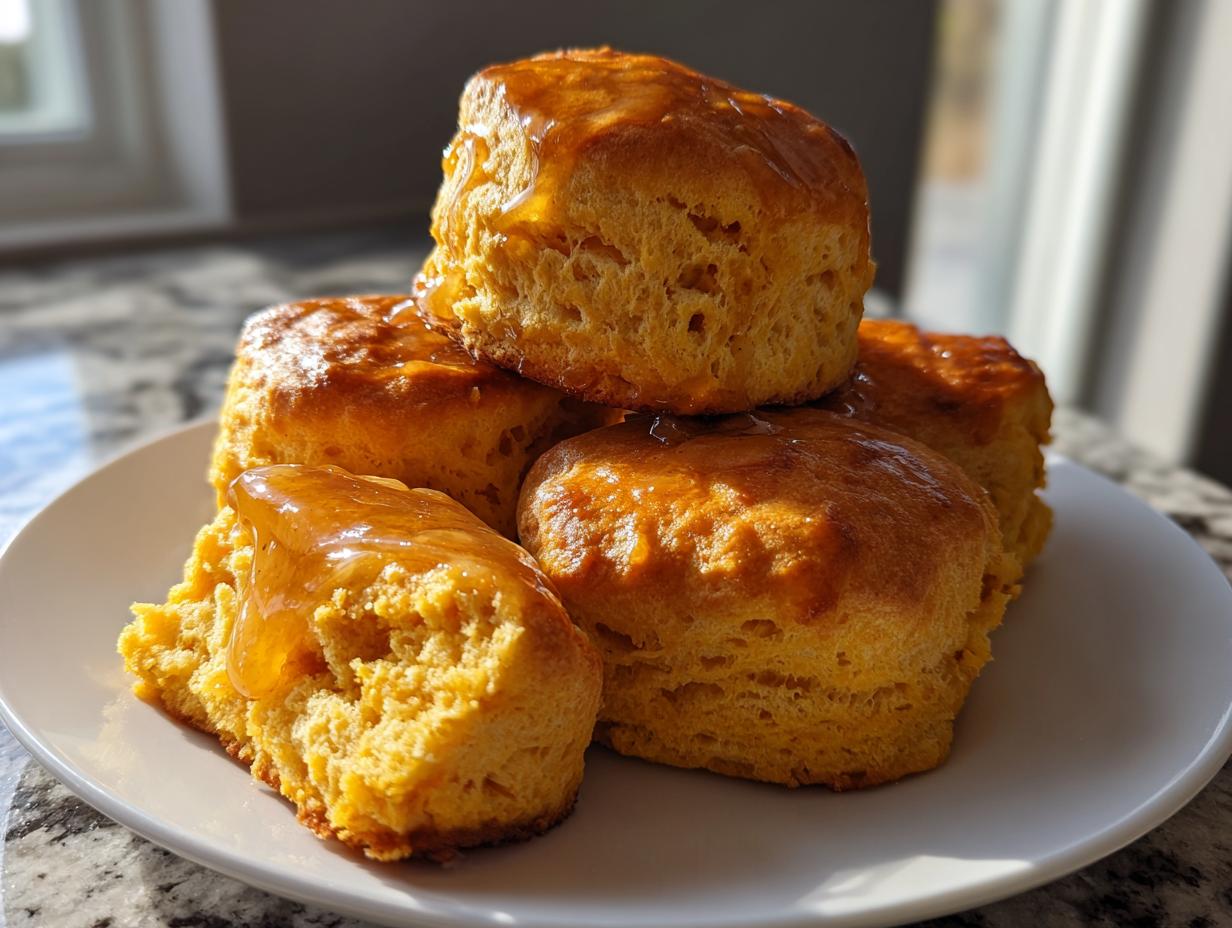
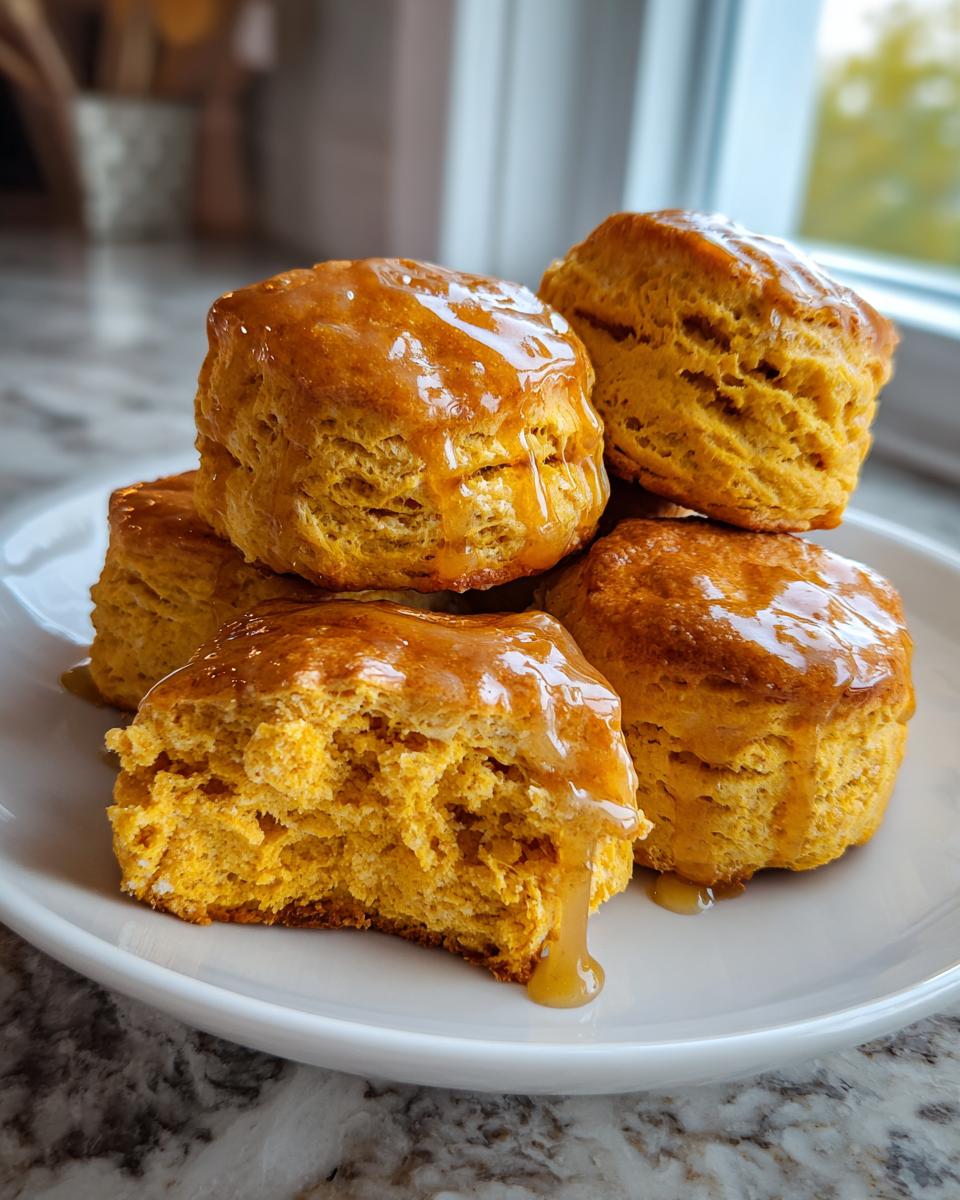
If you think you know biscuits, hold onto your mixing bowl because we’re about to have a serious upgrade! In my family, Southern comfort food isn’t just a meal; it’s a whole mood, and nothing brings joy faster than warm, tender baked goods. I know standard buttermilk ones are great, but trust me when I say that these sweet potato biscuits are miles above the rest. They are richer, moister, and have this subtle, earthy sweetness that just screams holiday table—especially Thanksgiving.
When I started Little Kitchen Diary, I wanted real food that fit into real, busy lives. These biscuits are the perfect example. We swap out some of the liquid for creamy sweet potato puree, which is my secret weapon for keeping them perfectly fluffy and never dry. Making these from scratch proves that you don’t need fussy techniques to create something incredibly delicious to share.
- Why These Fluffy Southern Biscuits Recipe Are Your New Favorite
- Ingredients Checklist for Perfect Sweet Potato Biscuits
- Preparing the Sweet Potato Puree for Your Biscuits with Sweet Potato Puree
- Step-by-Step Instructions for Fluffy Southern Biscuits Recipe
- Buttermilk Free Biscuit Recipe Alternative
- Making the Cinnamon Honey Butter Topping for Your Sweet Potato Biscuits
- Serving Suggestions for Your Easy Sweet Potato Side Dish
- Storage and Reheating Tips for Moist Biscuit Recipe Tips
- Frequently Asked Questions About Sweet Potato Biscuits
Why These Fluffy Southern Biscuits Recipe Are Your New Favorite
Honestly, once you try these, you’ll never look at a plain biscuit the same way again. These aren’t just baked goods; they are little pillows of deliciousness. I developed this recipe when I was trying to find a way to sneak more good stuff onto the table without anyone noticing, and wow, did it work. People always ask me what makes them so different from standard ones. For more tips on achieving that perfect height in Southern baking, you can check out my guide on fluffy Southern biscuits recipe!
Here’s what I absolutely love about making these:
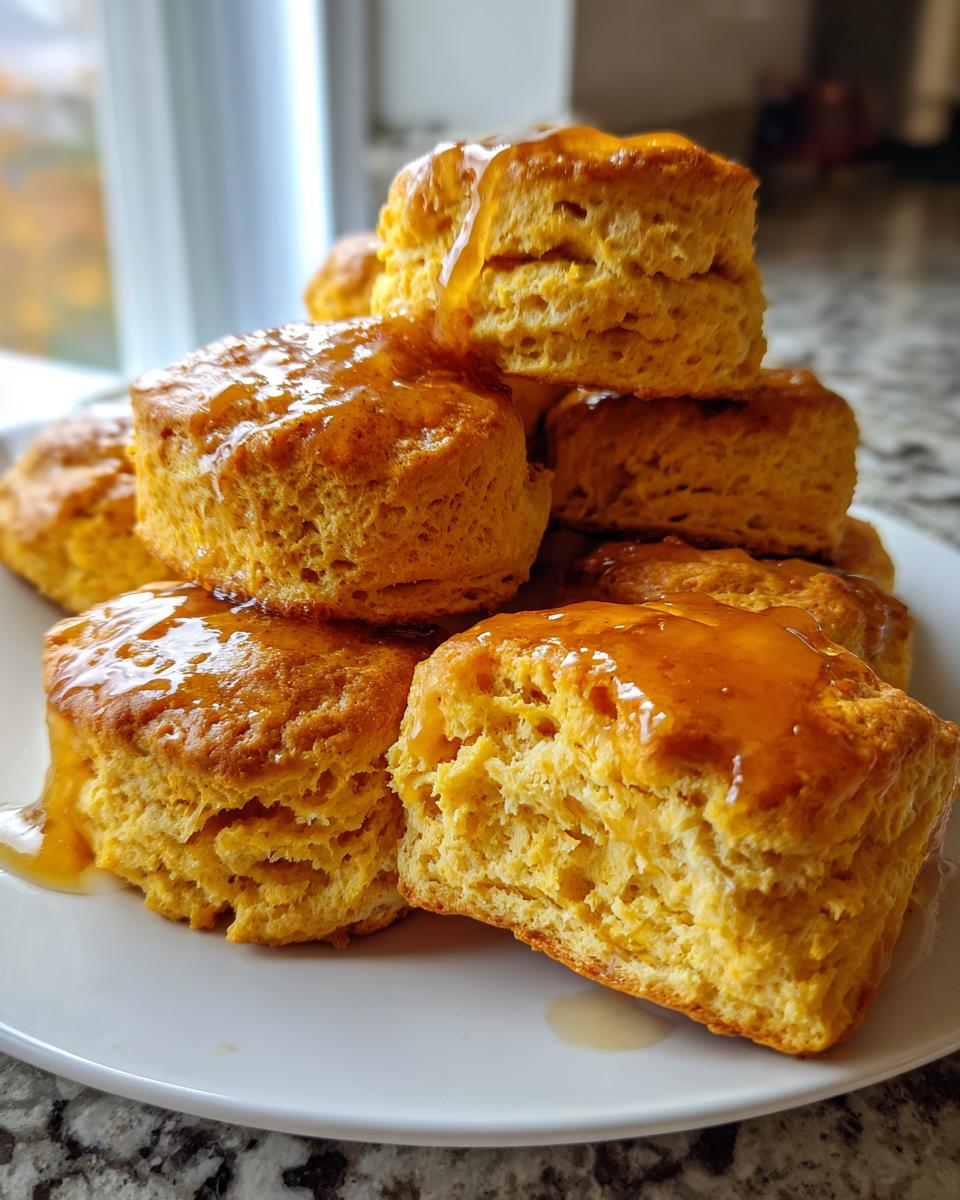
- They are genuinely melt in your mouth biscuits! The combination of the cold butter chunks and the starchy sweet potato puree creates layers that just dissolve when you bite into them.
- No more dry crumbs! The puree is a moisture powerhouse. Even if you eat these the day after Thanksgiving, they aren’t sad and crumbly; they are still tender.
- Amazing Color and Flavor: That gorgeous orange hue comes straight from the sweet potato, which also gives a subtle, warm sweetness that cuts through the butter perfectly.
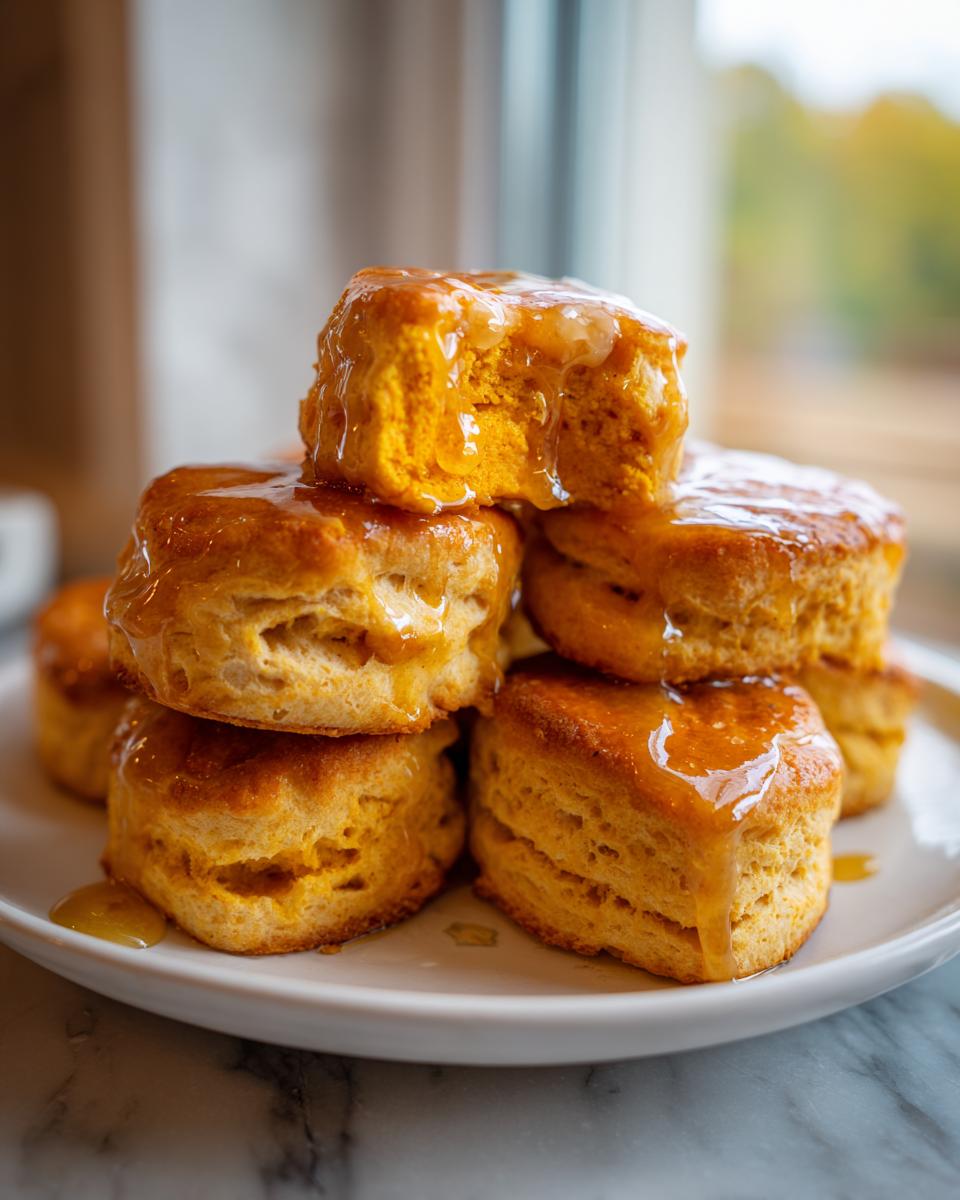
- They Rise Like Crazy: We talk about the secrets later, but when you follow the cold-ingredient rule, you get biscuits that stand tall and proud, which is definitely a Southern biscuit requirement.
- Super Quick Total Time: If your puree is ready, you are looking at less than 40 minutes total time from start to finish. That makes them fantastic for a weekend brunch bread idea when you don’t want a huge fuss.
Speaking of planning ahead, let’s make sure you know exactly what you’re signing up for in terms of time commitment!
Key Details: Prep, Cook, and Yield for Your Sweet Potato Biscuits
I always keep this little snapshot handy when I’m planning my holiday baking schedule, especially because it frees up oven space early!
- Prep Time: About 20 minutes, just chilling and mixing.
- Cook Time: A quick 15 minutes once they hit that hot oven.
- Yield: You should get about 10 to 12 beautiful biscuits, depending on how closely you pack them on the sheet.
Ingredients Checklist for Perfect Sweet Potato Biscuits
Okay, this is where we talk brass tacks. If you look at a recipe and feel panicked by the ingredient list, I totally get it. But this list is shockingly straightforward! Remember, the key to everything wonderful (the moisture, the rise, the flavor) is that your butter and buttermilk *must* be cold. I mean, almost icy. Don’t cheat this step; it’s the foundation of making **moist biscuit recipe tips** work for you!
Here is what you need for your batch of homemade sweet potato biscuits. Measure everything out before you even turn on the oven—that’s my real-life prep secret.
- 1 cup sweet potato puree (I’m big on oven-roasted for flavor, but you can use air-fried too, just make sure it’s smooth!)
- 2 1/2 cups all-purpose flour. Keep it leveled, not spooned and packed!
- 1 tablespoon baking powder. Yes, that much. It helps with the lift!
- 1 teaspoon salt. Don’t skip it, or they taste flat.
- 1/2 teaspoon baking soda. This reacts with the acidity in the buttermilk, so it’s important.
- 1/4 cup granulated sugar. Just a little sweetness.
- 1/4 cup packed light brown sugar. This adds that wonderful molasses flavor that pairs perfectly with the potato.
- 1/2 cup (that’s one full stick) unsalted butter, cut into small pieces. These pieces need to stay cold, so pop them in the freezer for 10 minutes while you measure everything else.
- 1 cup cold buttermilk. (We’ll talk about a substitute later, but buttermilk is truly best for that tender crumb!)
For the Homemade Honey Butter Recipe
If you stop here with just the biscuits, they are still fantastic. But topping them with this homemade honey butter recipe? That’s when things go from great to Thanksgiving MVP status. This topping requires almost zero effort, but the payoff is huge.
- 1/2 cup softened butter. I mean soft enough to swirl, but not greasy or melted. Leave it out while you bake.
- 1/4 cup honey. Use the good stuff if you have it!
- 1/2 teaspoon ground cinnamon. This is what makes it special—it really leans into that fall breakfast baking vibe.
Preparing the Sweet Potato Puree for Your Biscuits with Sweet Potato Puree
Okay, before we even think about mixing dry stuff, we need awesome puree! This is a crucial step for making genuinely tender sweet potato bread that has depth, not just color. While you *could* use canned puree in a pinch—and I won’t stop you if you’re in a huge rush—I highly, highly recommend cooking your own. The flavor difference is night and day.
My favorite way to get that rich, deep flavor is by roasting the potato, like I detail in my guide on baking sweet potatoes. When you roast them, the sugars caramelize a little bit inside, which adds complexity to the final biscuit. Air frying works great too if you want to save a little time but still get that concentration of flavor.
Here’s the quick method:
- Take one medium sweet potato. Poke it a few times with a fork—safety first, we don’t want any potato explosions!
- Roast it at 400°F (200°C) until it’s completely soft, which usually takes about 45 minutes to an hour, depending on the size.
- Let it cool just enough so you can handle it. Slice it open and scoop out all that lovely orange flesh into a bowl.
- Mash it up really well with a fork until it’s very smooth. We are aiming for 1 cup total for the recipe, so adjust your initial potato size accordingly.
If you use the air fryer, it cuts the time down significantly! Just pop the whole potato in at 375°F until tender. Make sure you mash it until there are absolutely no large lumps left. Those lumps will mess with the texture when you’re trying to achieve those melt in your mouth biscuits later on. Simple steps, but they make the final product shine!
Step-by-Step Instructions for Fluffy Southern Biscuits Recipe
Alright, this is the main event! We have our cold butter chunks ready, we have our smooth sweet potato puree measured—it’s time to bring this dough together. Remember, we are making sweet potato biscuits, and the number one rule of biscuit making, whether they have potato or not, is gentleness. We are building layers, not stirring cement. If you’re starting from scratch without any puree made, you can find my guide on old fashioned sweet potato biscuits which walks through the puree prep first.
This process moves quickly once you start combining things. Pay close attention to the mixing instructions; that’s the difference between a flaky biscuit and a dense hockey puck!
- First, we whisk all those dry ingredients in a big bowl—flour, baking powder, baking soda, and both sugars. Get them happily acquainted.
- Next up is that cold butter! Use a pastry blender, or honestly, just use your fingertips if they are cold. Work that butter into the flour until the largest pieces look like small peas. You need those visible bits of fat to create steam pockets later on.
- Gently swirl in your 1 cup of sweet potato puree. You just want it incorporated enough that you don’t see too much dry flour dusting the sides of the bowl.
- Now, pour in the cold buttermilk. Mix it with a fork. Stop when the dough *just* starts to look shaggy and comes together—I mean it, stop mixing! If you overmix now, you activate the gluten too much, and bye-bye fluffiness.
- Turn that sticky mess out onto a lightly floured counter. Don’t add too much flour; we want this dough rich. Gently pat or roll it out until it’s about 3/4-inch thick. If you roll it too thin, they won’t have the height we’re aiming for.
- Grab your biscuit cutter. This is critical: Press the cutter straight down into the dough and pull it straight up. Do not twist! Twisting seals the edges, and that sealed edge prevents your biscuit from rising straight up.
- Place your cut rounds close together on an ungreased baking sheet if you like softer sides, or a little further apart if you want crispy edges on all sides.
- Bake them right away at 425°F for about 12 to 15 minutes, until the tops look golden brown and delicious.
Secrets to Achieving Maximum Rise in Your Sweet Potato Biscuits
Listen, if you want those tall, lofty biscuits that look like they came straight out of a Southern bakery window, you have to commit to the ‘cold’ rule and the ‘no twist’ rule. I learned this the hard way more times than I care to admit!
- Keep Everything Shockingly Cold: I already mentioned this, but I’m saying it again because it’s the secret sauce! Cold butter melts slower in the oven, creating those beautiful, distinct flaky layers. Cold buttermilk cuts down on the spread, forcing the dough upward instead of outward. If your kitchen is hot, put your bowl of dry ingredients in the freezer for 10 minutes before mixing.
- The Cutter Technique: Remember that movement when you cut cookies? Forget that here! We want straight up and down. Twisting seals the dough bands, and when the baking powder tries to push up, it hits that seal and can’t climb. Press firmly, pull straight up.
- Baking Sheet Placement: For the absolute highest rise, place your cut biscuits right next to each other. When they touch, they support each other as they bake, which forces them to seek height instead of blowing out to the sides. If you like a crisp exterior, space them a bit more, but you’ll lose a tiny bit of that sky-high loft.
Follow these tips, and your batch of sweet potato biscuits will be the fluffiest ones you’ve ever pulled from your own oven. Enjoy watching them puff up!
Buttermilk Free Biscuit Recipe Alternative
Okay, I know not everyone keeps a gallon of buttermilk chilling in the fridge just for baking emergencies, and that is totally fine! I have run into this problem myself when I wanted to make a batch of buttermilk free biscuit recipe quick for brunch.
In our core recipe, the buttermilk isn’t just for liquid volume; it brings necessary acid to the party. That acid is what reacts beautifully with the baking soda we added earlier, giving the biscuits an extra boost in their rise and also helping to tenderize the crumb. Without that acidity, the biscuits can end up tasting a little flat or dense.
But don’t sweat it for a second! We totally have a workaround that mimics that acidity perfectly. If you don’t have buttermilk on hand, you just need to play chemist for about five minutes. I promise, it works wonders in these homemade sweet potato biscuits.
Here is the quick chemistry trick:
- Grab 1 cup of regular milk—whole milk is best, but whatever you have works.
- Stir in 1 tablespoon of white vinegar or lemon juice. Don’t stir it like you’re mixing a cake! Just stir it gently once or twice.
- Let that sit on the counter for five minutes. Seriously, just wait. You will see the milk start to curdle slightly and thicken up.
What you have now is homemade soured milk, which acts exactly like buttermilk in this recipe. You just use this mixture exactly where the recipe calls for the cold buttermilk. This little trick kept me from having to run to the store dozens of times before I finally remembered to buy buttermilk regularly!
If you want to see another great approach to using substitutions, check out the tips over at Kitchen at Hoskins—they also have a great perspective on making these without that traditional ingredient.
Making the Cinnamon Honey Butter Topping for Your Sweet Potato Biscuits
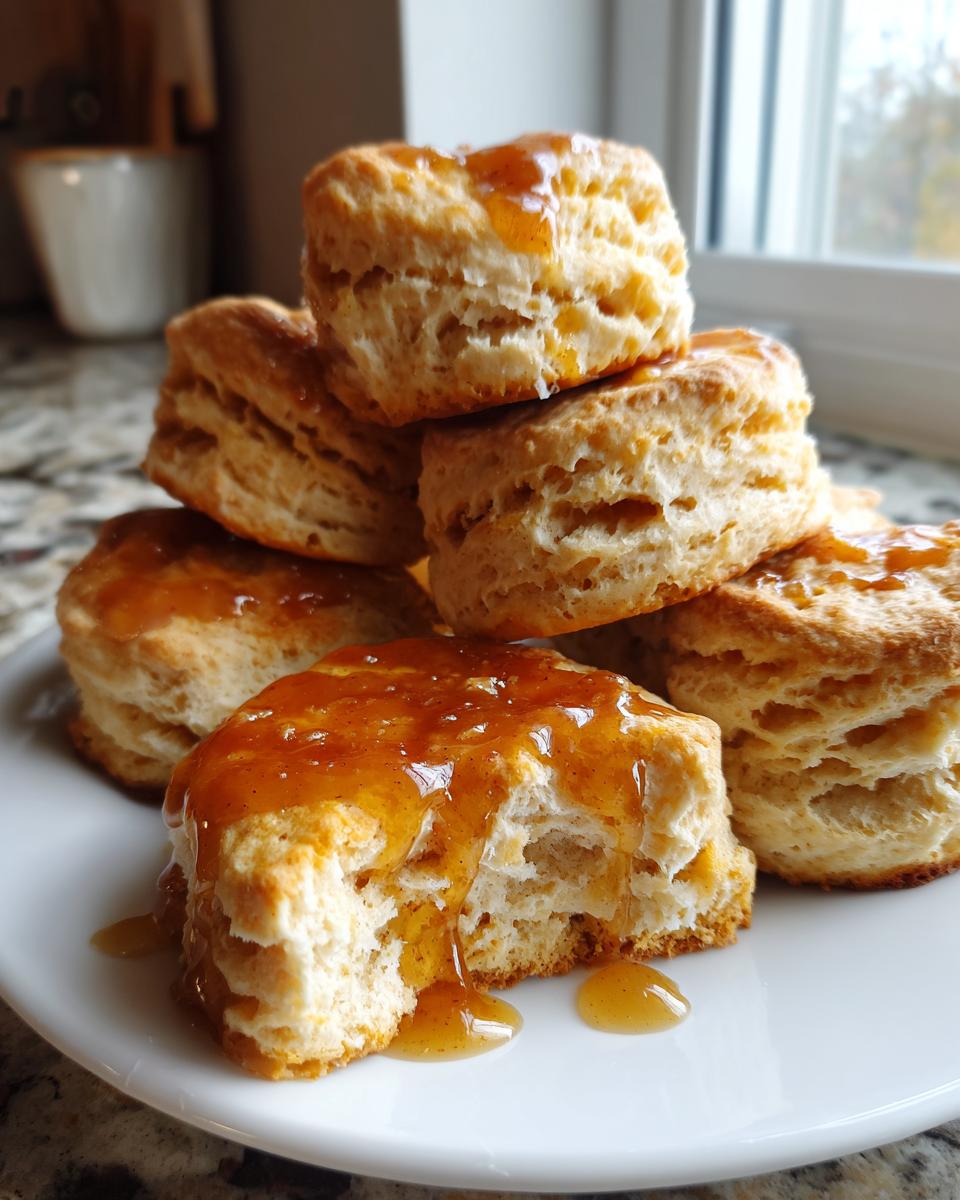
Seriously, if you think the biscuits themselves are good, wait until you hit them with this topping. The Cinnamon Honey Butter is just the cherry on top—or maybe the cloud on top—of your already incredible sweet potato biscuits. It takes about two minutes to whip up, which is why I always suggest making it while the biscuits are baking in that hot oven.
You don’t need anything fancy here, just a small bowl and maybe an electric hand mixer if you want it super fluffy fast. But honestly, a sturdy fork works just fine if you’re willing to put in a little elbow grease!
The main goal here is to completely incorporate the honey and the cinnamon into the softened butter. You’re looking for a lovely swirl of color and a smell that will make everyone in the house ask what’s coming out of the oven next!
- First, make sure your butter is properly softened! If you forgot, the microwave method (5 seconds on, 5 seconds off) sometimes works, but usually, it just makes melted butter. Remember, we want pliable, not liquid.
- Put that softened butter, your honey, and that cinnamon right into a bowl together.
- Beat it like you mean it! Keep mixing until everything is fully combined and you see those beautiful streaks of cinnamon suspended in the butter. It should look lighter in color than when you started.
That’s it! You’ve just made the perfect companion for your biscuits. I always keep the leftovers stored in a small covered dish in the fridge. If you’re reheating biscuits later, just pull this butter out about 20 minutes before serving so it gets nice and spreadable again. It’s also amazing on toast or warmed up over leftover sweet fall baked goods. It’s so easy, you’ll wonder why you ever bought plain butter again!
Serving Suggestions for Your Easy Sweet Potato Side Dish
I’m telling you, these bake up so fast, they often end up being made right before dinner, even when the rest of the meal is stressing me out! Because they have that subtle sweetness and beautiful color, they pair with almost anything savory, which is why they are my go-to fall breakfast baking addition.
You absolutely have to consider these if you are planning your menu for big gatherings. They look amazing on a buffet table; they add color and texture to the spread. Forget just serving them at dinner—I love making a big batch just for brunch!
Here are some ways my family loves to enjoy these beauties:
- The Ultimate Thanksgiving Biscuit Recipes Player: Serve them piping hot alongside slow-roasted turkey or alongside a salty country ham. The savory meatiness just cuts through the slight sweetness of the potato perfectly. If you manage to have any leftovers, they are amazing crumbled over leftover gravy the next day!
- Brunch Bread Ideas: Forget regular rolls and serve these instead! They are incredible split and used as the base for a little twist on Eggs Benedict. I often make a quick breakfast casserole and serve these on the side for scooping up extra sauce.
- With Savory Stews: When the weather gets chilly, nothing beats a bowl of hearty chili or a thick, creamy vegetable stew. These are sturdy enough to stand up to dunking without falling apart, unlike some of those delicate white flour varieties.
- The Simple Butter Route: If you made that Cinnamon Honey Butter I showed you earlier, you honestly don’t need anything else. Just a smear of that sweet, spiced butter is the whole perfect package. Sometimes the simplest sides are the most memorable ones, right?
Since they bake so fast, they are perfect for those times when you realize you forgot to make a starch or side dish until the main course is already resting. Quick prep, fantastic results—that’s what Little Kitchen Diary is all about!
Storage and Reheating Tips for Moist Biscuit Recipe Tips
So, somehow you managed to have leftovers of these beautiful sweet potato biscuits. Seriously, good job! Sometimes I aim for leftovers, but usually, they disappear before they even cool down. But if you do have extras, you want to make sure they are just as good the next day, right? We absolutely cannot afford for these to turn dry!
The key to keeping the moisture locked in lies entirely in how you store them. Since these biscuits have that lovely sweet potato puree, they tend to hold onto humidity better than plain flour biscuits, but you still need to treat them right. For the best results, I always refer back to what I learned making sturdy bread like my Irish Soda Bread—the covering matters!
Here is my system for storing them to ensure you get those moist biscuit recipe tips paying off later:
- Short Term (Same Day): If you think you’ll eat them within 12 hours, just leave them right on the counter. Make sure they are in an airtight container or tightly wrapped in plastic wrap. Don’t put them in the fridge! I know it seems backward, but the fridge air pulls moisture right out of biscuits, making them tough fast.
- Longer Term (Up to 3 Days): Seal them tightly in an airtight container. If you have lots of them, you can try placing a paper towel on the bottom of the container to absorb any extra condensation, but keep them at room temperature.
- Freezing for Later: If you made a double batch for Thanksgiving and want them ready next month, freeze them! Place fully cooled biscuits in a heavy-duty freezer bag. Squeeze all the air out before sealing. They handle freezing really well because of that sweet potato goodness.
Now, let’s talk about bringing them back to life. Because these aren’t just any biscuits; these are Southern comfort, and they deserve a warm welcome when they return to the table!
How to Reheat for That Fresh-from-the-Oven Fluff
Whatever you do, please, please skip the microwave if you are reheating more than one biscuit. Microwaves are the enemy of fluffy texture; they steam the outside and leave the center kind of chewy. We want light and airy!
For perfect reheating, I always default back to the oven. It gives you that gentle, even heat that brings back the buttery flakiness without drying out the inside.
- Oven Method (Best Flavor): Preheat your oven to a low 325°F (160°C). Place the biscuits directly on a baking sheet. Heat for about 8 to 10 minutes. This warms them all the way through and crisps up the outside just a little.
- Air Fryer Method (Fastest Reheat): If you used the air fryer to cook them, use it to reheat them! Set it to 300°F for about 4 minutes. They come out fast, hot, and beautifully tender.
- Thawing Frozen Biscuits: If they are coming straight from the freezer, wrap them loosely in foil first. Bake them at 350°F for about 15–20 minutes until they are warmed through, and then remove the foil for the last 5 minutes if you want a tiny bit of crispness back on the top.
Serving them warm with a little extra smear of that chilled Cinnamon Honey Butter is mandatory. Keep them warm, and they taste exactly like they did fresh out of the oven!
Frequently Asked Questions About Sweet Potato Biscuits
When I share my recipes, I always get a flood of emails with folks asking for just a little more clarification. That’s fantastic! It means you’re really investing in making these perfect. Because these sweet potato biscuits are a little different than your standard roll, people often have specific concerns about texture and prep. I’ve gathered up the most common ones right here to help you out!
Can I use canned sweet potato puree instead of roasting?
Yes, you absolutely can, especially if you are trying to whip these up as an easy sweet potato side dish when time is short! Canned puree is already cooked down, so it saves you about 45 minutes of oven time. However, you need to be mindful of the moisture content. Canned puree often has more water added to it than the intense, slightly drier puree you get from roasting or air-frying.
If you use canned puree, I highly recommend draining off any excess liquid before you measure out that 1 cup. If your puree seems much runnier than thick applesauce, you might want to blot it with a paper towel or stir it on the stove for a minute or two to cook off some extra water. Too much liquid equals biscuits that spread instead of rise!
What is the secret to Old Fashioned Sweet Potato Biscuits rising high?
This is my favorite question because it gets right to the heart of good baking technique! Achieving those impressive high rises for your old fashioned sweet potato biscuits comes down to combating gluten development and maximizing steam. It’s a two-part secret:
- The Cold, Cold Rule: You must use ice-cold butter chunks and ice-cold liquid (buttermilk or substitute). When those cold butter pockets hit the hot oven, they create steam instantly. That steam forces the layers of flour apart, pushing the biscuit upward. If your butter melts before the oven heat hits it, you end up with sad, flat breads.
- The No-Twist Cut: When you use your biscuit cutter, push it straight down firmly and then pull it straight up. Do not twist that cutter AT ALL! Twisting seals the edges all the way around. If the edges are sealed, that steam has nowhere to go except sideways or down, stopping your rise dead in its tracks.
Do those two things, and you will have the tallest, fluffiest biscuits you’ve ever made. It’s foolproof once you nail those basics!
Are these considered an Easy Sweet Potato Side Dish?
Hands down, yes! I wouldn’t dream of putting a recipe on Little Kitchen Diary if it was going to require a full afternoon of fuss. If you start with a pre-made puree (maybe you roasted a few extra pounds after a trip to the farmer’s market), your hands-on time is seriously minimal. We are mixing dry ingredients, cutting in butter, stirring in wet ingredients, and cutting them out.
With that total time hovering right around 35 minutes, they are faster than most casseroles and much quicker than kneading yeast rolls. They are an easy sweet potato side dish perfect for weeknights when you want something special, or for those crazy holiday meals when you need to get something done fast and delicious. They truly deliver high-impact flavor with low-impact effort.
PrintFluffy Southern Sweet Potato Biscuits with Cinnamon Honey Butter
Make tender, moist Southern-style sweet potato biscuits from scratch. This easy recipe uses sweet potato puree for great texture and includes instructions for a simple cinnamon honey butter topping.
- Prep Time: 20 min
- Cook Time: 15 min
- Total Time: 35 min
- Yield: 10-12 biscuits 1x
- Category: Side Dish
- Method: Baking
- Cuisine: American
- Diet: Vegetarian
Ingredients
- 1 cup sweet potato puree (oven-roasted or air-fried preferred)
- 2 1/2 cups all-purpose flour
- 1 tablespoon baking powder
- 1 teaspoon salt
- 1/2 teaspoon baking soda
- 1/4 cup granulated sugar
- 1/4 cup packed light brown sugar
- 1/2 cup (1 stick) cold unsalted butter, cut into small pieces
- 1 cup cold buttermilk (or substitute: 1 cup milk mixed with 1 tablespoon white vinegar, let stand 5 minutes)
- For Cinnamon Honey Butter: 1/2 cup softened butter, 1/4 cup honey, 1/2 teaspoon ground cinnamon
Instructions
- Prepare the sweet potato puree if you have not already. Roast or air-fry one medium sweet potato until soft, then scoop out the flesh and mash until smooth. Measure out 1 cup.
- In a large bowl, whisk together the flour, baking powder, salt, baking soda, granulated sugar, and brown sugar.
- Cut the cold butter into the dry ingredients using a pastry blender or your fingers until the mixture resembles coarse crumbs with some pea-sized pieces of butter remaining. This keeps the biscuits flaky.
- Stir in the sweet potato puree until just combined.
- Pour in the cold buttermilk substitute. Mix gently with a fork until the dough just comes together. Do not overmix; the dough will be slightly sticky.
- Turn the dough out onto a lightly floured surface. Gently pat or roll the dough to about 3/4-inch thickness.
- Use a 2-inch biscuit cutter to cut out the biscuits. Press the cutter straight down without twisting to help the biscuits rise high. Gather and gently re-pat scraps once for a few more biscuits if needed.
- Place the cut biscuits close together on an ungreased baking sheet for softer sides, or slightly apart for crispier edges.
- Bake in a preheated oven at 425 degrees Fahrenheit for 12 to 15 minutes, or until the tops are golden brown.
- While the biscuits bake, prepare the topping: Beat the softened butter, honey, and cinnamon together until light and fluffy.
- Remove the biscuits from the oven. Brush the tops immediately with melted butter, if desired, and serve warm with the cinnamon honey butter.
Notes
- For the highest rise, keep your butter and buttermilk very cold before mixing.
- If you skip the buttermilk, the vinegar/milk mixture works well as a direct substitute for the required acidity.
- Oven-roasting the sweet potato deepens the flavor compared to boiling.
Nutrition
- Serving Size: 1 biscuit
- Calories: 280
- Sugar: 8
- Sodium: 350
- Fat: 14
- Saturated Fat: 9
- Unsaturated Fat: 5
- Trans Fat: 0
- Carbohydrates: 35
- Fiber: 2
- Protein: 5
- Cholesterol: 35