
When I think about bringing people together, I think about easy, savory things that disappear off the platter way too fast. If you’re looking for that perfect Southern staple—something buttery, utterly cheesy, and unbelievably crispy—then you’ve found it. This cheese straws recipe is the reason I dust off my stand mixer almost every weekend. Forget fussy, tricky appetizers; these homemade cheese straws are simple enough for a Tuesday night snack but elegant enough for the biggest holiday party. Trust me, once you make a batch of these classic Cheddar Cheese Straws, you’ll see why they became legendary. They are pure, crunchy joy, and you can whip up a whole tray in under an hour! If you need another guaranteed party hit, check out my easy cheese ball recipe while you’re here.
- Why This Is the Best cheese straws recipe for Entertaining
- Gathering Ingredients for Your Crispy Cheese Straws Recipe
- Simple Steps to Make the Perfect cheese straws recipe
- Expert Tips for Crispy Cheese Straws Success
- Ingredient Notes and Variations for Your cheese straws recipe
- Serving Suggestions for this Savory Snack Ideas cheese straws recipe
- Storage and Reheating Instructions for Homemade Cheese Straws
- Frequently Asked Questions about the cheese straws recipe
- Nutrition Data for This Classic cheese straws recipe
Why This Is the Best cheese straws recipe for Entertaining
I promise you, this isn’t just another cracker recipe. If you want something that truly sings at your next gathering, this is the one. You’ll want to pick this cheese straws recipe because:
- They achieve that legendary Southern crispness—they snap, they don’t bend!
- We only use sharp cheddar, so the cheesy flavor cuts right through.
- The prep time is incredibly quick, meaning less time working and more time hosting.
- They are the perfect make-ahead option for busy holidays or game days.
See? Simple benefits for maximum impact. When they come out of the oven, you’ll immediately know you made the right choice. If you’re looking for something creamy to dip them into, our cheesy garlic bread dip is a huge hit!
Gathering Ingredients for Your Crispy Cheese Straws Recipe
Okay, the beauty of this cheese straws recipe is how few items you actually need. We’re keeping things simple so that sharp cheddar flavor really shines through. Remember, for the best cheddar cheese straws, don’t skimp on quality here!
You’ll need:
- 1 cup unsalted butter, make sure it’s nice and softened first.
- 2 cups sharp cheddar cheese, and please, grate it finely yourself!
- 2 cups all-purpose flour.
- 1 teaspoon salt.
- A little kick: 1/4 teaspoon cayenne pepper (optional, but I usually sneak it in).
- 1/4 teaspoon paprika for color.
- 1/4 cup of ice-cold water—this is key for texture!
That’s it! Just those seven things, and we’re on the way to the crispiest, most perfect straws you’ve ever made.
Simple Steps to Make the Perfect cheese straws recipe
Okay, I know you’re itching to get these in the oven, but trust me, following these steps exactly is how we get that satisfying, flaky crunch. First things first: get your oven warmed up to 350°F (175°C) and grab some parchment paper for your baking sheets. This recipe is written to deliver that amazing, homemade cheese straws texture you’re looking for.
Mixing the Dough for Your Homemade Cheese Straws
Grab your largest bowl. We need to cream that softened butter with all that gorgeous, finely grated sharp cheddar until it looks light and fluffy—it should lighten up nicely. Next, slowly introduce the flour mixture—salt, paprika, and cayenne, if you’re using it. Mix this on low speed just until it starts to come together and looks crumbly. That crumbly texture is exactly what we want! Now, drizzle in that cold water, tablespoon by tablespoon, until the dough finally decides to form a cohesive ball. Stop mixing the second it comes together. Seriously, don’t overmix, or you’ll lose the flake factor!
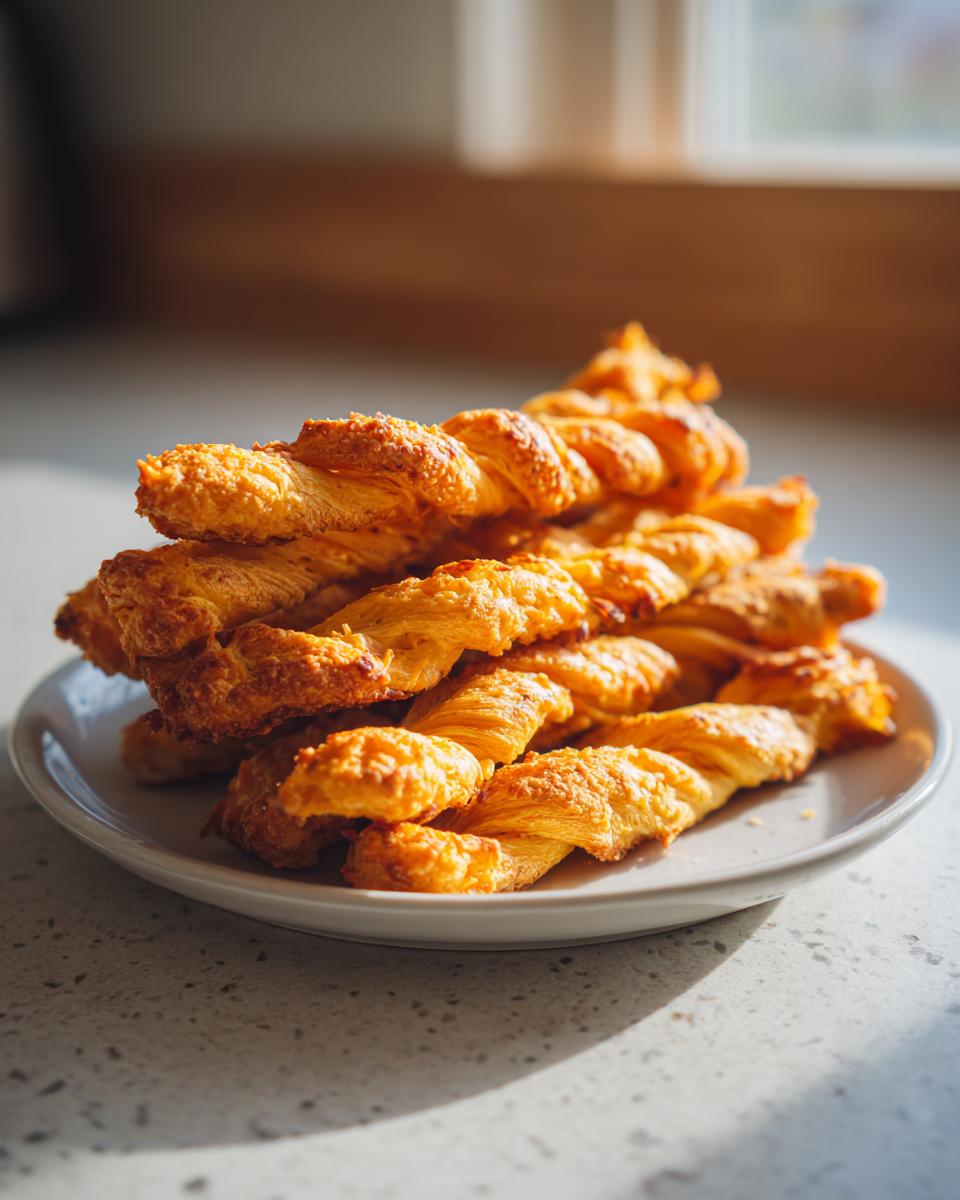
Shaping and Twisting the cheese straws recipe Strips
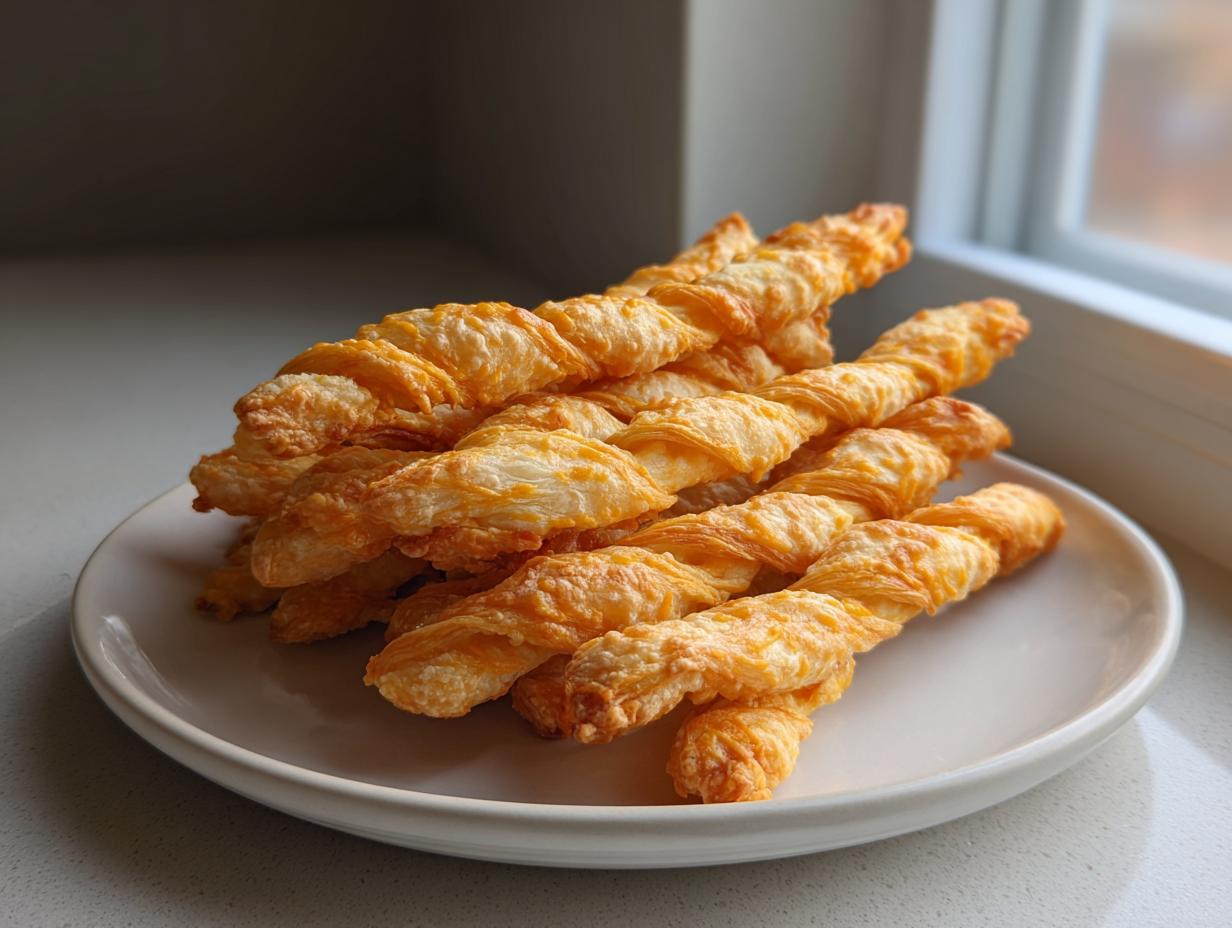
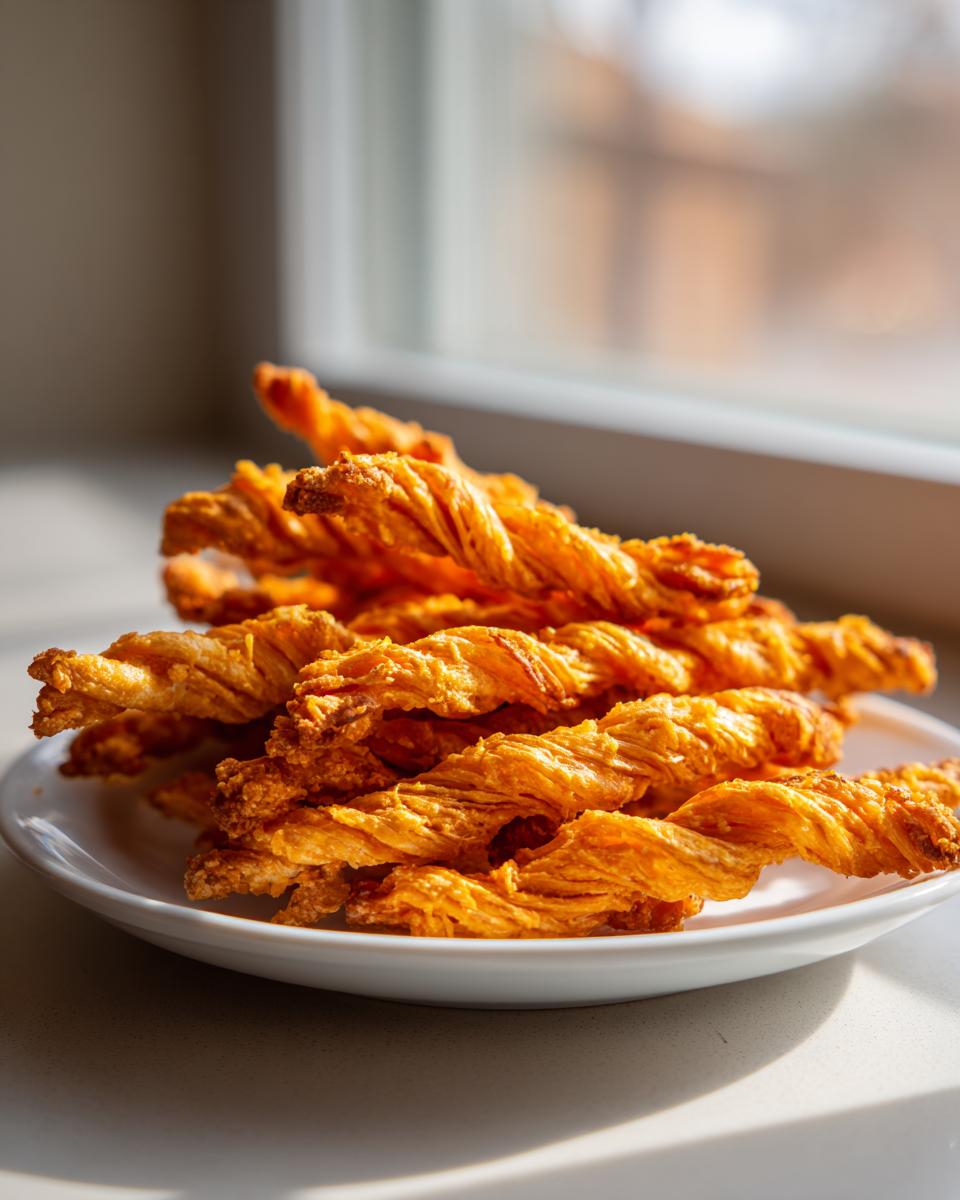
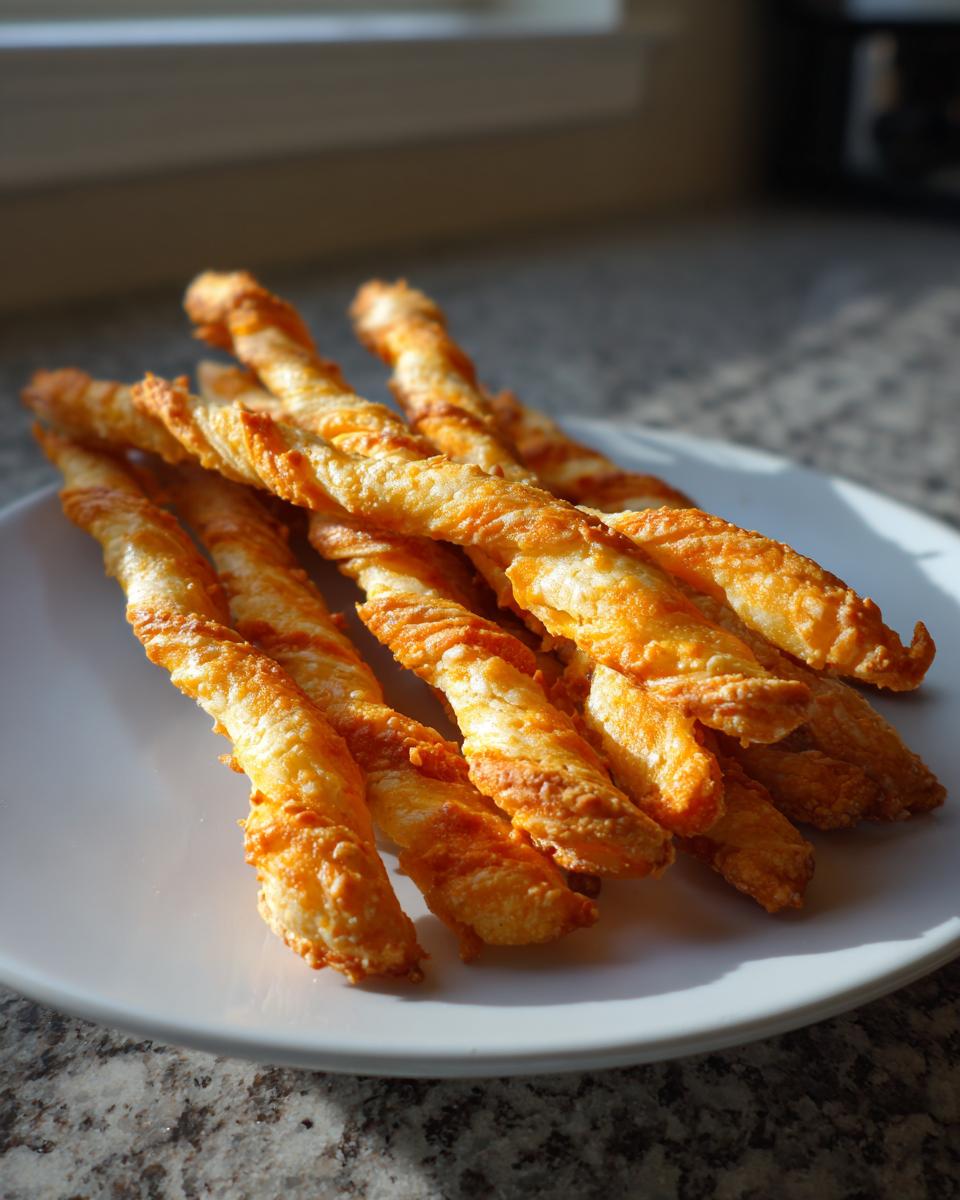
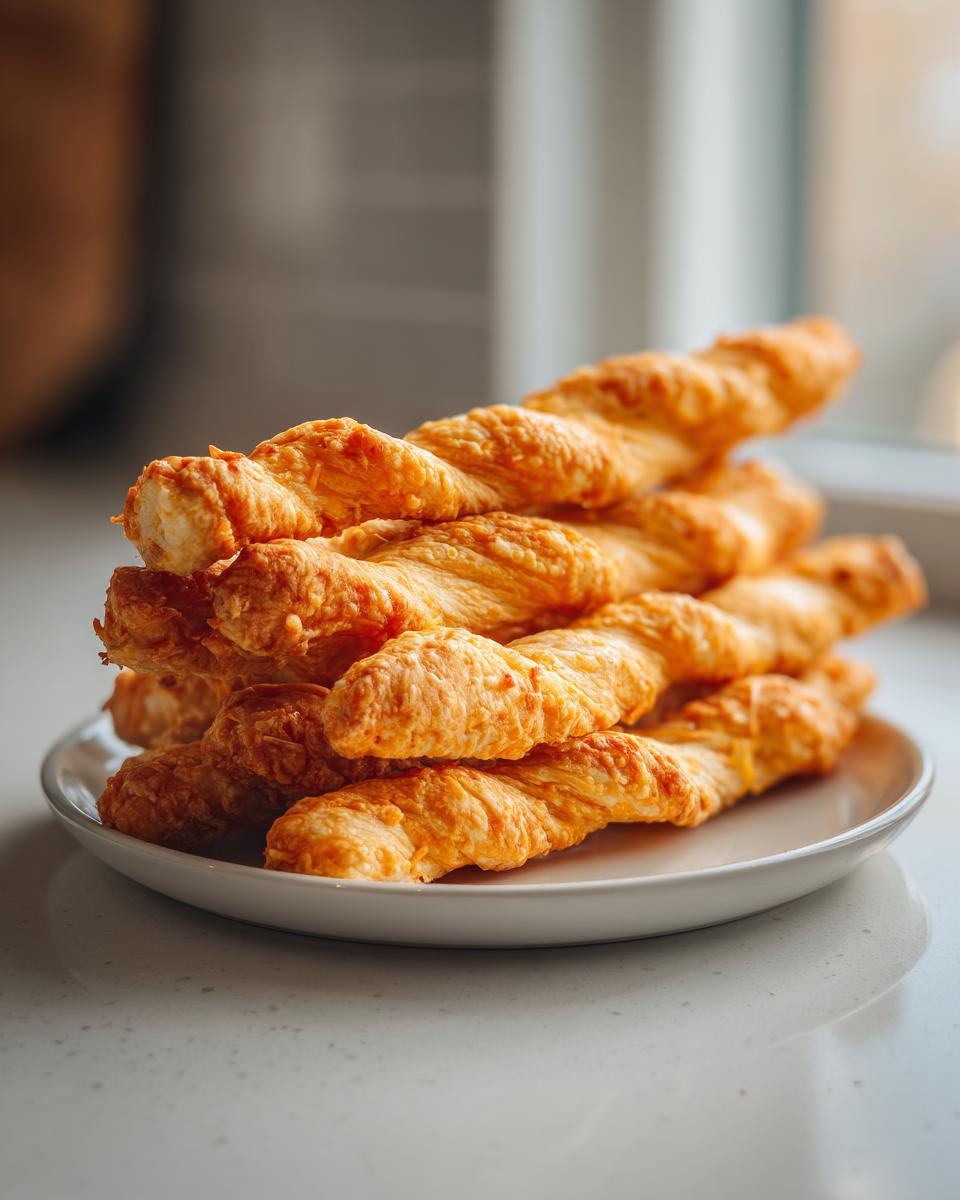
Now the fun part! Divide that cheesy dough in half. On a lightly floured counter, roll each piece out evenly until it’s just about 1/8-inch thick. Think thin, but not cracker-thin. Use a pizza cutter or a sharp knife to slice those sheets into strips—aim for about a half-inch wide and 4 to 6 inches long. Take one strip and give it a nice little twist right in the middle. It’s relaxing, honestly! Place these twisted beauties spaced out on your parchment-lined sheets. If you have any extra bits left over, just roll them back out. I’ve written extensively about baking the perfect flaky dough when I covered my buttermilk biscuits, and the same “don’t work it too much” rule applies here!
Bake them for 12 to 15 minutes until they just start to kiss the edges with golden brown color. They won’t look done, but they will crisp up perfectly as they cool on the pans. Patience rewards you here!
Expert Tips for Crispy Cheese Straws Success
Achieving that perfect snap is why we make homemade cheese straws in the first place, right? If you want truly Crispy Cheese Straws, I have a couple of must-dos from my own trials in the kitchen. First, remember what I said about the cheese: you absolutely must grate the sharp cheddar yourself. Bagged shredded cheese has additives that prevent sticking, and those additives stop your straws from getting that incredible crispness we crave.
Also, if your kitchen is super warm, or if you just have trouble keeping the dough together while you’re twisting, try this little trick: chill your dough! After you form the ball and before you roll it out, wrap it tightly and pop it in the fridge for about 30 minutes. It firms everything up and makes cutting those strips way cleaner. It’s a simple step that makes a huge difference when you’re aiming for perfection. If you love a deep savory flavor, you should also look at my sweet potato biscuits recipe; they rely on similar good, heavy ingredients!
Ingredient Notes and Variations for Your cheese straws recipe
Let’s talk quality control for a second, because the success of this cheese straws recipe rests almost entirely on what you put in it. My biggest rule, and this is firm, is about the butter. It needs to be softened, but please, don’t cheat by melting it in the microwave! If the butter is melted, you lose all that airy structure we beat into it during the creaming phase, and you end up with greasy crackers instead of flaky straws. Let it sit on the counter for an hour or so until you can press a finger in easily.
The cheese factor is just as crucial. We use sharp cheddar because those aged cheeses have a lower moisture content and a bigger flavor punch. If you’re feeling fancy, or maybe want to tone down the cheddar just a hair, feel free to swap out half of the cheddar for grated Parmesan cheese. It adds a wonderful nutty depth that elevates these snack straws instantly. These Parm-Cheddar hybrid straws are just delightful with a glass of wine. Speaking of flavor kicks, if you want to turn these into what I call my ‘party-starter’ version, just bump that cayenne pepper up to a full 1/2 teaspoon. That gives you proper spicy cheese straws without overpowering the cheddar.
If you’re ever staring at your pantry wondering if store-bought cheese works, no, it doesn’t! Grated cheese has starch added to keep it from clumping in the bag, and that starch is the enemy of crispiness. Always grate fresh! If you’re looking for another way to show off your cheese skills for your next gathering, my easy marinated cheese appetizer is always a winner.
Serving Suggestions for this Savory Snack Ideas cheese straws recipe
These amazing savory snack ideas truly shine when they are served right when they cool down a bit, but they’re fantastic at room temperature too! Since these are classic party appetizer recipes, I always put out a big bowl for guests. They pair perfectly salty with something bright and bubbly, like a chilled white wine or even one of my favorite simple cocktails, like the easy lemon drop martini. If you’re making these for a cozy night in, they are an absolute must beside a big bowl of tomato soup for dipping. Honestly, they taste like a sophisticated, buttery cracker!
Storage and Reheating Instructions for Homemade Cheese Straws
Look, the hardest part of making these homemade cheese straws is actually having any left over! But if you do manage to save some, we need to keep them ready for the next snack attack. The most important thing to remember is this: they MUST be completely cool before you even think about putting them into any type of container. If you trap any residual heat or steam in there, you will sweat out all the beautiful crispness we worked so hard to achieve.
Once they are rock solid cool—like, room temperature all the way through—store them in an airtight container at room temperature. I’ve kept them like this for a good four or five days, and they stay fantastic. Seriously, they stay snappy!
Now, if you want to tackle freezing, you certainly can! Wrap the cooled straws very tightly in plastic wrap first, and then tuck that whole bundle into a zip-top freezer bag. They should last a couple of months this way. When you pull them out of the freezer, let them thaw completely on the counter before you try reheating them. Don’t rush this part!
When you’re ready to serve the leftovers and you want that ‘fresh-out-of-the-oven’ sound when you bite in, the oven is your friend. Preheat your oven to a low temperature, maybe 300°F (150°C). Lay your straws out on a baking sheet—don’t stack them!—and pop them in for just about 5 to 7 minutes. This low heat gently wicks away any moisture they picked up while sitting in the container, bringing back that amazing snap. You’ll be amazed how good they taste after a quick refresh!
Frequently Asked Questions about the cheese straws recipe
I get a ton of emails about tweaking recipes, and these cheese straws recipe questions always pop up! Baking is personal, sure, but when it comes to crispness, a few rules really help keep these the perfect party appetizer. Here are the most common things folks ask me when they’re making their savory snack ideas.
Can I use pre-shredded cheese in this cheese straws recipe?
Oh, I really hope you don’t! I know it sounds easier, but please, resist that temptation. Pre-shredded cheese is coated with anti-caking agents—usually potato starch or cellulose—to stop it from clumping in the bag when it sits on the shelf. That coating is the enemy of truly crispy cheese straws! Those starches interfere with the butter and flour binding correctly, leading to a slightly grainy texture or, worse, a soft straw instead of a snappy one. For the best flavor and the ultimate snap, take five extra minutes to grate that sharp cheddar block yourself. It’s worth every second!
What makes these Southern Cheese Straw Recipe different?
That distinct Southern flair comes down to two things we emphasize right here: the cheese and the butter content. True Southern cheese straws need that deep, slightly pungent flavor that only comes from *sharp* or *extra-sharp* cheddar. We use a high-fat ratio in this recipe because we want that rich, buttery melt, but we incorporate just enough gentle water to bring it together so it bakes up flaky instead of dense, like a shortbread cracker. It’s that perfect balance between buttery richness and a sharp cheddar bite that sets the Southern version apart from a plain savory cracker. You can find more great Southern-inspired recipes, like my favorite light lunch ideas, throughout the site!
Here are a couple of other quick hits:
- Why aren’t mine crispy when they come out of the oven? This is almost always a cooling issue! You must let them cool completely, undisturbed, on the baking sheet for at least 20 minutes. They finish setting and crisping up *after* they leave the heat. If they feel soft, give them 10 minutes more draped over a wire rack.
- Can I use Parmesan Cheese Straws flavors? Absolutely! As I mentioned before, swapping out half the cheddar for finely grated Parmesan adds a fantastic nutty, salty note. It’s a simple way to switch up the flavor profile, though the structural integrity of using mostly aged cheddar remains key to getting that great texture.
Nutrition Data for This Classic cheese straws recipe
Now, I always try to keep things grounded in reality here in the diary, and I know some of you like to track what you’re snacking on—especially when these tasty cheese straws recipe bites are so easy to devour! Please keep in mind that these numbers are estimates based on my specific ingredients and calculations. Since cheese, butter, and even how much you twist the straw can change things, consider this a good guideline rather than a strict guarantee.
For a standard serving size of 4 of these irresistible, crispy straws, here is the breakdown:
- Calories: About 110
- Total Fat: Roughly 8 grams (that’s where the flavor comes from!)
- Total Carbohydrates: About 6 grams
- Protein: A solid 3 grams per serving
We also keep the sugar super low—less than a tenth of a gram, which is fantastic for a savory party appetizer! These are best enjoyed guilt-free alongside a cup of coffee or while watching the big game. Remember, the lower the sodium in your cheese, the lower the overall sodium count for the batch!
PrintCrispy Southern Cheddar Cheese Straws

Make these classic Southern cheese straws for a savory, flaky appetizer perfect for parties or snacks. This recipe uses sharp cheddar cheese to create a rich flavor and a satisfying crunch.
- Prep Time: 20 min
- Cook Time: 15 min
- Total Time: 35 min
- Yield: About 4 dozen 1x
- Category: Appetizer
- Method: Baking
- Cuisine: American
- Diet: Vegetarian
Ingredients
- 1 cup unsalted butter, softened
- 2 cups sharp cheddar cheese, finely grated
- 2 cups all-purpose flour
- 1 teaspoon salt
- 1/4 teaspoon cayenne pepper (optional, for a little heat)
- 1/4 teaspoon paprika
- 1/4 cup cold water
Instructions
- Preheat your oven to 350°F (175°C). Line two baking sheets with parchment paper.
- In a large bowl, cream together the softened butter and grated sharp cheddar cheese until the mixture is light and fluffy.
- In a separate bowl, whisk together the flour, salt, cayenne pepper (if using), and paprika.
- Gradually add the dry ingredients to the butter mixture, mixing on low speed until just combined. The dough will look crumbly.
- Slowly add the cold water, one tablespoon at a time, mixing until the dough just comes together into a cohesive ball. Do not overmix.
- Divide the dough in half. On a lightly floured surface, roll each half out to about 1/8-inch thickness.
- Use a pizza cutter or knife to cut the dough into strips about 1/2-inch wide and 4 to 6 inches long.
- Twist each strip a few times to form a straw shape. Place the twisted straws onto the prepared baking sheets, leaving a small space between them.
- Bake for 12 to 15 minutes, or until the edges are lightly golden brown and the straws are crisp.
- Let the cheese straws cool completely on the baking sheet before serving. They will crisp up further as they cool.
Notes
- For the best flavor and crispness, use sharp or extra-sharp cheddar cheese.
- You can substitute half of the cheddar with grated Parmesan cheese for a different flavor profile.
- Prepare the dough ahead of time, wrap it tightly, and chill it for up to 2 days before rolling and baking.
- These cheese straws are excellent served with cocktails or as a side for soup.
Nutrition
- Serving Size: 4 straws
- Calories: 110
- Sugar: 0.1
- Sodium: 150
- Fat: 8
- Saturated Fat: 5
- Unsaturated Fat: 3
- Trans Fat: 0.1
- Carbohydrates: 6
- Fiber: 0.3
- Protein: 3
- Cholesterol: 25