
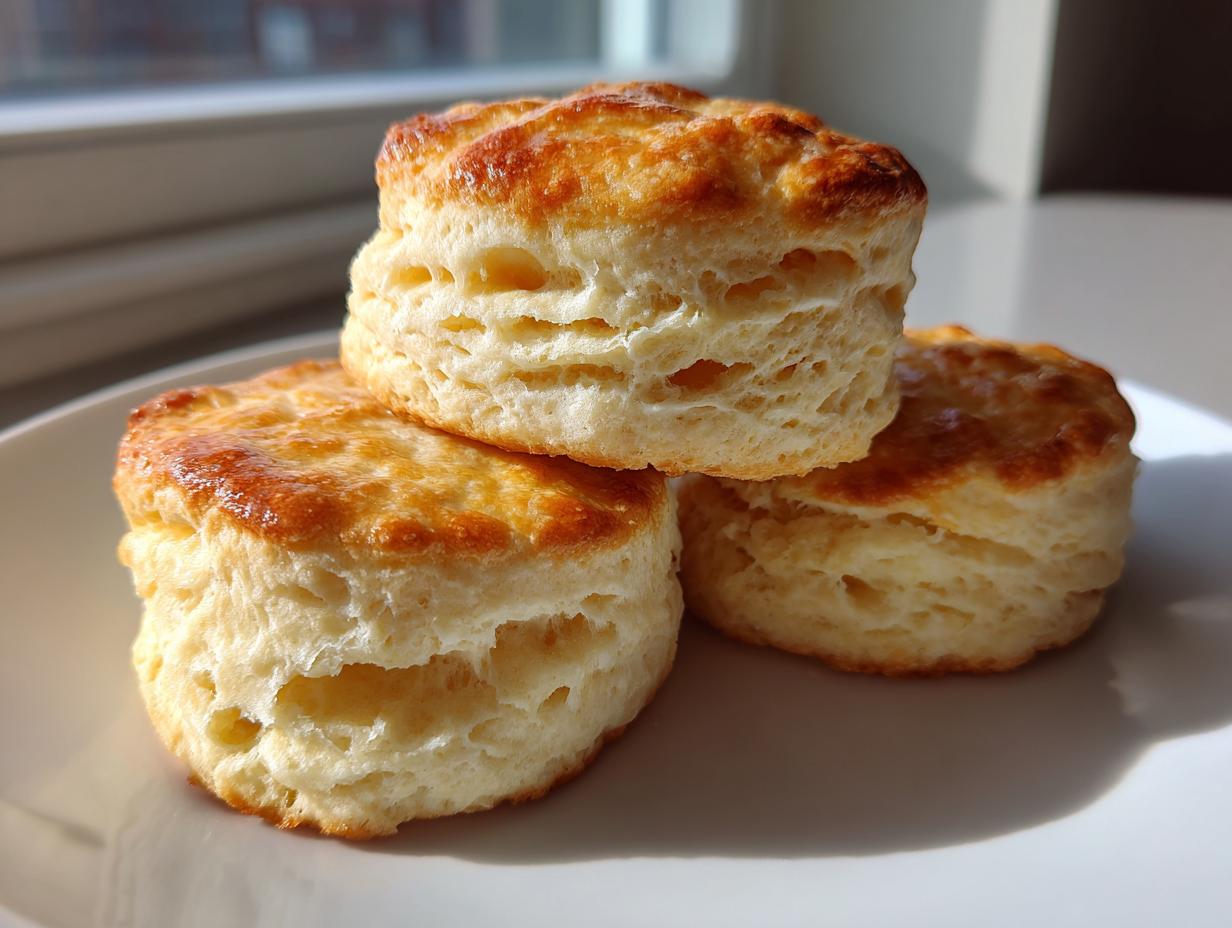
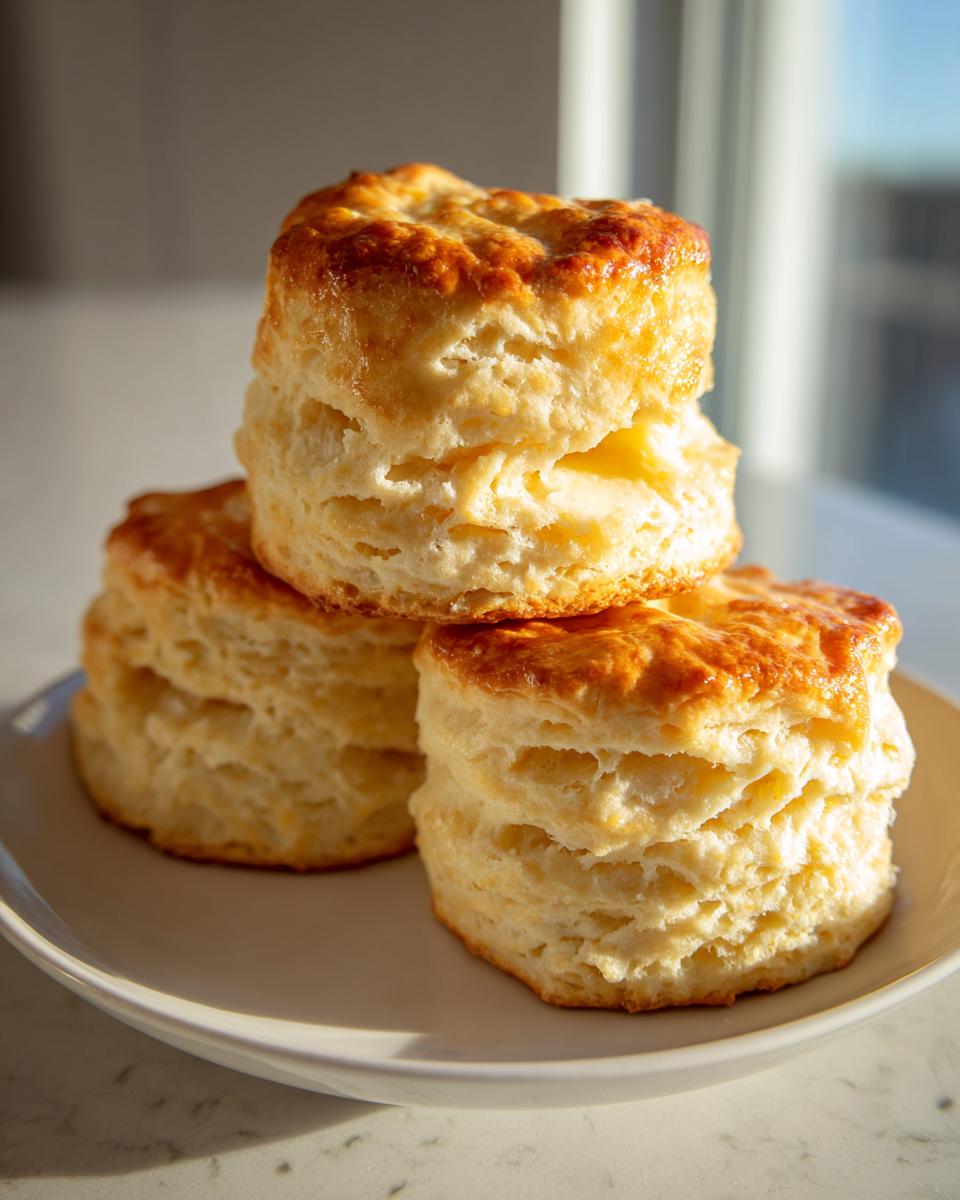
There is nothing quite like that first bite of a real, honest-to-goodness homemade biscuit. You know the kind I mean—the ones that practically stand at attention on the plate, promising layers of fluffy, buttery goodness inside. For me, getting back into my kitchen meant rediscovering that simple joy, moving past the convenience foods, and finding recipes that actually work for real life. That journey led directly here: to the absolute best recipe for buttermilk biscuits, Southern style. Trust me, achieving those tall, flaky layers doesn’t need complicated baking school techniques; it just needs a little bit of cold butter, a big dash of love, and the right method. I’m Ethan, and I’m thrilled to share this diary entry with you.
- Why You Will Make the Best Buttermilk Biscuits From Scratch
- Ingredients for Tender Buttermilk Biscuits Recipe
- Baking Techniques for Flaky Biscuits: Step-by-Step Instructions
- Tips for Success When Making Buttermilk Biscuits
- Serving Suggestions for Your Fluffy Buttermilk Biscuits
- Storage and Reheating Instructions for Classic American Biscuits
- Frequently Asked Questions About Buttermilk Biscuits
- Estimated Nutritional Data for This Recipe
- Share Your Baking Journey
Why You Will Make the Best Buttermilk Biscuits From Scratch
I know, everyone says their recipe is the “best,” but hear me out. When I was getting back into cooking, the one thing I missed most was that perfect bite of a real Southern biscuit. Not the dense, sad hockey pucks you sometimes get, but the ones that practically float off the plate! This recipe is my guarantee that you’ll nail that texture right out of the gate. It’s all about harnessing a few key elements that turn simple flour and milk into something truly special.
Forget spending hours fiddling with dough. These are made to fit right into your busy week. Here is what you get when you trust this method for your buttermilk biscuits:
- Seriously Fluffy Buttermilk Biscuits: We rely on chemistry—baking soda reacting with the acidity in the buttermilk—to shoot these straight up in the oven. You get height, not flatness!
- Guaranteed Flaky Layers: It all comes down to the cold butter. When you cut it in right, you create those pockets of steam that separate the dough into perfect, delicate layers.
- Authentic Southern Flavor: This isn’t a bland quick bread. It’s rich, buttery, and tastes exactly like comfort food should. Perfect for serving alongside your favorite breakfast spread.
- Quick Prep Time: Seriously, these come together faster than ordering delivery! You’re looking at about 15 minutes to mix everything up before they hit that hot oven.
If you’re looking for a recipe that promises melt in your mouth biscuits without the stress, this is the one you need in your collection. You’ll be reaching for this recipe again and again!
Ingredients for Tender Buttermilk Biscuits Recipe
Okay, listen up, because the magic of truly tender buttermilk biscuits hinges entirely on the ingredients being impeccably prepared. We aren’t using fancy store-bought shortcuts here; we need basic stuff treated right. When you gather these simple items, make sure they are COLD. I cannot stress this enough for those beautiful, flaky layers biscuits we are aiming for!
Here is what you need for about 8 glorious biscuits:
- 2 cups all-purpose flour
- 1 tablespoon baking powder
- 1 teaspoon salt
- 1/2 teaspoon baking soda
- 1/2 cup (1 stick) cold unsalted butter, cut into small pieces
- 3/4 cup cold buttermilk
- 2 tablespoons melted butter, for brushing
That butter needs to be straight from the fridge, and the buttermilk should be so cold it almost hurts your fingers when you pour it. This temperature difference between the fat and the flour is what makes them puff up instead of just spreading out into sad pancakes.
Ingredient Notes and Substitutions for Fluffy Buttermilk Biscuits
People always ask me if they can swap things out, especially when they need a quick biscuit recipe. Generally, I say stick close to the script for your first attempt at these classic American biscuits, but here are my thoughts on the non-negotiables.
First, the butter. You must use real, unsalted butter. Shortening works fine for basic structure, sure, but it won’t give you that rich, deep flavor that makes these buttermilk biscuits taste like true comfort food baking. That melted butter for brushing on top? That’s where the incredible golden brown biscuits come from, so don’t skip that finale!
Second, buttermilk. If you are in a jam and only have regular milk (maybe you want to try a generic buttermilk quick bread recipe using yogurt instead?), you can make a substitute. Just mix 3/4 cup of regular milk with 3/4 teaspoon of white vinegar or lemon juice, let it sit on the counter for five minutes until it slightly curdles. But honestly? That acidic tang in real buttermilk is what activates the baking soda so beautifully for those high rises. You want those lofty, fluffy buttermilk biscuits, so hunt down the real deal if you can!
As for those final touches, feel free to change up the biscuit topping ideas. While I love just the melted butter brush, a sprinkle of flaky sea salt on top before baking can really make those savory flavors pop, especially if you plan to eat them with gravy!
Baking Techniques for Flaky Biscuits: Step-by-Step Instructions
This is where most people go wrong, and honestly, I learned the hard way! Early on, I used to mix biscuit dough like I was making cake batter—whipping everything together vigorously. Big mistake! I ended up with dense, tough rounds instead of those light, airy melt in your mouth biscuits. I realized that making true Southern style buttermilk biscuits is more about gentle folding and respecting the butter, not aggressive mixing. The goal is to keep those butter pieces intact so they create steam pockets that lift the dough sky-high. You can check out this great method on another site for comparison, Making Fluffy Buttermilk Biscuits At Home This Weekend, but my steps below are what seal the deal for me.
First, make sure that oven is cranked up! We need serious heat for a fast rise. Preheat your oven to 425 degrees Fahrenheit. Line a baking sheet with parchment paper so cleanup is a breeze.
- In a large bowl, whisk together the flour, baking powder, salt, and baking soda. Making sure these are fully combined prevents weird clumps later.
- Add the cold butter pieces to the dry ingredients. This is crucial: use a pastry blender or just your fingertips—and work quickly! You need to cut the butter into the flour until the mixture looks like coarse crumbs, but you absolutely must see some pea-sized chunks of butter still visible. Those chunks are your future flaky layers!
- Pour in the cold buttermilk all at once. Stir gently with a fork until the dough just starts to come together in shaggy masses. Stop stirring immediately when you can no longer see dry flour streaks. Seriously, stop!
- Turn the dough out onto a lightly floured surface. Now is the moment of truth: gently knead the dough only 4 or 5 times until it just holds together into a cohesive mass. Overworking this dough is how you get tough bread, so be minimal here.
- Pat or roll the dough out to about 3/4-inch thickness. We want height, remember?
- Use a 2-inch biscuit cutter to cut out your biscuits. I’ve got some links for great easy homemade biscuits techniques if you need inspiration, but the key here is pressing down firmly and vertically.
- Place the cut biscuits close together on the prepared baking sheet if you prefer softer sides, or slightly apart if you want crispier edges on your final product.
- Brush the tops lightly with the melted butter—hello flavor!
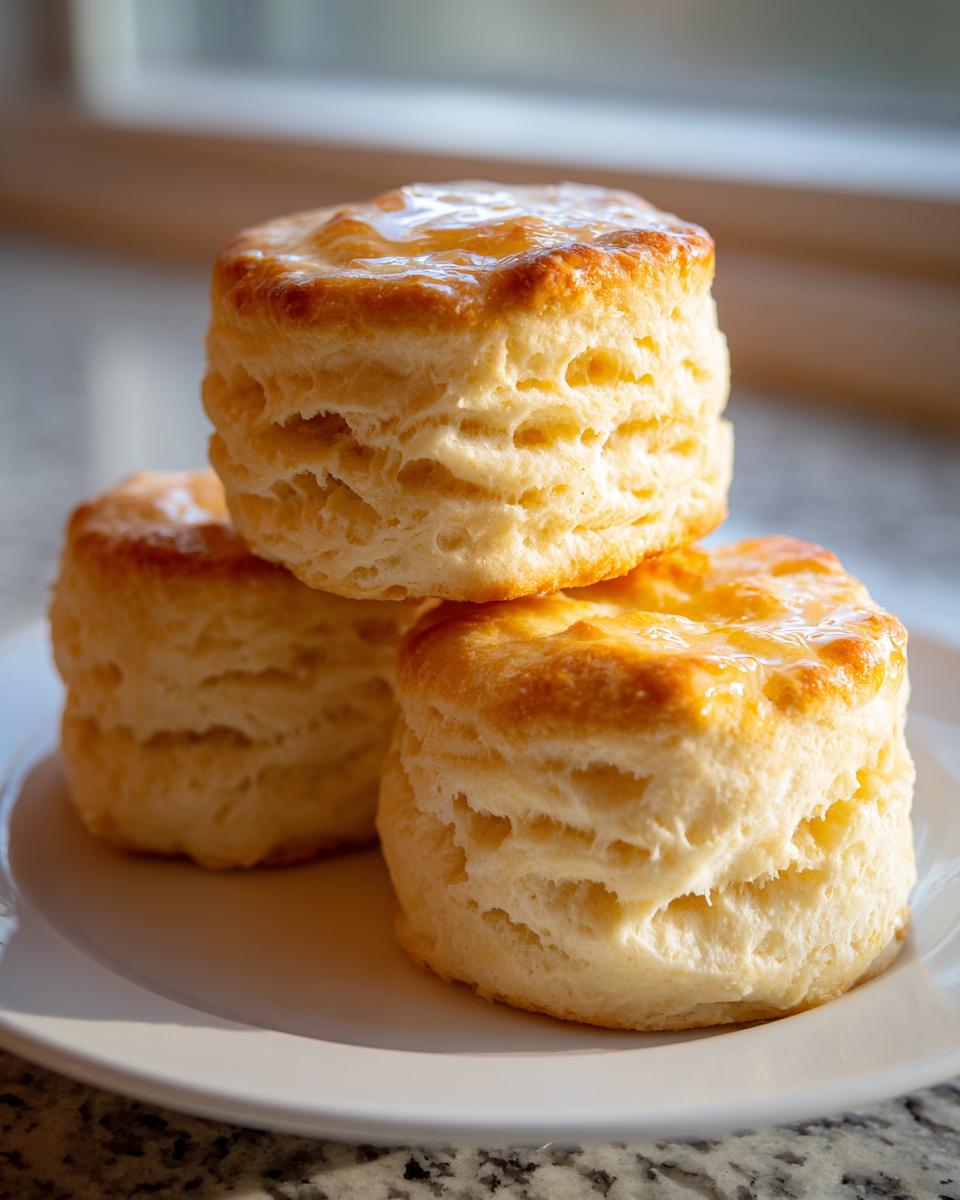
- Bake for 12 to 15 minutes, or until the buttermilk biscuits are golden brown beautifully on top.
- Remove them from the oven and immediately brush the tops again with any remaining melted butter. Eat them while they are piping hot!
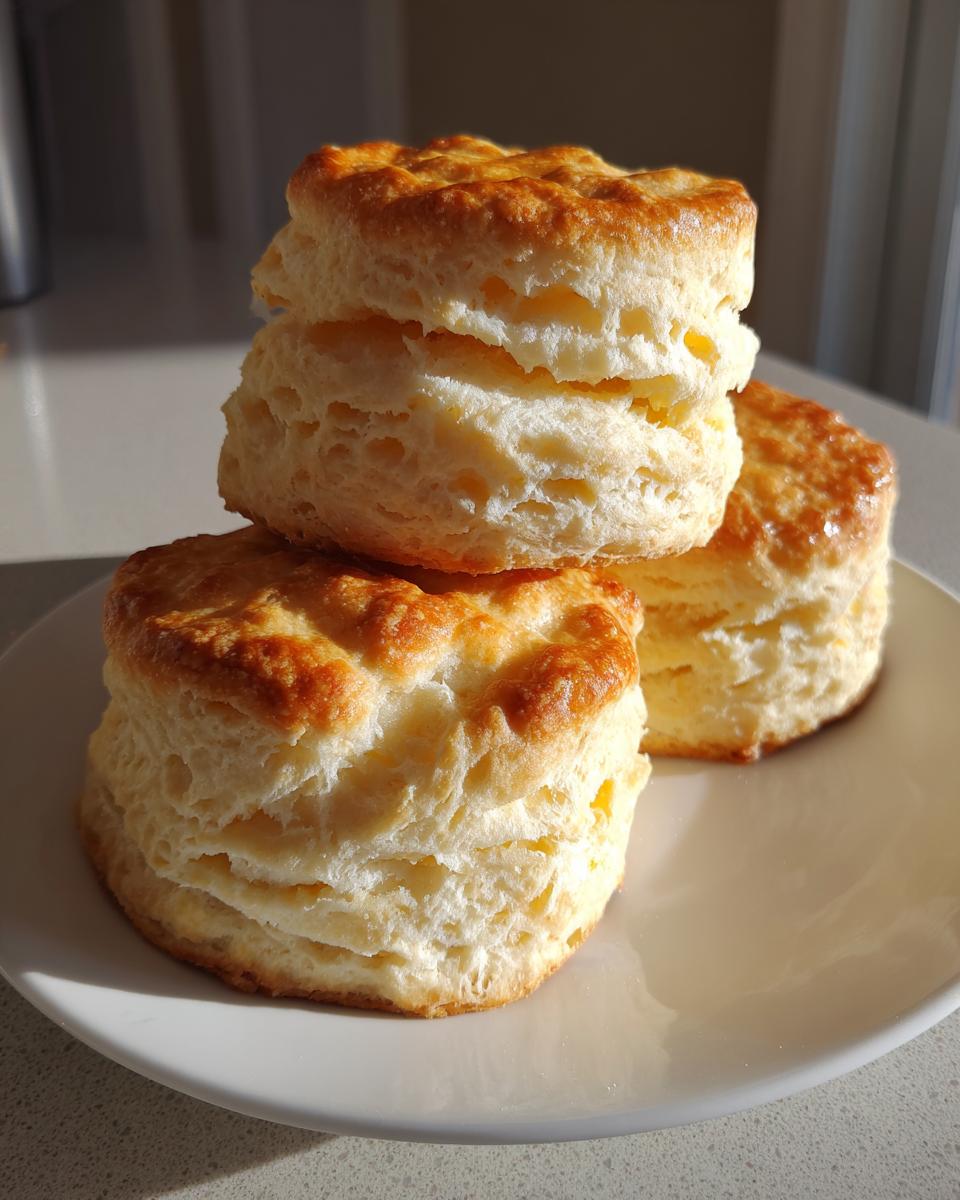
Achieving Tall, Golden Brown Biscuits
Everyone asks me how I get mine so tall—it’s not magic, just technique! The biggest factor is how you use that biscuit cutter. You must press the cutter straight down without twisting it. Twisting seals the edges closed before they even get into the oven, and that seals in the dough, preventing that beautiful vertical lift. Think clean cuts!
Also, remember that 425°F? That high heat shock is what forces the milk solids and butter to create massive amounts of steam instantly, which pushes those layers apart. Keep that oven hot! If you are aiming for those soft sides—the ones that hug their neighbors on the pan—make sure you place them close together. If you need those crisper sides that look perfectly golden brown biscuits all the way around, leave about an inch between each one on the sheet. Both ways are delicious, but they look different!
Tips for Success When Making Buttermilk Biscuits
Look, even though this recipe is straightforward, achieving those perfect, tender buttermilk biscuits recipe results takes watching a few key spots. This is where people slip up, and I want to make sure you don’t! This isn’t intimidating; it’s just knowing the rules of the dough. If you follow these temperature and handling tips, you’ll finally understand why people rave about true Southern biscuits.
The biggest rule, which I touched on before, is temperature. You need ice-cold ingredients. If your butter melts even a little bit before it hits the oven, instead of creating steam pockets, it just mixes into the flour, leading to a dense, crumbly texture instead of those heavenly, flaky layers biscuits you crave. If your kitchen is warm, put your flour and your cut butter into the freezer for 15 minutes before you start mixing. That extra chill goes a long way!
Next up is handling time. Once you add that cold buttermilk, you’ve started a timer. The sooner you get these into the oven, the better. Don’t let the dough sit around contemplating life on the counter. Work quickly and gently. If you see the dough warming up while you are rolling it out, slide the whole thing, cutter and all, back into the fridge for 5 minutes. This chill solidifies the butter again, guaranteeing a better final product. You can get some great technique guidance for making these ultra flaky by checking out this recipe on how to make Ultra Flaky Buttermilk Biscuits.
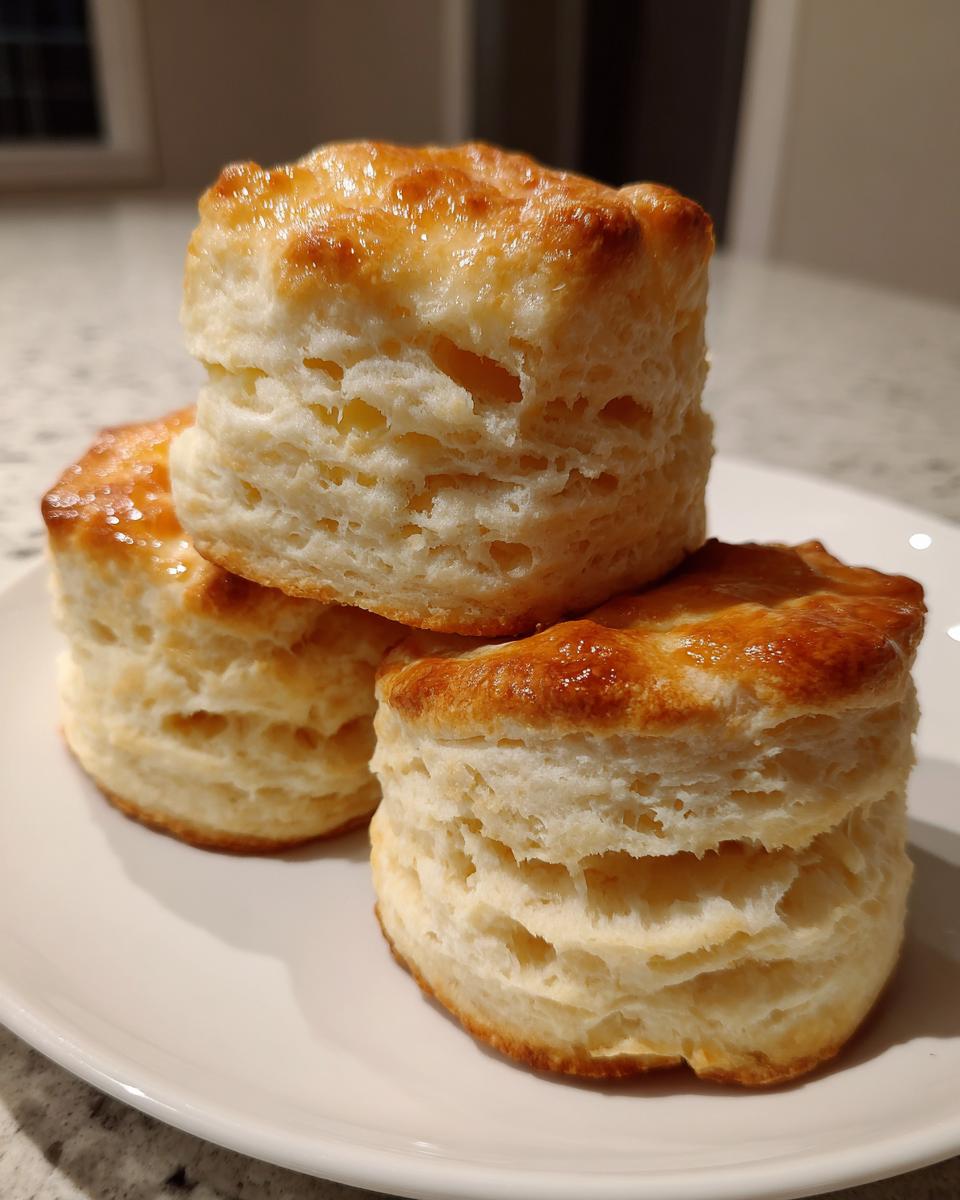
Now, for the secret weapon that really pushes these into the ‘tall’ category: the fold-over. If you’re using a standard 2-inch cutter and want biscuits that look like they belong on a magazine cover, try this folding trick before you cut your final rounds. After you mix the dough (Step 4), gently pat it into a rough square, maybe an inch thick. Fold the dough in thirds, like you’re folding a business letter. Turn it 90 degrees and gently roll or pat it back out to that 3/4-inch thickness, and then cut. Repeat this folding process two or three times. Every single fold introduces new layers of butter and flour, giving you unbelievable lift when those buttermilk biscuits bake up. It’s the difference between a good biscuit and a legendary one!
Serving Suggestions for Your Fluffy Buttermilk Biscuits
Okay, congratulations! You’ve successfully made a batch of the most incredible, fluffy buttermilk biscuits known to man. Now comes the crucial part: what are you going to put on them? Honestly, these are delicious plain, warm from the oven with just a little melted butter glistening on top. But we know that’s just the starting point, right?
If you’re anything like me, you’re thinking about buttermilk biscuits for breakfast immediately. For a classic Southern morning, you absolutely have to have gravy. A heavy sausage gravy poured liberally over these tender rounds is heaven. If you want to keep the Southern theme going all the way through breakfast, you must try making a side of my creamy cheese grits next time—they are such a wonderful pairing! You can find the recipe for my creamy southern cheese grits recipe right here on the blog.
But let’s not forget the simpler joys. A stack of these warm beauties with nothing more than a jar of good quality jam or some local honey spread thick? That’s comfort food simplicity at its finest. They are so tender, they practically welcome the topping. You don’t need to overthink these tender buttermilk biscuits recipe servings; simple is usually best!
Quick Biscuit Recipe Pairings Beyond Breakfast
Just because they are the perfect breakfast side doesn’t mean the party stops at noon! Because these are such a quick biscuit recipe to whip up, they actually make an outstanding addition to any weeknight meal you’re trying to elevate from average to amazing. We’re talking about bringing that homemade warmth to dinner with minimal extra effort.
Think about serving these alongside a big bowl of hearty chili or maybe a slow-simmered beef stew. Instead of serving plain bread, you get these amazing, fluffy clouds ready to soak up all that delicious broth. They’re fantastic mopped around soups, too. They truly shine as a stand-in for any standard bread side dish. When you’re looking for comfort food baking that feels instantly rewarding, these buttermilk biscuits are always the ticket!
Storage and Reheating Instructions for Classic American Biscuits
Even though these buttermilk biscuits are so good they rarely last past breakfast, life happens! Maybe you made a double batch (that’s what I usually do!). Keeping these fresh-baked clouds intact is simple, but reheating them correctly is the secret to making them taste like they just came out of the oven, not like something microwaved into rubber.
For short-term storage—say, the next day—the best way is actually pretty old-fashioned. Place your cooled biscuits in an airtight container. Do not put them in the fridge! That cold air is the enemy of soft bread; it dries them out faster than you can say “flour dust.” Room temperature in a sealed container will keep them pretty nice for up to 2 days. If you need them to last longer, freezing is your best bet for keeping that flavor locked in.
When you go to freeze them, wrap individual biscuits tightly in plastic wrap first, then place them into a heavy-duty freezer bag. This double layer prevents freezer burn. They freeze wonderfully, and they hold up beautifully for about two months.
Waking Up Your Leftover Biscuits
Reheating is where we rescue a perfectly good, but slightly stale, biscuit experience. The microwave is fast, but it turns them hard as a rock within minutes, which is the absolute opposite of what we want in our classic American biscuits!
Skip the microwave entirely, unless you are in a dire emergency and only need it for 5 seconds! The oven is your friend here. Wrap a few biscuits tightly in aluminum foil—this steams them slightly while warming them through—and put them into an oven preheated to 350°F for about 10 minutes. This gently warms the inside and softens the texture back up.
If you want maximum ‘fresh-baked’ effect, don’t bother with the foil. Just place the biscuits directly on a baking sheet and pop them into a 350°F oven for 5 to 7 minutes. They get a little bit crispier on the outside, and the inside steams back to life. This method works wonders for bringing back that tender crumb you worked so hard to achieve with your cold butter and buttermilk handling!
Frequently Asked Questions About Buttermilk Biscuits
What if I don’t have buttermilk? Can I use regular milk?
This is the most common question I get! While traditional buttermilk baking recipes really rely on the acidity of real buttermilk to activate the baking soda—which is key for that rise—you absolutely can make a substitute in a pinch. For this tender buttermilk biscuits recipe, just take 3/4 cup of regular milk (whole milk works best), stir in 3/4 teaspoon of white vinegar or lemon juice, and let it sit on the counter for about five minutes until it looks just slightly textured or soured. It won’t have the exact same rich flavor, but it works perfectly well for reaction, giving you those necessary lift and preventing flat biscuits!
How do I guarantee super tall, fluffy buttermilk biscuits?
If you want those impressive, tall biscuits, there are two main things you have to focus on, besides keeping the butter cold! First, never twist your cutter. Stamping straight down seals the edges, trapping the dough and preventing that beautiful vertical expansion. Second, try the folding trick I mentioned earlier. Folding the dough onto itself a few times before you cut gives you significantly more height and those wonderful flaky layers biscuits. Don’t overwork the dough when folding, though; you want gentle turns!
I don’t have a biscuit cutter. What can I use?
Don’t let missing specialized tools stop you from making these! If you need a quick biscuit recipe and are missing a cutter, look around your kitchen. A clean, empty jar with a rim that’s about 2 or 2.5 inches wide works brilliantly for stamping out rounds. Even a sturdy, sharp knife works if you’re making square biscuits instead—just make sure those cuts are clean and straight! Square biscuits are actually easier to fit together on the sheet, maximizing your yield. They still end up being amazing melt in your mouth biscuits!
Can these be made ahead of time or frozen?
Yes, absolutely! These are fantastic as a quick biscuit recipe because you can prep the cut dough ahead of time. After you cut the rounds, place them on a parchment-lined baking sheet and freeze them solid—about an hour should do it. Once hard, transfer them to a freezer bag. When you’re ready to bake (maybe for a big buttermilk biscuits for breakfast spread), just put the frozen rounds directly onto the baking sheet and add about 5-7 minutes onto the bake time. They come out perfectly!
What’s the best way to serve these besides breakfast?
These classic American biscuits are perfect for more than just the morning! They are the ultimate comfort food baking sidekick if you are looking for some great ideas for quick weeknight dinners. Think about pairing them with something saucy where they can soak up every last drop. They are phenomenal mopped around chili or stews. They truly shine as a stand-in for any standard bread side dish. They’re truly versatile, just like the best homemade dough should be!
Estimated Nutritional Data for This Recipe
I always include this section because, while we’re baking comfort food here, knowing what’s in your buttermilk biscuits is just practical. Remember, this is just an estimate based on the ingredients listed—stuff like how much butter you use for brushing or if you add extra jam later can change the final count. But this gives you a good baseline for these incredible, fluffy rounds!
Here’s the breakdown for one serving (one biscuit):
- Serving Size: 1 biscuit
- Calories: 220
- Fat: 11g (That’s where the flaky flavor comes from!)
- Saturated Fat: 7g
- Unsaturated Fat: 4g
- Trans Fat: 0g
- Cholesterol: 25mg
- Carbohydrates: 27g
- Fiber: 1g
- Sugar: 1g (Natural sweetness only, none added beyond trace amounts in the buttermilk!)
- Protein: 4g
- Sodium: 350mg
It’s important to remember that we aren’t cutting corners here, so the fat content is honest because real butter is key to getting those amazing, melt-in-your-mouth biscuits. Consider these tender buttermilk biscuits recipe as a satisfying treat, perfect for fueling up before a big day!
Share Your Baking Journey
Well, that’s it! You’ve got the recipe, and more importantly, you’ve got the techniques for getting those jaw-droppingly tall, fluffy buttermilk biscuits. When I started Little Kitchen Diary, it was because I wanted to prove that joy doesn’t have to take a backseat to a busy schedule. Making something this delicious from scratch, something that smells this good, is exactly what I mean when I talk about reclaiming the heart of the home.
Now I need to hear from you! Did you get those perfect, flaky layers biscuits? Did they actually melt in your mouth? Please don’t be shy—come back here and leave a rating for this tender buttermilk biscuits recipe. Even better, tell me in the comments what you served them with. Were they swimming in gravy, or did you go simple with biscuits with jam and honey?
If you snapped a photo of your beautiful, golden brown biscuits, I would absolutely love to see it! Tag us on social media so I can celebrate your success right along with you. Connecting over real, honest food is why I started this diary, and sharing your results means the world to me. If you have any last-minute questions that I didn’t cover in the FAQ, you can always reach out to me directly via the contact page. Happy baking, friends!
PrintFluffy Southern Buttermilk Biscuits: The Best Homemade Recipe
Make tender, flaky buttermilk biscuits that are tall and buttery. This straightforward recipe delivers classic Southern comfort food perfect for breakfast or any meal.
- Prep Time: 15 min
- Cook Time: 15 min
- Total Time: 30 min
- Yield: 8 servings 1x
- Category: Breakfast
- Method: Baking
- Cuisine: American
- Diet: Vegetarian
Ingredients
- 2 cups all-purpose flour
- 1 tablespoon baking powder
- 1 teaspoon salt
- 1/2 teaspoon baking soda
- 1/2 cup (1 stick) cold unsalted butter, cut into small pieces
- 3/4 cup cold buttermilk
- 2 tablespoons melted butter, for brushing
Instructions
- Preheat your oven to 425 degrees Fahrenheit. Line a baking sheet with parchment paper.
- In a large bowl, whisk together the flour, baking powder, salt, and baking soda.
- Add the cold butter pieces to the dry ingredients. Use a pastry blender or your fingertips to cut the butter into the flour until the mixture resembles coarse crumbs with some pea-sized pieces of butter remaining. This step creates flaky layers.
- Pour in the cold buttermilk all at once. Stir gently with a fork until the dough just comes together. Do not overmix.
- Turn the dough out onto a lightly floured surface. Gently knead the dough 4 to 5 times until it holds together.
- Pat or roll the dough to about 3/4-inch thickness. Use a 2-inch biscuit cutter to cut out the biscuits. Press the cutter straight down without twisting to maintain height.
- Place the cut biscuits close together on the prepared baking sheet for softer sides, or slightly apart for crispier edges.
- Brush the tops lightly with the melted butter.
- Bake for 12 to 15 minutes, or until the buttermilk biscuits are golden brown on top and cooked through.
- Remove from the oven and brush the tops again with any remaining melted butter immediately after baking. Serve warm.
Notes
- Keep all your ingredients, especially the butter and buttermilk, very cold for the best rise and flakiness.
- For extra tall biscuits, fold the dough over itself a few times before cutting.
- Serve these melt in your mouth biscuits with jam and honey or alongside your favorite gravy.
Nutrition
- Serving Size: 1 biscuit
- Calories: 220
- Sugar: 1
- Sodium: 350
- Fat: 11
- Saturated Fat: 7
- Unsaturated Fat: 4
- Trans Fat: 0
- Carbohydrates: 27
- Fiber: 1
- Protein: 4
- Cholesterol: 25