
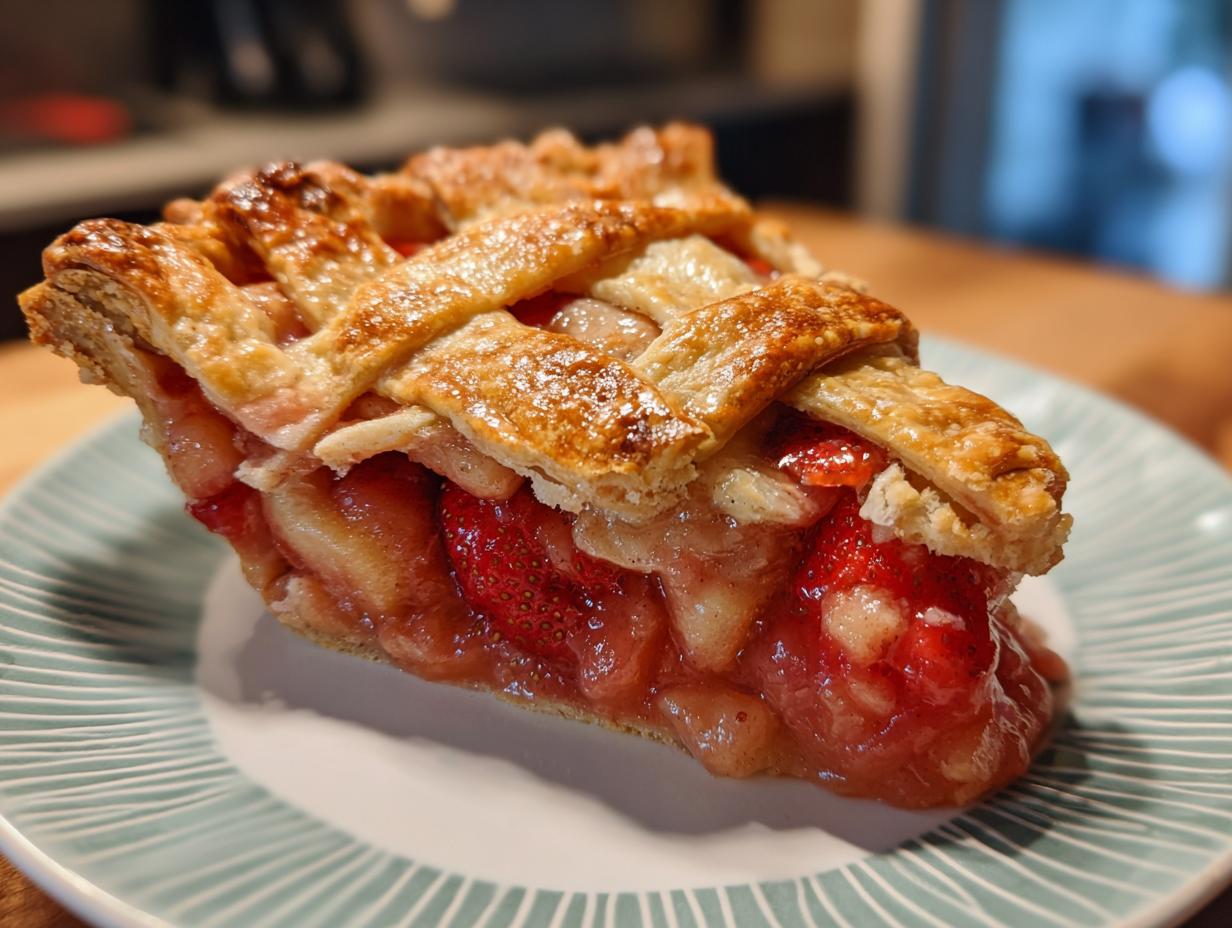
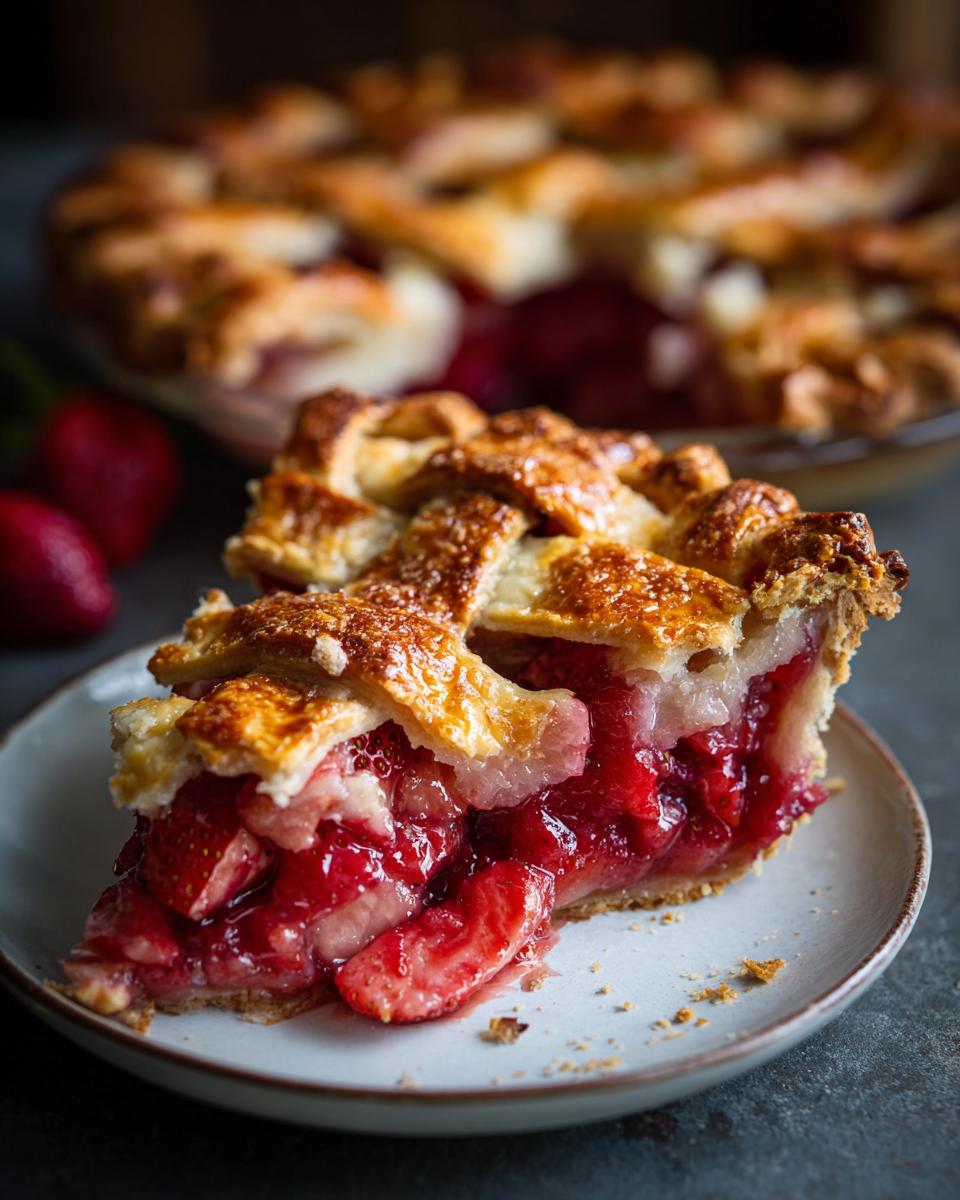
Oh, the smell of summer baking! It’s that specific blend of bright tang and deep, mellow sweetness that always pulls me right back to the kitchen. When fresh strawberries and rhubarb start showing up, I know it’s time to put away the complicated holiday baking and return to something truly soulful. That’s why I’m sharing what I genuinely believe is The Best Homemade Strawberry Rhubarb Pie with a Flaky Lattice Crust.
When things got hectic with work, I almost forgot how much joy a simple, perfect dish could bring. This strawberry rhubarb pie recipe was my way back—a project that felt rewarding and tasted like pure nostalgia. This pie is straightforward, relying on technique more than fancy steps, reminding us that the best food often comes from the simplest, most classic places like making a fantastic flaky pie crust from scratch.
- Why This Strawberry Rhubarb Pie Recipe is Your New Summer Baking Essential
- Gathering Ingredients for Your Strawberry Rhubarb Pie
- Step-by-Step Instructions for the Best Strawberry Rhubarb Pie
- Tips for Success with Your Classic Rhubarb Dessert
- Ingredient Notes and Substitutions for Strawberry Rhubarb Pie
- Serving Suggestions for This Summer Fruit Pie
- Storage & Reheating Instructions for Homemade Strawberry Pie
- Frequently Asked Questions About Strawberry Rhubarb Pie Recipe
- Nutritional Information Estimate for Strawberry Rhubarb Pie
- Share Your Perfect Strawberry Rhubarb Pie Creation
Why This Strawberry Rhubarb Pie Recipe is Your New Summer Baking Essential
Look, there are a hundred ways to make a pie, but this one consistently knocks it out of the park for me, and I know it will for you too! This isn’t just another recipe; it’s the key to unlocking that perfect, balanced tart and sweet dessert flavor everyone craves in the summer. Since starting up Little Kitchen Diary, I’ve stressed less about perfection and more about reliability, and this pie delivers every time. It’s one of my go-to summer baking essentials for a reason.
- You get incredible flavor without a runny mess.
- The crust comes out golden and shatters beautifully when you cut it.
- It brings that classic, satisfying homemade feel to your table.
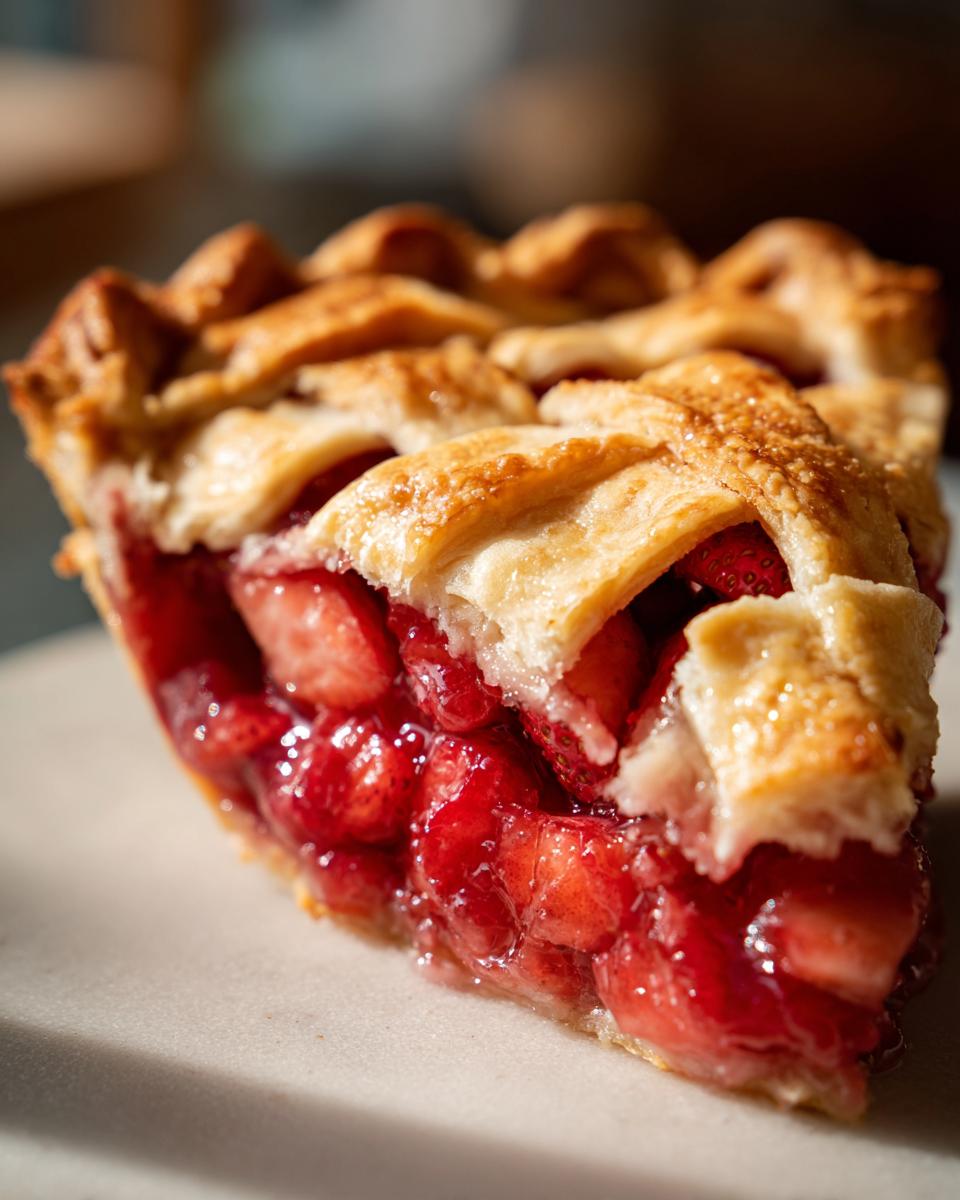
Achieving the Perfect Strawberry Rhubarb Filling Consistency
That sad, watery filling pooling on the plate? We aren’t having that here! The secret to a gorgeous strawberry rhubarb filling that sets up beautifully lies in that specific amount of sugar mixed with cornstarch. The cornstarch is crucial; it absorbs the liquid released by the fruit as it cooks down. If your fruit on a particular spring day seems extra juicy, just whisk an extra teaspoon of cornstarch right into the fruit mixture before you pour it in. That simple step ensures you get that signature glossy, set filling every single time.
The Secret to a Truly Flaky Pie Crust Tutorial
If you want that show-stopping, buttery crunch, you have to respect the cold. Seriously, this part is non-negotiable for my flaky pie crust tutorial. We aren’t kneading bread here; we want distinct layers of butter that melt in the oven, creating those beautiful pockets of air. Keep your butter cubed and frozen, and your water ice-cold. Minimal handling is key—just work it until it barely holds together. This technique is the foundation of all great pastry work, and it’s what separates a good crust from one that’s just absolutely unforgettable.
Gathering Ingredients for Your Strawberry Rhubarb Pie
Okay, let’s talk ingredients. This is where we set ourselves up for success. I’ve listed everything you need below. Notice how specific I am about the butter—it needs to be cold and cubed! That’s the magic for the flaky crust we talked about. Getting your mise en place sorted now means the assembly process feels like a breeze later on. If you’re looking for other buttery basics, check out my recipe for fluffy buttermilk biscuits; the principles are the same!
- For the Dough: 2 1/2 cups all-purpose flour, 1 teaspoon salt, 1 cup (2 sticks) cold unsalted butter, cut into cubes, and 1/2 cup ice water, plus more if needed.
- For the Filling: 4 cups fresh rhubarb (1-inch pieces), 4 cups fresh strawberries (halved or quartered), 1 3/4 cups granulated sugar, 1/4 cup cornstarch, 1 tablespoon lemon juice, and 1 teaspoon vanilla extract.
- For the Finish: 1 large egg, beaten with 1 teaspoon water (that’s your egg wash!).
Step-by-Step Instructions for the Best Strawberry Rhubarb Pie
Alright, time to get our hands dusty! Baking a pie from scratch can seem scary, especially if you’re new to it, but I promise you, following these steps exactly will give you that gorgeous, professional look. We’re going step-by-step here, so take your time, especially with the dough. If you want to get really comfortable with dough handling, my breadsticks recipe uses a similar foundation!
Making the Flaky Pie Dough
First things first: the dough needs to chill! Whisk your flour and salt, then toss in that super cold butter. You’re looking for a texture that’s mostly sand but still has little bits of butter the size of frozen peas peeking out. Don’t mash those pea-sized bits! Add your ice water tablespoon by tablespoon until it just clumps when you squeeze a handful. Divide it, wrap it tight, and forget about it in the fridge for at least an hour. That chilling time is mandatory; it sets the butter so it bakes flaky, not tough.
Mixing the Strawberry Rhubarb Filling
While the dough is getting cold, mix your fruit. Remember, we want texture! Put your rhubarb and berries in a big bowl, and in a separate small bowl, whisk the sugar and cornstarch together well—no clumps allowed. Now, gently pour that sugar mix over the fruit. Toss everything very gently with a spatula—we don’t want to crush all those beautiful berries and rhubarb pieces yet! Let this sit for about 15 minutes. This resting time helps the sugar start drawing out juices, prepping that filling perfectly.
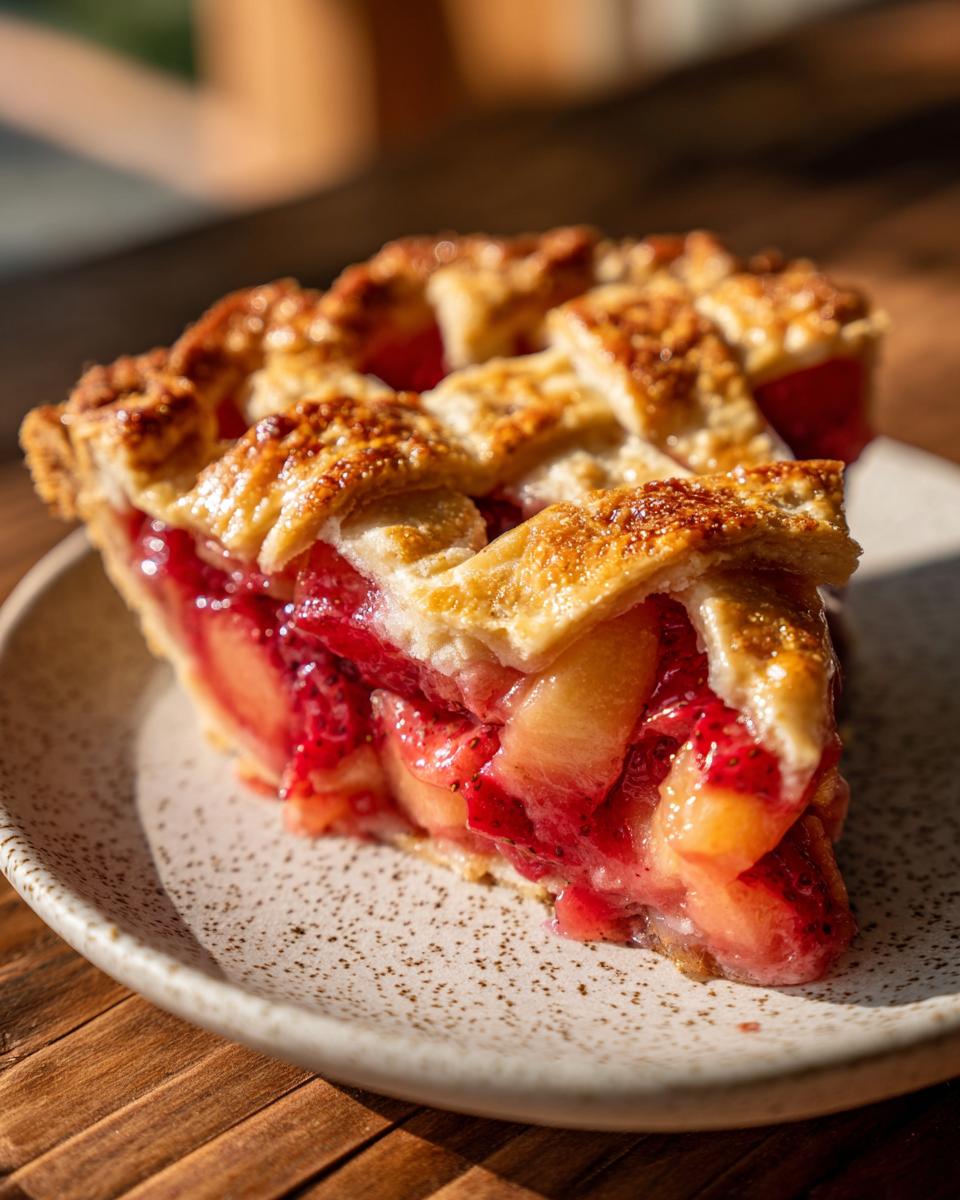
Assembling and Creating the Lattice Pie Top Ideas
Time to roll out that first disk into a 12-inch circle and get it settled gently into your pie plate. Now for the fun part: the lattice! Roll out the second disk and slice it into even strips—about 3/4 of an inch wide works great for classic lattice pie top ideas. Weave them over your fruit filling—over one, under one. Once woven, brush the bottom crust edges with egg wash, fold the overhang under, and crimp it all nicely to seal in all those wonderful juices. Don’t forget to brush the top lattice with the rest of that egg wash for color!
Baking and Cooling the Strawberry Rhubarb Pie
Preheat your oven to 400°F (200°C) and pop the pie on a baking sheet—trust me, something will bubble over! Bake hard at 400°F for 20 minutes to set the crust structure. Then, immediately drop the heat down to 375°F (190°C) and bake for another 40 to 50 minutes. If the edges look too dark, throw a foil ring around them. The absolute hardest part? Cooling! You MUST let this pie sit on a rack for at least four hours. If you slice it hot, the filling will run everywhere. Patience yields the richest, set slices, I promise!
Tips for Success with Your Classic Rhubarb Dessert
Getting that perfect, slightly nostalgic flavor profile for your classic rhubarb dessert takes just a couple of extra thoughts during the process. First, regarding sweetness: taste your raw rhubarb before you start. Some years it’s super tart, and other years it’s milder. If it’s incredibly sour, bump that sugar up by a tablespoon or two—you’re aiming for balance, not a shock!
Here’s a trick I learned when dealing with very juicy fruit: always bake your pie on a preheated baking sheet. Because the bottom crust is insulated by the cold dough, it sometimes doesn’t set until the very end. Putting the pie on a hot sheet directs that initial blast of heat right to the base, helping prevent a soggy bottom. It’s a game-changer! If you’re looking for something completely different to sip alongside this pie, you have to try my lemon drop martini recipe—the brightness cuts through the richness beautifully.
Ingredient Notes and Substitutions for Strawberry Rhubarb Pie
I get asked all the time if you can use frozen fruit, and the answer is yes! If you use frozen strawberries and rhubarb, just toss them straight from the freezer into the filling bowl. You might need to add a tiny splash more lemon juice for brightness, but the real change is in that thickener. Use an extra tablespoon of cornstarch since frozen fruit releases more liquid. That’s what makes this filling so reliable!
And speaking of toppings, if weaving a lattice seems like too much fuss after a long day, don’t sweat it. You can absolutely skip the lattice strips and make a divine crumb topping pie instead. Just mix 1 cup of flour, 1/2 cup brown sugar, and 1/2 cup cold butter until crumbly, sprinkle it all over the top crust edge, and bake as directed. It adds this amazing textural contrast.
If you want richer flavors in a different context, you might enjoy my recipe for no-bake peanut butter bars, which proves that simple flavor combinations are often the best!
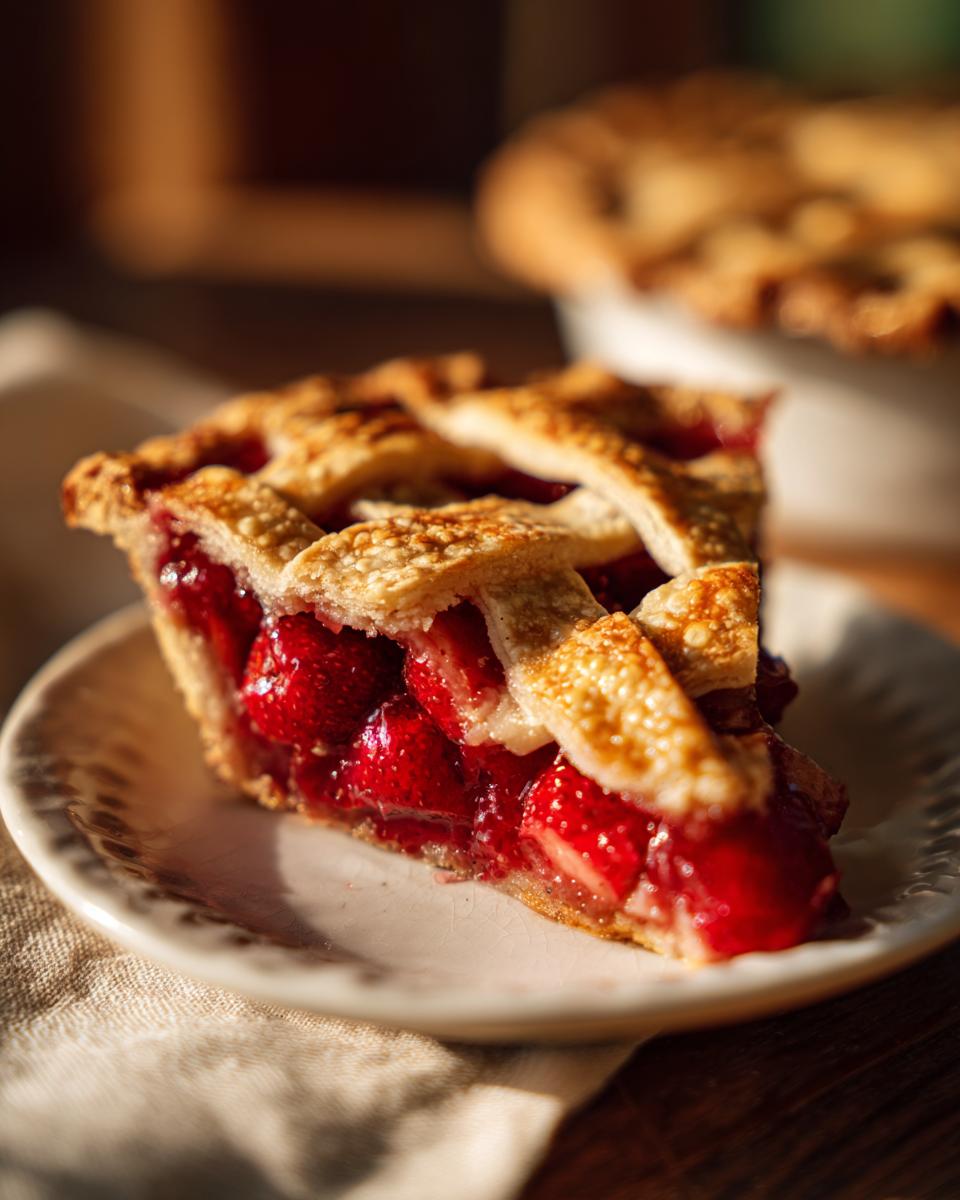
Serving Suggestions for This Summer Fruit Pie
Cutting into a perfect slice of this summer fruit pie feels like an event, doesn’t it? While this strawberry rhubarb pie is absolutely stellar all by itself, you can’t beat the classic pairings. The tartness of the rhubarb just begs for something cool and creamy to balance it out.
My absolute favorite way to serve it is warm—not piping hot, but nicely warmed through—with a big, generous scoop of good vanilla ice cream. The contrast in temperatures is just divine. Alternatively, a simple dollop of fresh, lightly sweetened whipped cream, maybe even infused with a tiny bit of vanilla or mint, works beautifully. If you’re feeling extra fancy, I even have an ice cream pie recipe if you want to skip baking entirely next time, but for this one, keep it classic!
Storage & Reheating Instructions for Homemade Strawberry Pie
Okay, you’ve waited the agonizing four hours, and you finally have that perfect slice of homemade strawberry pie. How do we keep leftovers tasting as good as fresh? Since this pie has a very juicy filling, I recommend storing leftovers loosely covered on the counter for up to two days. It usually stays just fine there. If you need to keep it longer than that, wrap a slice tightly in plastic and pop it in the fridge—just know that the crust might soften a touch.
If you want to reheat a slice later to get that crust nice and crisp again, skip the microwave! It makes the crust soggy immediately. Instead, wrap the individual slice loosely in foil and warm it in a 350°F oven for about 10 minutes. That helps steam the inside filling while re-crisping the sides. If you’re interested in something that freezes better, my chocolate zucchini muffins are great for freezing!
Frequently Asked Questions About Strawberry Rhubarb Pie Recipe
I know you might have a few last-minute questions before diving into this gorgeous bake, especially if this is your first time making a strawberry rhubarb pie recipe. Let’s clear those up so you feel confident!
How do I prevent my strawberry rhubarb filling from being runny?
This is the biggest worry, honestly! The key is the cornstarch blend, but equally important is the cooling time. Seriously, you *must* let the pie cool completely—four hours minimum—before slicing. That time allows the starches to fully gel and set the filling. If you cut it early, it will happily spill out all over your plate. Patience makes for a perfect slice!
Is this recipe difficult for beginners?
Not at all! That’s why I designed it this way. While making a flaky pie crust tutorial step can feel fiddly the first time, the filling is just mixing fruit and sugar. Once you master keeping your dough cold, you realize it’s a lot less scary than people make it out to be. It’s a wonderful entry point into baking, even if you move on to more complex things later.
Can I use frozen fruit instead of fresh for this classic rhubarb dessert?
Yes, absolutely! We’ve all been there when fresh happens to be scarce. If you use frozen fruit, don’t thaw it first. Add the frozen fruit directly to your filling mixture but increase the cornstarch addition by one extra tablespoon. Bake time might also increase by about 10 to 15 minutes, so just keep an eye on that golden-brown color and bubbly filling.
Where can I see another highly-rated version of this pie?
If you want to compare notes with another trusted source, I sometimes check out what other great cooks are doing. For example, Kitchn has a great deep dive you might appreciate: The Kitchn Strawberry Rhubarb Pie.
Nutritional Information Estimate for Strawberry Rhubarb Pie
I always want to give you a clear picture of what we’re making here in the kitchen, even if baking is mostly about joy, not counting calories! Keep in mind these are just estimates based on standard measurements and flour varieties. If you go heavy on the butter for that super flaky crust, or use more sugar, those numbers will shift a bit.
Here is the breakdown for one slice of this wonderful homemade strawberry pie:
- Serving Size: 1 slice
- Calories: 420
- Sugar: 35g
- Fat: 24g (15g Saturated)
- Carbohydrates: 50g
- Protein: 5g
This is just an estimate, folks, but it shows you what a glorious, satisfying slice of classic summer dessert we’re making!
Share Your Perfect Strawberry Rhubarb Pie Creation
Now that you’ve got the tang of the rhubarb and the sweetness of the strawberries locked down under that gorgeous, golden lattice, I really want to know how it went! This is where my kitchen diary meets yours. Did that crust shatter beautifully? Was the slicing easier once it cooled? Don’t be shy—let us all know in the comments below!
Seriously, seeing your creations is the best part of this entire process. Snap a picture of your slice—especially if you nailed that lattice—and drop it in the comments section. If you hit any snags, ask away! That’s what we’re here for; we’re all learning together here. If you need to get in touch directly with questions or feedback that you’d rather keep quiet, you can always reach out via my contact page.
Happy baking, everyone! I’m already looking forward to reading about your success with this strawberry rhubarb pie. Enjoy every single bite!
PrintThe Best Homemade Strawberry Rhubarb Pie with Flaky Lattice Crust
Make the perfect sweet and tart dessert with this classic recipe for homemade strawberry rhubarb pie. You get a juicy filling encased in a golden, flaky lattice crust, ideal for summer baking.
- Prep Time: 45 min
- Cook Time: 70 min
- Total Time: 125 min
- Yield: 8 servings 1x
- Category: Dessert
- Method: Baking
- Cuisine: American
- Diet: Vegetarian
Ingredients
- 2 1/2 cups all-purpose flour
- 1 teaspoon salt
- 1 cup (2 sticks) cold unsalted butter, cut into cubes
- 1/2 cup ice water, plus more if needed (for crust)
- 4 cups fresh rhubarb, cut into 1-inch pieces
- 4 cups fresh strawberries, hulled and halved or quartered
- 1 3/4 cups granulated sugar (adjust based on fruit tartness)
- 1/4 cup cornstarch
- 1 tablespoon lemon juice
- 1 teaspoon vanilla extract
- 1 large egg, beaten with 1 teaspoon water (for egg wash)
Instructions
- Prepare the Pie Dough: In a large bowl, whisk together the flour and salt. Cut in the cold butter using a pastry blender or your fingers until the mixture resembles coarse crumbs with some pea-sized pieces of butter remaining. Gradually add the ice water, one tablespoon at a time, mixing until the dough just comes together. Do not overmix. Divide the dough in half, form each half into a disk, wrap in plastic, and chill for at least 1 hour.
- Prepare the Filling: In a large bowl, gently combine the cut rhubarb and strawberries. In a separate small bowl, whisk together the granulated sugar and cornstarch. Pour the sugar mixture over the fruit, add the lemon juice and vanilla extract, and toss gently to coat. Let the filling sit for 15 minutes while you roll out the dough.
- Assemble the Bottom Crust: On a lightly floured surface, roll out one disk of dough into a 12-inch circle. Carefully transfer the dough to a 9-inch pie plate. Trim the edges, leaving a 1-inch overhang. Place the pie plate in the refrigerator.
- Create the Lattice Top: Roll out the second disk of dough into an 11-inch circle. Cut the dough into even strips (about 3/4 inch wide) for the lattice top.
- Fill and Top the Pie: Pour the strawberry rhubarb filling into the chilled bottom crust. Brush the edges of the bottom crust with the egg wash. Lay the dough strips over the filling in a lattice pattern. Trim the strips, fold the overhang under, and crimp the edges to seal. Brush the entire lattice top with the remaining egg wash.
- Bake the Pie: Preheat your oven to 400°F (200°C). Place the pie on a baking sheet to catch any drips. Bake for 20 minutes at 400°F. Reduce the oven temperature to 375°F (190°C) and continue baking for another 40 to 50 minutes, or until the crust is golden brown and the filling is bubbling thickly. If the edges brown too quickly, cover them loosely with foil.
- Cool Completely: Transfer the baked pie to a wire rack. You must let the pie cool for at least 4 hours before slicing. This allows the filling to set properly, preventing a runny slice. Serve at room temperature or slightly warm.
Notes
- For an extra flaky pie crust, keep all your ingredients, including your hands, as cold as possible during the mixing process.
- If you prefer a different topping, you can substitute the lattice top with a simple full crust (cut vents) or a brown sugar crumb topping.
- This recipe works well with frozen fruit, but you may need to increase the cornstarch slightly and add 10-15 minutes to the total baking time.
Nutrition
- Serving Size: 1 slice
- Calories: 420
- Sugar: 35g
- Sodium: 250mg
- Fat: 24g
- Saturated Fat: 15g
- Unsaturated Fat: 9g
- Trans Fat: 0g
- Carbohydrates: 50g
- Fiber: 3g
- Protein: 5g
- Cholesterol: 60mg