
Oh, I know that feeling well. You’re sitting down to a bowl of spaghetti or maybe some dipping sauce, and all you can think about is tearing into those warm, ridiculously soft breadsticks you usually only get when you eat out. For the longest time, that craving led me straight to the takeout menu, which honestly, wasn’t practical for my busy schedule. That’s when I started tinkering in my own kitchen, determined to crack the code for the ultimate Olive Garden Copycat Breadsticks.
I promise you, these are the soft, chewy beauties you dream about, drenched in that garlicky, buttery goodness. As I shared over on my story, Little Kitchen Diary is built on finding realistic, delicious home solutions, and this recipe is the absolute peak of simple comfort food success. Trust me, once you bake these, you won’t need a reservation!
- Why This Homemade Breadsticks Recipe is Your New Favorite
- Ingredients for Soft & Chewy Breadsticks
- How to Prepare The Ultimate Olive Garden Copycat Breadsticks
- Tips for Perfect Chewy Breadsticks Every Time
- Variations: Making Cheesy Breadsticks or Mozzarella Breadsticks
- Storage and Reheating Instructions for Buttery Breadsticks
- Serving Suggestions for Garlic Breadsticks Recipe
- Frequently Asked Questions About Homemade Breadsticks
- Review Your Experience Making These Breadsticks
Why This Homemade Breadsticks Recipe is Your New Favorite
I won’t mess around—these breadsticks check every single box you’re looking for. They are incredibly easy, which is why I put them right up front. Forget complicated doughs; we are getting restaurant-style flavor without the fuss. Here’s why you’re going to stick with this recipe:
- They deliver that signature, pull-apart soft and chewy texture you have to have.
- The garlic butter topping is potent, fresh, and applied right when they come out of the oven.
- You can have them ready in just over an hour, which means they qualify as a quick bread recipe for a weeknight dinner!
Ingredients for Soft & Chewy Breadsticks
Okay, let’s talk ingredients. Getting these right is non-negotiable, especially if we are aiming for that perfect soft and chewy experience. I’ve listed everything below, and I really need you to measure carefully here. Remember, the temperature of the water is super important for waking up that yeast!
This recipe is structured so you make the dough first, and then the topping comes together while the dough is rising. I’ve got it all listed here for you. Don’t let the list intimidate you; these are all easy-to-find things.
- 1 1/2 cups warm water (you absolutely want this to be around 110°F—use a thermometer so you don’t kill your yeast!)
- 2 1/4 teaspoons active dry yeast (That’s one standard packet, usually!)
- 2 tablespoons granulated sugar (This feeds the yeast, making our dough happy.)
- 4 cups all-purpose flour, plus more for dusting (We add this gradually, so have it next to you.)
- 1 teaspoon salt (For the dough structure.)
- 1/4 cup vegetable oil, plus more for greasing (Oil keeps the dough tender while it rests.)
And now for the main event—the topping that makes these breadsticks famous. Get ready for the garlic bomb!
- 1/2 cup (1 stick) unsalted butter, melted (Don’t use salted butter here; we control the salt in the seasoning mix.)
- 4 cloves garlic, minced (Yes, I mean four. Don’t skimp!)
- 1 teaspoon dried Italian seasoning (This brings that classic Italian flavor profile.)
- 1/2 teaspoon salt (To balance the richness.)
- 1/2 cup grated Parmesan cheese (Make sure it’s freshly grated if you can—it melts so much better!)
How to Prepare The Ultimate Olive Garden Copycat Breadsticks
Alright, this is where the magic happens. Following these steps precisely is the secret handshake to getting truly soft, chewy breadsticks. We are breaking this down into four very simple phases. Don’t stress about the dough; just let time and temperature do the heavy lifting for us, okay?
While the dough is rising (we’ll get to that!), use that quiet time to prep your oven and mix up that incredible garlic butter topping. That way, when the hot breadsticks come out, you are ready to go! For those of you checking out my policy pages later, rest assured, these instructions are foolproof.
Making the Yeast Dough for Homemade Breadsticks Recipe
First up, we wake the yeast. Get that warm water (110°F—not hot!) mixed with the sugar and yeast. If it doesn’t foam up nicely after about ten minutes, your yeast is probably dead, and you need to start over! Don’t skip this foaming step, seriously. Once it’s bubbly, stir in 3 1/2 cups of flour, salt, and the oil. Now, tip it onto your countertop. Kneading is crucial for that chewiness, so work that Homemade Dough Recipe for a solid 5 to 7 minutes until it’s smooth. It should feel springy, not sticky!
The Essential Rising Time for Soft Breadsticks
We need air in these babies to make them melt-in-your-mouth Soft Breadsticks. Place your dough ball in an oiled bowl, cover it up so it doesn’t get a dry skin, and let it chill out in a warm draft-free spot for a good hour to an hour and a half. I aim for it to double in size—that’s your sign! After the big rise, punch it down gently. Then, before baking, you give the dough strips a quick 15-minute rest period while your oven catches up to temperature. This short second rise makes the final texture unreal.
Shaping and Baking Your Restaurant Style Breadsticks
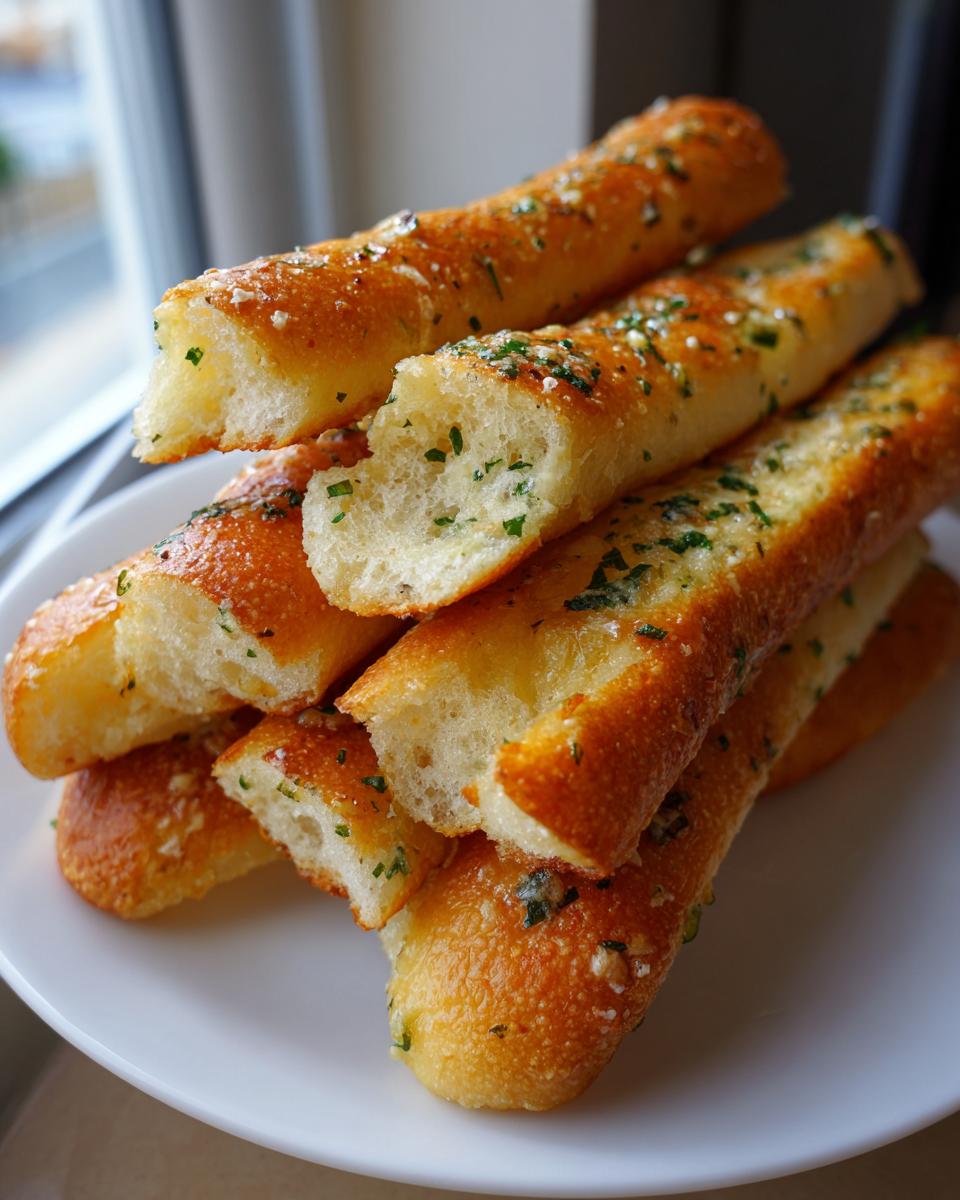
Preheat your oven to 400°F (200°C). Line your baking sheets—I use parchment paper because cleanup is a nightmare otherwise! Divide the dough in half and roll each piece out until it’s quite thin, about 1/4 inch thick. Cut those into strips, aiming for about 1 inch wide. Spread them out so they don’t merge while baking. Pop them in the oven for just 10 to 12 minutes. Keep an eye on them; we want golden brown, not dark brown, for true Restaurant Style Breadsticks.

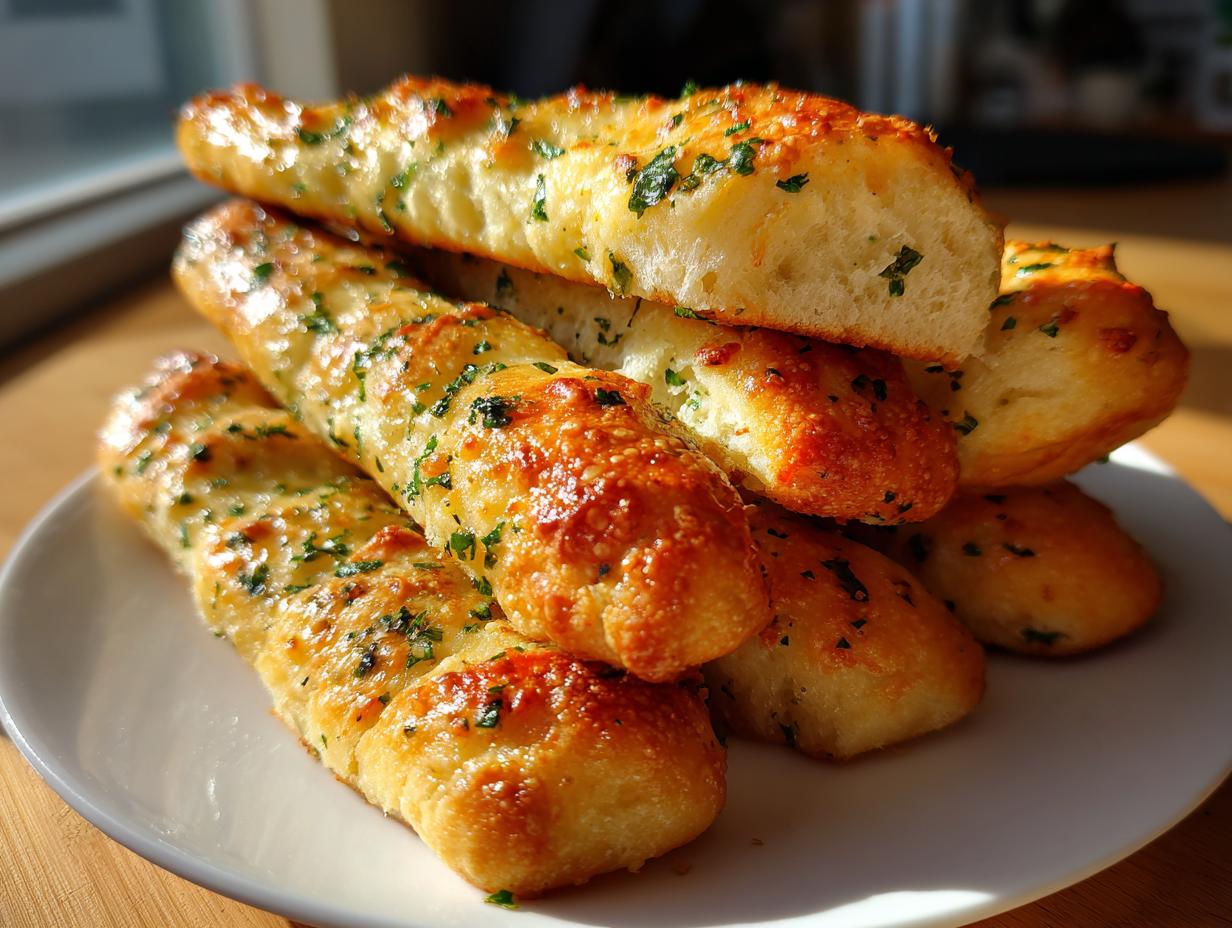
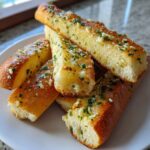
Creating the Signature Garlic Parmesan Breadsticks Topping
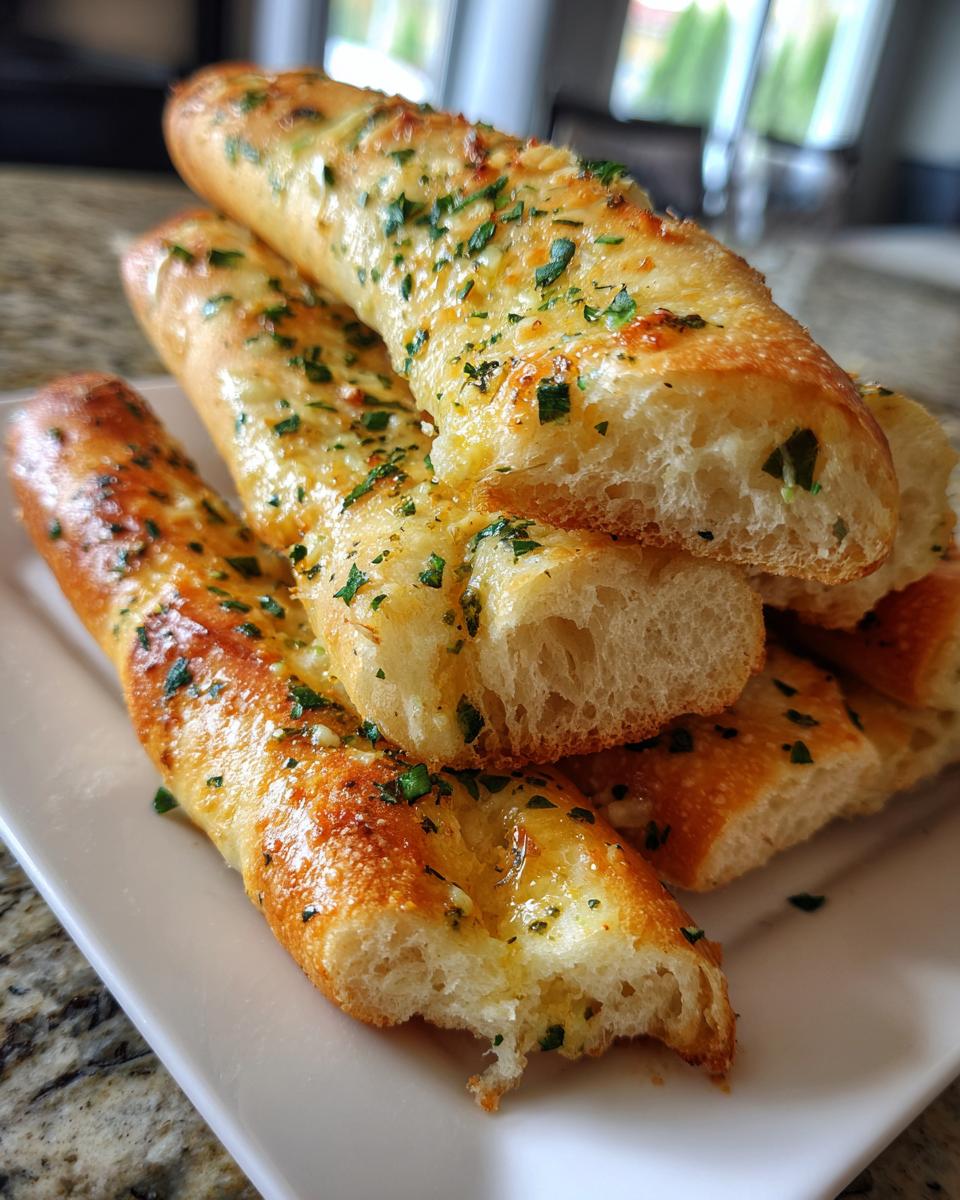
This is the part where your kitchen smells like heaven! While they bake, mix that melted butter, minced garlic, Italian seasoning, and salt together. The second those strips come out of the oven—and I mean *immediately*—start brushing that garlic butter all over every single warm surface. It sinks right in! Then, hit them generously with that grated Parmesan. These Garlic Parmesan Breadsticks are best eaten the second they are cool enough to hold!
Tips for Perfect Chewy Breadsticks Every Time
Getting that perfect, slightly resistant chew—the kind that makes you pull harder than you probably should at the dinner table—is all about managing the dough structure correctly. Honestly, achieving that ideal texture in your homemade breadsticks is easier than you think if you focus on temperature and mixing! We want soft, yes, but we don’t want cake; we want structure that bends, not crumbles.
Here are the little things I learned through trial and error that make all the difference:
- Don’t Over-Proof Early On: While the first rise is necessary for flavor and volume, watch it closely. If you let the dough rise for way too long—like twice its size—the gluten structure gets too weak, making the breadsticks too airy and soft, not chewy. Stop it when it’s just doubled.
- Kneading is Your Friend: That 5 to 7 minutes of kneading builds strong gluten strands. Strong gluten equals chewiness! If you rush this step, your final product will be soft like a roll, but it’ll lack that satisfying toothsome resistance we are aiming for in clone-like restaurant breadsticks.
- Bake Hot and Fast: The 400°F oven temperature is perfect. A high, fast bake sets the exterior quickly, which locks in that moisture we created with the oil and butter, ensuring the inside stays steamy and chewy while the outside gets that light golden crust.
- The Magic of Oil: Notice we use vegetable oil in the dough itself, not just for greasing the bowl. Oil shortens gluten strands just a little, which keeps the dough from getting too tough, achieving that beautiful balance between soft and chewy. It’s the key to avoiding rock-hard dinner sides!
Variations: Making Cheesy Breadsticks or Mozzarella Breadsticks
Okay, since I know half of you were already scrolling down the page looking for the cheese step, let’s talk about taking these incredible breadsticks from great to absolutely unforgettable. We can’t ignore the public demand for Cheesy Breadsticks!
The recipe notes I included earlier give you the blueprint for two different levels of delicious dairy goodness. You can go simple, or you can go for that full-on gooey Mozzarella experience. Don’t worry, adding cheese is super easy and doesn’t mess up the timing of the dough much at all.
Going Extra Parmesan Cheesy Breadsticks
If you just want a little extra salty punch—my favorite way, honestly—you just need to amp up the final stage. After you’ve brushed the breadsticks with that glorious garlic butter mixture, hit them with a heavy dusting of Parmesan. Think of it like dusting snow over the top! Since we already put some Parmesan on in the original recipe, this just adds more flavor and crispiness to the crust. This is an easy way to get more flavor into your Garlic Parmesan Breadsticks without changing the dough structure.
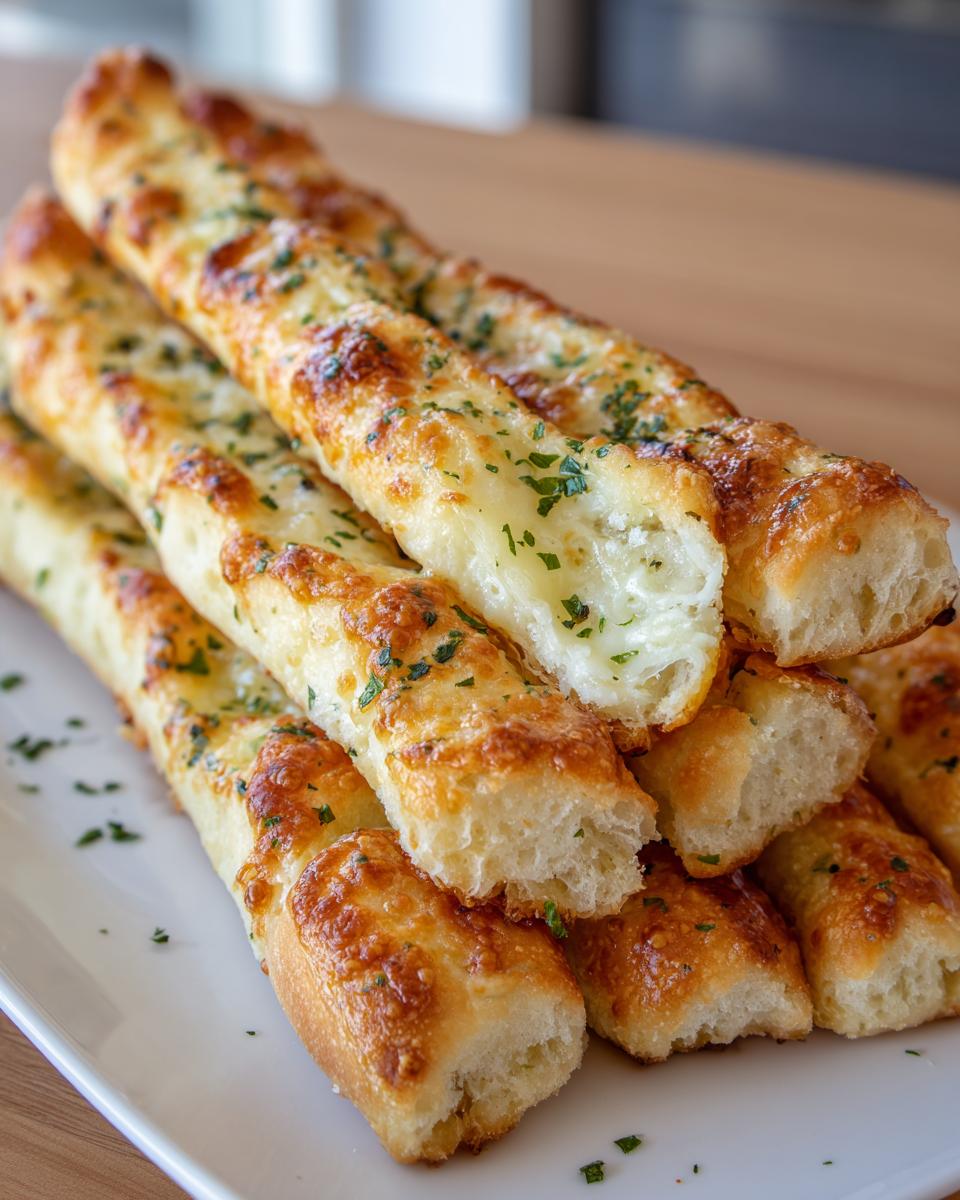
Achieving Gooey Mozzarella Breadsticks
If you want that stretch and that glorious melt, we are adding mozzarella. This step needs to be timed perfectly with your bake time. Once your strips have been brushed with the garlic butter, that’s when you scatter the mozzarella over the top. They go back into the 400°F oven for just 2 to 3 minutes more. You’re not trying to cook them here; you just want that cheese soft and melted. Watch them closely! You don’t want the oil from the cheese to burn, so keep an eye on the edges. These Mozzarella Breadsticks are truly a showstopper when served immediately.
For more inspiration on easy garlic apps, check out this great recipe I found for easy garlic treats. But honestly, once you try this homemade dough, you might not look back!
Storage and Reheating Instructions for Buttery Breadsticks
If you have any leftovers—which is rare around here, I must admit—storing your Buttery Breadsticks correctly is key to keeping that soft texture. Pop them into an airtight container on the counter; don’t stick them in the fridge unless it’s going to be more than four days. The fridge sucks all the moisture right out!
To reheat, skip the microwave if you want to keep the chew. Pop them on a baking sheet at 350°F for about 5 minutes. That warms them right through and keeps the outside from getting sad and soft. They’ll taste almost fresh-baked!
Serving Suggestions for Garlic Breadsticks Recipe
So, what do you serve these golden beauties with? That’s the easy part! These Garlic Breadsticks Recipe staples are designed to be the perfect companion for almost anything Italian, but honestly, they hold their own as a stellar appetizer. I always make a double batch because they disappear so fast when they are served warm.
Think of these as your ultimate upgrade to any meal that needs a little extra dunking capability. They transform from a simple snack to a required Dinner Side Dish Bread instantly!
Here are my go-to pairings when I pull a fresh batch out of the oven:
- Pasta Sauces: Obviously, you need something saucy to drag these through! Marinara, meatballs, or even a rich Bolognese—my kids are happy as long as they have butter and garlic to sop up the plate.
- Hearty Soups: They are fantastic swapped in for plain crackers with tomato soup, or alongside a bowl of creamy broccoli cheddar soup. That little bit of garlic cuts through the richness perfectly.
- Big Salads: When you need croutons but want something softer and more substantial, just tear these into bite-sized pieces and toss them right onto your Caesar or garden salad.
For more ideas on quick dinner sides, you can check out how others use their homemade breadsticks in their weekly routines. Enjoy dipping—it’s the best part!
Frequently Asked Questions About Homemade Breadsticks
I get so many questions about this recipe once people start baking them at home, and honestly, that’s a great sign! It usually means you’re ready to ditch the frozen section for good. I’ve pulled together the most common things folks ask about their Homemade Breadsticks Recipe below. If I missed your burning question, hop over to my contact page and let me know!
Can I skip the rising time for these Easy Breadsticks?
Oh, friend, I really, really wouldn’t recommend it if you want that signature soft texture. These are designed to be Easy Breadsticks, but yeast needs time to work its magic! If you skip the rising time, you skip building the structure that makes them light and airy. You’ll end up with something dense and flat—more like a cracker or a tough crust than the pillowy Soft Breadsticks we are aiming for. Use the warm water trick, let it foam, and trust the 90 minutes of rising. It’s worth the wait, I promise!
What is the best way to store leftovers of these breadsticks?
Listen, if you somehow manage to have leftovers of these breadsticks, pat yourself on the back! The best way to keep them soft is to store them at room temperature in an airtight container. If you must store them longer than a day, wrap them tightly in plastic wrap first, and *then* put them in the container. Keep them completely away from the refrigerator! The fridge is the death of soft bread because it speeds up staling. If they get a little stiff upon reheating, just give them a quick 3-minute blast in the oven at 350°F.
Are these breadsticks similar to Olive Garden Breadsticks Copycat recipes?
That’s exactly what we were aiming for! Yes, these are absolutely designed to be the best Olive Garden Breadsticks Copycat you’ve made at home. The secret isn’t just the soft dough; it’s that finishing touch. The crucial part is brushing them immediately with melted butter, garlic, and Italian seasoning while they are piping hot. That combination of fresh garlic aroma and rich butter mimics the restaurant experience perfectly. A lot of other recipes miss that final, heavy brushing step, but we don’t!
Review Your Experience Making These Breadsticks
Now that you’ve pulled a tray of those fresh, garlicky, soft breadsticks out of your oven, I need to know everything! Seriously, I’m invested in your success here. Did you achieve that signature chewiness? Were they light enough to feel like they just came out of a basket at your favorite Italian spot?
Please, take a minute to leave a star rating right below this section. Stars are great, but comments are even better! I especially want to hear from you if you decided to get adventurous. Did you try the cheesy variation with the mozzarella, or maybe you added an extra clove of garlic to the butter topping? Let me know how close you got to that perfect Olive Garden Breadsticks Copycat flavor in your own kitchen.
I love reading every comment, and your feedback truly helps others decide if these are the right appetizer bread sticks for their next big meal. Don’t forget, you can always check out the site’s terms of use if you have any questions about sharing your culinary triumphs!
PrintThe Ultimate Soft & Chewy Olive Garden Copycat Breadsticks with Garlic Parmesan Butter
Make soft, chewy breadsticks at home that taste just like the restaurant favorite. This easy recipe uses simple steps to create buttery, garlic-seasoned breadsticks perfect for any dinner side dish.
- Prep Time: 20 min
- Cook Time: 12 min
- Total Time: 1 hour 27 min
- Yield: 20 servings 1x
- Category: Appetizer
- Method: Baking
- Cuisine: American
- Diet: Vegetarian
Ingredients
- 1 1/2 cups warm water (110°F)
- 2 1/4 teaspoons active dry yeast
- 2 tablespoons granulated sugar
- 4 cups all-purpose flour, plus more for dusting
- 1 teaspoon salt
- 1/4 cup vegetable oil, plus more for greasing
- 1/2 cup (1 stick) unsalted butter, melted
- 4 cloves garlic, minced
- 1 teaspoon dried Italian seasoning
- 1/2 teaspoon salt
- 1/2 cup grated Parmesan cheese
Instructions
- Activate the yeast: In a large bowl, combine the warm water, yeast, and sugar. Let this stand for 5 to 10 minutes until foamy.
- Mix the dough: Add 3 1/2 cups of the flour, 1 teaspoon of salt, and 1/4 cup of vegetable oil to the yeast mixture. Mix until a shaggy dough forms.
- Knead the dough: Turn the dough out onto a lightly floured surface. Knead for 5 to 7 minutes, adding the remaining flour gradually until the dough is smooth and elastic.
- First rise: Lightly grease a large bowl with oil. Place the dough in the bowl, turning to coat. Cover the bowl with plastic wrap or a clean towel and let it rise in a warm place for 1 to 1.5 hours, or until doubled in size.
- Shape the breadsticks: Preheat your oven to 400°F (200°C). Line two large baking sheets with parchment paper. Punch down the risen dough and divide it into two equal pieces. Roll each piece into a rectangle about 1/4 inch thick. Cut each rectangle into 10 to 12 strips, about 1 inch wide.
- Second rise: Place the breadstick strips onto the prepared baking sheets, leaving a small space between them. Cover loosely and let them rest for 15 minutes while the oven finishes preheating.
- Bake: Bake for 10 to 12 minutes, or until lightly golden brown.
- Prepare the topping: While the breadsticks bake, combine the melted butter, minced garlic, Italian seasoning, and 1/2 teaspoon of salt in a small bowl.
- Brush and finish: Immediately after removing the breadsticks from the oven, brush them generously with the garlic butter mixture. Sprinkle evenly with the grated Parmesan cheese.
- Serve: Serve the homemade breadsticks warm as a dinner side dish or appetizer.
Notes
- For extra soft dinner rolls texture, you can brush the dough lightly with melted butter before the second rise.
- If you want cheesy breadsticks, sprinkle mozzarella cheese over the tops during the last 3 minutes of baking before adding the garlic butter.
- You can make this dough ahead of time; refrigerate it for up to 3 days after the first rise, punching it down before chilling.
Nutrition
- Serving Size: 1 breadstick
- Calories: 145
- Sugar: 1
- Sodium: 250
- Fat: 6
- Saturated Fat: 3
- Unsaturated Fat: 3
- Trans Fat: 0
- Carbohydrates: 20
- Fiber: 1
- Protein: 4
- Cholesterol: 10