
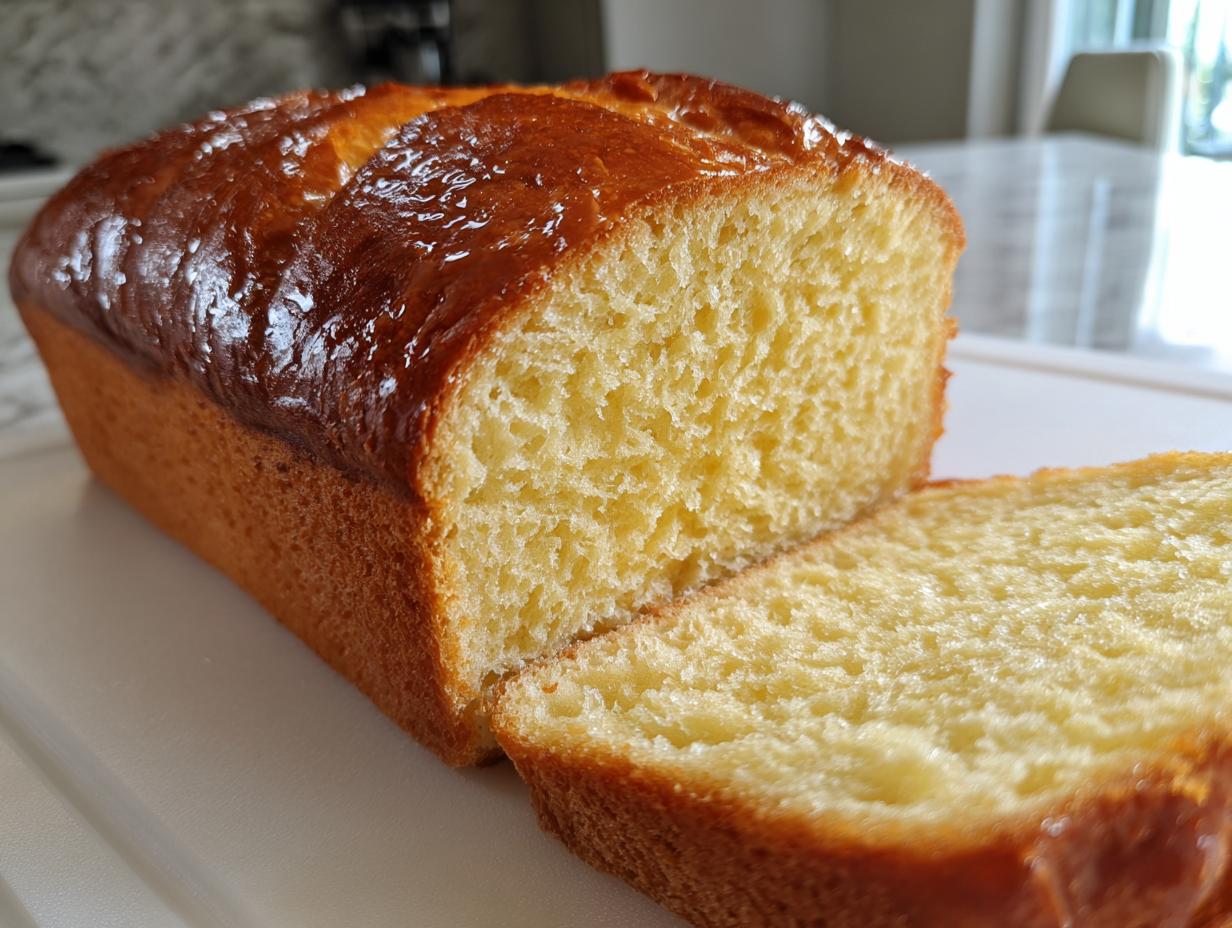
I honestly believe that achieving that cloud-like, melt-in-your-mouth softness you find at the best bakeries is totally possible right in your own kitchen. After I got buried under work pressure, I needed baking to be simple and comforting again, not another complicated project. That’s why this condensed milk bread ended up becoming my absolute go-to recipe. Seriously, the sweetened condensed milk does all the heavy lifting, guaranteeing an unbelievably tender crumb and just that perfect hint of sweetness without needing a complicated overnight process. It’s my secret weapon for easy, satisfying bakes now, and I know it’ll bring that joy back to your kitchen too. If you love my tips on things like mixing up light frostings, you’re going to adore this reliable bread!
- Why This Sweetened Condensed Milk Bread Recipe Works (The Secret to Fluffy Milk Bread)
- Gathering Ingredients for Your Ultimate Condensed Milk Bread Loaf
- Step-by-Step Instructions for Soft Homemade Bread
- Baking Your Bakery Style Sweet Bread to Perfection
- Tips for Making Easy Baking for Beginners Condensed Milk Bread
- Serving Suggestions for Your Sweet Bread Recipe
- Storage and Reheating Instructions for Fresh Condensed Milk Bread
- Frequently Asked Questions About Bread Made with Condensed Milk
- Share Your Fluffy Milk Bread Success
Why This Sweetened Condensed Milk Bread Recipe Works (The Secret to Fluffy Milk Bread)
When I first saw recipes calling for sweetened condensed milk in bread, I thought, “That seems too easy, what’s the catch?” But here’s the thing: it works brilliantly! The magic isn’t just that it adds sweetness; it’s all about those concentrated milk solids and sugar.
Because the condensed milk is so rich, it coats the flour proteins differently than regular milk or sugar alone. This interference keeps the gluten structure from getting too tough, which is exactly what you want for a super soft texture. That’s the secret to achieving that **tender crumb bread** quality that feels like it came straight from a high-end Asian bakery.
Benefits of Making Our Condensed Milk Bread
- It’s incredibly fast for yeast bread because the moisture is already perfectly balanced.
- You get that coveted **soft homemade bread** texture that stays fresh for days.
- It’s a genuinely wonderful **sweet bread recipe** that doesn’t need glaze—the sweetness is baked right in!
- It’s so versatile; it works for toast or sandwiches.
Gathering Ingredients for Your Ultimate Condensed Milk Bread Loaf
Okay, let’s get organized because part of making an **easy yeast bread** is having everything ready to go. This ingredient list is short but mighty! The beautiful thing about this recipe, which I cover in detail in my guide to fluffy southern biscuits too, is that it uses simple pantry standards.
- 1 cup warm milk (make sure it’s 105-115°F, not scalding hot!)
- 2 1/4 teaspoons active dry yeast
- 1/4 cup granulated sugar
- 1/2 cup sweetened condensed milk – our star player!
- 1 large egg, room temperature (this helps the yeast work nicely)
- 1/4 cup unsalted butter, melted
- 1 teaspoon salt
- 3 1/2 cups all-purpose flour, plus more for dusting
Ingredient Notes and Substitutions for Your Sweet Homemade Loaf
The temperature of that milk is non-negotiable—too cool and the yeast won’t wake up, too hot and you kill it! Aim for that perfect sweet spot, between 105 and 115°F. If you want to upgrade this immediately into a **rich brioche style bread**, you can swap the regular milk for heavy cream. Trust me, the richness factor goes way up, but you might need another tablespoon of flour to keep the dough from getting too sticky.
Step-by-Step Instructions for Soft Homemade Bread
This is where the magic happens, folks! Because we are aiming for that signature **fluffy milk bread** texture, pay close attention to the gluten development steps. I know waiting for dough to rise feels like forever, but trust me, those two rising periods are non-negotiable for a light, airy crumb. If you need a quick bread fix while this one rises, check out my guide on fluffy buttermilk biscuits!
Activating Yeast and Mixing the Condensed Milk Bread Dough
First things first, we wake up the yeast! Mix your warm milk and yeast together and let it just sit there for about five minutes. You’re watching for foam—that’s happy yeast telling you it’s ready to go to work. Once it’s foamy, whisk in your granulated sugar, the star sweetened condensed milk, that room temperature egg, the melted butter, and salt. Don’t worry about the egg being chilly; room temperature just helps everything blend smoother right away.
Kneading and First Rise: Developing the Tender Crumb Bread
Now, start adding your flour slowly. Once it gets too stiff to mix with a spoon, dust off your counter and turn it out. This is the most important part for texture: you need to knead this dough for a good solid 8 to 10 minutes. You’re building strength, which means you get that gorgeous, pillowy texture in your final **condensed milk bread**. After kneading, pop it into an oiled bowl, cover it up tight, and let it chill out for an hour, maybe an hour and a half, until it’s doubled in size. Don’t rush this!

Shaping and Second Proof for Perfect Loaf Structure
Gently punch that air out, turn it onto your counter, and shape it into a tight log. Tuck the seams underneath before gently placing it into your greased 9×5 loaf pan. Cover it again, and let it have its second nap—usually 45 to 60 minutes. The visual cue for this second rise is key: you want the dough to look domed and crown about an inch over the rim of the pan. Make sure you crank your oven up to 350°F during the last 15 minutes of this proofing time!
Baking Your Bakery Style Sweet Bread to Perfection
Alright, the dough has proofed beautifully, it’s puffed up nicely over the rim of the pan, and your oven is finally hot! We’re baking this amazing loaf at 350°F (175°C). The usual baking time is right around 30 to 35 minutes. When you look at it through the oven door, you’re looking for a deep golden brown on top. It should smell incredible—that mix of sweet milk and baked sugar is unbeatable.
Now, here’s my biggest trick for ensuring you have the softest experience possible when you slice into this **sweet homemade loaf**: use an instant-read thermometer. I know, I know, sometimes we just want to use a skewer, but for truly reliable bread, temperature matters. You are aiming for an internal temperature of 200°F (93°C) right in the center.
Once it hits that magic number, pull it out immediately! Don’t let it sit in that hot pan for even two minutes. If you leave it in there, the residual heat trapped in the metal will keep cooking the bottom and sides, and you’ll end up with a slightly soggy or wet bottom on your perfect loaf. Slide it right out onto a wire rack to cool completely. I know it smells amazing, but you have to let it cool before slicing it if you want to see that beautiful **tender crumb bread** structure we worked so hard for! If you need a suggestion for what to eat with this bread, I’ve got a fantastic crusty Italian bread recipe guide that uses similar temperature checks, just in case you want to tackle something crusty next!
Tips for Making Easy Baking for Beginners Condensed Milk Bread
If this is your first time working with yeast, don’t let that intimidate you! This recipe is pretty forgiving, but there are a few things I learned the hard way that I always share with newcomers. Remember, the biggest hurdle in any yeast bread is usually the rising process, so let’s nail that down for your **condensed milk bread**.
First, that sticky dough during kneading? Resist the urge to dump in handfuls of flour to make it manageable. That’s the quickest way to turn your soft dough into a tough loaf. If the dough is sticking to your hands, just lightly flour your hands, not the entire work surface. That built-in richness from the condensed milk is what keeps this loaf so fantastic, so we want to keep that moisture level high.
Also, please be patient during the rises! If your kitchen is chilly, you can always warm up your oven slightly (turn it on for just 30 seconds, turn it OFF, and then put the covered dough inside). This creates that perfect warm, draft-free spot necessary for a good double-rise. If you want to skip shaping that loaf entirely, you can totally pivot to making individual rolls! This is a fantastic route for **easy baking for beginners**.

To make the **condensed milk roll recipe**, simply divide the dough into 12 even portions after the first rise, roll them into smooth balls, and pack them snugly into a greased 9×13 pan instead of shaping a log. They bake up even faster, too, usually needing only 20 to 25 minutes in the oven. For more basic yeast structure help, my guide on easy yeast bread recipes goes into the nitty-gritty of gluten development if you want to read more about the science behind the chew.
Serving Suggestions for Your Sweet Bread Recipe
This incredibly soft loaf is honestly one of the most versatile things I bake all year long. Sure, it’s perfect sliced thick and toasted with butter for **breakfast bread ideas**, but don’t stop there! Because it’s slightly sweet, this bread is incredible when used for French toast—try using my recipe for fluffy strawberry pancakes batter to coat your slices for an amazing treat.
It also makes a killer **sweet sandwich bread**, especially if you’re making PB&J! For something savory, it’s wonderful served alongside soup or stew. If you’ve got leftovers and want a fun party appetizer, I swear it’s divine dipped in a warm cheesy garlic bread dip. You’ll be shocked how well the sweet and savory play together!
Storage and Reheating Instructions for Fresh Condensed Milk Bread
I know the biggest hurdle with any truly delicious homemade bread is usually making it last past day one! This **condensed milk bread** is so tender that we have to be careful not to let it dry out because that softness is what we worked so hard to achieve.
For simple storage, make sure the bread is completely cooled—and I mean stone cold—before you even think about wrapping it up. If you wrap warm bread, the steam gets trapped and ruins that perfect crust, making it gummy. Once totally cool, wrap that loaf tightly in plastic wrap twice, and then slide the whole thing into a large zip-top bag. Stored this way on the counter, it stays beautifully soft for up to four days. Seriously, the sugar and milk solids act like natural preservatives!
If you need it to last longer, freeze it! Slice the cooled loaf first, then wrap individual slices or halves tightly in plastic wrap and foil before tossing them into a freezer bag. This way, you only thaw what you need!
Now, for reheating—this is key to bringing that bakery texture back. Whether you’re warming up a whole loaf or just a slice, I always recommend wrapping it loosely in foil first. Pop that foil-wrapped bread into a 300°F oven for about 10 minutes. The foil traps the slight moisture you have left inside, steaming it just enough to make it feel fresh-baked again. If you want a little crisp on the crust, unwrap it for the last minute or two, but generally, warm and soft is what we’re aiming for with this **sweet homemade loaf**!
Frequently Asked Questions About Bread Made with Condensed Milk
I get so many questions about this recipe after folks try it the first time, usually because it turns out so much softer than they expected! It’s honestly the best kind of headache to have. If you’re diving into baking for the first time, don’t forget to check out my guide on easy baking for beginners for general help!
Can I use evaporated milk instead of sweetened condensed milk in this bread recipe?
Oh, that’s a classic mistake people make when looking for substitutes! Please don’t swap evaporated milk for the sweetened condensed milk here. Evaporated milk is just concentrated regular milk—it has no added sugar. This recipe relies heavily on the high sugar content of the condensed milk to tenderize the dough and keep the crumb soft and moist. Using evaporated milk will result in a much tougher, less sweet loaf, losing that signature fluffy texture of the **condensed milk bread**.
How long does the dough need for the second rise?
The second rise is all about creating that beautiful dome on your loaf. You’re looking for the dough to almost double again. Generally, this takes between 45 to 60 minutes, depending on how warm your kitchen is. The most important thing isn’t the timer, though—it’s the visual cue! You want the dough to crown about 1 inch over the rim of your loaf pan. If it’s not crowning, give it a little more time; don’t put it in the oven too soon!
If you want to see how others are tackling this bread, check out some great inspiration over at Bakewith Amelia’s take on condensed milk bread!
Is this bread similar to Japanese Milk Bread?
That’s a fantastic question! Many people ask, and rightfully so, because both are incredibly soft. Japanese milk bread usually uses the *tangzhong* method (a cooked flour paste) to achieve its fluffiness. Our **condensed milk bread** achieves a very similar, soft, tender crumb just by relying on the richness and sugar in the condensed milk itself. So, no boiling water paste needed here—it’s our shortcut to bakery-style softness!
Can I just sleep in and use cold milk instead of warming it?
You really shouldn’t skip warming the milk! Yeast needs warmth to activate properly and get all bubbly and happy before you add the other ingredients. If your milk is too cold, your yeast might just sleep through the whole process, and then you end up with a flat, dense brick instead of a loaf. Remember, aim for that 105°F to 115°F sweet spot. If you’re ever unsure if your yeast is good, give it a quick test run with just warm water and a pinch of sugar first!
Share Your Fluffy Milk Bread Success
Well, we made it! I truly hope the aroma of this sweet homemade loaf is filling your kitchen right now, and I’m already picturing how soft that first slice is going to be!
Now that you’ve gone through all the steps—from waking up the yeast to pulling that golden-brown beauty out of the oven—I absolutely want to hear about your experience. Did it turn out as soft as you hoped? Did you add any extra vanilla, or maybe smear it with honey right away?
Don’t keep those successes secret! Please take a minute to leave a rating below so others know just how reliable this easy recipe is. If you snapped a picture of your beautiful **fluffy milk bread**, I would be thrilled if you shared it with me! You can always connect with me directly or send photos over via my contact page. Happy baking, everyone!
PrintThe Ultimate Fluffy Sweetened Condensed Milk Bread Loaf: Soft, Sweet, and Easy to Make
Make this incredibly soft, slightly sweet homemade bread using sweetened condensed milk for a tender crumb. This recipe delivers bakery-style texture with simple steps, perfect for breakfast or as a snack.
- Prep Time: 20 min
- Cook Time: 35 min
- Total Time: 2 hours 50 min
- Yield: 1 loaf (about 12 slices) 1x
- Category: Baking
- Method: Yeast Baking
- Cuisine: American
- Diet: Vegetarian
Ingredients
- 1 cup warm milk (105-115°F)
- 2 1/4 teaspoons active dry yeast
- 1/4 cup granulated sugar
- 1/2 cup sweetened condensed milk
- 1 large egg, room temperature
- 1/4 cup unsalted butter, melted
- 1 teaspoon salt
- 3 1/2 cups all-purpose flour, plus more for dusting
Instructions
- In a large bowl, combine the warm milk and yeast. Let it sit for 5 minutes until foamy.
- Add the granulated sugar, sweetened condensed milk, egg, melted butter, and salt to the yeast mixture. Whisk until combined.
- Gradually add the flour, mixing until a shaggy dough forms.
- Turn the dough out onto a lightly floured surface. Knead for 8 to 10 minutes until the dough is smooth and elastic. This kneading develops the gluten for a fluffy texture.
- Place the dough in a lightly oiled bowl, turning to coat. Cover the bowl with plastic wrap or a clean towel. Let the dough rise in a warm place for 1 to 1.5 hours, or until doubled in size.
- Gently punch down the risen dough. Shape it into a log and place it seam-side down in a greased 9×5 inch loaf pan.
- Cover the loaf pan loosely and let the dough rise again in a warm spot for 45 to 60 minutes, or until the dough has crowned about 1 inch over the rim of the pan.
- Preheat your oven to 350°F (175°C) during the last 15 minutes of the second rise.
- Bake for 30 to 35 minutes, or until the top is golden brown and the internal temperature reaches 200°F (93°C).
- Remove the bread from the pan immediately after baking and cool completely on a wire rack before slicing.
Notes
- For an extra rich, brioche style bread, use whole milk instead of 2% milk.
- To achieve the softest crumb, avoid over-flouring the surface during kneading.
- If you want sweet condensed milk rolls instead of a loaf, divide the dough into 12 equal pieces after the first rise and shape them into balls before placing them in a greased 9×13 inch baking dish. Adjust baking time to 20-25 minutes.
Nutrition
- Serving Size: 1 slice
- Calories: 210
- Sugar: 10
- Sodium: 250
- Fat: 5
- Saturated Fat: 3
- Unsaturated Fat: 2
- Trans Fat: 0
- Carbohydrates: 35
- Fiber: 1
- Protein: 5
- Cholesterol: 25