
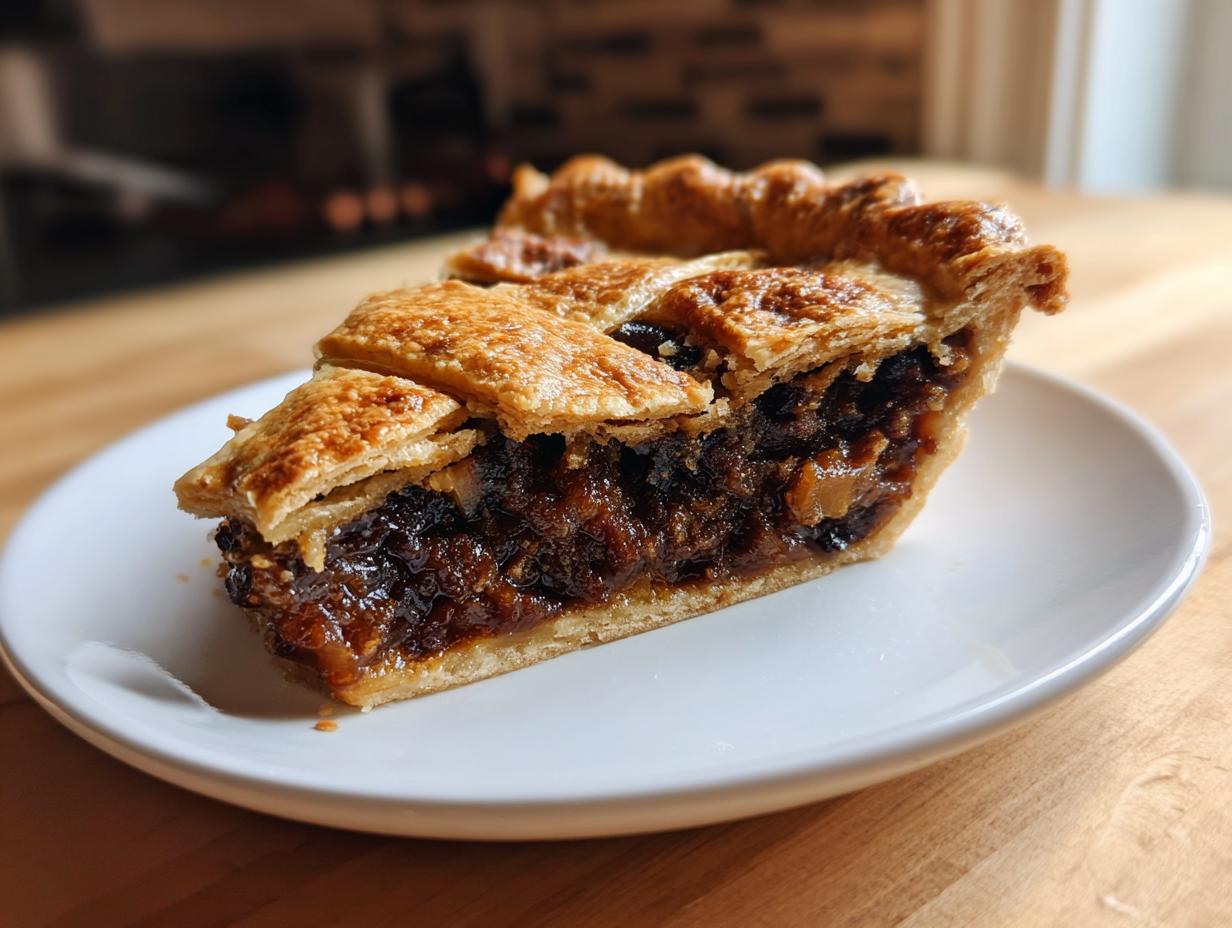
The holidays just don’t feel right without that deep, spiced aroma filling the kitchen, do they? For years, I thought making a truly great mincemeat pie meant dredging up some ancient, complicated recipe involving beef suet, and honestly, who has the time for that? When I started my journey back to joyful, practical cooking, I decided to crack the code on the best holiday dessert. Well, friends, I think I found it! This recipe for Juicy, Old-Fashioned Vegetarian Mincemeat Pie captures all that nostalgic, rich flavor you dream about, but it’s simple enough for a weeknight bake. It’s just one of those classic holiday bakes, much like my very favorite take on flaky crust apple pie. Trust me, Ethan Carter wouldn’t share it unless it was both deeply satisfying and completely achievable, even when life is moving a mile a minute.
- Why This Old-Fashioned Mincemeat Pie Recipe Stands Out
- Gathering Ingredients for Your Mincemeat Pie
- How to Make Old Fashioned Mincemeat Filling
- Assembling and Baking Your Mincemeat Pie
- Ingredient Notes and Substitutions for Mincemeat Pie
- Storage and Make Ahead Mincemeat Filling
- Frequently Asked Questions About Classic Mincemeat Pie Recipe
- Serving Suggestions for Your Holiday Dessert Pies
- Sharing Your Mincemeat Pie Creations
Why This Old-Fashioned Mincemeat Pie Recipe Stands Out
I know what you’re thinking: Mincemeat Pie sounds fussy, old, or maybe even a little intimidating. But this is my absolute favorite classic mincemeat pie recipe because it flips that script! It delivers that deep, comforting, holiday vibe without requiring you to source anything weird or spend days tending a filling. My method for this pie is based on making things practical, just like how I approach my crispy tender apple fritters. We get that sought-after, rich flavor that feels totally old fashioned, even though it skips the meat entirely. My secret is focusing on hydration for the ultimate fruit experience. Honestly, if you just follow my simple three-step approach, you’ll see why this recipe is a keeper.
Achieving the Perfect Juicy Mincemeat Pie Texture
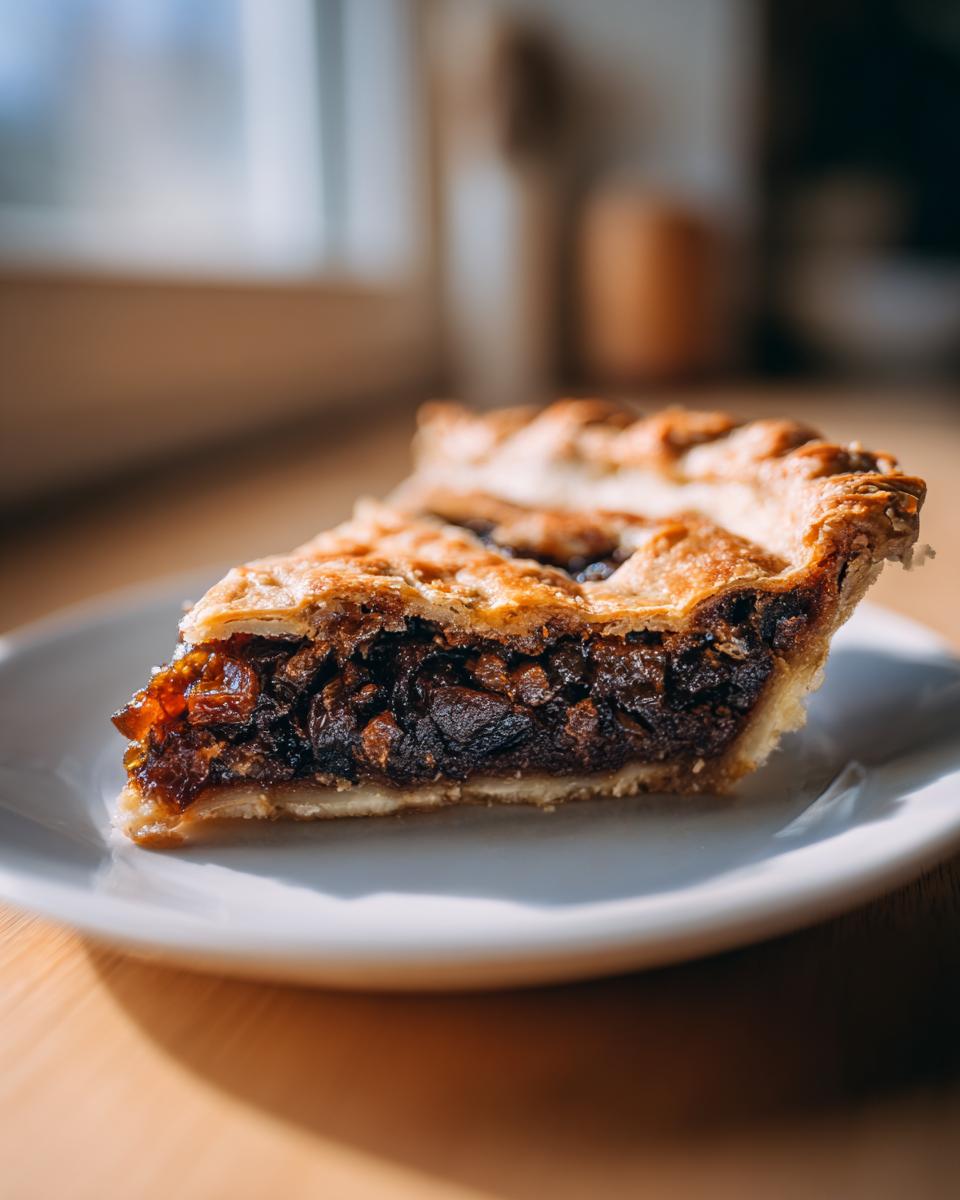
The number one reason this pie doesn’t end up tasting dry is Step 3—the maceration time. Don’t skip it! This is where all those wonderful liquids—the orange juice, the lemon juice, and the optional brandy—get absorbed deep into the raisins and dried cranberries. Think of it like marinating; the fruit plumps up beautifully. That overnight soak is one of the biggest juicy mincemeat pie secrets I ever learned. It ensures every single bite slices beautifully and isn’t chewy or dry.
The Flavor Profile of Our Traditional Mince Pie
We nail the nostalgic flavor by leaning hard into the spices. We use cinnamon, nutmeg, and allspice—the trifecta of cozy baking! Mixing that with the bright citrus peel and the sweetness of the brown sugar creates a multi-layered experience. It tastes exactly like what I imagine a traditional mince pie from decades ago tasted like, only easier for modern me to pull off on a busy December afternoon. It’s sweet, warm, and totally festive.
Gathering Ingredients for Your Mincemeat Pie
Okay, let’s talk about what you need to bring this magic to life! One of the best parts about this recipe is that it relies on ingredients you probably already have in your pantry or can grab easily at the store. This fits right into my philosophy here at the Diary: great food doesn’t need a specialty grocery run!
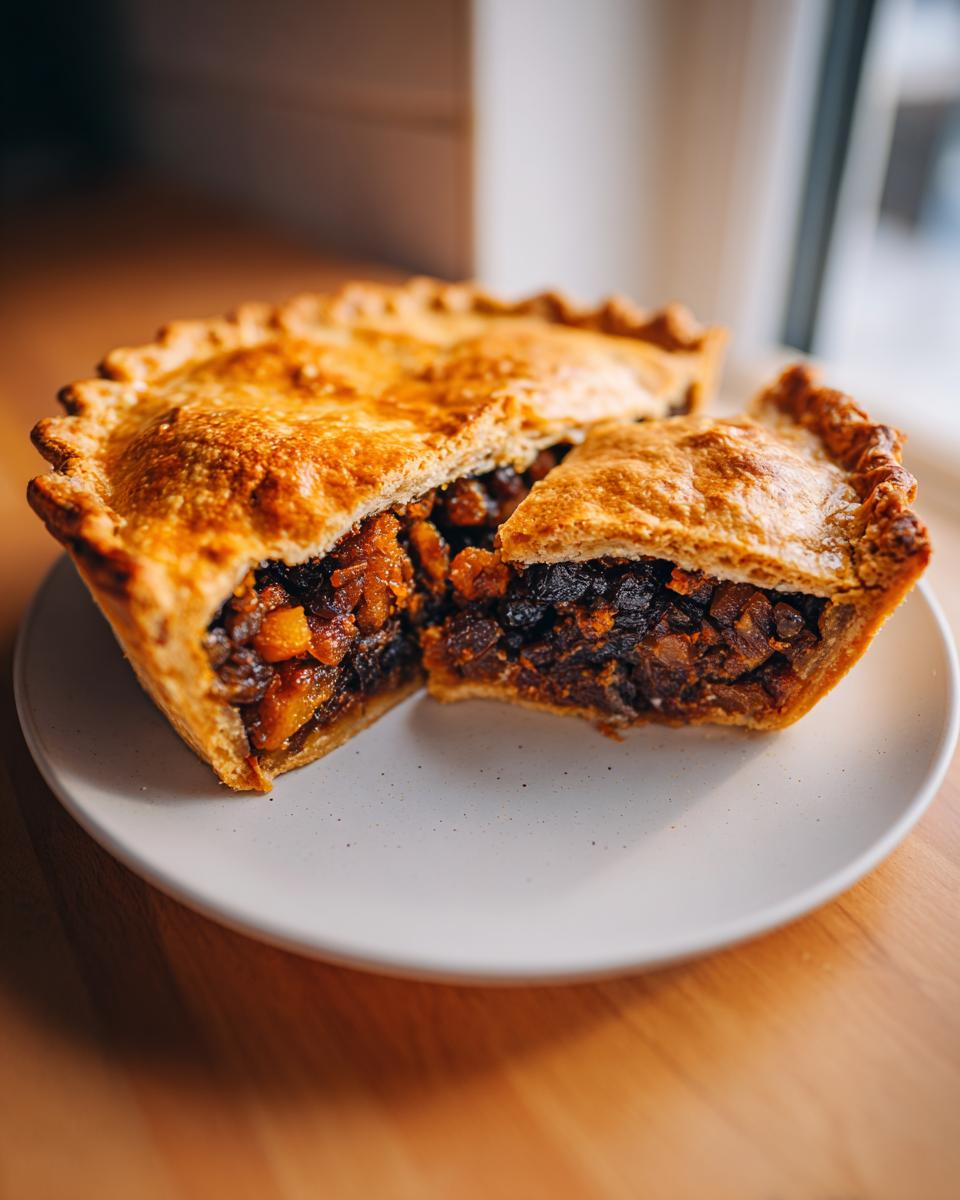
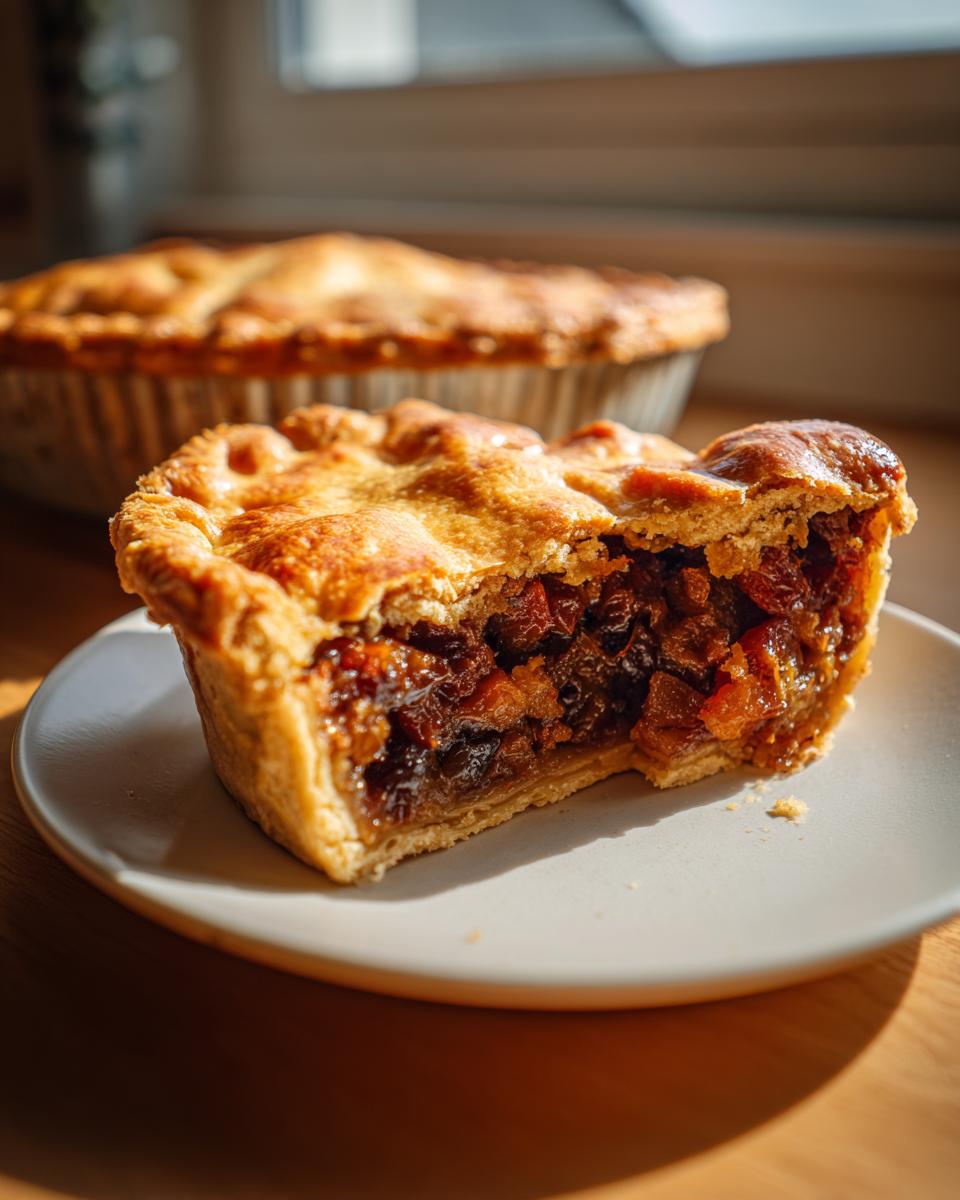
We’re using tons of dark and golden raisins, cranberries, a fresh apple for backbone, and that candied citrus peel that smells like Christmas morning. I really want to stress, though, that because the filling is so fruit-focused, the quality of your dried fruit truly matters. If you skimp here, your overall mincemeat pie texture suffers! When I buy fruit for these holiday dessert pies, I look for softer packages, not the dried-out hard ones.
Pie Crust Considerations for Your Mincemeat Pie
Now, since this recipe is all about the incredibly juicy filling, I absolutely give you permission to take a shortcut on the crust! If you have a go-to homemade pastry recipe that you love—maybe something like my recipe for fluffy buttermilk biscuits, but adapted for pastry—feel free to use it. Otherwise, pick up two store-bought crusts! We need a bottom and a top for this beauty. Just make sure they are ready to go so you can start that crucial soaking process for the fruit.
How to Make Old Fashioned Mincemeat Filling
This is where the real flavor building starts, and honestly, it requires just a little bit of patience, which I’ve learned is the best ingredient in any vintage recipe. We’re starting with Steps 1 through 3 here, and the key phrase is “let it sit.” Don’t think you can rush this part, because it’s what turns a nice bowl of fruit into a spectacular, juicy base for your mincemeat pie. It’s all about maximizing that moisture before we even hit the oven!
First, everything goes into a big bowl—all those beautiful dried fruits, the fresh chopped apple, the melted butter, the juices, and the sugar. Mix it all up until it looks like a happy, sticky mess. But here’s the crucial step I learned from old baking books (and confirmed by trying to rush it once—oops!): you have to let it macerate. That means covering it and just letting it sit. I try to leave mine overnight in the fridge, but even four hours does wonders. It allows the fruit to drink up all that liquid. If you want the full, rich experience of a classic fruit-forward filling, this soaking time is non-negotiable, much like making sure my lemon drop martini is perfectly chilled before serving!
Spicing the Sweet Mincemeat Recipe
When it comes to the spices, accuracy matters here for that authentic taste. We aren’t just throwing things in; we are building the aroma profile of a traditional mince pie. Make sure you scrape out every bit of that cinnamon and nutmeg! After you add everything, give it a really good, thorough stir. You are aiming for a complete coating, which is why I love looking at similar recipes like this fruity mincemeat pie guide online for inspiration on fruit balance. That even coating is what keeps the flavor consistent across the entire pie and maximizes the taste of this sweet mincemeat recipe.
Assembling and Baking Your Mincemeat Pie
Now that our fruit filling is plump, juicy, and wonderfully saturated with spice, it’s time to put the mincemeat pie together. This is the fun part! You’ll take your prepared bottom crust, lay it into your dish, and spoon in all that glorious filling. Don’t pack it down too hard; remember, we want air pockets and room for those juices to bubble while baking! Once it’s filled, drape that second crust over the top. Seal those edges tight—I like to pinch mine around the rim like I’m finishing off one of my no-bake mini cheesecakes.
The baking stage is where the two-temperature trick comes into play. We start hot—400°F—for just 15 minutes. This sets the crust structure really quickly. Then, drop the heat down to 350°F for the remainder of the bake time. This ensures the rich filling heats all the way through without burning the edges of that beautiful, buttery crust pie.
Tips for a Golden Brown Buttery Crust Pie Recipes Finish
You absolutely must use an egg wash before that pie goes into the oven. It’s what gives you that deep, glossy gold color that screams ‘holiday baking.’ Just whisk one egg with a splash of water or milk and brush it lightly over the top crust. My biggest piece of advice? Keep an eye on those edges! They brown way faster than the center, especially when you’re dealing with a sweet, high-sugar filling. If you see them getting too dark after the first 30 minutes of the lower bake, don’t panic. Just grab a strip of aluminum foil, loosely tent it over the edges, and let the middle finish baking until it’s perfectly done.
Ingredient Notes and Substitutions for Mincemeat Pie
Even though this is my tried-and-true recipe, I know life happens, and sometimes you’re missing that one specific ingredient! Don’t stress; that’s what a fellow home cook is here for. Flexibility is key to keeping your kitchen joyful. For example, if you run out of Granny Smith apples, don’t let that stop you from making this! You can substitute with a firm pear, or maybe even use some chopped preserved ginger for a bit of a zing. This is where you start building your own personal history with the dish, creating your own unique sweet mincemeat recipe.
When it comes to the dried fruits, remember that balance is everything in this fruity mincemeat filling guide. If you loathe cranberries, swap them for dried cherries or even chopped dried figs! The more variety you have in texture and size, the better your final result will be. Just make sure you have roughly two cups of dried fruit total to keep the flavor ratio right for the spices.
Making a Boozy Mincemeat Pie
If you’re aiming for that deeply rich, almost historic flavor profile, you absolutely have to lean into the spirits! I only called for one optional tablespoon of brandy or rum in the main steps, but for a proper, warm, boozy mincemeat pie, you can easily bump that up. I sometimes use a full quarter cup total when making a batch just for the adults. It deepens the flavor of the dried fruit so much while it soaks overnight. Just make sure you mix it in during the initial blending so it has time to infuse everything properly!
Storage and Make Ahead Mincemeat Filling
Listen, holiday baking is all about planning ahead, right? If you can tackle one part of the dessert early, you suddenly have more time for wrapping presents or just relaxing with a cup of tea. That’s why I love this recipe, because the filling is the perfect candidate for a make ahead mincemeat filling project! You can mix up all those juicy ingredients and let them soak in a sealed container in the fridge for up to two weeks. Can you imagine having your whole mincemeat filling done weeks before Thanksgiving or Christmas? It’s a huge load off!
Once the pie is fully baked, just let it cool completely on the rack—at least two hours, like I mentioned before, so it sets up properly. Store the finished pie tightly covered at room temperature for about a day, or pop it in the fridge for up to four days. If you’re making individual mince pies, they are even better the next day. Keep any leftovers in an airtight container. Honestly, these are so good, I doubt you’ll have many leftovers to worry about, especially if you skip the classic tiramisu this year and just serve pie!
Frequently Asked Questions About Classic Mincemeat Pie Recipe
I always get a ton of questions when I post this recipe, especially around the holidays when everyone is trying to nail down their perfect classic mincemeat pie recipe. I pull these from my own experience and the notes people leave me! I figure if one person wonders about it, three others are thinking the exact same thing.
Can I make this mincemeat pie recipe vegan?
Oh, totally! Since this is already a vegetarian take, we are most of the way there. The easiest swap is to replace that melted butter with an equal amount of refined coconut oil when you mix the filling. For the crust, just use your favorite store-bought vegan pastry, or swap the butter in your homemade recipe for a good quality plant-based butter block. You won’t lose much flavor at all!
How long does the filling need to sit before baking?
This is the key to that incredible juiciness! You really need the fruit to plump up and marry all those spices. My official minimum is four full hours at room temperature or in the fridge. But honestly, if you want the absolute best flavor profile for your mincemeat pie, make the filling the day before and let it rest in the refrigerator overnight. That slow rest creates the most wonderful, deep flavor.
Is this pie supposed to taste savory or sweet?
That’s a fun one, because that’s the part people get mixed up about when they think of the incredibly old versions! My recipe here is decidedly sweet—it’s a proper spiced fruit dessert pie, similar to a rich fruitcake in flavor profile. We use brown sugar and fruit, not meat, so you get that bright, aromatic flavor similar to an intensely spiced plum pudding, rather than anything savory. I hope that clears up any confusion about making a traditional mince pie versus historical versions!
Can I bake this as individual mince pies instead of a whole pie?
Yes, you can! If you use a standard muffin tin, the baking time changes quite a bit. You’ll want to preheat everything to 400°F, bake those little guys for about 15 to 20 minutes total, checking them often. They cook much faster because they are smaller, so keep an eye on them so they don’t burn. It’s a lot more work, but they make fabulous individual treats. I’ve even used fun cookie cutters for the tops before, kind of like when I make my easy baked dip and add a fun topping!
Serving Suggestions for Your Holiday Dessert Pies
You’ve done the hard work, you’ve steeped those fruits overnight, and now you have this stunning, wonderfully spiced mincemeat pie hot out of the oven. The only question left is: what do you serve it with? This is a rich, dense holiday dessert, so you want cooling accompaniments that balance that warmth. My top suggestion, always, is a big dollop of fresh, lightly sweetened whipped cream—it melts just beautifully into the crevices!
If you’re feeling a little extra festive, a classic brandy butter is heavenly alongside this pie. It melts right on top and gives you that extra kick. For simplicity, vanilla ice cream is unbeatable, or you could try something like a scoop of chilled custard. If you ever want to see how other chefs approach these amazing pastries, I always look at great resources; for instance, you can check out some of the methods used for Gordon Ramsay’s mince pies for inspiration! And speaking of toppings, if you’re looking for a truly fluffy homemade topping that’s easy to whip up, I have a fantastic vanilla buttercream recipe that can easily be adapted into a slightly softer, dessert-style topping if you thin it out with a little milk. Honestly, even just seeing the way that warm filling smells makes me want to bake another one right now!
Sharing Your Mincemeat Pie Creations
Well, we made it! You’ve got a glorious, juicy, old fashioned mincemeat pie cooling on the counter, and I sure hope it smells as good as mine does right now. That’s the real heart of Little Kitchen Diary—bringing these simple, joyful bakes into your life. I really, truly want to know how yours turned out! Please, come back and leave a star rating, or better yet, drop a comment below telling me about your favorite part.
If you snap a picture of your beautiful slice, tag me on social media! Seeing your bakes makes my entire week and proves that real, delicious, home-style cooking is possible even with a busy schedule. If you loved this recipe, maybe you’ll want to try my super simple three-ingredient Oreo fudge next!
PrintJuicy, Old-Fashioned Vegetarian Mincemeat Pie

Make a classic holiday dessert with this recipe for juicy, old-fashioned vegetarian mincemeat pie. This filling uses dried fruits and warm spices for a rich, nostalgic flavor, perfect for your Christmas table.
- Prep Time: 20 min
- Cook Time: 55 min
- Total Time: 3 hours 15 min
- Yield: 8 servings 1x
- Category: Dessert
- Method: Baking
- Cuisine: British
- Diet: Vegetarian
Ingredients
- 1 recipe for your favorite double pie crust (or 2 store-bought crusts)
- 1 cup golden raisins
- 1 cup dark raisins or currants
- 1 cup dried cranberries
- 1 large Granny Smith apple, peeled, cored, and finely chopped
- 1/2 cup candied citrus peel, finely chopped
- 1/2 cup packed light brown sugar
- 1/4 cup unsalted butter, melted
- 1/4 cup orange juice
- 2 tablespoons lemon juice
- 1 tablespoon brandy or dark rum (optional, for boozy mincemeat)
- 1 teaspoon ground cinnamon
- 1/2 teaspoon ground nutmeg
- 1/4 teaspoon ground allspice
- Pinch of ground cloves
- Pinch of salt
- 1 large egg, beaten (for egg wash)
Instructions
- Prepare the Mincemeat Filling: In a large bowl, combine the golden raisins, dark raisins/currants, dried cranberries, chopped apple, candied citrus peel, brown sugar, melted butter, orange juice, lemon juice, and optional brandy or rum.
- Add the spices: Stir in the cinnamon, nutmeg, allspice, cloves, and salt until everything is evenly coated.
- Macerate the filling: Cover the bowl and let the mincemeat mixture sit at room temperature for at least 4 hours, or preferably overnight in the refrigerator. This allows the fruit to absorb the liquids and become juicy. Stir occasionally.
- Preheat your oven to 400°F (200°C). Lightly grease a 9-inch pie dish.
- Assemble the bottom crust: Roll out one pie crust and carefully place it into the prepared pie dish. Trim the edges.
- Fill the pie: Spoon the prepared, juicy mincemeat filling evenly into the bottom crust. Do not overfill.
- Top the pie: Roll out the second pie crust. Place it over the filling. Trim the top crust edges and crimp them together with the bottom crust edges to seal. Cut several slits in the top crust to allow steam to escape during baking.
- Apply egg wash: Brush the top crust lightly with the beaten egg for a golden finish.
- Bake the pie: Place the pie on a baking sheet to catch any drips. Bake at 400°F (200°C) for 15 minutes.
- Reduce the heat: Lower the oven temperature to 350°F (175°C) and continue baking for another 30 to 40 minutes, or until the crust is golden brown and the filling is bubbling slightly. If the edges brown too quickly, cover them loosely with foil.
- Cool the pie: Remove the pie from the oven and let it cool on a wire rack for at least 2 hours before slicing. This helps the filling set.
Notes
- For a truly old-fashioned, boozy mincemeat pie, increase the brandy or rum to 1/4 cup total.
- If you want a thicker filling, add 1 tablespoon of cornstarch mixed with 1 tablespoon of cold water to the fruit mixture before letting it sit.
- This homemade mincemeat filling keeps well in the refrigerator for up to two weeks, making it a great make ahead mincemeat filling option.
Nutrition
- Serving Size: 1 slice
- Calories: 420
- Sugar: 45g
- Sodium: 180mg
- Fat: 22g
- Saturated Fat: 10g
- Unsaturated Fat: 12g
- Trans Fat: 0g
- Carbohydrates: 58g
- Fiber: 3g
- Protein: 4g
- Cholesterol: 35mg