
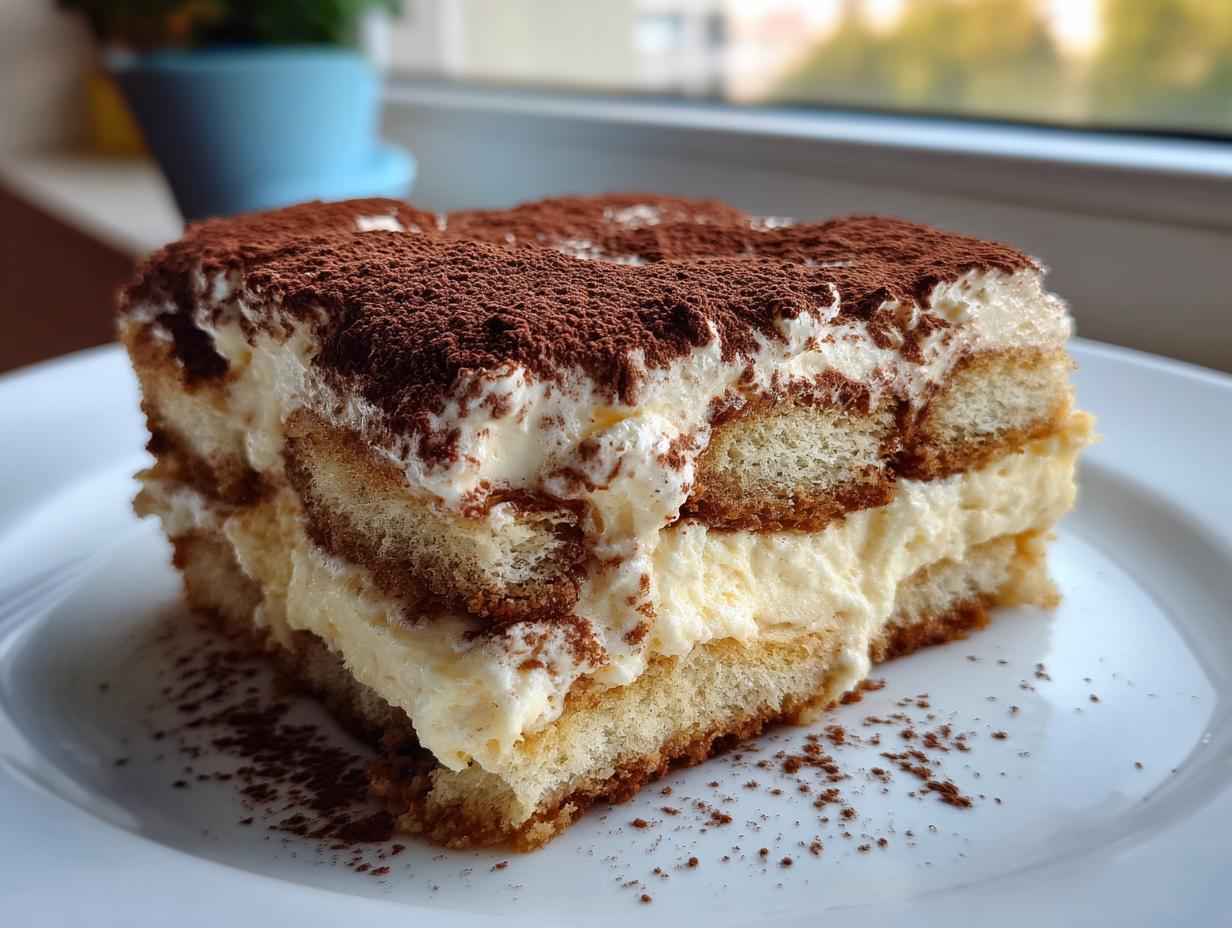
There’s just something magical about an Authentic Italian Dessert, isn’t there? That perfectly balanced bite of coffee, cream, and just a hint of chocolate dust? For years, I thought making a truly great, creamy tiramisu recipe meant dealing with fussy egg yolks and worrying about salmonella, keeping this show-stopping dessert off my weeknight rotation. That stopped right here in my kitchen when I cracked the code for an unbelievably silky, easy, no-bake tiramisu.
When I started Little Kitchen Diary, I swore I’d only share recipes I could actually make after a long day at work. This tiramisu recipe is the perfect example of that—it’s fast, requires zero oven time, and bypasses the raw eggs entirely. Trust me, you get all that decadent flavor and that beautiful, cloud-like texture without any of the usual fuss. It’s the kind of dessert that looks like you spent hours on it, but only took me about 25 minutes of actual work!
- Why This Easy Tiramisu Recipe Is Your New Favorite
- Ingredients for Your No Bake Tiramisu Recipe
- How to Make the Ultimate Easy Tiramisu Recipe
- Tips for the Best Classic Tiramisu Recipe Success
- Make Ahead Dessert: Storing and Serving This Tiramisu Recipe
- Variations for Your Tiramisu Recipe
- Frequently Asked Questions About This Tiramisu Recipe
- Estimated Nutrition for This Decadent Creamy Dessert
- Share Your Homemade Tiramisu Experience
Why This Easy Tiramisu Recipe Is Your New Favorite
So, why should you ditch every other recipe you’ve seen and stick with this version? Honestly, it boils down to maximum flavor for minimal effort. I promise, this is the creamy mascarpone dessert you’ve been waiting for. It’s the quintessential Classic Tiramisu Recipe made simple for everyday life.
- It’s completely No Bake! You don’t even have to turn on the oven, which is a lifesaver in the summer.
- It’s safe and easy because we skip the raw eggs entirely. Say goodbye to that worry!
- The filling is impossibly light yet rich. Seriously, it’s divine.
- It truly is quick. You’ll be moving pieces into the fridge faster than you think.
If you loved how easy my no-bake pecan pie dip was, you’re going to fall head over heels for this approach to tiramisu. It lets you serve an impressive Italian classic without the stress.
Simple Steps for a Classic Tiramisu Recipe
My whole goal here was to keep this accessible, even if you’ve never touched a Savoiardi biscuit before. We focus on building flavor layers using strong coffee and sweet cream. This is truly one of those Simple Italian Desserts that punches way above its weight class in terms of presentation. You’re just a few ingredients away from starting the assembly!
Ingredients for Your No Bake Tiramisu Recipe
Okay, let’s talk about what goes into this magic! Since this is a no-bake tiramisu, the ingredients have to be top-notch because there’s nowhere to hide any off-flavors. We’re keeping the ingredient list intentionally short so you can focus on quality, especially that coffee. I never skimp on the espresso here. If you don’t have an espresso maker, just brew it extra strong—the stronger the better for soaking those ladyfingers!
Here is what you need to grab from the store for this Decadent Creamy Dessert:
- 1 cup strong brewed espresso or coffee, cooled (This must be cool before you dip!)
- 2 tablespoons coffee liqueur (like Kahlúa or Tia Maria—totally optional, but delicious!)
- 1 cup granulated sugar
- 16 ounces mascarpone cheese, softened (Let this sit out for about 20 minutes before you start)
- 1 1/2 cups heavy whipping cream (Must be cold for whipping!)
- 1 teaspoon vanilla extract
- 1 package (7 ounces) ladyfingers (Look for the Savoiardi biscuits if you can!)
- Unsweetened cocoa powder, for dusting (Don’t grab the sweetened stuff!)
If you’re looking for other simple party favorites, check out my recipe for caramelized onion dip—different food group, same easy factor!
Ingredient Notes and Substitutions for the Creamy Mascarpone Dessert
I know sometimes things aren’t in the pantry, so let’s cover quick swaps. If you skip the coffee liqueur for a family-friendly version, don’t just leave the coffee plain. You need that depth! I suggest adding 1 teaspoon of dark rum extract right into your cooled coffee mix. It gives you that warm background note that really sells the flavor.
Also, make sure that mascarpone is *softened* but not melted. If it’s too cold, it will just clump when you mix it with the sugar. If it’s too warm, it won’t hold up when you fold in the whipped cream, and we need that structure for a perfect silky smooth tiramisu layer!
How to Make the Ultimate Easy Tiramisu Recipe
Now for the fun part—putting it all together! Since we aren’t baking, this assembly moves super quickly, but time management here is everything, especially when dealing with liquid and cream. We need structure! Don’t rush this step, but since it’s no-bake, you can actually have your kids help layer it!
I see a lot of people online rushing through the steps, but the result is always a soupy mess. If you follow the separation of tasks, I guarantee you a perfect, layered Homemade Tiramisu that holds up beautifully. Remember my mantra: Chilling is mandatory! I need you to promise me you’ll let this chill for at least 6 hours.
Preparing the Coffee Soak for Your Ladyfinger Dessert
First things first: your coffee mixture needs to be ready and slightly warm or completely cool. Never use hot espresso! Hot liquid will melt your beautiful mascarpone cream later. So, take that strong espresso—maybe with your optional liqueur—and pour it into a shallow bowl. A pie plate works perfectly for this, since we need to dip flat biscuits.
Creating the Silky Smooth Tiramisu Filling
This is where we build that amazing, light texture that makes this an Elegant Dinner Party Dessert. You need two main components here. First, in one bowl, whip your heavy cream and vanilla until you get stiff peaks. And I mean stiff! These peaks are going to substitute for the structure you usually get from raw egg whites. Set that aside. In a separate bowl, beat your softened mascarpone and sugar until it looks homogeneous and creamy—just combined, don’t beat it into butter!
The key secret to a silky smooth tiramisu is folding. Take about a third of your whipped cream and stir it right into the mascarpone mix to lighten it up. I’m reminded of how carefully you need to fold when making my homemade marshmallows—you don’t want to lose that volume! Then, very gently, fold in the rest of the whipped cream. Use a spatula and cut down the middle, then sweep up the side. Stop folding the moment you no longer see streaks of white. Overmixing here deflates all that air we just worked so hard to create!
Assembling Your No Egg Tiramisu Recipe
Time to layer! Grab your biscuits—those lovely ladyfinger dessert sponges. You must work quickly here. Dip each finger into the coffee bath for maybe one second on each side. One second! If you let it sit, you end up with coffee-soaked mush, not nice firm layers. Lay a single layer of these quick-dipped biscuits in your dish. Then, smoothly spread half of your glorious cream over them.
Repeat! Dip the rest of your ladyfingers and arrange them on top of the cream layer. Cover that with the remaining cream, spreading it right to the edges. Now, cover the whole thing tightly with wrap. I am serious about chilling: this needs a minimum of 6 hours, but honestly, overnight is when this Espresso Dessert Recipe really shines because all those flavors marry up perfectly. If you need another example of how letting things rest makes a huge difference, check out my easy homemade lasagna—it’s so much better the next day!
My biggest mistake when I first tried making this years ago was slicing it after just two hours in the fridge. It just sagged! You need that setting time for the ladyfingers to fully absorb the coffee and firm up the cream. You’ll find a great visual guide for layering over at this great recipe if you need an extra look!

Tips for the Best Classic Tiramisu Recipe Success
Getting this right comes down to respecting that chill time and using the best coffee you can find. Remember one of my strict rules? Use high-quality, strong espresso—it’s the backbone of the flavor for this Classic Tiramisu Recipe. If you use thin, watery coffee, your dessert will taste… well, thin!
Also, please heed the warning about the cocoa dusting. I learned this the hard way last year. I dusted the top early in the morning because I wanted a quick photo, but we didn’t serve it until evening. By then, the cocoa had absorbed all the moisture from the air and the cream, turning into this sad, damp, brownish paste on top. Disaster! Now, I always use a fine-mesh sieve to dust it right before I slice it. It needs to be fresh!
And about the chilling—oh, that chilling! I tried rushing it once when we had unexpected guests. I pulled it out after maybe four hours. It looked okay, but when I cut into it, the layers slumped immediately, and the ladyfingers were still a bit firm in the middle. It tasted fine, but presentation-wise? Zero stars. This needs that minimum 6 hours to become the firm, sliceable, Elegant Dinner Party Dessert you want. It’s worth the wait, I promise. For more tips on making great fresh flavors shine, take a peek at my restaurant-style Caesar salad dressing recipe; it relies on fresh components too!
Make Ahead Dessert: Storing and Serving This Tiramisu Recipe
One of the best things about this tiramisu recipe is that it’s basically designed to be a big stress reliever for party planning—it’s a pure Make Ahead Dessert! Because it needs that mandatory chilling time (remember, at least six hours, but overnight is the dream), you can actually get the hardest part done way ahead of time.
Once it’s assembled and chilled, cover that dish tightly with plastic wrap. Keeping it wrapped stops it from picking up any other smells in the fridge—we want it to smell only like rich espresso and mascarpone, thank you very much! It keeps beautifully for about three days, though honestly, the flavors are totally settled and perfect by the end of day one. If you struggle with storage, try my grinder sliders recipe; those are fantastic for immediate serving!
Now, the grand finale: the cocoa dusting. This is non-negotiable for presentation. You should only dust it right before you plan on bringing it to the table. If you dust it too early, that beautiful, dark powder will soak up the tiny bit of moisture coming off the creamy filling underneath, and you’ll just have a damp, ugly layer instead of that velvety contrast. Keep your cocoa powder handy, use a fine-mesh sieve, give it a generous cloud of dusting, and watch everyone gasp. It’s the simplest step, but it makes this look like a million bucks.
Variations for Your Tiramisu Recipe
While I stand by this Classic Tiramisu Recipe as the ultimate way to get that perfect, traditional flavor, sometimes you want to switch things up a little bit without turning this into an entirely different dessert. Since this is entirely no-bake, we have a lot of freedom to swap out the coffee base, which is where most of the flavor variation comes from!
If you’re making this for a crowd that maybe doesn’t love strong coffee, or if you just want to try something bright for the summer, you can totally swap the espresso for other liquids. It keeps the integrity of the creamy mascarpone dessert intact, which is the most important thing!
Swap the Soak for Fruitier Flavors
Forget the coffee entirely and explore some fruit-based soaks. For a stunning twist that works beautifully for spring gatherings, try using chilled, strong lemon-flavored tea or even some peach nectar. You can enhance that citrus note by adding a splash of Limoncello right into the tea before dipping. Imagine those sweet, tangy layers instead of the usual bitter coffee—it’s amazing! If you enjoy bright, zesty flavors like that, you have to try my lemon drop martini recipe; it harnesses that same sunny flavor profile.
A Not-So-Traditional Chocolate Tiramisu Recipe
Okay, this next one leans into the cocoa powder coating and turns it into an ingredient! If you were interested in a Tiramisu Cake Recipe texture but want to stick to the simple layering, you can create a chocolate version. Instead of using plain espresso, mix hot water with good quality, unsweetened cocoa powder—maybe even a spoonful of instant chocolate powder if you have it—until it’s fully dissolved and strong.
You can also slightly reduce the granulated sugar in the mascarpone filling itself and add a tablespoon of dissolvable chocolate drink powder or even a touch of melted, cooled dark chocolate. It makes the whole dessert rich and brownie-like, though still incredibly light because of the whipped cream structure. It’s a fun deviation from the traditional Italian favorite!
For more inspiration on authentic Italian flavors done simply, check out the fantastic breakdown on this classic Italian tiramisu recipe to see how others approach tradition. Every variation is still rooted in that same simple layering technique, making it simple for any Tiramisu for Beginners to tackle!
Frequently Asked Questions About This Tiramisu Recipe
I absolutely love getting questions about this recipe! It means you’re getting ready to make your own Homemade Tiramisu, and I want to make sure you have total confidence before you start. Since this is such a Traditional Italian Favorite, people always wonder about the necessary components. Here are a few things that come up most often when folks new to the game are looking to master this dessert.
Can I use regular cream instead of heavy whipping cream in this tiramisu recipe?
Oh, that’s tempting when you’re missing an ingredient, but no, you really shouldn’t! This No Egg Tiramisu relies entirely on that heavy whipping cream being whipped up into stiff peaks to create the airy structure that usually comes from egg whites. Regular milk or half-and-half just won’t whip up to hold that structure. You need that heavy cream to keep your filling light and airy—otherwise, it sinks right down into a thick, dense layer instead of staying fluffy.
How long can I store this No Bake Tiramisu?
This is the beauty of a Make Ahead Dessert! Since we aren’t using anything that spoils quickly (remember, no raw eggs!), this holds up really well. Generally, you can easily store it covered tightly in the fridge for up to three full days. If you ask me, though, the best flavor is actually on day two. That’s when those ladyfingers have fully softened up from the coffee soak, and everything has settled into one harmonious bite of Authentic Italian Dessert flavor. Keep it wrapped well to protect it from fridge smells!
Is this Tiramisu recipe okay for people new to Italian Desserts?
Yes, absolutely! I designed this entire tiramisu recipe to be totally achievable for Tiramisu For Beginners. Because it’s no-bake and every step is straightforward—whip cream, mix cheese, dip, layer—it’s a fantastic starting point. You skip the tricky tempering steps that official recipes require. If you can whip cream and dip a cookie, you can nail this. Let me know how it goes!
Do I have to use coffee liqueur/alcohol?
Not at all! If you are baking for kids or just prefer to skip the booze, you can skip the liqueur entirely. I mentioned adding rum extract to the coffee, but honestly, using just plain, strong, cooled espresso gives you a wonderful, intense Best Coffee Dessert flavor that doesn’t need that extra kick. It will still taste incredibly authentic and delicious!
If you try this out and have any trouble at all, don’t hesitate to shoot me a message over on my contact page. Happy cooking!
Estimated Nutrition for This Decadent Creamy Dessert
Now, I know some of you are tracking things, and I totally get that. Whether you’re planning for guests or just curious about what you’re pulling out of the fridge, nutrition matters. Keep in mind that calculating the exact numbers for these kinds of layered desserts is always a bit tricky because of how much liquid gets absorbed and how big you cut your slices!
The numbers I have here are based on dividing the entire 8×8 inch dish into 8 equal servings, using standard brand measurements. Think of this as a helpful guideline, not a strict nutritional mandate. It’s meant to show you that even though this is a rich, Decadent Creamy Dessert, portion control is easier than you think when you serve it.
Here’s the breakdown for one generous slice:
- Serving Size: 1 slice
- Calories: around 380
- Sugar: 25g (Mostly from the mascarpone mix and ladyfingers!)
- Fat: 28g (Hello, mascarpone and cream!)
- Protein: 7g
- Carbohydrates: 28g
It certainly packs a punch of flavor, but for an elegant, satisfying dessert, it’s actually quite reasonable! Remember, this is a special occasion treat, not daily fuel. If you’re looking for something equally delicious but lighter on the count, maybe check out my healthy tuna salad with Greek yogurt—a totally different direction, but great for keeping things light elsewhere in the meal!
Share Your Homemade Tiramisu Experience
This is where the diary keeps growing, you know? When I first developed this tiramisu recipe, it was just for me and my family huddled around the table, but now it’s for all of us! I genuinely want to know what you think once you’ve built those perfect, creamy layers.
Did you stick to the strong espresso? Did you end up sneaking a little sip of the coffee liqueur while you were dipping those ladyfingers? Or maybe you tried a flavor swap like I mentioned earlier?
Please, please, jump down to the comments below! Tell me if it was easy and how quickly your family devoured it. If you made it for a gathering, I’d love to hear how many compliments you received—it truly is a Show Stopping Dessert when you get that cocoa dust just right.
And if you happen to snap a picture of that beautiful slice, share it on social media and tag me! Seeing your successful, no-bake creations is seriously the best part of running Little Kitchen Diary. If you’re curious about my journey, there’s a little bit about why I started sharing everything on my About Page.
If you’re feeling adventurous after conquering this classic, you might want to check out this site for some other fun takes, but I truly hope this version becomes your go-to Easy Italian Tiramisu Recipe for years to come. Happy tasting!
PrintEasy No-Bake Classic Tiramisu Recipe (No Raw Eggs)

Make this easy, no-bake Tiramisu recipe for a creamy, authentic Italian dessert. This version skips raw eggs, making it simple and safe for any gathering.
- Prep Time: 25 min
- Cook Time: 0 min
- Total Time: 6 hr 25 min
- Yield: 8 servings 1x
- Category: Dessert
- Method: No-Bake
- Cuisine: Italian
- Diet: Vegetarian
Ingredients
- 1 cup strong brewed espresso or coffee, cooled
- 2 tablespoons coffee liqueur (optional)
- 1 cup granulated sugar
- 16 ounces mascarpone cheese, softened
- 1 1/2 cups heavy whipping cream
- 1 teaspoon vanilla extract
- 1 package (7 ounces) ladyfingers (Savoiardi biscuits)
- Unsweetened cocoa powder, for dusting
Instructions
- Prepare the coffee mixture: In a shallow bowl, combine the cooled espresso and coffee liqueur, if using. Set aside.
- Make the creamy mascarpone filling: In a large bowl, beat the heavy cream and vanilla extract with an electric mixer until stiff peaks form. Set aside.
- In a separate bowl, beat the softened mascarpone cheese and granulated sugar together until smooth and fully combined. Do not overmix.
- Gently fold the whipped cream into the mascarpone mixture in two additions until just combined and the cream is silky smooth.
- Assemble the dessert: Quickly dip each ladyfinger into the coffee mixture, turning once. Do not soak them too long or they will become soggy.
- Arrange a single layer of the dipped ladyfingers in the bottom of an 8×8 inch baking dish or a similar sized serving dish.
- Spread half of the mascarpone cream mixture evenly over the layer of ladyfingers.
- Repeat the process: Dip the remaining ladyfingers and arrange them over the cream layer.
- Spread the remaining mascarpone cream evenly over the second layer of ladyfingers.
- Cover the dish with plastic wrap and chill in the refrigerator for at least 6 hours, or preferably overnight, to allow the dessert to set.
- Before serving, dust the top generously with unsweetened cocoa powder using a fine-mesh sieve. Slice and serve this decadent, creamy dessert.
Notes
- For the best flavor, use high-quality, strong espresso.
- If you skip the coffee liqueur, add 1 teaspoon of dark rum extract to the coffee for depth.
- Chilling time is essential; this allows the ladyfingers to soften properly and the flavors to meld.
- Dust with cocoa powder right before serving to prevent it from absorbing moisture.
Nutrition
- Serving Size: 1 slice
- Calories: 380
- Sugar: 25g
- Sodium: 85mg
- Fat: 28g
- Saturated Fat: 17g
- Unsaturated Fat: 11g
- Trans Fat: 0.5g
- Carbohydrates: 28g
- Fiber: 1g
- Protein: 7g
- Cholesterol: 110mg