
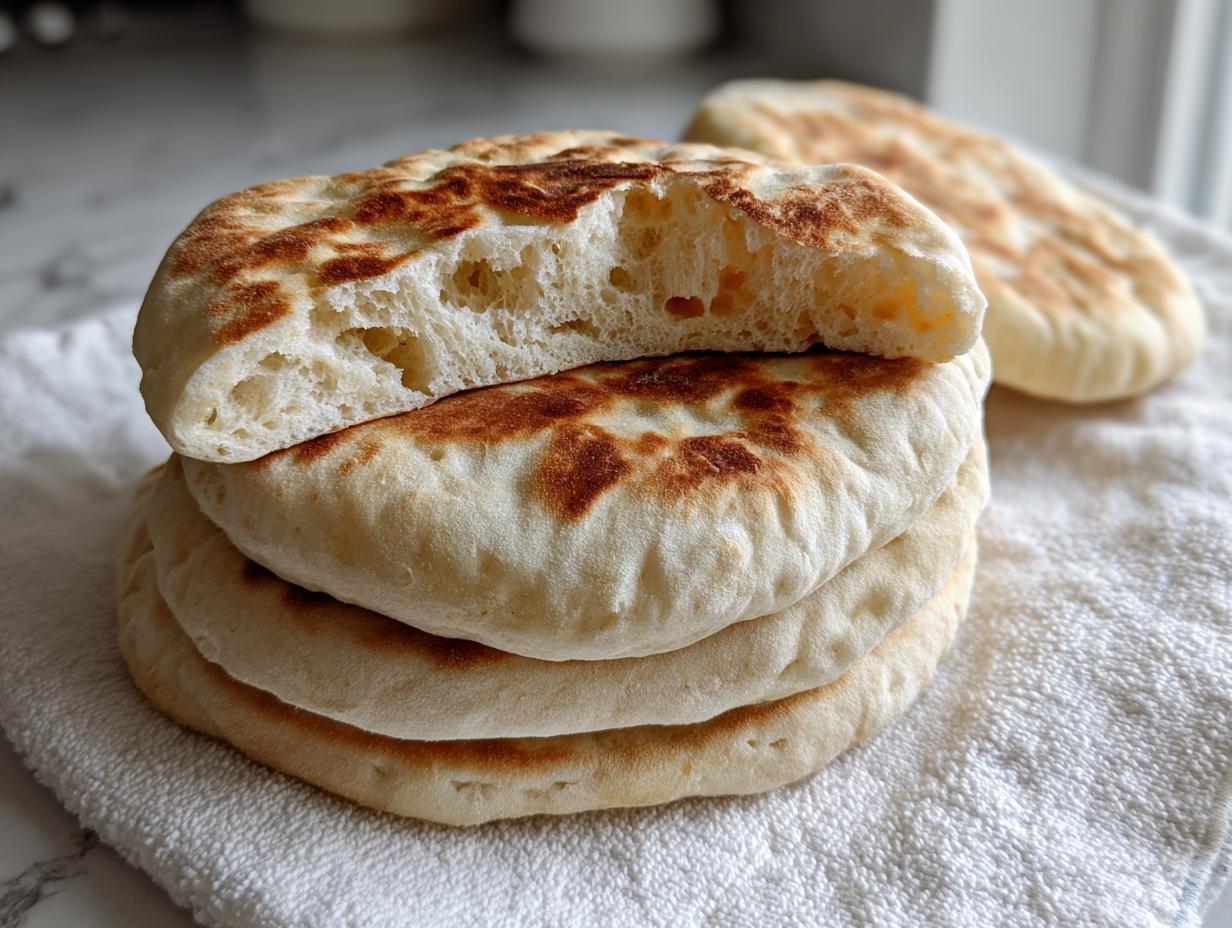
Oh, there is absolutely nothing—nothing—like the smell of truly fresh baked bread pulling you out of your chair! For years, I thought making professional-quality homemade pita bread meant waiting around for hours or wrestling with a hot oven, but I was wrong. I spent ages in my own kitchen trying to nail the perfect texture for quick weeknight meals, and I finally cracked the code: you can get miraculously soft, fluffy pita bread with perfect pockets right on your stovetop!
As someone who juggles a busy schedule, I designed this recipe to be practical. It uses basic things you probably already have, and honestly, mastering the pocket puff is half the fun. Trust me, once you nail this stovetop method, you’ll never look at the plastic bag of store-bought stuff again. Welcome to your new favorite Mediterranean flatbread!
- Why This Homemade Pita Bread Recipe Works So Well
- Gathering Your Ingredients for Perfect Pita Bread
- The Step-by-Step Pita Bread Pockets Tutorial
- How to Make Pita Bread Puff Perfectly on the Skillet
- Tips for the Best Pita Bread Recipe Results
- Serving Suggestions for Your Warm Homemade Bread
- Storage and Reheating Soft Pita Bread
- Frequently Asked Questions About Making Pita Bread
- Share Your Fresh Baked Bread Creations
Why This Homemade Pita Bread Recipe Works So Well
I know what you’re thinking: ‘My pita bread never puffs!’ That’s okay! This recipe is popular because it focuses straight on solving your biggest problems. Forget complicated oven techniques; we’re getting phenomenal results on the stove, which makes it a truly quick pita bread experience.
- We give you the full pita bread pockets tutorial so you understand the science behind the ballooning effect.
- You get incredibly soft pita bread every single time—ideal for loading up with fillings.
- This technique is fast! It’s hands-down the best pita bread recipe for people who are short on time but refuse to sacrifice quality.
Achieving Maximum Puff: The Secret to Pita Bread Pockets
The puff isn’t luck, it’s thermodynamics working for you! When you roll the dough thin, you create a tiny chamber inside. If your skillet is screaming hot—and I mean ripping hot—that moisture inside the dough flashes instantly into steam. That steam has nowhere to go but up, forcing the layers apart to create that glorious, open pocket. My one rule? Cast iron only, and let it preheat for a solid 10 minutes. Don’t rush the heat; that initial shock is everything!
The Soft Pita Bread Texture Secret (Hint: It Might Be Yogurt)
We use a bit of good fat, of course, with the olive oil because every fluffy flatbread needs it. But the real kicker for texture is the optional Greek yogurt. It adds a little acidity and a lot of tenderness. If you use it, you are leaning toward that dreamy, soft texture you find in a real Greek pita bread recipe. Even if you skip it, the proper kneading ensures a wonderfully pliable dough.
Gathering Your Ingredients for Perfect Pita Bread
Okay, now for the fun part: making sure we have the right tools, which for this recipe means very basic stuff! This homemade pita bread recipe relies on pantry staples, so don’t stress about a special shopping trip. We need flour, yeast, sugar, salt, olive oil, and water. I want you to pay close attention to that water temperature—it needs to be warm, about 105 to 115°F, or the yeast won’t wake up!
I’ve also added Greek yogurt as an optional boost for flavor and softness, but don’t panic if you don’t have any.
Ingredient Notes and Substitutions
Let’s talk yeast first, because this is where many beginners get tripped up. You must ensure those 2 1/2 teaspoons of active dry yeast are blooming nicely in the warm water with that little bit of sugar. If it isn’t foamy after 10 minutes, toss it and grab new yeast—it is the engine driving this whole operation!
For the flour, stand by all-purpose flour for the best results. If you decide to leave out the Greek yogurt entirely, congratulations! You’ve just made a fantastic vegan pita bread that still puffs beautifully on the heat.
The Step-by-Step Pita Bread Pockets Tutorial
Now we get into the nitty-gritty where the magic truly happens. Making perfect pita bread isn’t just about ingredients; it’s about developing the right structure so that steam has something strong to push against. This whole process is incredibly satisfying; I actually link to my beginner’s guide to yeast bread basics right here if you’re feeling a little nervous about activating the yeast!
Mixing and Allowing the Pita Bread Dough to Rise
First, we activate the yeast. Get that water warm—not hot!—mix in the sugar, then the yeast, and watch it go foamy. I remember the first time I tried this, I used water that was way too hot, and nothing happened. Dead yeast means no rise, period. Always check that foam!
Once you add the flour and all the liquid stuff, get your hands in there until it’s shaggy. Then, turn it out and knead it for a solid five to seven minutes. You need that gluten to wake up and get elastic so it can trap the steam later on. After kneading, put it in an oiled bowl, cover it up, and honestly, walk away for a full hour. It needs dark, cozy warmth to double in size properly.
Dividing, Resting, and Rolling Your Pita Bread
When that dough looks like a giant pillow, punch it down gently—that’s so satisfying, by the way! Divide it into the 8 equal pieces. Don’t skip that quick 10-minute rest after you ball them up. If you try to roll them straight away, the dough fights you, bounces back, and you’ll get frustrated. That short rest lets the gluten relax.
When you roll them out, aim for a thin disc, about 6 to 7 inches across. Think thin, but not transparent! If it’s too thick, it might cook before the steam fully inflates it, and you lose that perfect pocket. Take your time here, roll evenly, and get ready for the skillet!
How to Make Pita Bread Puff Perfectly on the Skillet
This is where all the hard work pays off, and honestly, this is the defining step for any successful easy skillet pita bread. Remember what I said about the heat? It has to be blazing hot! Get your cast iron pan really hot over medium-high heat—we aren’t adding any oil to the pan, zero oil needed there.
Lay your thin rolled dough right onto that surface. You’ll see bubbles forming in about a minute or two. That’s good! That’s steam building pressure. Flip it over quickly. That second side is usually the magical one where the entire thing balloons up like a delicious, warm cloud. Wow!
If it only half-puffs or seems sluggish, grab a thin spatula and gently press the edges down, guiding the steam toward the center. It usually cooperates then.
This is what makes it such a fantastic quick pita bread choice; they cook in under four minutes total! As soon as they puff, get them off the heat and immediately stack them on a clean towel. You need to wrap them up tight right away. That trapped heat and steam keeps the bread soft and pliable, so it doesn’t become stiff like a cracker.
If you want more tips on quick yeast breads that don’t require an oven, check out my thoughts on quick Irish soda bread, though the pocket technique is very different!
If you’re following along with others, this stovetop method is widely regarded as the best way to achieve success, just like the folks over at Recipe CS mention for their recipe!
Tips for the Best Pita Bread Recipe Results
Look, even with the best recipe, sometimes things in baking don’t go perfectly the first time, and that’s honestly part of the fun! I’ve gathered up the best survival tips from my own kitchen diary to make sure you get that satisfying puff and amazing soft pita bread texture consistently. You’re aiming for the best pita bread recipe here, so let’s talk through the snags.
Troubleshooting Common Pita Bread Issues
If your dough feels way too stiff or dry during kneading, it’s begging for a splash—just a tiny bit! I mean a teaspoon of water at a time until it smooths out. If it’s sticky and clinging to your hands, don’t just dump in flour; add flour one tablespoon at a time while kneading until it feels supple, not tacky.

The biggest issue I still see relates to the skillet temperature. If your pita breads are burning black almost instantly before they even have a chance to bubble, your pan is too hot! Turn the heat down just a notch, let it regulate for 30 seconds, and try again. If they are cooking through but staying flat, the pan isn’t hot enough yet. It’s a fine balance, but once you find that sweet spot, you’ll be churning out perfect discs!
Serving Suggestions for Your Warm Homemade Bread
The absolute best part of making your own warm homemade bread is knowing you have the perfect vessel ready for dipping! These fluffy discs aren’t just for making gyros, though they are absolutely incredible stuffed with grilled chicken and veggies. I love tearing one open and using it to scoop up chunky hummus or a creamy baba ghanoush.
If you’re looking for a hearty dip to pair these with, I have a fantastic cheesy garlic bread dip that works shockingly well with this Mediterranean flavor profile!
For a truly authentic experience, check out some of the traditional techniques shared by the folks at Mia Kouppa. Honestly, freshly baked pita bread is delicious with just a drizzle of high-quality olive oil and a sprinkle of oregano.
Storage and Reheating Soft Pita Bread
The beauty of this pita bread is that it’s best eaten the moment it puffs, but let’s be real—sometimes you have leftovers! The secret to keeping them soft and pliable, almost like they just came off the skillet, is all about moisture retention. Do not store them in a plastic bag by itself; they’ll sweat, and then they get gummy!
As soon as a batch of pitas finishes cooking, stack them immediately on top of each other and wrap the entire stack tightly inside a clean, dry kitchen towel. That towel traps the residual steam, which keeps the crumb wonderfully supple. They usually stay fantastic like this at room temperature for a full day.
If you need them to last longer, you can freeze them! Store them in a heavy-duty freezer bag, making sure to press out most of the air before sealing. They last great for about a month.
When you’re ready to eat the frozen ones, let them thaw on the counter for about 30 minutes first. To bring back that irresistible tenderness, you’ve got to reheat them. Skip the microwave if you can! The best way, hands down, is to toss them back into your hot, dry skillet for just 20 to 30 seconds per side. They warm up fast and usually puff up slightly again as they heat, tasting just like you made them fresh!
Frequently Asked Questions About Making Pita Bread
I always get emails asking for clarification on a few points, especially when folks are trying to make their first batch of pita bread. It’s totally normal to have questions! I’ve rounded up the ones I hear most often so you can bake with confidence and achieve that perfect stuffable flatbread.
Can I make this pita bread recipe without yeast?
That’s a no, friend. This specific homemade pita bread recipe depends entirely on the yeast for two major things: giving the dough enough rise during that hour-long rest, and more critically, producing the gas needed to create those famous pockets in the hot pan. If you skip it, you just end up with a flat, chewy piece of bread, not a true pita!
How long can I store my homemade pita bread?
For the best texture—that wonderful soft pita bread you are looking for—they are truly best eaten the same day. However, if you wrap them tightly in a towel, they hold up surprisingly well at room temperature for a full 24 hours. After that, you should definitely move them to the freezer to maintain quality. Pop them in the freezer for up to a month!
Is this considered a Greek pita bread recipe?
Yes, absolutely! Especially if you utilize the optional Greek yogurt I mentioned! That yogurt doesn’t just make the bread softer; it adds a slight tanginess that really echoes the flavor profile of traditional Greek pita bread used for souvlaki. It definitely leans that way, though it’s fantastic for any Mediterranean dish you can think of. If you love this flavor, you should take a look at my recipe for an authentic Greek salad to serve alongside!
Share Your Fresh Baked Bread Creations
Alright, that’s it! You’ve done the kneading, you’ve conquered the heat, and you’ve got a tower of warm, homemade pita bread sitting on your counter. I’m genuinely so excited for you to tear into one!
When you make this, I absolutely want to know how it went, especially regarding that puff! Did you get those glorious, huge pockets? Did you stuff them full of savory fillings or just dunk them straight into your favorite dip? Seriously, take a picture and tag me! Sharing your success stories—or even just asking a quick clarifying question—is what makes this whole Little Kitchen Diary community so special.
If you loved how simple this process was, please consider rating the recipe at the top of the page; it helps me know what practical recipes you need next. And if you’re curious about my cooking philosophy and why I focus on these straightforward, real-life meals, check out my About Page. Happy baking, and I truly hope this fluffy flatbread becomes a staple in your house!
PrintEasy Skillet Pita Bread: Soft, Fluffy Pockets for Dipping and Gyros
You can make incredibly soft, fluffy homemade pita bread with perfect pockets right on your stovetop. This easy recipe uses simple pantry staples and is perfect for stuffing or dipping.
- Prep Time: 20 min
- Cook Time: 15 min
- Total Time: 1 hour 35 min
- Yield: 8 servings 1x
- Category: Bread
- Method: Stovetop
- Cuisine: Mediterranean
- Diet: Vegetarian
Ingredients
- 3 cups all-purpose flour
- 1 cup warm water (about 105-115°F)
- 2 1/2 teaspoons active dry yeast
- 1 teaspoon sugar
- 1 teaspoon salt
- 1 tablespoon olive oil
- Optional: 2 tablespoons Greek yogurt for extra softness
Instructions
- Combine the warm water, sugar, and yeast in a small bowl. Let this mixture sit for 5 to 10 minutes until it becomes foamy. This shows the yeast is active.
- In a large mixing bowl, combine the flour and salt. Add the yeast mixture, olive oil, and Greek yogurt (if using). Mix the ingredients until a shaggy dough forms.
- Turn the dough out onto a lightly floured surface. Knead the dough for 5 to 7 minutes until it becomes smooth and elastic.
- Lightly oil the mixing bowl. Place the dough inside, turning it once to coat. Cover the bowl with plastic wrap or a clean towel. Let the dough rise in a warm spot for 1 hour, or until it has doubled in size.
- Gently punch down the risen dough. Divide it into 8 equal pieces. Roll each piece into a smooth ball.
- Cover the dough balls and let them rest for 10 minutes. This resting period helps the gluten relax, making rolling easier.
- Preheat a large, heavy skillet (cast iron works well) over medium-high heat. Do not add oil to the pan.
- Take one dough ball and roll it into a thin circle, about 6 to 7 inches in diameter.
- Place one rolled circle onto the hot, dry skillet. Cook for 1 to 2 minutes until bubbles appear on the surface.
- Flip the pita. Cook the second side for 1 to 2 minutes. The pita should puff up dramatically, forming a pocket. If it does not puff immediately, gently press down on the edges with a spatula to encourage the steam to inflate the center.
- Remove the puffed pita from the pan and place it on a clean towel. Cover it immediately to keep it warm and soft while you cook the remaining pitas.
- Serve your fresh baked bread warm.
Notes
- For the best pocket formation, your skillet must be very hot before you place the dough in it.
- If you skip the optional Greek yogurt, this recipe becomes a vegan pita bread.
- To keep the cooked pitas soft, stack them and wrap them tightly in a clean kitchen towel immediately after cooking.
Nutrition
- Serving Size: 1 pita
- Calories: 180
- Sugar: 1
- Sodium: 250
- Fat: 3
- Saturated Fat: 0.5
- Unsaturated Fat: 2.5
- Trans Fat: 0
- Carbohydrates: 34
- Fiber: 2
- Protein: 6
- Cholesterol: 0