
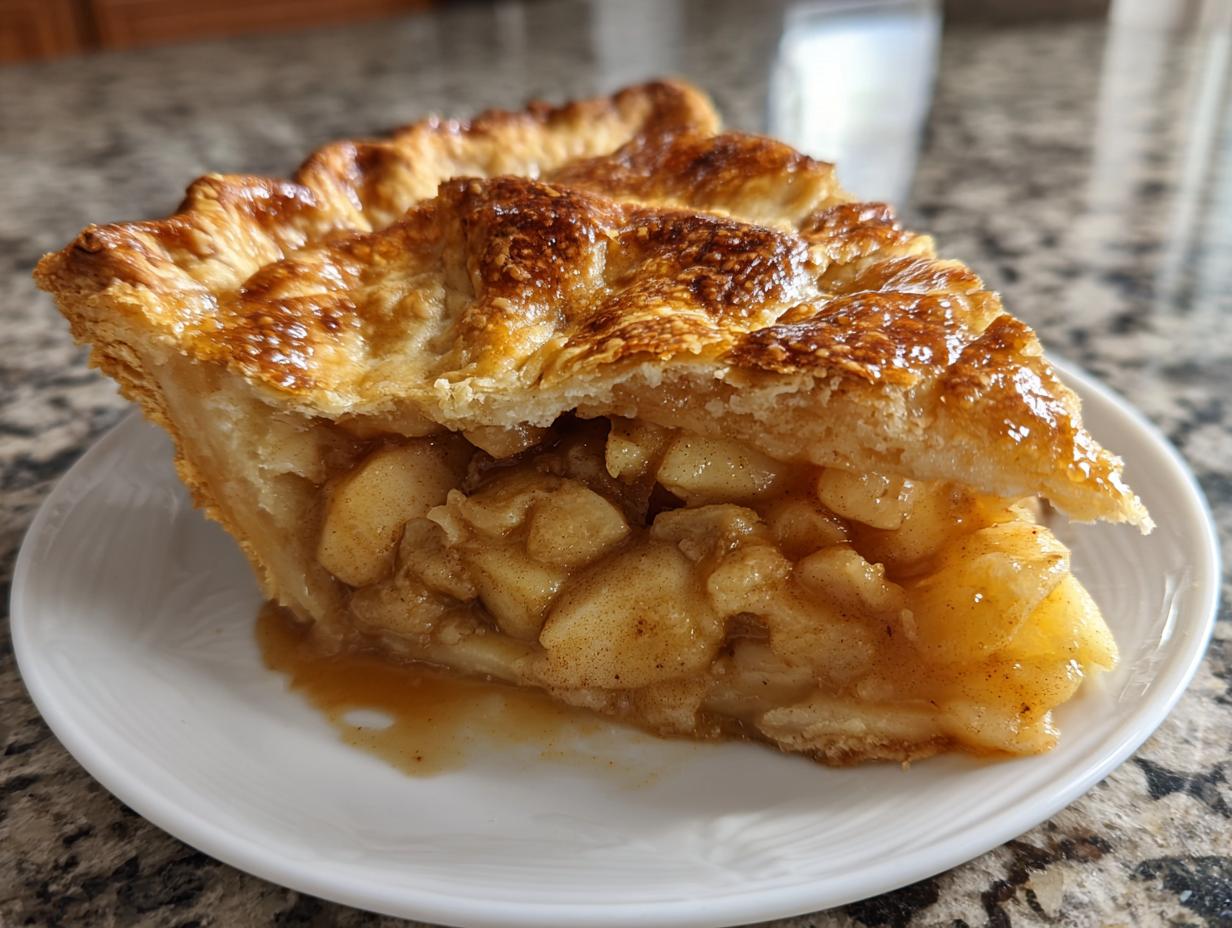
There is just something about that first warm slice, right? The steam rises, catching the light, and you know you’ve made something truly special. Life got hectic for me, and honestly, that comforting moment of biting into a perfect slice of homemade apple pie used to feel like a distant memory. That’s when I started this whole diary—my journey back to real, satisfying food that doesn’t demand a professional kitchen.
This recipe, my friends, is the result of that journey. Forget intimidating pastry classes; this is the best classic homemade apple pie with a flaky double crust. We’re aiming for tradition and that amazing, tender texture. I promise you, if you follow these simple steps, you’ll nail that perfect balance of spiced apples wrapped in buttery, melt-in-your-mouth crust.
- Why This Classic Apple Pie Recipe Belongs on Your Baking Bucket List
- Gathering Ingredients for Your Homemade Apple Pie
- Step-by-Step Instructions for the Double Crust Apple Pie
- Tips for Success When Making This Traditional Apple Pie Filling
- Variations: From Dutch Apple Pie to Deep Dish Apple Pie
- Serving Suggestions for Your Apple Pie Dessert
- Storage and Reheating Instructions for Leftover Apple Pie
- Frequently Asked Questions About Making Apple Pie
- Appreciation and Sharing Your Baking Journey
Why This Classic Apple Pie Recipe Belongs on Your Baking Bucket List
Look, if you’re going to make an apple pie, you have to make one that totally knocks it out of the park. This isn’t just Sunday dessert; this is the absolute best apple pie recipe you’ll use for holidays!
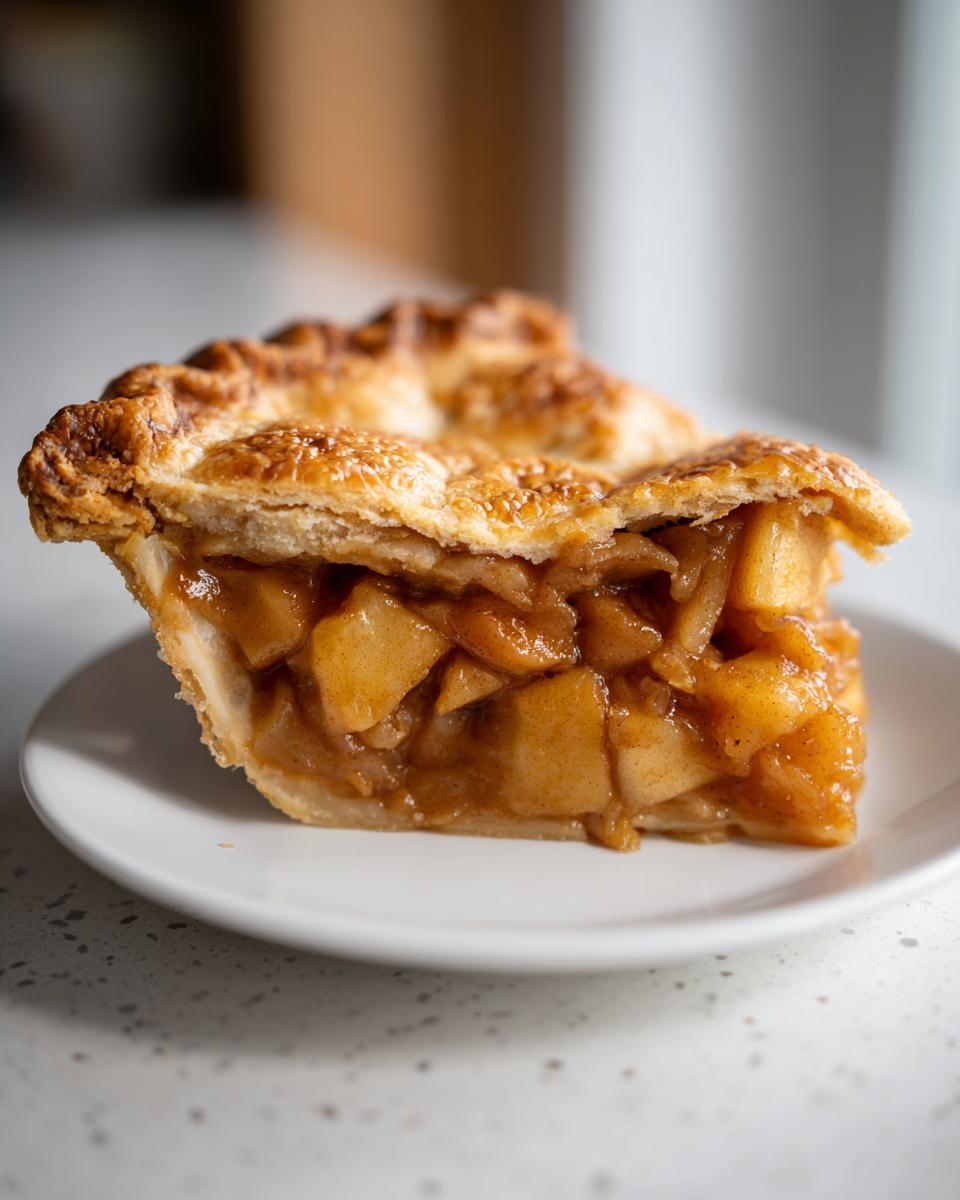
- The flawless, buttery texture proves this is the ultimate classic apple pie recipe.
- It delivers that deep, comforting satisfaction of a true homemade apple pie.
The Secret to a Truly Flaky Pie Crust Tutorial
We’re focusing on that flaky pie crust tutorial perfection here! Seriously, keeping everything—the butter, the water—ice cold is the secret handshake. When those cold chunks hit the hot oven, BAM! Instant steam pockets = flakiness. Don’t skip the chill time, I’m begging you.
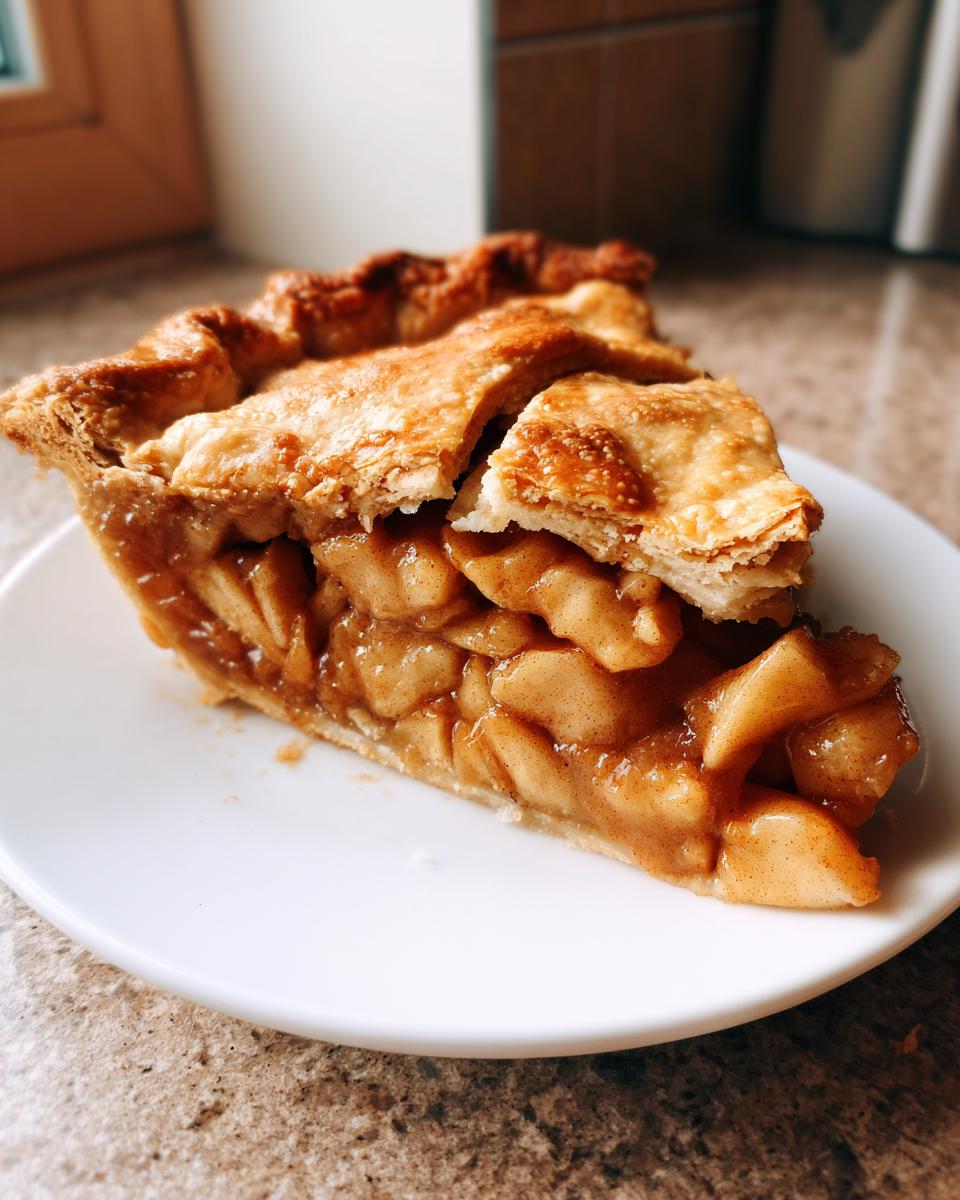
Balancing Flavors in Your Sweet Spiced Apple Filling
This is where the magic happens for your sweet spiced apple filling. We use two kinds of apples not just for texture, but for flavor depth. And yes, there is a tiny, tiny pinch of black pepper in there. It sounds weird, I know, but it just makes the cinnamon and spice pop! That’s what elevates this into the best apple pie recipe territory.
Gathering Ingredients for Your Homemade Apple Pie
Okay, let’s talk about what we actually need to get this amazing homemade apple pie baked! Since this is a classic recipe, we need all the standard players, but the quality matters heaps. I’ve broken down the list here so you can grab everything smoothly when you hit the store.
For the dough, you need your flour, salt, and most importantly, 2 sticks of unsalted butter cut into cubes—make sure that butter is freezing cold, trust me on this one. Then for the filling, we use that power couple: Granny Smith for the tartness, and Honeycrisp mixed in to keep things sweet and juicy.
Ingredient Notes and Substitutions for the Apple Pie
When mixing apples, I always go 6 Granny Smith to 2 Honeycrisp. The Granny Smiths hold their shape so well and give that necessary tang, which prevents the final product from being too sweet. If you happen to grab apples that seem a little runnier than usual, don’t panic! Just bump that thickening flour in the filling up to 3 tablespoons instead of 2. A little extra structure never hurt anyone!
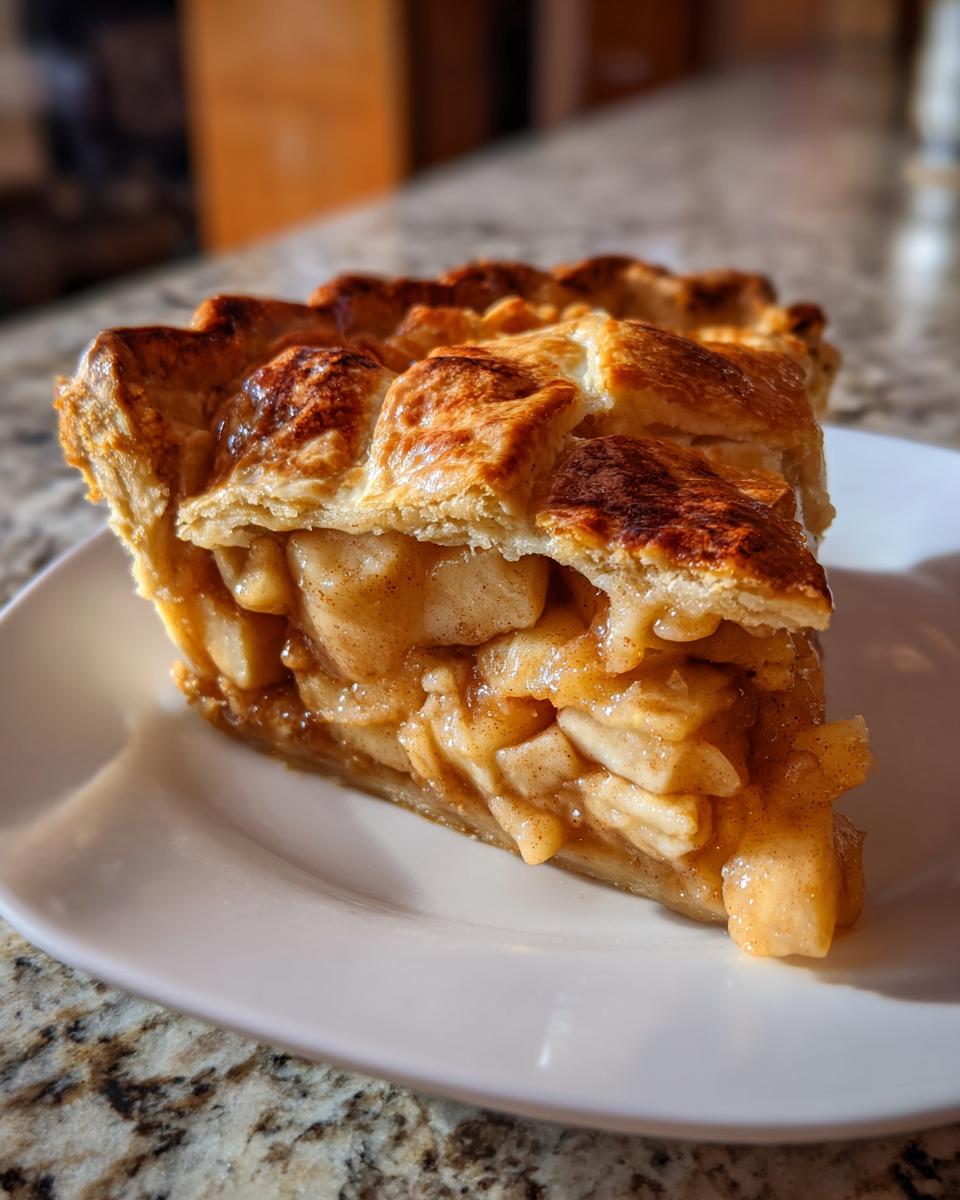
Step-by-Step Instructions for the Double Crust Apple Pie
Alright, let’s get baking because I know you’re hungry for that first bite of this spectacular apple pie. The instructions are straightforward, but the timing is key, especially when you are working toward that incredible flaky pie crust tutorial finish!
First things first: that dough needs a good nap. Make the dough, divide it, wrap it up, and stick it in the fridge for at least one full hour. While that’s chilling, mix up your filling—toss those apples with the spices and sugars until they shimmer. When the dough is ready, roll out the bottom and get it into your pie plate.
Once the filling is mounded nicely, top it with your second crust. Don’t forget to crimp those edges together tight—we want all that delicious moisture locked inside! And please, give it those slits on top so the steam can escape while it bakes. We handle the actual baking temperature changes in a minute.
Mastering the Flaky Pie Crust Tutorial: Chilling and Rolling
For this amazing flaky pie crust tutorial result, remember the mantra: COLD, COLD, COLD. When you’re mixing that water in for the dough in Step 1, add it slowly. If you work the dough too much while it’s coming together, you’ll activate too much gluten and end up with something tough, not flaky! When you roll out that bottom crust (that’s Step 3), handle it quickly and gently. If the dough starts getting sticky or warm, just pop the whole thing back into the fridge for ten minutes. Patience equals flakiness!
Achieving the Perfect Bake on Your Apple Pie
This two-stage bake is crucial for getting the bottom cooked and the top golden brown! After you brush on that egg wash and sprinkle the coarse sugar (Step 6—it gives such a nice crunch!), you start hot: 15 minutes at 425°F. Then, immediately drop the heat down to 375°F for another 40 to 50 minutes. If you see the edges getting too dark before the filling is bubbling, grab a little strip of foil and shield those crust edges. Now, the hardest part is Step 8: cooling! You absolutely MUST wait 3 hours. If you cut it early, that sweet spiced apple filling will run everywhere. Trust me, that wait makes the best apple pie!
Tips for Success When Making This Traditional Apple Pie Filling
Listen, making a truly traditional apple pie means avoiding the dreaded soggy bottom! That’s my personal baking nightmare, and I learned the hard way. One time, I rushed the cooling process, trying to sneak a piece after only an hour. Total disaster—the sweet spiced apple filling was basically soup!
So, for a perfect slice, here’s my main piece of advice: bake it on the lowest rack you can manage for the first half of the bake. This hits the bottom crust with direct heat so it sets up firm before the moisture from the apples has a chance to soak in irreversibly. Also, that little bit of extra flour we added to the filling? It’s doing the heavy lifting to hold everything together while it’s hot.
Use a metal pie pan, too, not glass, if you really want that bottom crust cooked through. It conducts heat way better and helps nail that golden brown finish every time. Stick to the 3 hours of cooling, and you won’t regret having the best apple pie.
Variations: From Dutch Apple Pie to Deep Dish Apple Pie
You know, once you master the classic apple pie, it’s fun to play around! This recipe is super flexible. If you’re craving that crunchy top texture instead of a full lid, you can easily convert this into a Dutch apple pie.
Just skip making the top crust entirely! Instead, whip up a simple streusel topping using flour, sugar, and butter (see the notes section for guidance) and generously cover those spiced apples before baking. It changes the whole vibe!
If you want a deeper, heartier pie, that’s just a structural change. For a deep dish apple pie, you’ll need a much deeper pan, which means you’ll likely want to double the filling quantity we used here. A little extra time in the oven ensures that thick middle cooks perfectly!
Serving Suggestions for Your Apple Pie Dessert
Okay, our beautiful homemade apple pie dessert is finally cooled enough to slice, but we can’t just leave it sitting there naked! For that true comfort food dessert feeling, you absolutely *have* to go classic. A scoop of high-quality vanilla bean ice cream that just starts melting over the warm apples? That’s heaven.
If you aren’t an ice cream person, a generous dollop of freshly made whipped cream works perfectly. Sometimes, especially if I’ve made my own homemade marshmallows, I’ll toast a few mini marshmallows and press them onto the slice right before serving instead. It looks fancy, but it’s so easy!
Storage and Reheating Instructions for Leftover Apple Pie
Oh man, leftovers! That’s the best kind of problem to have, isn’t it? If you actually manage to have any of this gorgeous double crust apple pie left over, you need to treat it right so the crust doesn’t get sad and soggy.
Since this recipe doesn’t have a dairy-heavy filling like a custard pie, you can actually leave it on the counter for a little while. If it’s still warm, definitely let it cool completely first. Once cool, I usually store leftover apple pie tightly covered with plastic wrap or foil at room temperature for up to two days. The spices keep it tasting fresh!
If you know you won’t get to it within 48 hours, the fridge is your friend. Wrap it well—otherwise, it might suck up some fridge smells, and nobody wants that! In the fridge, it should last a solid five, maybe six days. It’s perfect for a quick dessert later on.
Now for reheating, this is crucial! You want your crust to be crisp again, not limp. Don’t even think about the microwave for a whole slice—it turns the crust chewy instantly. I always use the oven. Pop a slice on a baking sheet (around 350°F) for about 10 minutes. That gentle heat warms the cinnamon apple dessert filling back up and sort of crisps the bottom crust right back up. It tastes almost as good as fresh!
Frequently Asked Questions About Making Apple Pie
I know sometimes baking seems scary, especially when you’re trying an apple pie for beginners recipe for the first time! Don’t worry, I get a ton of questions about the details. Here are the things I hear most often when people tackle this classic apple pie recipe.
Can I use pre-made pie crust for this apple pie?
Oh, absolutely! We all have those days where time just vanishes, right? You usually can use store-bought crusts, and they’ll get you a decent pie. But, and this is a big ‘but,’ you’re trading a bit of that legendary flakiness. That homemade flaky pie crust tutorial takes a little elbow grease, but honestly, it’s half the fun of making a perfect homemade apple pie. Don’t skip making it next time!
What is the best way to prevent a soggy bottom on my apple pie?
This is the challenge every baker faces when they tackle a sweet spiced apple filling! My best defense, besides making sure you bake on the lowest rack for the first part of the bake, is using an actual metal pie dish. Glass and ceramic look pretty, but they don’t conduct heat as fast as metal does on the bottom. That means the crust gets really set before all that apple moisture can seep in and make things gloopy. It’s a game-changer for sure!
Appreciation and Sharing Your Baking Journey
Now that you have this incredible apple pie cooling, I really want to know what you think! Did your crust turn out flaky? Did you sneak a bite before the three hours were up?
Please leave me a rating and tell me all about your experience in the comments below. It means the world to me when I hear from you amazing cooks! You can read a bit more about my own journey right here too.
PrintThe Best Classic Homemade Apple Pie with Flaky Double Crust
Follow this straightforward recipe to make a classic apple pie featuring a tender, flaky double crust and a perfectly spiced filling. This recipe delivers the comforting taste of tradition.
- Prep Time: 45 min
- Cook Time: 65 min
- Total Time: 110 min
- Yield: 8 servings 1x
- Category: Dessert
- Method: Baking
- Cuisine: American
- Diet: Vegetarian
Ingredients
- 2 1/2 cups all-purpose flour
- 1 teaspoon salt
- 1 cup (2 sticks) cold unsalted butter, cut into cubes
- 1/2 cup ice water, plus more if needed
- 6 large Granny Smith apples, peeled, cored, and sliced 1/4-inch thick
- 2 large Honeycrisp apples, peeled, cored, and sliced 1/4-inch thick
- 3/4 cup granulated sugar
- 1/4 cup packed light brown sugar
- 1 tablespoon lemon juice
- 1 teaspoon ground cinnamon
- 1/4 teaspoon ground nutmeg
- 1/8 teaspoon ground black pepper (optional, to enhance flavor)
- 2 tablespoons all-purpose flour (for thickening)
- 1 large egg, beaten with 1 teaspoon water (for egg wash)
- 1 tablespoon coarse sugar for sprinkling
Instructions
- Prepare the Pie Dough: In a large bowl, whisk together the 2 1/2 cups flour and 1 teaspoon salt. Cut in the cold butter using a pastry blender or your fingers until the mixture resembles coarse crumbs with some pea-sized pieces of butter remaining. Gradually add the ice water, 1 tablespoon at a time, mixing until the dough just comes together. Do not overmix. Divide the dough in half, flatten each half into a disk, wrap in plastic, and chill for at least 1 hour.
- Prepare the Apple Filling: In a large bowl, combine the sliced Granny Smith and Honeycrisp apples, granulated sugar, brown sugar, lemon juice, cinnamon, nutmeg, black pepper, and 2 tablespoons of flour. Toss gently until the apples are evenly coated. Set aside while you roll out the bottom crust.
- Assemble the Bottom Crust: On a lightly floured surface, roll out one disk of dough into a 12-inch circle. Carefully transfer the dough to a 9-inch pie plate. Trim the edges, leaving a 1-inch overhang. Place the plate in the refrigerator.
- Fill the Pie: Pour the apple filling into the chilled bottom crust, mounding the apples slightly in the center.
- Assemble the Top Crust: Roll out the second disk of dough into an 11-inch circle. Place the top crust over the filling. Trim the edges, leaving a 1-inch overhang. Crimp the top and bottom edges together to seal. Cut several slits in the top crust to allow steam to escape.
- Apply Egg Wash and Sugar: Brush the top crust lightly with the egg wash mixture. Sprinkle evenly with coarse sugar.
- Bake the Pie: Preheat your oven to 425 degrees Fahrenheit (220 degrees Celsius). Place the pie on a baking sheet to catch any drips. Bake for 15 minutes at 425°F. Then, reduce the oven temperature to 375 degrees Fahrenheit (190 degrees Celsius) and continue baking for an additional 40 to 50 minutes, or until the crust is golden brown and the filling is bubbly. If the edges brown too quickly, cover them loosely with foil.
- Cool: Let the apple pie cool on a wire rack for at least 3 hours before slicing and serving. This allows the filling to set properly.
Notes
- For an extra flaky crust, keep all your dough ingredients very cold, especially the butter and water.
- If you prefer a Dutch apple pie, skip the top crust and cover the filling with a simple streusel crumb topping instead.
- Use a mix of tart and sweet apples, like Granny Smith and Honeycrisp, for the best flavor balance in your sweet spiced apple filling.
Nutrition
- Serving Size: 1 slice
- Calories: 450
- Sugar: 35g
- Sodium: 250mg
- Fat: 25g
- Saturated Fat: 15g
- Unsaturated Fat: 10g
- Trans Fat: 0g
- Carbohydrates: 58g
- Fiber: 3g
- Protein: 5g
- Cholesterol: 60mg