
When life gets hectic, the last thing you want to do is wrestle with complicated baking instructions. Believe me, I get it! That’s why I started the Little Kitchen Diary—to find those recipes that deliver big flavor without eating up your entire evening. If you’re craving something warm, bubbly, and incredibly fruity right now, look no further than the glorious **cherry dump cake**. This dessert embodies my whole philosophy: practical, delicious, and totally satisfying. We’re talking about the ultimate three-ingredient dessert here. You literally just dump the ingredients together, and voilà! Magic appears. It’s the kind of foolproof baking that proves you don’t need to be a professional chef to bring joy to the table. Give this one a shot; you’ll be amazed at how simple the best things are. If you loved how easy this is, you should definitely check out my easy no-bake mini cheesecake recipe too!
- Why This Easy Cherry Dump Cake is Foolproof Baking Magic
- Gathering Ingredients for Your 3 Ingredient Dessert Cherry Dump Cake
- Step-by-Step Instructions for the Best Dump Cake Recipe
- Tips for Success When Making a Gooey Cherry Cake
- Variations: Making Pineapple Cherry Dump Cake or Chocolate Cherry Dump Cake
- Serving Suggestions: The Perfect Pairing for Your Warm Fruit Dessert
- Storage and Reheating Instructions for Leftover Cherry Dump Cake
- Frequently Asked Questions About This Cherry Dump Cake Recipe
- Share Your Simple Dump Cake Success
- Estimated Nutritional Data (For Planning Purposes)
Why This Easy Cherry Dump Cake is Foolproof Baking Magic
I absolutely adore this recipe because it completely removes stress from the dessert equation. It’s unbelievably forgiving, which is why I call it the definition of a Quick Cherry Dessert. Cleanup? Barely exists! It’s one of those amazing no mixer desserts, which saves so much time scrubbing bowls.
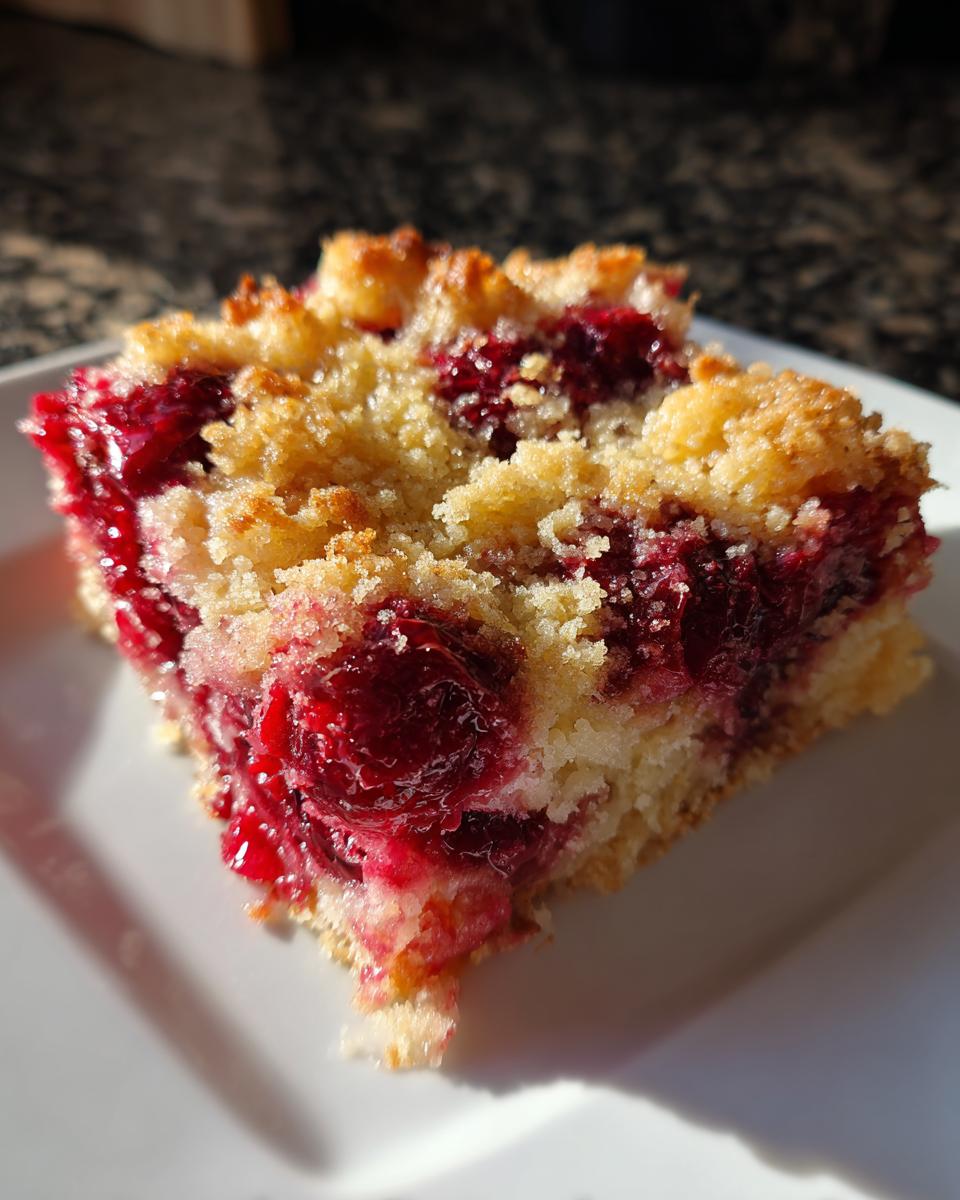
- It’s always gloriously gooey and bubbly.
- Prep time is seriously under five minutes.
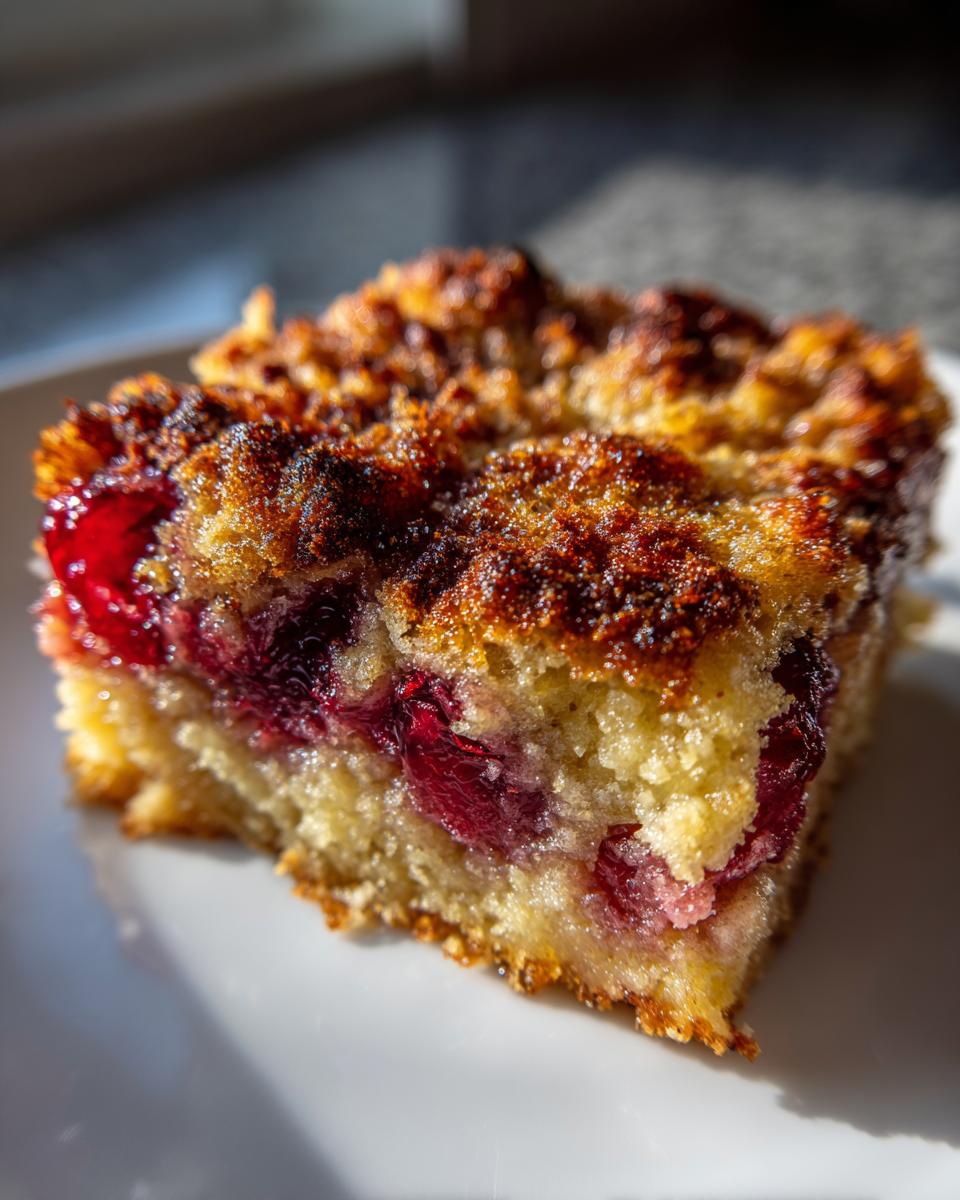
- It handles accidental overbaking like a champ—it just gets crispier on top!
The Appeal of a Simple Dump Cake Recipe
The whole concept of a dump cake is brilliant, isn’t it? There’s no sifting, no creaming, no weird folding techniques required. You just grab the ingredients, use your measuring cups (or maybe just eyeball it, ha!), and layer everything right into the baking dish. That cut the traditional dessert prep time by about 80 percent for me. It’s the ultimate helper when you need a fantastic potluck dessert idea at the last minute.
Gathering Ingredients for Your 3 Ingredient Dessert Cherry Dump Cake
Okay, let’s talk about what you need, because this is where the magic of a 3 ingredient dessert really shines. Keeping the list short means you can pull this recipe together faster than ordering a pizza! For the classic version, you only need three things, but pay attention because Ethan (that’s me!) has a couple of strong opinions on getting the best result.
Here is the exact shopping list I use for my basic cherry dump cake:
- One standard can of good quality cherry pie filling (about 21 ounces).
- One 15.25-ounce box of yellow cake mix—and this is crucial: do not mix it! Just use it dry.
- Half a cup (that’s one full stick) of unsalted butter, melted.
Ingredient Notes and Substitutions for Your Cherry Dump Cake
Now, about that pie filling. My tip here is always to pick a filling that looks nice and thick on the shelf. If it looks watery, you might end up with a soggy bottom, and we want bubbly, not soupy! For the butter, I always specify unsalted so I can control the saltiness, but if you only have salted, go ahead and use it—it adds a nice salty counterpoint to the sweet cherries.
If you can’t find yellow cake mix, white or butter flavor works perfectly fine. They all bake beautifully on top of the filling. If you happen to have a different flavor of pie filling, like apple or blueberry, this works just as well; it just won’t be a classic cherry dump cake, but who’s complaining?
Step-by-Step Instructions for the Best Dump Cake Recipe
This is the part where we put it all together, and folks, this recipe truly lives up to its name. Seriously, it requires zero thought, which is perfect after a long day. Remember how I said we aren’t using any bowls? Good! Grab your 9×13 inch baking dish now. While you’re doing that, go ahead and get your oven heated up to 350 degrees Fahrenheit. Getting the temperature right helps everything melt together perfectly.
Once the oven is warm, we start layering. It’s critical that you follow this order exactly. I learned the hard way what happens when you mix things up! If you want that glorious, crisp topping, layering is everything. I’ve got a whole section on my creamy stovetop cheesy rice recipe where layering matters too, but here it’s even simpler.
Assembling the Layers of Your Cherry Dump Cake
First up, pour the entire can of cherry pie filling right into the bottom of your greased dish. Spread it out so it covers the bottom evenly. Next, sprinkle that dry yellow cake mix right on top. And here’s the rule hammered home: DO NOT STIR! You want distinct layers so the butter has time to work its magic through the dry mix.
The final layer is the butter. Drizzle that melted butter slowly and deliberately over the entire surface of the cake mix. Try to get butter everywhere so you don’t end up with dry, powdery pockets in your finished gooey cherry cake!
Baking Time and Checking Doneness for Your Cherry Dump Cake
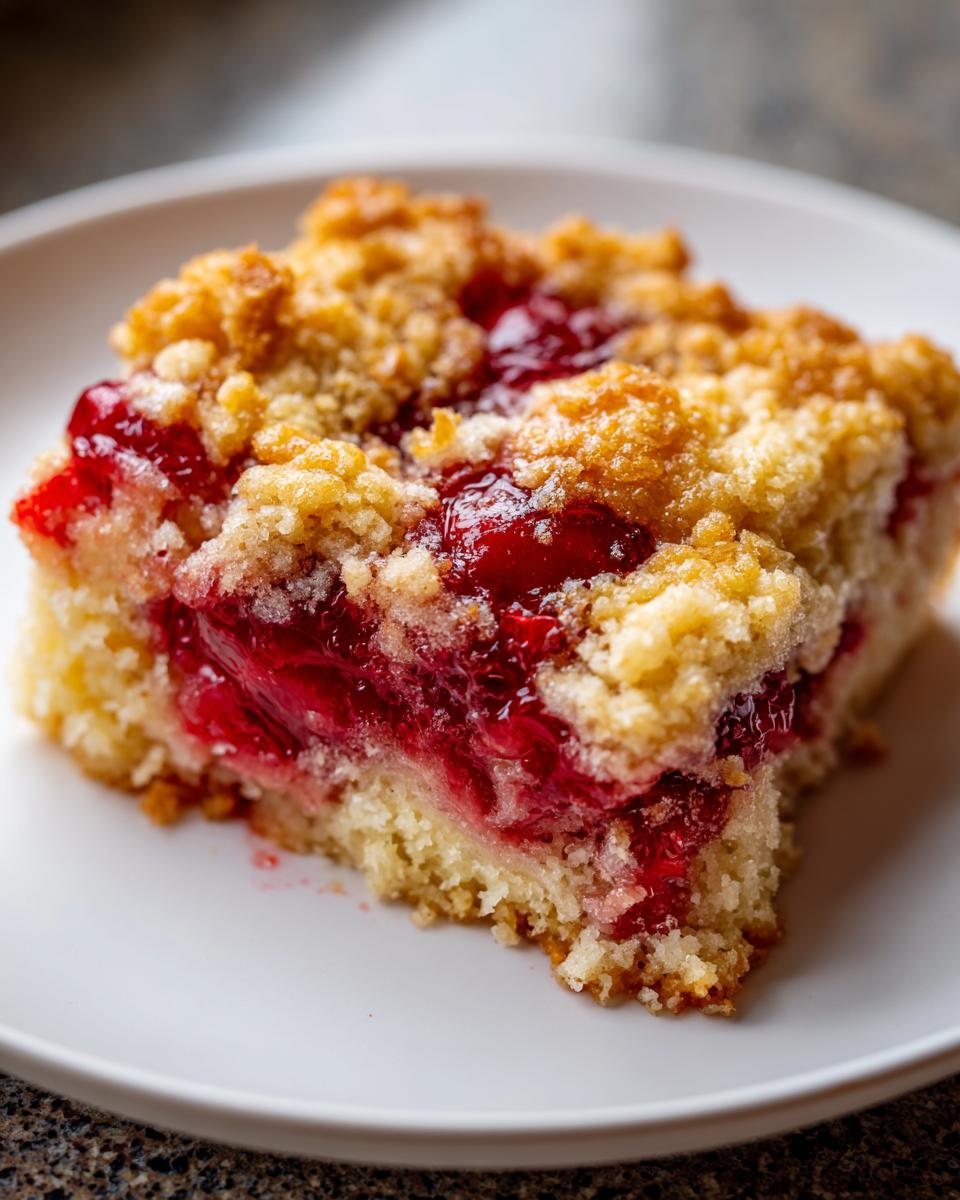
Now, slide that dish into the 350°F oven. I tell everyone to set a timer for 45 minutes, but be ready to leave it in for a few extra minutes, up to 55 total. You are looking for two main things: the topping should be a nice, deep golden brown color. Second, look at the edges—you want to see the cherry filling actively bubbling up around them.
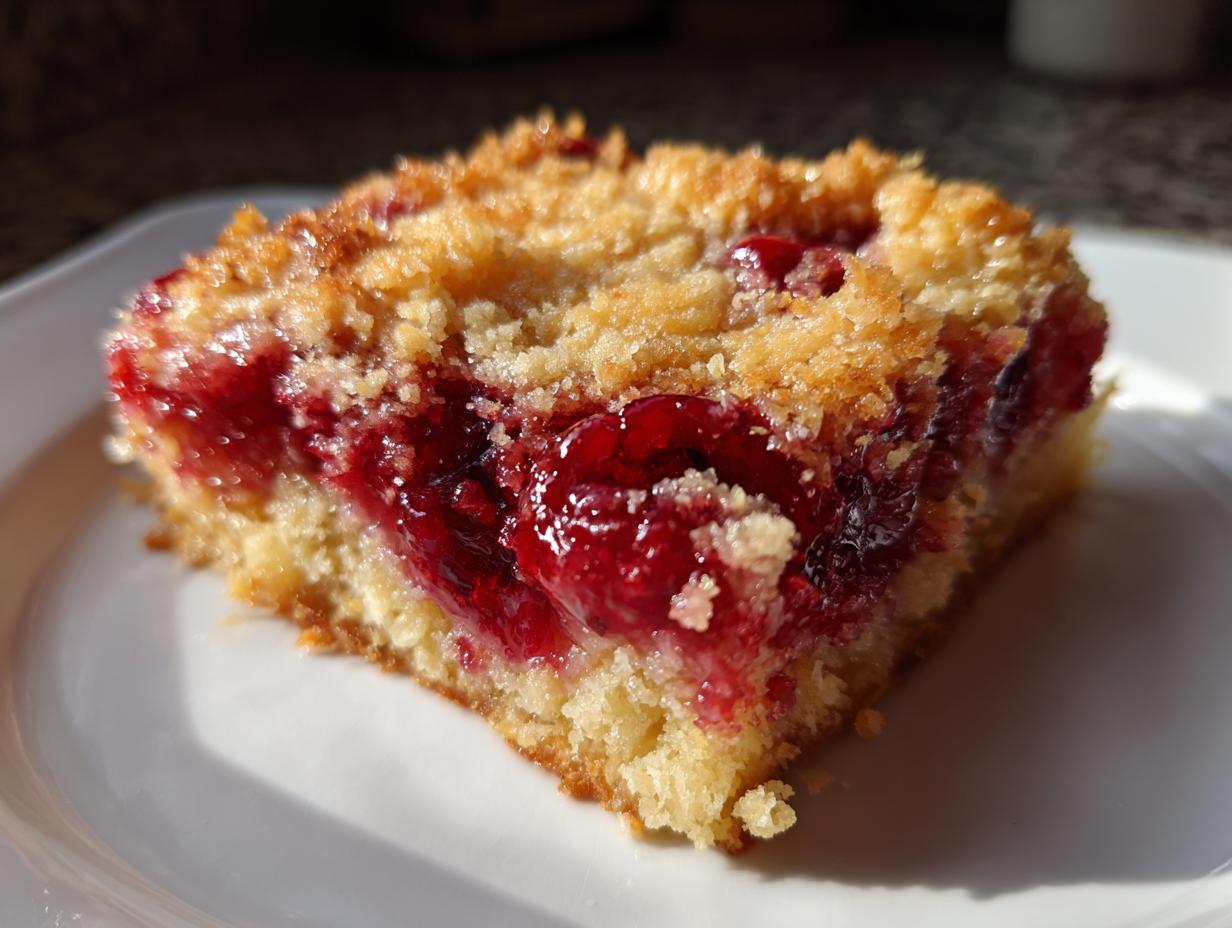
When it looks golden and bubbly, pull that glorious **cherry dump cake** out! Trust me, the smell alone will stop you in your tracks. It’s a winner every single time you follow these easy steps.

Tips for Success When Making a Gooey Cherry Cake
Even though this is the easiest dessert ever invented, a few little tricks can take it from good to absolutely legendary. Since we aren’t mixing anything, the way you pour and drizzle really matters for the final texture of your gooey cherry cake. My biggest secret, especially if you like that nice crunch, is how you apply the butter.
When drizzling the melted butter on the dry cake mix, try to move your hand slowly in a back-and-forth motion across the entire surface. Don’t dump it all in one spot! I like to pour about half, gently shift the pan slightly to help it spread, and then pour the rest. This ensures that every single dry crumb gets some of that rich butter mixed in, guaranteeing that crisp, golden topping.
Also, please resist the urge to eat it straight from the oven! I know it smells incredible, but letting your **cherry dump cake** rest for about 10 to 15 minutes is essential. This short cool-down lets that bubbling filling set up just enough so it doesn’t run all over your plate when you serve it. A little patience goes a long, long way here.
Variations: Making Pineapple Cherry Dump Cake or Chocolate Cherry Dump Cake
While the classic three-ingredient cherry dump cake is my go-to favorite—especially when I need a last minute treat—sometimes you just need to mix things up a bit! The beauty of this recipe is how adaptable it is, letting you change the fruit or chocolate profile without needing a whole new method. It’s still foolproof baking, just with a little extra flavor excitement!
If you’re looking to shake up dessert night, here are the two easiest tweaks I rely on. You’ll be surprised how much of a difference a simple swap makes without adding any extra fuss.
Making a Pineapple Cherry Dump Cake
This variation is fantastic because the tartness of the pineapple cuts through the sweetness perfectly. It gets that bright, tropical flavor that’s wonderful in the summer months! To do this, you’ll prepare everything exactly the same way, but you need to account for the extra liquid from the canned pineapple.
Right after you put down that first layer of cherry filling, grab a can of crushed pineapple. The key here is to thoroughly drain all the juice—we don’t want soup on the bottom! Then, gently spread the drained pineapple right on top of the cherry layer. After that, it’s back to normal: sprinkle the dry cake mix over the fruit mixture, then drizzle with butter. This adds a lovely tanginess!
Creating a Chocolate Cherry Dump Cake
Oh, chocolate and cherries? Yes, please! This combination is rich, decadent, and tastes like a fancy bakery item, yet it’s still just a ‘dump’ recipe. For this version, we swap out the yellow cake mix for something darker. Use a box of devil’s food or chocolate cake mix instead. The result is so satisfying; check out the flavor profile when you compare it to my Chocolate Cherry Dump Cake post for inspiration!
You layer the cherry filling first, sprinkle the chocolate cake mix evenly over the top, and then drizzle that melted butter evenly over the top. Don’t worry that the butter seems to disappear into the dark powder—it’s working its magic underneath! When it bakes, you get this amazing molten, almost brownie-like topping over warm, gooey cherries. It’s definitely a showstopper, and nobody will ever guess it only took five minutes to assemble.
Serving Suggestions: The Perfect Pairing for Your Warm Fruit Dessert
Once your glorious **cherry dump cake** is out of the oven and has cooled down just a touch—remember that 10-minute rest?—it’s time for the best part: deciding what to smother it with! This dessert is fantastic all on its own, being warm, fruity, and buttery, but honestly, it sings when you pair it with something cold and creamy.
If you ask me, Ethan, the absolute, non-negotiable perfect pairing is vanilla ice cream. Nothing beats that contrast—the warm, gooey cherry filling meeting that cold, melting vanilla. It creates this incredible sweet and slightly tart mix that’s just heavenly. I’ve even included instructions on how I make my easy frozen desserts, like my easy ice cream pie recipe, if you wanted a side project!
But hey, I get it—sometimes you just need something quick, or maybe you’re out of ice cream. Don’t worry, this dessert is far from ruined. You still have fantastic options that work beautifully:
- Whipped Cream: A big dollop of freshly whipped cream (or a can of the store-bought stuff if you’re keeping this quick!) adds lightness to balance the richness of the butter topping.
- A Simple Dusting: If you used a variation like the Chocolate Cherry Dump Cake, sometimes a very light dusting of powdered sugar is all you need to make it look pretty.
- Cinnamon Kick: For the traditional **cherry dump cake**, sometimes I just sprinkle a tiny bit of ground cinnamon over the top right before serving, especially if I’m feeling extra cozy. It just enhances that baked fruit aroma!
No matter how you top it, remember that this is a warm fruit dessert, so serve it soon after it finishes baking for the best experience. Enjoy every scoop!
Storage and Reheating Instructions for Leftover Cherry Dump Cake
Now, the big question: what if you actually have leftovers? That’s rare around my house, but I keep forgetting how much this keeps so I can take it for lunch the next day! You can generally leave your **cherry dump cake** right on the counter, covered tightly with foil or plastic wrap, for a day if your kitchen isn’t too warm. It just keeps that topping a little crisper.
If you need it to last longer, definitely tuck it into the fridge—again, covered well. To reheat, I skip the microwave most of the time because it makes the topping soggy. Instead, I just pop a square onto a baking sheet and warm it up in a low oven (about 300°F) for about 10 minutes. That brings back that wonderful bubbling texture. If you’re rushed, a quick 30 seconds in the microwave is fine, just be sure to have that ice cream ready to soften it back up!
Frequently Asked Questions About This Cherry Dump Cake Recipe
I get asked so many questions every time I share this recipe, and honestly, it’s because people are amazed at how simple it is yet how good it tastes! I’ve pulled together the ones I hear most often. Remember, these answers come straight from my kitchen diary adventures, so they are tested and true!
Can I use fresh cherries instead of pie filling in this cherry dump cake?
That’s a big question when you’re trying to use up a fresh summer haul! My answer is: Technically, yes, you can, but if you’re sticking to the spirit of the 3 ingredient dessert, you need to stick to the pre-made pie filling. Fresh cherries introduce a lot more liquid and they cook down differently. If you start adding fresh fruit, you’ll need to toss them with sugar and maybe some cornstarch to thicken everything up, which turns it into a completely different recipe. Honestly, for this specific, quick-and-easy method, the canned filling is the absolute winner.
What is the best way to make this a Crockpot Dump Cake?
Oh, I love making this in the slow cooker when I know I’ll be busy all afternoon! Making a Slow Cooker Cherry Dump Cake is super easy, but you need to grease that crockpot liner really well first—I use a little cooking spray, even though the butter helps prevent sticking later. You layer it exactly the same way: filling, dry cake mix, then butter drizzled over the top.
Then, you set it and forget it! Cook on LOW for about 3 to 4 hours. You want the topping to be set and the filling underneath to be hot and bubbly. It tends to be a bit softer, more like a true cobbler topping when done this way, which is just as delicious!
Can I use a different flavor of cake mix?
Absolutely, this is where you can really customize things! Yellow cake mix is the gold standard because its slight buttery vanilla flavor pairs perfectly with cherry. However, if you use white cake mix, the results are almost identical—just sometimes a touch lighter in color.
If you want to go rich and decadent, switching to a chocolate cake mix is phenomenal. That turns it into a homemade Chocolate Cherry Dump Cake experience! Seriously, try that one for a weekend treat; the chocolate mixes with the cherry filling beautifully as it bakes. Just skip the butter drizzle if you want a richer, fudgier quality in the topping, but I usually keep the butter in for the crusty edges.
Share Your Simple Dump Cake Success
Well, we made it! When you finish this, you’ve successfully executed what might be the easiest, most satisfying dessert on the entire internet. That’s something we should all celebrate here in the Little Kitchen Diary community. Now that you’ve got your own warm, gooey bowl of cherry goodness ready to go, I’d love to hear about it!
Don’t be shy! Head down to the comments section below and let me know how your **cherry dump cake** turned out. Did you stick to the three ingredients, or did you try the Pineapple Cherry or the Chocolate Cherry swap? Seeing your results—and maybe what you paired it with (I’m hoping for ice cream!)—is truly the highlight of my days. This recipe exists because we share our kitchen wins, big or small.
If this recipe saved your dessert plans last minute, please consider sharing it with a friend who might also need a five-minute fix! You can find the sharing buttons right near the recipe card. Even better, if you leave a rating, it tells me to keep these simple, straightforward recipes coming your way. You can also drop me a line anytime via my contact page if you have any other thoughts or need troubleshooting help. Thanks so much for baking with me today!
Estimated Nutritional Data (For Planning Purposes)
Okay, I always feel a little weird posting these numbers because, let’s be honest, when you’re making a three-ingredient dessert dumped straight into a pan, you aren’t exactly thinking about macros! But out of courtesy, and just in case you are planning for a larger group, here is the estimated nutritional breakdown. This data is based on the standard measurements listed in the recipe.
Keep in mind, since cake mix brands and specific pie filling thicknesses vary just a little bit, these are just guidelines for your own planning. They are calculated assuming you make 8 generous servings of this glorious **cherry dump cake**.
- Serving Size: 1 slice
- Calories: 380
- Sugar: 45g
- Sodium: 320mg
- Fat: 19g
- Saturated Fat: 11g
- Carbohydrates: 50g
- Protein: 4g
As you can see, this is definitely a treat, not an everyday snack! But when you realize it took you less than ten minutes of active work to create something that tastes that good, those numbers just seem totally worth it. Enjoy this wonderful, easy dessert!
PrintThe Easiest 3-Ingredient Cherry Dump Cake Recipe
This is the definition of foolproof baking. You just dump cherry pie filling, dry cake mix, and butter, then bake for a warm, bubbly, gooey cherry dessert that always satisfies. It is perfect for quick potlucks or weeknight treats.
- Prep Time: 5 min
- Cook Time: 50 min
- Total Time: 55 min
- Yield: 8 servings 1x
- Category: Dessert
- Method: Baking
- Cuisine: American
- Diet: Vegetarian
Ingredients
- 1 (21 ounce) can cherry pie filling
- 1 (15.25 ounce) box yellow cake mix (do not mix)
- 1/2 cup (1 stick) unsalted butter, melted
Instructions
- Preheat your oven to 350 degrees Fahrenheit. Lightly grease a 9×13 inch baking dish.
- Spread the entire can of cherry pie filling evenly across the bottom of the prepared baking dish.
- Sprinkle the dry yellow cake mix evenly over the cherry filling. Do not stir the layers together.
- Drizzle the melted butter evenly over the dry cake mix layer.
- Bake for 45 to 55 minutes, or until the topping is golden brown and the filling is bubbly around the edges.
- Let the cake cool slightly before serving warm.
Notes
- Serve this warm cherry dump cake with a scoop of vanilla ice cream for the best experience.
- You can substitute the yellow cake mix with white or butter flavor for slight variations.
- For a richer flavor, use a full stick (1/2 cup) of salted butter instead of unsalted.
Nutrition
- Serving Size: 1 slice
- Calories: 380
- Sugar: 45
- Sodium: 320
- Fat: 19
- Saturated Fat: 11
- Unsaturated Fat: 8
- Trans Fat: 0.5
- Carbohydrates: 50
- Fiber: 2
- Protein: 4
- Cholesterol: 45