
If you ask me what the most versatile ingredient in my kitchen is, it’s probably not flour, it’s rice. It can be creamy, fluffy, savory, or sweet, but when you take that humble grain and mold it into a satisfying sphere, you unlock pure comfort food magic. That’s why I’m obsessed with rice balls. Seriously, they are incredible!
But here’s the thing: not all rice balls were created equal. I find that people get really passionate about their version, and honestly, I get it! Instead of just sticking to one idea, I want to show you how to master two superstars in the world of savory spheres: the crispy, cheesy Italian Arancini, and the simple, portable Japanese Onigiri. They are completely different—one is deep-fried decadence, the other is grab-and-go goodness—but mastering both means you’ve got an incredible trick up your sleeve for apps, lunch, or dinner.
When I was getting Little Kitchen Diary off the ground, I needed recipes that delivered huge flavor without taking an entire weekend. These two styles of rice balls do exactly that. They prove that simple ingredients, handled with a little love and the right technique, are what make a meal truly memorable. Trust me, once you try these, you’ll be making them all the time!
- Why This Guide to Rice Balls Works for Your Busy Life
- Gathering Your Ingredients for Perfect Rice Balls
- How to Prepare Authentic Italian Rice Balls (Arancini)
- Simple Steps for Japanese Rice Balls and Yaki Onigiri
- Ingredient Notes and Substitutions for Your Rice Balls
- Tips for Success When Making Any Type of Rice Balls
- Serving Suggestions for These Savory Rice Snacks
- Storage and Make Ahead Rice Snacks Instructions
- Frequently Asked Questions About Rice Balls
- Share Your Homemade Rice Balls Creations
Why This Guide to Rice Balls Works for Your Busy Life
I designed this guide specifically because I know what it’s like trying to balance everything. You want amazing food, but you don’t have hours to stand around slaving over a hot stove every night. That’s the core of Little Kitchen Diary—making great meals *work* for real life. These rice ball recipes are total game-changers because they fit right into a hectic schedule.
Here’s what you get right away when you choose these methods:
- Quick Rice Snacks: Both Arancini (if you use leftover risotto!) and Onigiri come together fast once the rice is cooked. They’re perfect for those hungry moments where you need a satisfying bite fast.
- Versatility Wins: Whether you need easy appetizer recipes for guests or something for your next packed lunch, you have two completely different, delicious options ready to go.
- Make-Ahead Magic: You can prep the dough/rice mixtures in advance, making assembly the next day a breeze. Check out my tips for packing them up when you look at easy lunch ideas on the blog!
We cut out the complexity so you can enjoy the flavor!
Gathering Your Ingredients for Perfect Rice Balls
Okay, before we start rolling anything, we absolutely need to talk about ingredients. This is where the magic starts, and frankly, it’s where the two styles of rice balls diverge dramatically. You can’t just grab any leftover rice for these—we need specific textures, especially if you want that amazing crunch on the Italian side or that perfectly moldable stickiness for the Japanese style. Pay close attention to my notes on the rice type here; it truly makes or breaks the final product.
If you’re looking for more tips on cooking the perfect base grain, I have a great rundown on how to get perfect short-grain rice at home!
Rice Base and Components for Italian Rice Balls
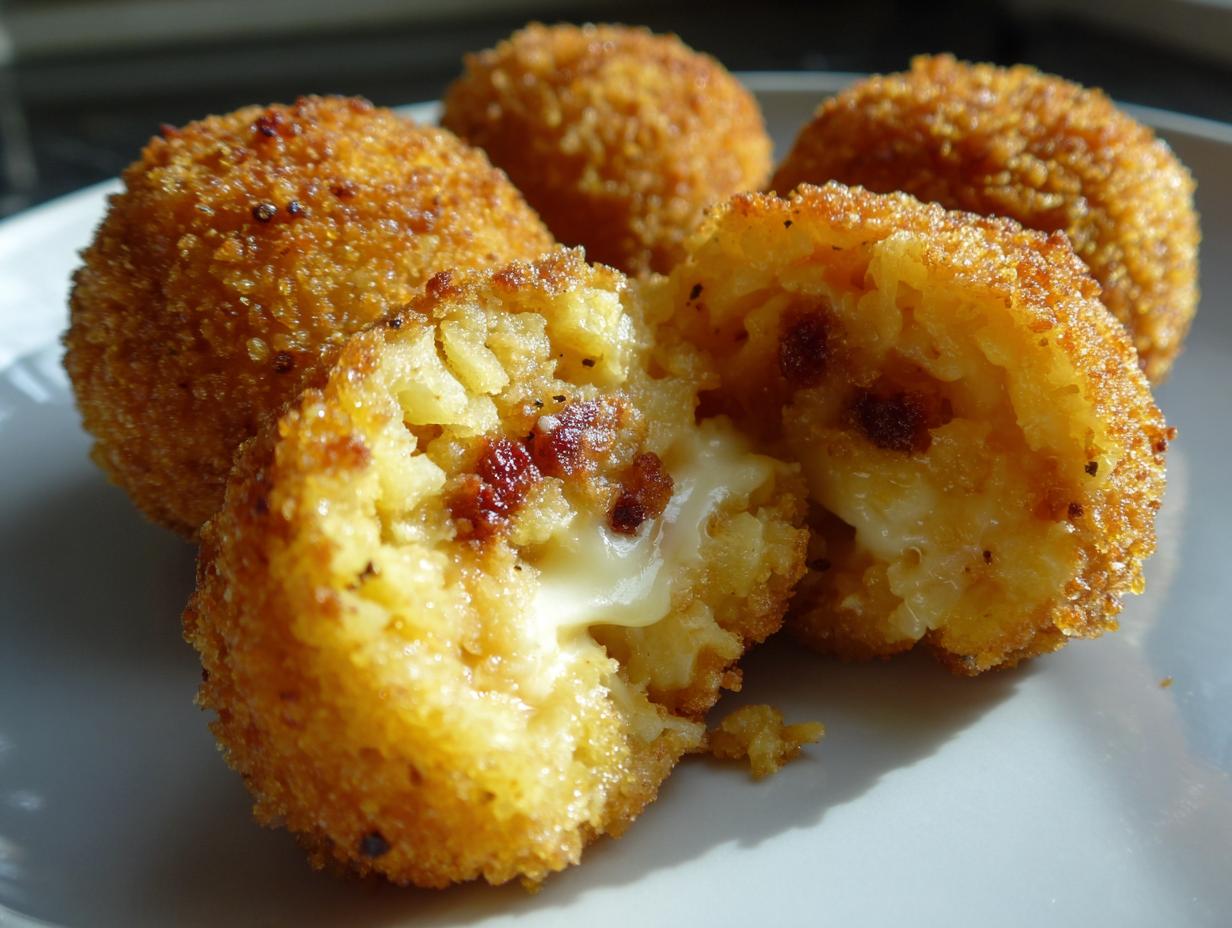
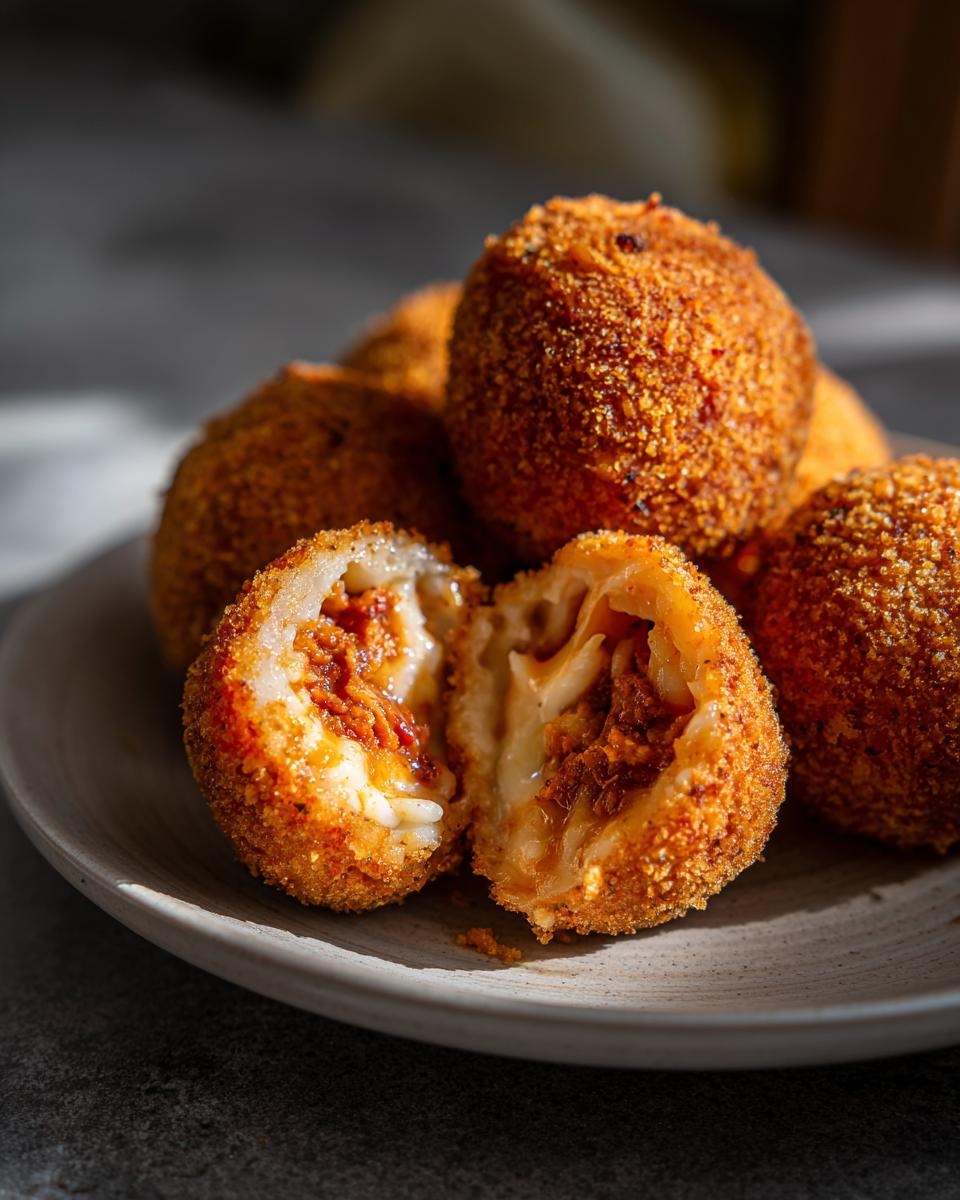
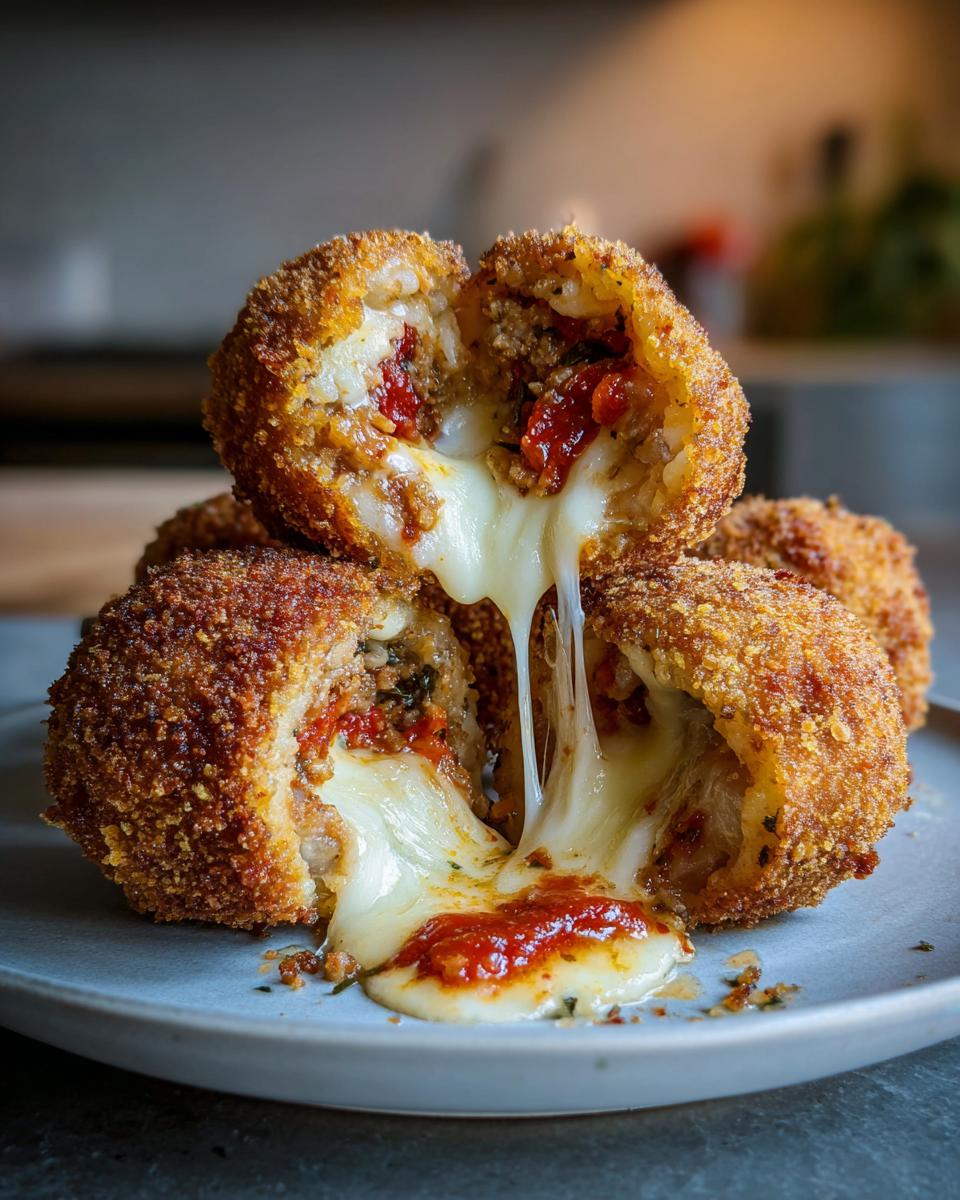
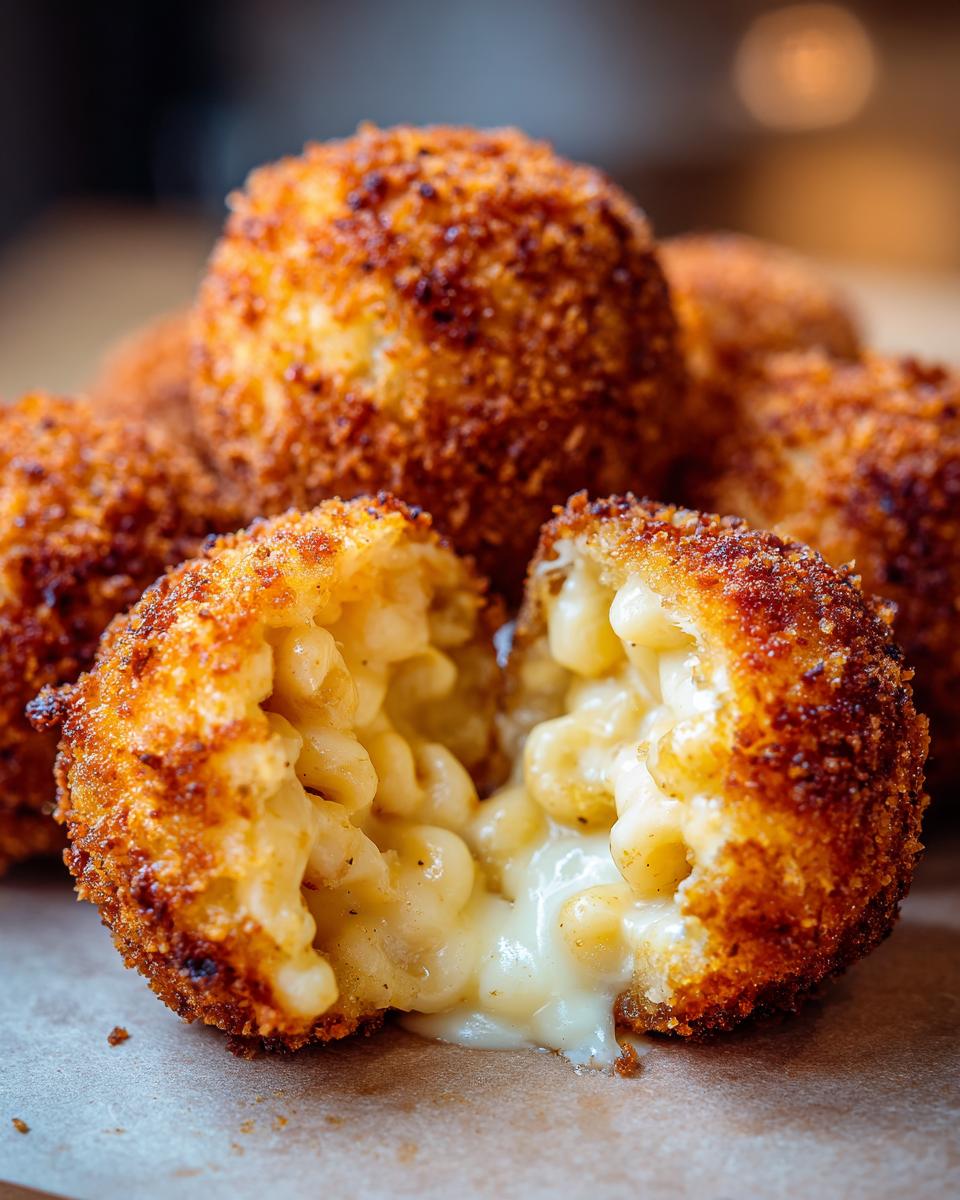
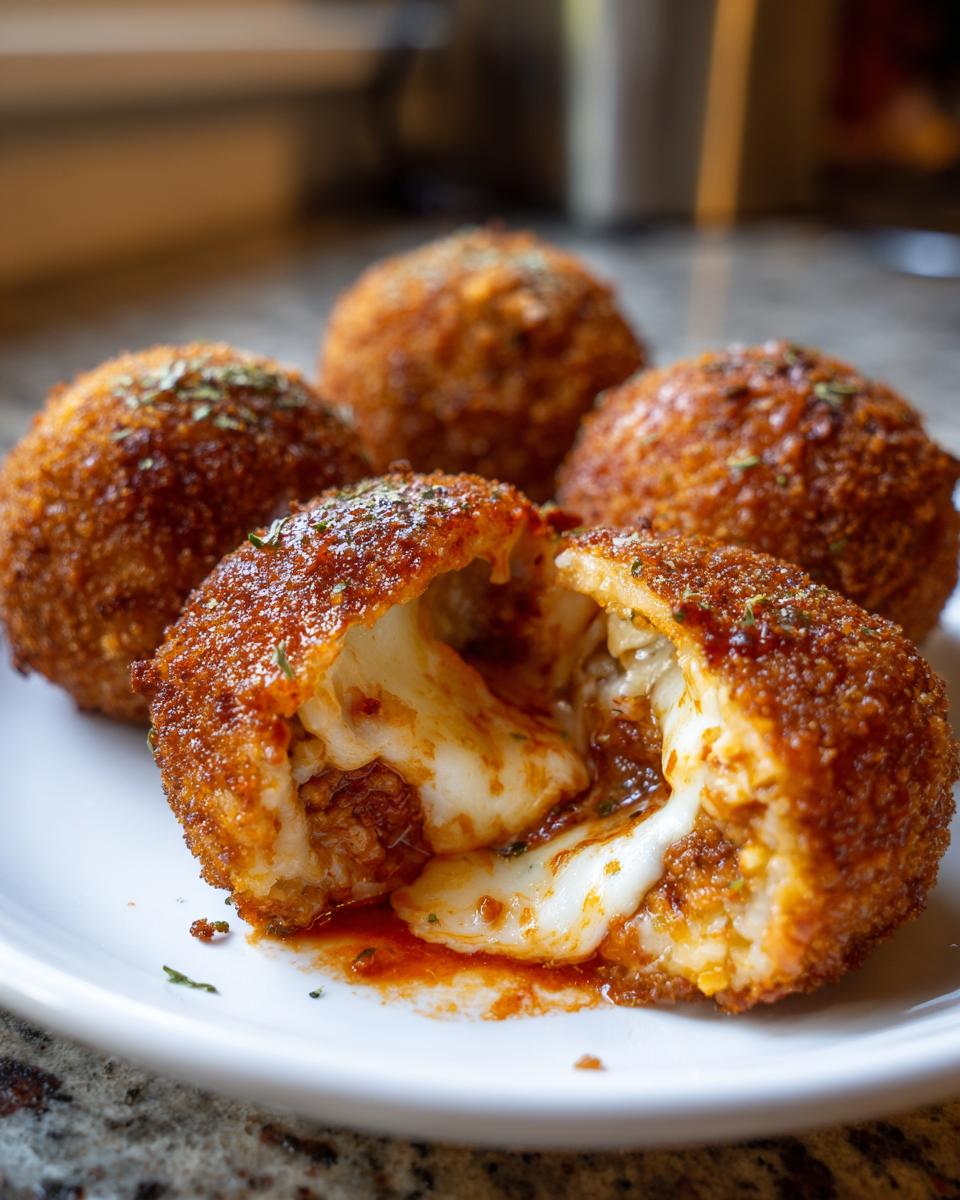
For Arancini, you need that creamy, starch-heavy stuff, so make sure you grab Arborio rice—it yields that necessary sticky texture for stuffing. Beyond the rice itself, you’ll need your stuffing (I use that leftover ragu and mozzarella combination), plus the classic three-step coating station: simple flour, beaten eggs, and, this is important, Panko breadcrumbs for that superior crunch. Don’t skimp on the oil situation either, because we’re frying these beauties until they’re gorgeously golden.
Essential Ingredients for Japanese Rice Balls (Onigiri)
With the Japanese style, we move to short-grain white rice, the stickiest kind you can find. That stickiness is what lets you shape them without glue! For fillings, anything goes—tuna mayo is classic, or maybe some seasoned seaweed. When we do the grilled version, the Yaki Onigiri recipe needs a simple soy sauce brush mixture for that savory crust. This is truly the best base for any make ahead rice snacks you might assemble!
How to Prepare Authentic Italian Rice Balls (Arancini)
Alright, this is where we get into the truly decadent side of things. Making your own fried rice balls is so much more rewarding than ordering takeout, I promise! The key to great Arancini—whether you’re stuffing them with meat ragu or using a cheesy filling like in my savory ricotta appetizer ideas—is making sure the base rice is completely cool. If it’s warm, it’ll never hold its shape, and that’s a huge mess waiting to happen!
Once that rice is chill, we move onto assembly. It takes a little practice, but you’ll be a pro at shaping these stuffed rice balls in no time. For anyone who wants the absolute best texture, check out the steps at this guide for the real traditional technique!
Achieving the Perfect Stuffed Rice Balls Shape
I always start by wetting my hands slightly—it keeps the rice from gluing itself to me! Scoop out maybe a 1/3 cup of the cooled rice into one palm and flatten it gently, making a small, deep well in the center. This is where your filling goes. Be generous, but not so much that you can’t cover it! Tuck the edges of the rice up and over the filling and start rolling it gently between your palms. You need firm pressure here to compact everything so that when it hits the hot oil, it doesn’t explode. We want tight, smooth spheres.
Frying Tips for Crispy Rice Bites
Now for the fun part: the coating and the frying! You need your flour, egg wash, and breadcrumbs ready to go. My huge tip, which you won’t want to skip, is to make sure you press your coatings on well, especially the Panko breadcrumbs. That final layer has to be perfect because it’s what keeps the structure intact when frying. Heat your oil up to 350°F (175°C)—if it’s not hot enough, the little balls just soak up oil and turn greasy instead of becoming those beautiful crispy rice bites we want!
Drop them in carefully, a few at a time, and let them fry for about five minutes until they are a deep, gorgeous brown. Pull them out, drain them, and get ready to eat!
Simple Steps for Japanese Rice Balls and Yaki Onigiri
Switching gears from the deep-fried indulgence of Arancini, we move over to the fantastic world of Japanese rice balls, or Onigiri. These are completely different cousins—they rely purely on that amazing stickiness of short-grain rice for structure, so no major coating station is needed here. They are quick, portable, and fantastic for packing up for lunch, which I cover in my quick meals section.
Whenever I handle this sticky rice, my trick is keeping a small bowl of water nearby. Dipping your hands in that water prevents the rice from clinging to your skin. It’s the simplest thing, but it saves so much frustration! You can find more great tips on technique over at this helpful guide.
Molding Your Japanese Rice Balls
Start with about a half-cup of your cooked, cooled rice. Lightly salt your damp palms, scoop the rice, and add a tiny bit of filling right in the middle if you are using one. The key here is gentle pressure. You aren’t trying to mash it into rock-hard concrete like we did with the Arancini! You want to gently squeeze and rotate the rice until it holds a shape—usually a triangle or sometimes just a nice round ball. This gentle handling ensures the integrity of the individual rice grains remains.
Making Grilled Rice Balls (Yaki Onigiri)
If you want that deeply savory flavor that makes Yaki Onigiri recipe so famous, you have to grill them! After you mold your Onigiri, brush the outside lightly but thoroughly with a soy sauce mixture—I usually mix a little soy with a tiny splash of mirin, but straight soy sauce works too. Then, you pan-fry or grill them over medium heat. You’re looking for that crust to form on the outside, turning slightly golden and charred in spots. These grilled rice balls are addictive comfort food appetizers!
Ingredient Notes and Substitutions for Your Rice Balls
One question I always get—and it’s a great one—is whether you can swap the rice. Quick answer: for these two recipes, no, you really shouldn’t! The difference between Arborio rice for the Italian style and short-grain sticky rice for the Japanese style is crucial for texture. Arborio releases starch differently under wet cooking, which is what we want for that creamy base. Short-grain, however, is naturally stickier for molding.
But fillings? That’s totally flexible! If you want to make some amazing vegetarian rice balls, don’t sweat the meat ragu. Mix sautéed mushrooms, finely chopped spinach, and a little ricotta for the Arancini. For Onigiri, go wild with seasoned seaweed or some pickled plum. If you want inspiration for creamy sides that use rice differently, check out this recipe for creamy stovetop cheesy rice. The goal here is delicious, whatever shape it takes!
Tips for Success When Making Any Type of Rice Balls
Whether you’re deep-frying Italian masterpieces or pan-searing Japanese snacks, there are a few universal rules about rice that’ll stop you from having a kitchen disaster. I’ve learned these the hard way, trust me! The biggest one, regardless of whether you are aiming for Arancini or Onigiri, is getting that rice base perfect and, most importantly, cooling it down correctly.
If your rice is even slightly warm when you try to form your balls, they will either turn into gooey mush (if you’re frying) or they won’t hold that perfect shape (if you’re molding). You really need that rice to be completely cooled to room temperature, maybe even chilled slightly, before you start handling it. If you’re feeling lazy—and we all have those days—using leftover, day-old rice is actually fantastic for both recipes!
A couple of other quick fixes I always lean on:
- Oil Quality Matters: If you are deep frying the Arancini, use a neutral oil with a high smoke point, like vegetable or canola. Don’t try to get fancy here; you want that oil to maintain that 350°F sweet spot so your fried rice balls are crispy, not soggy.
- The Damp Hand Hack: This is essential for the sticky short-grain rice used in Japanese rice balls, but it helps with sealing the stuffing in Arancini too. Keep a small bowl of water nearby and just dip your fingers before you handle the rice. It creates a non-stick barrier that makes shaping so much cleaner.
- Don’t Overmix the Coating: For the Arancini dredge, dip quickly! Flour, then egg, then crumbs. If you leave that coated ball sitting around too long before it hits the fryer, the coating starts to get damp and you lose that ultimate crispness.
We want these to be a joy, not a struggle. If you’re looking for other easy ways to manage staple ingredients without stressing out, you should definitely check out how I tackle oven roasted potatoes—same principle, simple side, maximum flavor!
Serving Suggestions for These Savory Rice Snacks
Now that you have successfully created two amazing versions of rice balls, you have to serve them right! They really shine in different ways because they come from such different culinary traditions. You can’t serve a glorious, stuffed Arancini the same way you serve a simple, portable Onigiri, right?
For the Italian side, those crispy, golden-brown beauties are absolute show-stoppers when presented as comfort food appetizers. They look fantastic piled high on a rustic wooden board. They *need* a dipping sauce—don’t just serve them plain! A simple, bright marinara sauce that’s still warm is the classic. But if you want to shake things up, try serving them alongside a creamy, slightly tangy sauce. I actually have a recipe for an easy baked street corn dip that, when whipped up a bit thinner, serves as an incredible, slightly smoky companion for the cheesy rice balls.
The Japanese Onigiri, on the other hand, are all about portability and presentation. These are your star players when you need bento box rice ideas! Since they are meant to be eaten cold or room temperature, presentation is key. Wrap just the bottom portion with a crisp strip of nori seaweed—it gives you something to hold onto and adds that wonderful oceanic flavor.
You can arrange them neatly in rows in a bento box, maybe garnishing the box with some colorful pickled ginger or a few steamed edamame pods. If you’re serving them right away as savory rice snacks, just place them on a platter with a small dish of soy sauce for dipping, though many purists prefer them seasoned enough on their own. No matter how you plate them, remember that these wonderful rice ball recipes are meant to be shared!
Storage and Make Ahead Rice Snacks Instructions
One of the best parts about making batches of rice balls is having leftovers for lunch the next day, or being able to prep them ahead of time for a party. But listen closely, because storing the Italian version and the Japanese version requires totally different approaches. We don’t want soggy Arancini or flavorless, dried-out Onigiri!
For the Italian fried rice balls, remember that beautiful crisp coating is their greatest asset, and that asset fades fast once refrigerated. If you have leftovers, the absolute best way is to eat them the same day, maybe just reheat them quickly in an oven or an air fryer to crisp up that exterior again. Please, skip the microwave unless you want chewy rice! If you need to store them overnight, let them cool completely, pop them in an airtight container, and plan on reviving them in a hot oven.
Now, for the Japanese style—these are fantastic make ahead rice snacks! The Onigiri should be wrapped individually, ideally in plastic wrap or parchment paper, to keep them sealed. They are designed to be eaten cold or at room temperature, so reheating isn’t usually necessary, though some folks gently warm the very center in a microwave if they want the filling warm. If you’re planning meals out, you might also like some ideas for using up leftovers in deli salads later in the week.
The main rule, no matter which style you’ve made, is this: cool the rice completely before sealing it away. Trapping steam is your enemy if you want clean storage. If you’re prepping these for a busy week, the Onigiri are your best friend. Just keep them sealed tight, and they’ll stay perfect for a day or two!
Frequently Asked Questions About Rice Balls
I know you might still have a few little questions spinning around after tackling two different international icons! It’s totally normal. Trying to decide between frying versus molding, or picking the right rice, can feel overwhelming at first. I’ve pulled together some of the most common things people ask me about mastering these fantastic rice balls!
Can I bake Arancini instead of frying?
Oh, the classic health question! Yes, you absolutely *can* try to bake or air fry your stuffed rice balls, but I have to be honest with you: you won’t get that signature, incredibly crispy, slightly oily shell that defines authentic Arancini. Baking tends to dry out the breadcrumbs before the inside gets hot enough, or it results in a paler, softer crust. If you’re determined to cut the oil, definitely try the air fryer—just a light spritz of cooking spray on the breaded balls helps! If you’re using an air fryer, you might want to look at how I prep things like frozen shrimp for that appliance, since the technique is similar—high heat, short time! Check out my tips for getting air fryer frozen shrimp right!
What is the main difference between Arancini and Onigiri?
This is the most important distinction, honestly! Think of them as totally different dishes that just happen to share a shape. Arancini (Italian rice balls) demand Arborio rice, are usually stuffed with savory fillings like ragu or cheese, are coated in flour/egg/breadcrumbs, and are deep-fried until golden. They are rich appetizers or side dishes. Onigiri (Japanese rice balls) use a stickier, short-grain rice, are molded into shape gently, often have a simple filling or just salt, and are meant to be portable, often eaten cold or grilled. So one is fried richness, the other is simple, satisfying snack!
What is the best rice for Japanese rice balls?
For Japanese style, you absolutely need short-grain rice. This is the stuff that practically glues itself together when cooked right—think sushi rice. The high starch content is what lets you handle it and press it into that perfect triangle without it crumbling apart, especially if you want to try those Korean rice balls recipe variations later on. Do not substitute Arborio here, or you’ll end up with a sticky, soupy mess that won’t hold its shape!
Can I freeze these rice balls?
You can freeze both, but you need to prep them differently first! For Arancini, roll them after breading (before frying), place them on a tray to freeze solid (flash freeze), and then bag them up. When you cook them from frozen, just add a minute or two to the frying time. For Onigiri, they freeze surprisingly well *without* a filling. Wrap each molded ball tightly in plastic wrap before freezing. Thaw them on the counter and then gently reform them with damp hands before adding flavorings like soy sauce. The main rule, no matter which style you’ve made, is this: cool the rice completely before sealing it away. Trapping steam is your enemy if you want clean storage!
Share Your Homemade Rice Balls Creations
Well, friends, that’s the deep dive into the wonderful world of rice balls! Whether you dove into the deep fryer for some decadent Italian Arancini or perfected the art of molding a triangular Japanese Onigiri, I really hope you felt that spark of joy in your own kitchen. That’s what Little Kitchen Diary is all about—taking something simple and turning it into something that brings a little connection and happiness to your table.
Now it’s your turn! I want to hear all about your successes. Did the Panko breading on your Arancini stay super crisp? Did your Yaki Onigiri get that perfect grill char? Don’t be shy! Please jump down into the comments below and let me know which recipe you tried first. If you have a rating—a star rating, maybe five out of five?—please leave it right there so other busy cooks know these recipes are keeper material.
If something threw you for a loop or you have a substitution question, please ask! I’m always around to help troubleshoot those little kitchen hurdles. And if you took a beautiful picture of your finished rice ball snacks, I’d love to see them! You can always reach out directly through my contact page if you want to send pictures or just say hello. Happy cooking, everyone. Here’s to making every day taste a little more like home!
PrintThe Definitive Guide to Rice Balls: From Crispy Italian Arancini to Easy Japanese Onigiri

Learn to make popular rice balls, covering both the crispy, fried Italian Arancini stuffed with ragu and cheese, and the simple, molded Japanese Onigiri perfect for portable snacks. These recipes use straightforward methods for satisfying results.
- Prep Time: 45 min
- Cook Time: 30 min
- Total Time: 75 min
- Yield: 12 servings 1x
- Category: Appetizer
- Method: Frying and Grilling
- Cuisine: Italian / Japanese
- Diet: Vegetarian
Ingredients
- 2 cups Arborio rice (for Arancini) OR 2 cups short-grain sticky rice (for Onigiri)
- 4 cups water or broth
- 1 teaspoon salt
- 1 tablespoon butter or olive oil
- 1 cup prepared meat ragu or cheese/pea filling (for Arancini stuffing)
- 1 cup shredded mozzarella cheese (for Arancini stuffing)
- 2 large eggs, beaten
- 1 cup all-purpose flour
- 2 cups breadcrumbs (Panko recommended for extra crispiness)
- Vegetable oil, for frying
- Soy sauce or mixed seasonings (for Onigiri flavor/glaze)
Instructions
- Prepare the Rice Base: Cook the Arborio rice (for Arancini) or short-grain rice (for Onigiri) according to package directions, using less liquid than usual to ensure the rice is sticky but not overly wet. Stir in butter or oil and salt. Spread the cooked rice thinly on a baking sheet and allow it to cool completely.
- Make Italian Arancini (Stuffed Rice Balls): Once the rice is cool, take about 1/3 cup of rice in your palm. Flatten it slightly and create a well in the center. Place a spoonful of ragu and a small piece of mozzarella inside. Carefully fold the rice around the filling, shaping it into a tight, smooth ball.
- Coat the Arancini: Set up a dredging station: one bowl with flour, one with beaten eggs, and one with breadcrumbs. Roll each rice ball first in flour, shaking off excess. Dip it completely in the egg wash. Finally, roll it thoroughly in the breadcrumbs, pressing gently to adhere.
- Fry the Arancini: Heat vegetable oil in a deep pot or fryer to 350°F (175°C). Carefully place the breaded rice balls into the hot oil, working in batches. Fry for 4 to 6 minutes, turning occasionally, until they are deep golden brown and crispy. Remove and drain on paper towels.
- Make Japanese Onigiri (Molded Rice Balls): Use the cooled short-grain rice. Wet your hands slightly and sprinkle a little salt on your palms. Scoop about 1/2 cup of rice into your hand. Place a small amount of filling (like tuna or pickled plum) in the center, if using. Gently press and mold the rice into a triangle or round shape.
- Season Onigiri: For simple Onigiri, you can wrap the outside with nori seaweed. For Yaki Onigiri (Grilled Rice Balls), brush the molded rice balls lightly with soy sauce or a soy-mirin mixture. Grill or pan-fry them over medium heat until the outside is lightly browned and slightly crisp.
- Serve the Rice Balls: Serve the Arancini hot as an appetizer. Serve the Onigiri immediately or pack them for a make-ahead rice snack.
Notes
- For Arancini, using leftover risotto makes the process much faster.
- When molding Onigiri, keep your hands damp to prevent the sticky rice from adhering to your skin.
- If you are making vegetarian Arancini, use a mixture of spinach and ricotta cheese as the stuffing.
Nutrition
- Serving Size: 2 balls
- Calories: 350
- Sugar: 3
- Sodium: 450
- Fat: 18
- Saturated Fat: 7
- Unsaturated Fat: 11
- Trans Fat: 0
- Carbohydrates: 35
- Fiber: 1
- Protein: 14
- Cholesterol: 35