
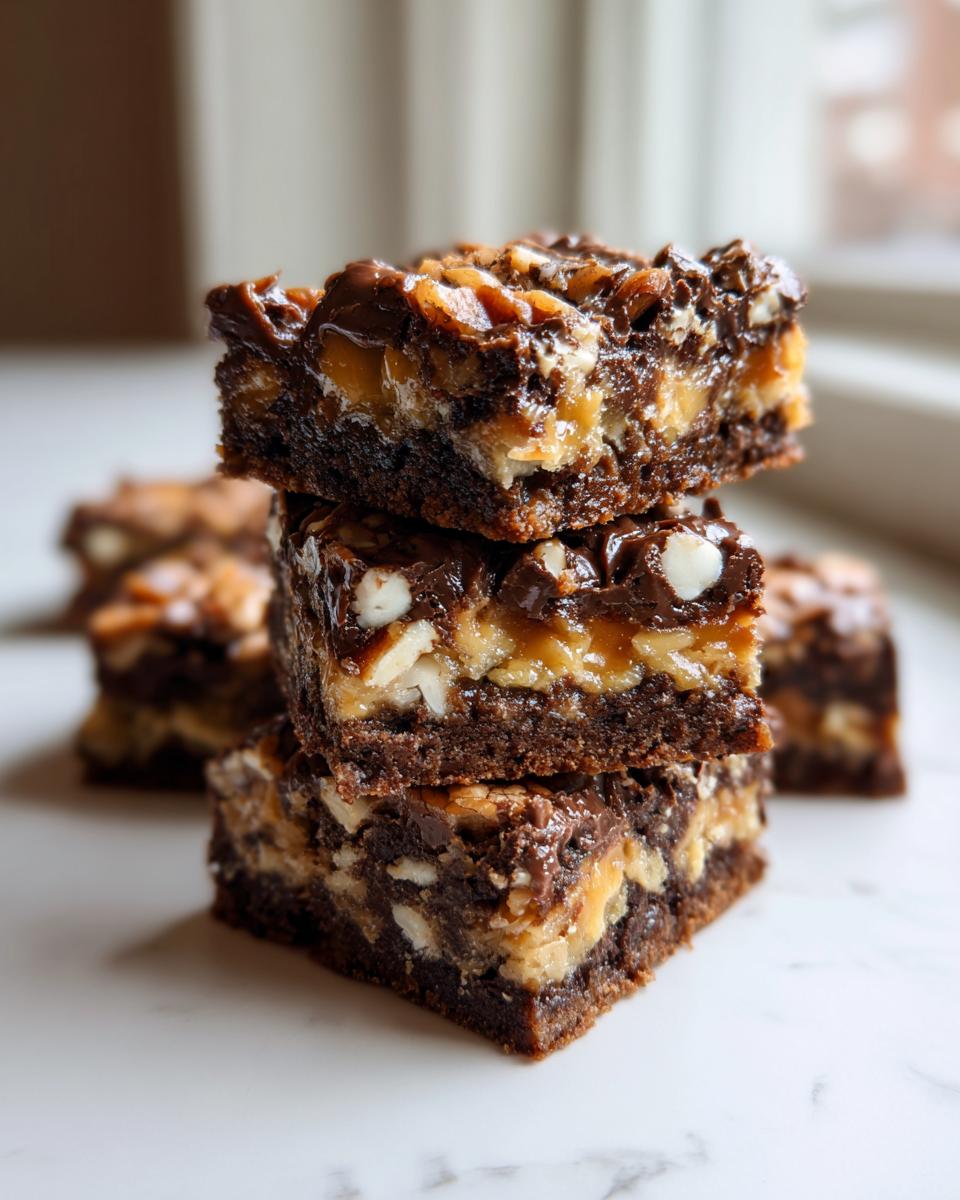
Do you ever crave those desserts that just taste like childhood? The ones that require almost zero thought but deliver maximum comfort? I’m talking about truly nostalgic treats, and nothing fits that bill quite like magic cookie bars. Seriously, these Seven Layer Bars are my go-to when I need a rich, gooey, satisfying dessert using just a few pantry staples. They’re famous for a reason, folks! Over at Little Kitchen Diary, we focus on recipes that work when life gets busy, and these bars are proof you don’t need hours in the kitchen to achieve something spectacular. If you want a little extra sweetness later on, you can check out my recipe for easy vanilla buttercream, but right now, let’s focus on these bars. Trust me, once you see how this one comes together, it’ll be living in your rotation, too. Get ready for the chewiest bars you’ve ever made.
- Why This Is The Ultimate Chewy magic cookie bars Recipe
- Gathering Ingredients for Your magic cookie bars
- Simple Steps to Prepare Gooey magic cookie bars
- Tips for Perfect Chewy Dessert Bars
- Serving Suggestions for Your magic cookie bars
- Storage and Reheating Instructions for magic cookie bars
- Frequently Asked Questions About magic cookie bars Recipe
- About Ethan Carter and Little Kitchen Diary
- Share Your magic cookie bars Success
Why This Is The Ultimate Chewy magic cookie bars Recipe
When I say this is the ultimate recipe, I mean it! These magic cookie bars skip all the complicated steps that other layered desserts demand. We’re using a simple press-in crust and just pouring everything on top. It’s the definition of a no-fail bar cookie, which is why they are always welcome at any potluck or holiday table—they’re true crowd pleasers.
The real magic, which you’ll see in the next steps, locks in the moisture for that perfect texture. You won’t end up with dry, crumbly squares here; you end up with something wonderfully gooey. I also have a recipe for easiest 3-ingredient Oreo fudge if you like simple indulgences, but these bars hit a different level of satisfying!
- Guaranteed Gooey Texture: Thanks to that essential layer of condensed milk, these bars never dry out.
- Seriously Simple Assembly: Prep time is just minutes because there’s no chilling or complicated mixing involved.
- Adaptable Layers: While this is the classic, you can easily tweak the chips and nuts based on what you have!
Gathering Ingredients for Your magic cookie bars
Okay, assembling these treats is where the fun truly begins! The ingredient list for these Seven Layer Bars looks long, but I promise you, they are all common items you probably have sitting in your pantry right now. The real secret sauce—the thing that binds this whole glorious mess together and ensures we get that signature gooey texture—is the sweetened condensed milk. Don’t try to skip that step, because that milk caramelizes beautifully in the oven! If you’re looking for more chocolate inspiration after this, check out my chocolate zucchini muffins recipe.
Remember, preparation matters here. Make sure that butter is melted, and you’ve got those nuts roughly chopped before you start layering. Let’s get everything measured out so we can move quickly once the crust is out of the oven!
Ingredient List for Classic Seven Layer magic cookie bars
- 1 1/2 cups graham cracker crumbs
- 1/2 cup unsalted butter, melted
- 1 (14 ounce) can sweetened condensed milk
- 1 cup semi-sweet chocolate chips
- 1 cup butterscotch chips
- 1 1/2 cups flaked coconut, sweetened
- 1 cup chopped pecans or walnuts
Simple Steps to Prepare Gooey magic cookie bars
Now we put this all together, and trust me, it goes fast! Since these bars cook up so quickly, make sure your oven is fully preheated to 350 degrees Fahrenheit before you even mix your first crumb. Organization is key here so nothing burns while you’re rushing to layer everything right. Remember, we need that crust to set up a little bit before the goo hits it, which is why that short initial bake is so important. If you’ve ever struggled with bread rising correctly, check out my thoughts on classic quick Irish soda bread; baking is all about timing!
Building the Graham Cracker Crust magic cookie bars
First things first: grab that 9×13 pan and line it with parchment paper, making sure you leave some overhang. That overhang is your best friend later when it’s time to lift this glorious slab out for cutting! Mix your graham cracker crumbs and that melted butter until it looks like wet sand. Press it down into the bottom of the pan really firmly. You want a solid base for all those delicious layers waiting above it. Once it’s packed tight, pop it into the oven for exactly 8 minutes. This pre-bake gives the crust the structure it needs to hold everything up.
Layering and Baking the magic cookie bars
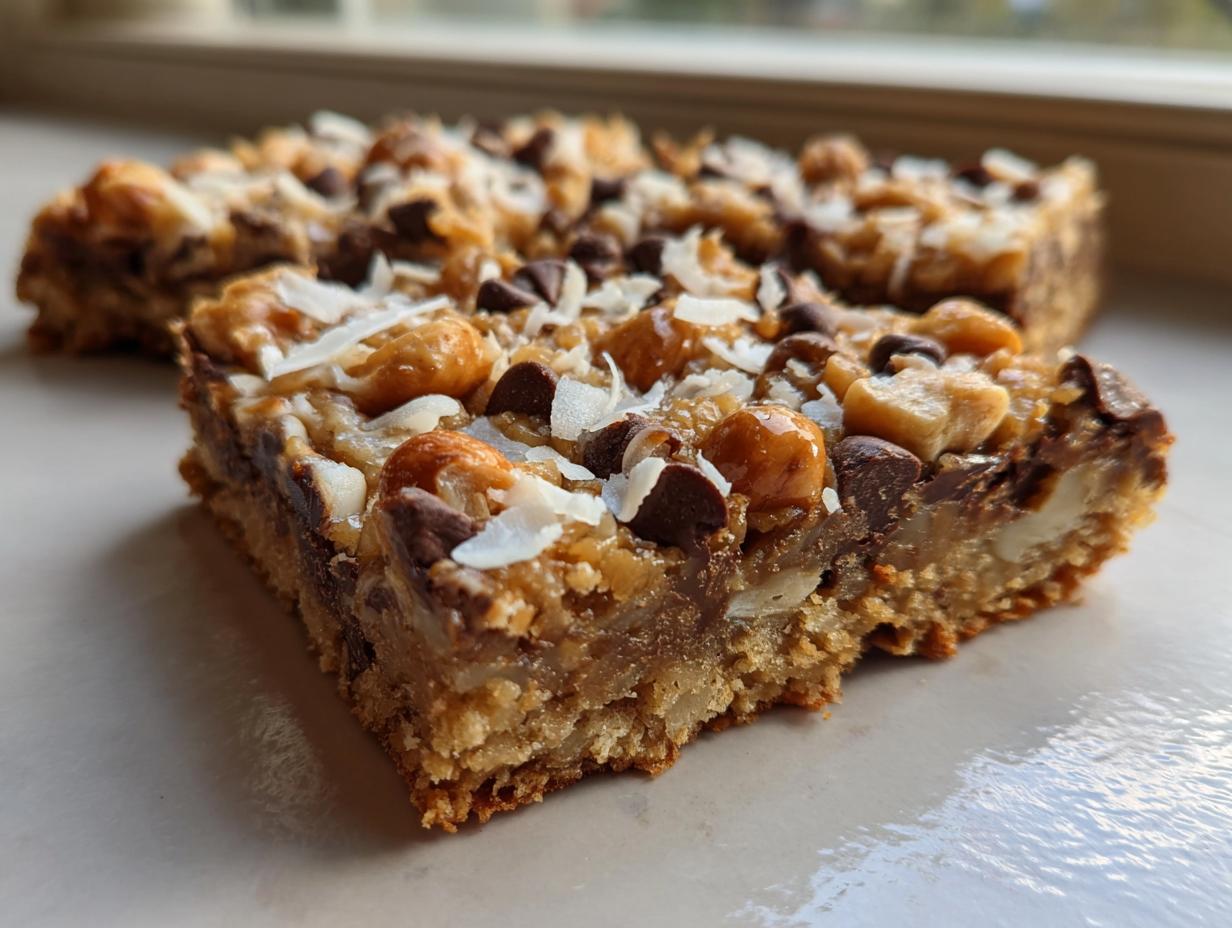
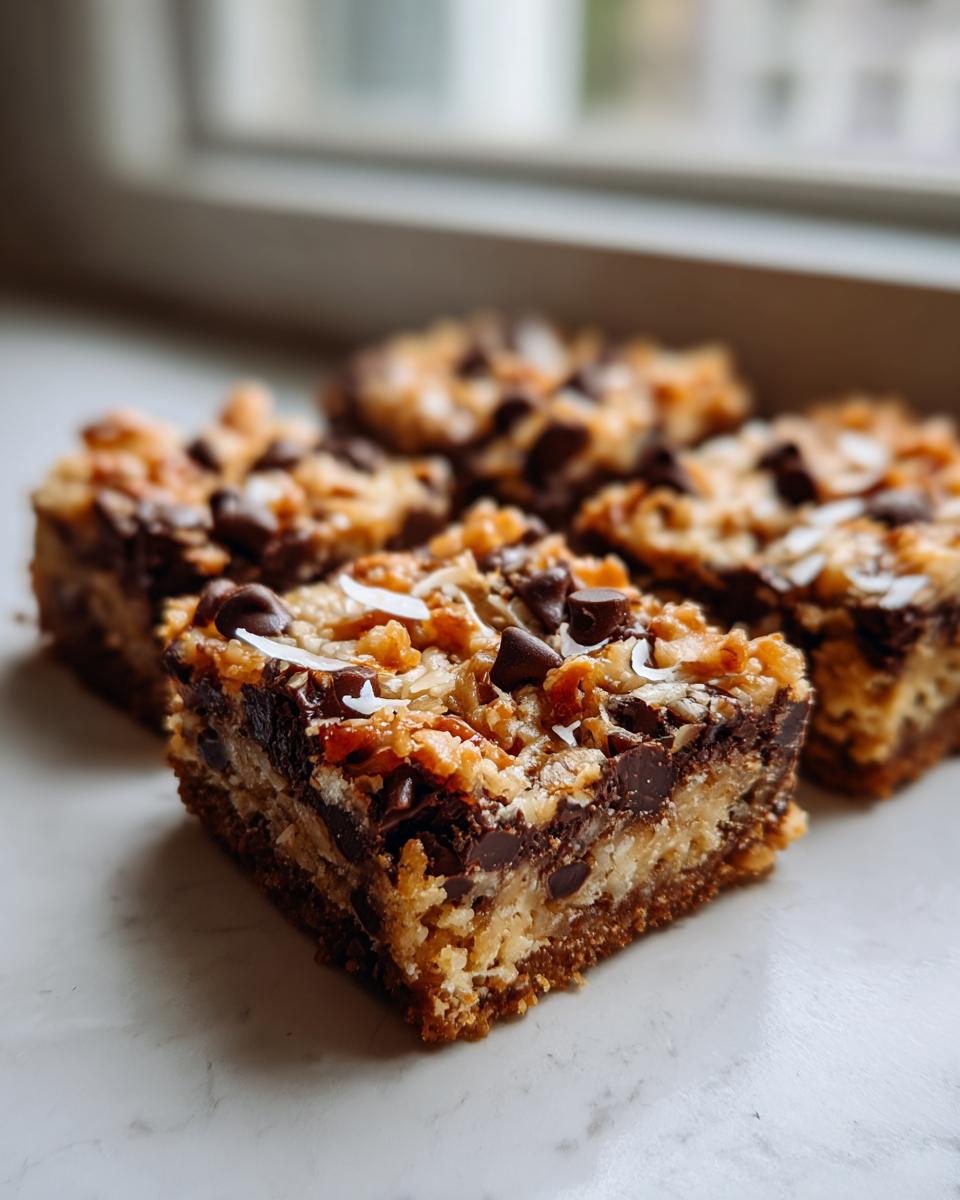
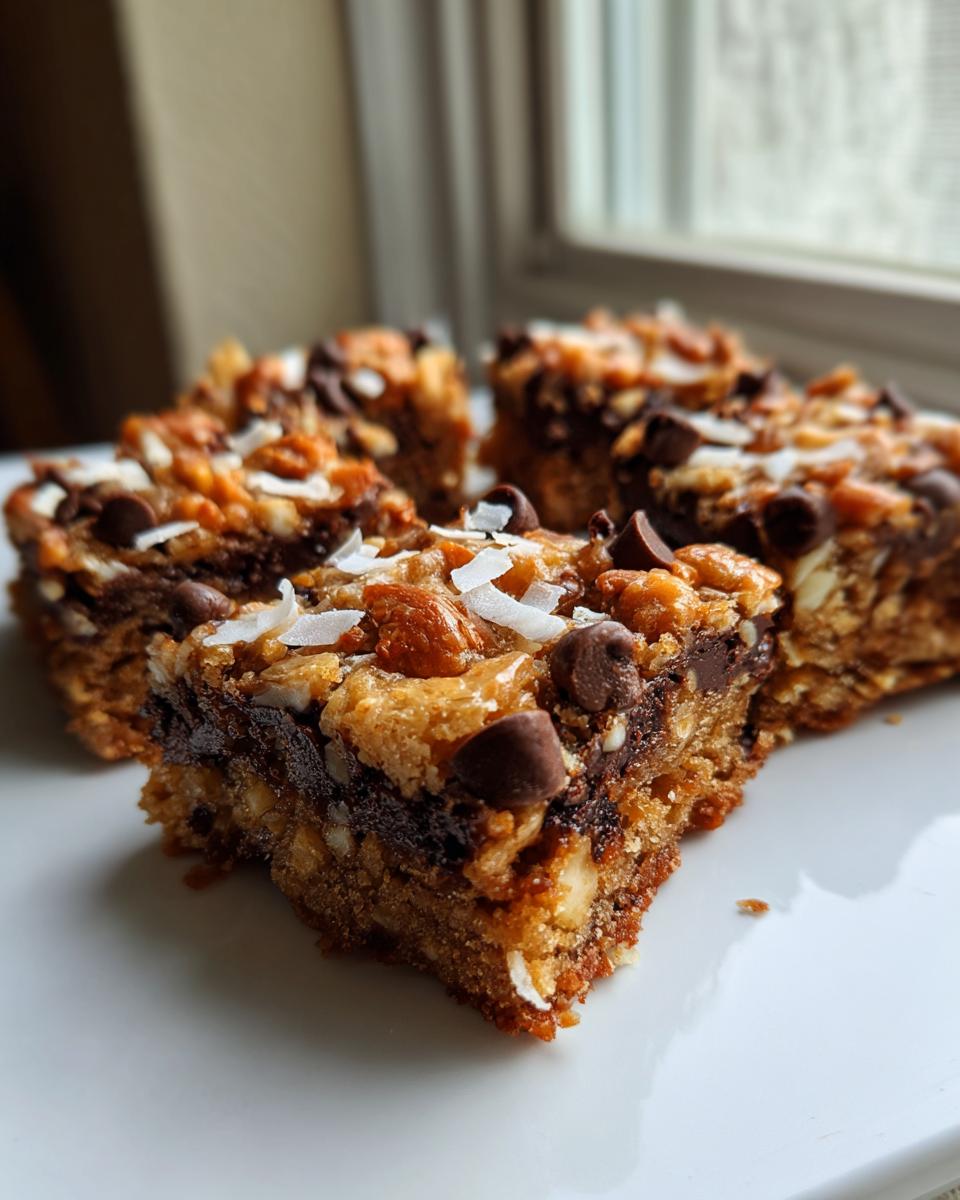
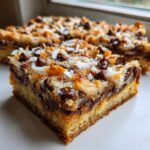
When that crust comes out shiny and warm, get that entire can of sweetened condensed milk poured evenly over the top. Seriously, coat every inch of that base layer. Then, start sprinkling! Distribute your chocolate chips, then the butterscotch chips, then the coconut, and finally, those chopped nuts. Here’s a huge tip: Do NOT press any of those toppings down into the milk. Just let them rest gently on the surface!
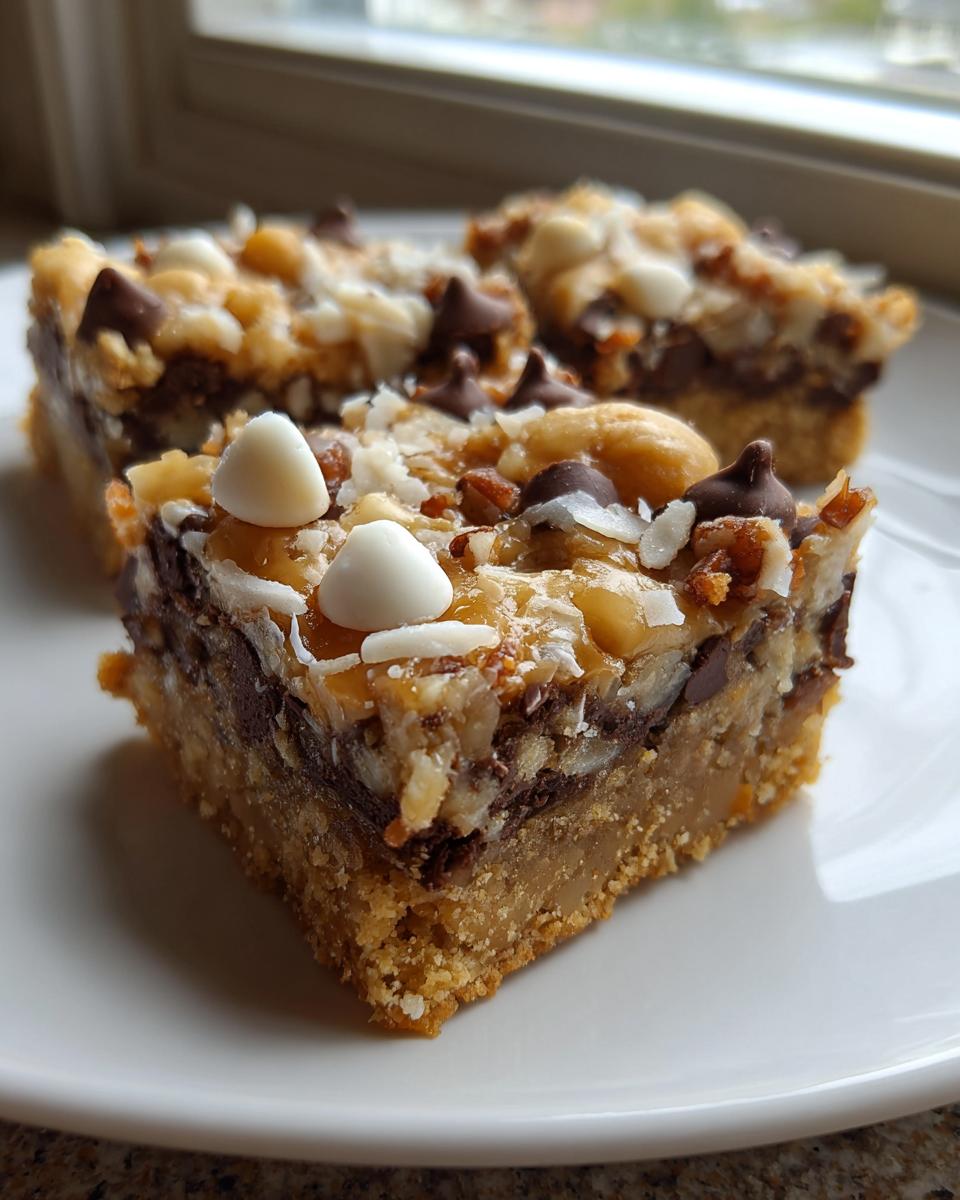
Back into the oven they go for about 20 to 25 minutes. You are looking for the edges to get nicely golden brown and those beautiful layers—especially the milk—to look bubbly and set. Don’t overbake it, or you’ll lose the gooey factor we worked so hard to achieve!
Tips for Perfect Chewy Dessert Bars
Listen, getting these magic cookie bars right isn’t just about layering; it’s about the final moments before you slice into them. I’ve learned from my own kitchen mistakes that skipping time here leads to a melted mess when you try to cut them. We want clean squares, not a spread! That sweet, gooey factor we want so badly needs a serious chill session to firm up properly.
In my diary, I note that my biggest baking fail was trying to rush these out of the pan thirty minutes after they came out of the oven. Big mistake! We need patience to let that sweetened condensed milk work its magic and set those layers tight. If you’re struggling with kitchen timing, maybe my guide on how to make perfect sushi rice at home will help you understand why resting time matters for texture!
The Importance of Cooling for magic cookie bars
Step number seven in the recipe—the cooling—is honestly one of the most critical steps for achieving those perfect chewy dessert bars. You absolutely must let these bars cool completely on a wire rack. I’m talking at least two hours, maybe even aiming for three if your house is warm. If you try to cut them too soon, that liquid gold of condensed milk just oozes everywhere, and you end up with an uneven, sad-looking pile instead of neat squares for your guests.
Cooling allows the sugars and the fats to stabilize and gel up again after the heat has done its work. This is what gives you that magnificent pull when you bite into a perfectly set bar. Don’t rush it; the waiting makes the eating so much better!
A few other bits of advice I’ve gathered while perfecting this recipe: If you’re worried about nuts, just leave them out! But if you do, make absolutely sure you add an extra half cup of chocolate chips. Those layers need volume to balance out the thickness of that milk layer. Also, while baking, you want them bubbly, but don’t let them brown too much on top—that slight softness in the center means they’ll be perfectly moist once they chill down.
Serving Suggestions for Your magic cookie bars
Once you have these beauties cooled and sliced—and trust me, slicing them perfectly is half the battle won—you have to think about *how* you’re going to serve them. These Seven Layer Bars are so rich and sweet they really don’t need much fuss, but a little presentation goes a long way, especially when you bring them out at a party. They are the ultimate crowd pleaser desserts because everyone can grab one with a napkin and mingle.
For big family gatherings or holiday cookie platters, I usually just line them up right next to the fudge or peanut butter cookies. They look fantastic just as they are because you can see all those colorful layers peeking out around the edges!
When it comes to pairings, you have a few great options. Because these bars are so sweet, they absolutely beg for a strong beverage to cut through the richness. A tall glass of cold milk is the classic choice—it takes me right back to my childhood kitchen. If you’re serving them in the afternoon or evening, a cup of strong black coffee works wonders. The slight bitterness of the coffee is a perfect counterpoint to all that chocolate and butterscotch.
If you are serving these after a big dinner, like maybe after my creamy Cajun chicken pasta, you might want to serve them slightly warm, which definitely ups the gooey factor. Just pop a square on a microwave-safe plate for about 10 seconds. Don’t go too long or you’ll lose that structure we worked so hard to set during the cooling stage!
Storage and Reheating Instructions for magic cookie bars
So, you made an amazing batch of magic cookie bars, and now you have leftovers—lucky you! These bars are surprisingly resilient, but storing them correctly keeps that gooey center from getting weirdly hard or sticky. You don’t want them drying out, especially not after all that work!
Here is what I do: Keep them stored in a single layer in an airtight container at room temperature. They honestly do great on the counter for about three to four days. Sticking them in the fridge actually tends to firm up that lovely gooey texture just a bit too much, but if your kitchen is super hot, the fridge buys you a few extra days. If you need to store them longer, freezing them works great too! I usually wrap them tightly in plastic wrap first. If you’re into slightly warmer breakfasts later, you might also want to check out my recipe for fluffy strawberry pancakes.
When it comes time to enjoy those leftovers, skip the microwave unless you’re aiming for ultra-gooey! If they were refrigerated, just let them sit out for 30 minutes. If they were frozen, a quick 15-20 second zap is all they need, but watch them closely!
Frequently Asked Questions About magic cookie bars Recipe
I get so many questions about these bars because everyone wants that perfect texture! I figured I’d answer the top few things that come up whenever I share this magic cookie bars recipe with friends. If you’re trying to tweak things, this is the place to look. I’ve got my tips below, and if you need more general baking wisdom, feel free to peek at my gingerbread granola recipe—it shares some similar layering philosophies!
Can I skip the nuts in these Seven Layer Bars?
Absolutely, you can skip the nuts! I know not everyone is a fan (or maybe someone bringing a dessert has an allergy). If you omit them, though, remember that layer needs filling! As I mentioned earlier, my best advice is to replace the volume of the nuts with extra chocolate chips or maybe some butterscotch chips if you have them lying around. Just don’t leave a gap; you want that solid layer of goodness hitting that sweet condensed milk.
What if I don’t have butterscotch chips? Can I still make them?
Yes, don’t stress if the butterscotch chips are missing! These are some of the most flexible easy dessert bars you can make. If you don’t have butterscotch chips, you can simply double up on the semi-sweet chocolate chips. You’ll still get a fantastic, rich, chocolatey result. Some people even swap them out for peanut butter chips if they feel like adding a little salty kick to their gooey bar cookies. It’s totally up to you!
How do I ensure I get the chewiest texture possible?
This is the million-dollar question! The chewiness comes from three places: the nuts/coconut absorbing moisture, the butterscotch chips melting, and, most importantly, not overbaking. When the edges look golden but the center still looks a tiny bit soft and bubbly, pull them out! They finish setting up while they cool on the counter. If you’re worried about drying them out, definitely check external resources like this guide on Magic Cookie Bars from Eagle Brand for extra reassurance!
Can I turn this into a nut-free or dairy-free version?
You can definitely adapt these! For dairy-free, you’d need dairy-free chocolate chips and butterscotch chips, and you’d swap the butter for a vegan butter substitute. The main substitution that can trip people up is the sweetened condensed milk. You need to look specifically for *sweetened condensed coconut milk* or *sweetened condensed oat milk*—regular evaporated milk won’t work because it doesn’t have enough sugar to properly set and caramelize into that gooey layer. You got this!
About Ethan Carter and Little Kitchen Diary
I’m Ethan Carter, and I’m the person typing this out to you from my own kitchen—which, let me tell you, sometimes looks a little chaotic, just like yours probably does! I’m not some fancy chef who went to culinary school; I’m a home cook who learned the hard way that real life doesn’t always leave three hours free for dinner prep.
That’s why Little Kitchen Diary exists. It started as my personal notebook when I realized I was defaulting to takeout way too often. I needed food that was delicious, satisfying, and—most importantly—did what it was supposed to do without a massive list of complicated techniques. These magic cookie bars are a perfect example of that philosophy in action!
My goal here is simple: to prove that you can make memorable, stunning food without turning cooking into a second job. If you ever want to know more about how we tackle accessibility in the kitchen, you can always peek at our main About page. We’re all learning together here, keeping things straightforward, joyful, and always delicious.
Share Your magic cookie bars Success
Now that you’ve successfully navigated the layers and patiently waited for them to set—which I know is the hardest part when something smells this good—I absolutely want to hear about your batch of Ultimate Magic Bars!
When I first started sharing recipes, I was so nervous about how they would turn out in other kitchens. But these magic cookie bars are so reliable that I know you nailed it. Don’t stop now, though! The best part of this whole process, for me, is connecting with you guys, the real bakers making these recipes shine.
If you loved how easy this was for a party or a quick weeknight treat, please hit that star rating button right below. A few seconds of your time helps others know this recipe is absolutely worth their while. If you struggled with the cooling time (we all have those moments!), please drop a comment below telling me about it. I read every single one!
And hey, if you snapped a photo of your perfectly layered, gooey squares, share that too! Tag us on social media so I can cheer you on. It means the world to me to see the joy these simple desserts bring to your tables. If you need to reach out directly with a question, you can always use the contact form here: Let’s connect. Now, go enjoy those bars, and maybe check out what others are saying about these amazing Seven Layer Bars!
PrintUltimate Chewy Magic Cookie Bars (Classic Seven Layer Bars)
Make the ultimate chewy Magic Cookie Bars, also known as Seven Layer Bars. This simple recipe uses sweetened condensed milk to create rich, gooey layers of chocolate, coconut, and nuts over a graham cracker crust. It is a crowd-pleaser dessert perfect for parties or holidays.
- Prep Time: 15 min
- Cook Time: 35 min
- Total Time: 1 hour 50 min
- Yield: 24 servings 1x
- Category: Dessert
- Method: Baking
- Cuisine: American
- Diet: Vegetarian
Ingredients
- 1 1/2 cups graham cracker crumbs
- 1/2 cup unsalted butter, melted
- 1 (14 ounce) can sweetened condensed milk
- 1 cup semi-sweet chocolate chips
- 1 cup butterscotch chips
- 1 1/2 cups flaked coconut, sweetened
- 1 cup chopped pecans or walnuts
Instructions
- Preheat your oven to 350 degrees Fahrenheit. Line a 9×13 inch baking pan with parchment paper, leaving an overhang for easy removal.
- Combine the graham cracker crumbs and melted butter in a medium bowl. Press this mixture firmly and evenly into the bottom of the prepared baking pan to form the crust.
- Bake the crust for 8 minutes. Remove the pan from the oven.
- Pour the entire can of sweetened condensed milk evenly over the warm crust. This milk is key for the gooey texture.
- Sprinkle the chocolate chips, butterscotch chips, flaked coconut, and chopped nuts evenly over the condensed milk layer. Do not press the toppings down.
- Return the pan to the oven and bake for 20 to 25 minutes, or until the edges are golden brown and the center is set. The top should look bubbly.
- Let the bars cool completely in the pan on a wire rack, at least 2 hours, before cutting. Cooling allows the layers to set for clean slices.
- Once cool, use the parchment paper overhang to lift the bars out of the pan. Cut into squares.
Notes
- For a richer flavor, toast the flaked coconut lightly before adding it to the layers.
- If you omit the nuts, consider adding an extra half cup of chocolate chips to maintain the layer volume.
- For the chewiest bars, do not overbake; the center should still look slightly soft when you remove them from the oven.
Nutrition
- Serving Size: 1 bar
- Calories: 220
- Sugar: 18g
- Sodium: 75mg
- Fat: 13g
- Saturated Fat: 7g
- Unsaturated Fat: 6g
- Trans Fat: 0g
- Carbohydrates: 24g
- Fiber: 1g
- Protein: 3g
- Cholesterol: 15mg