
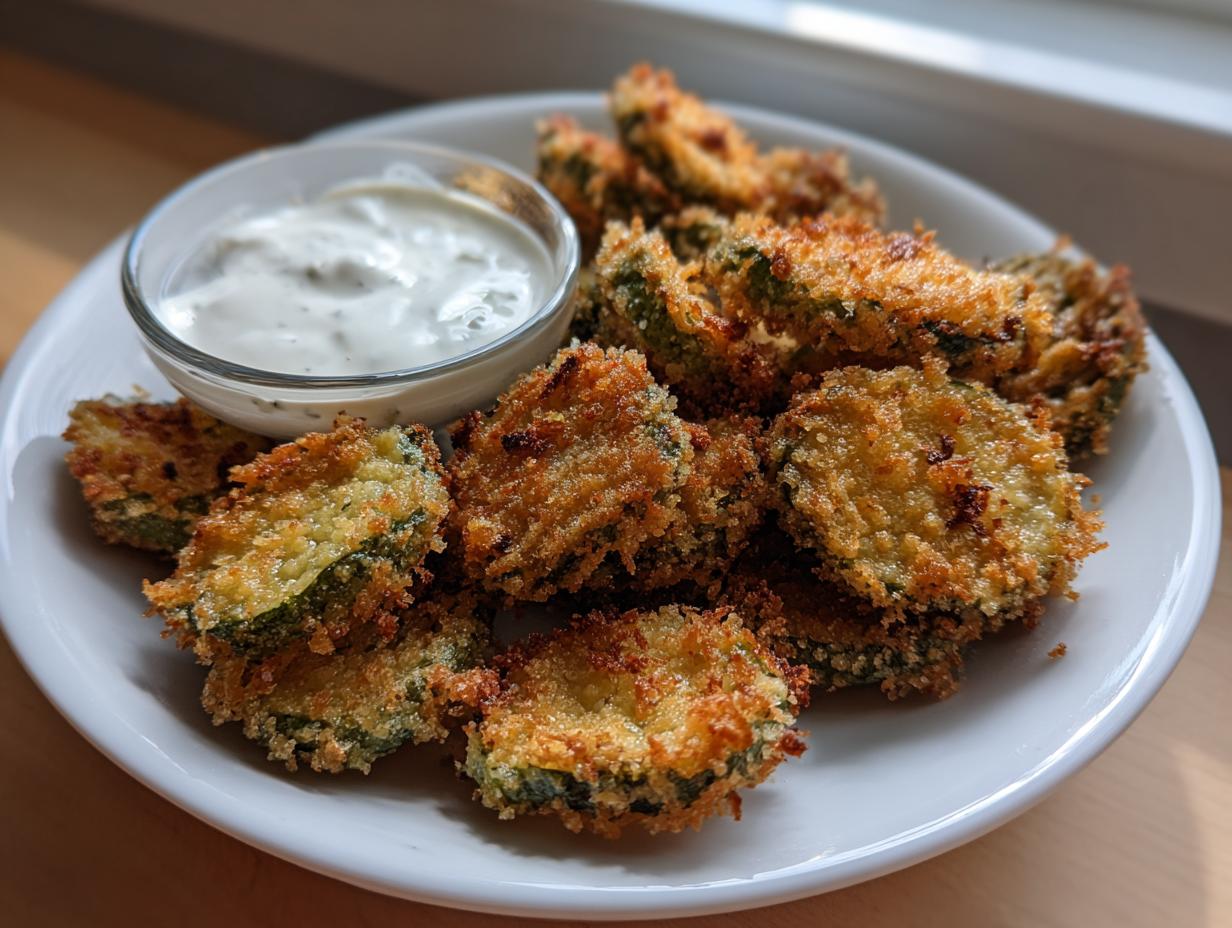
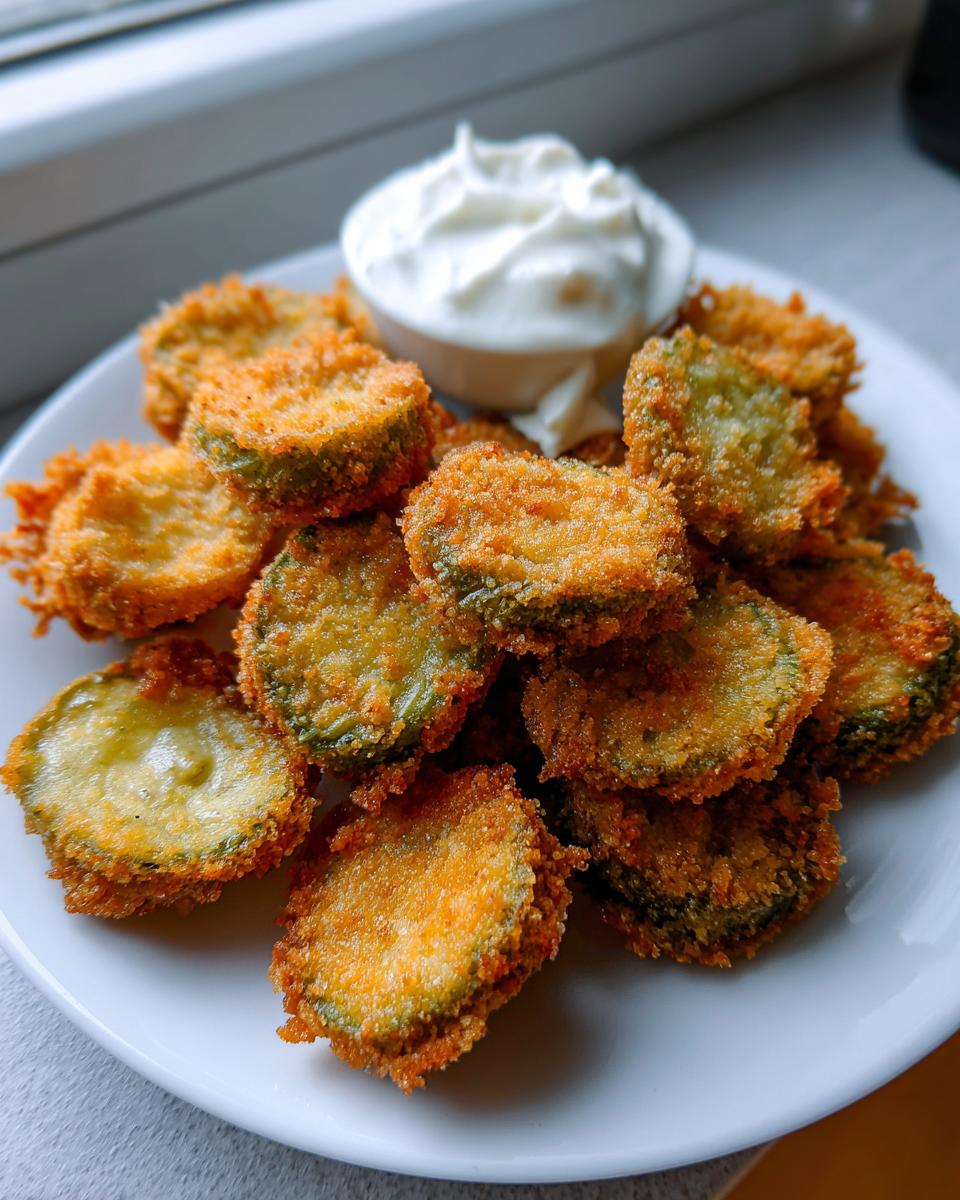
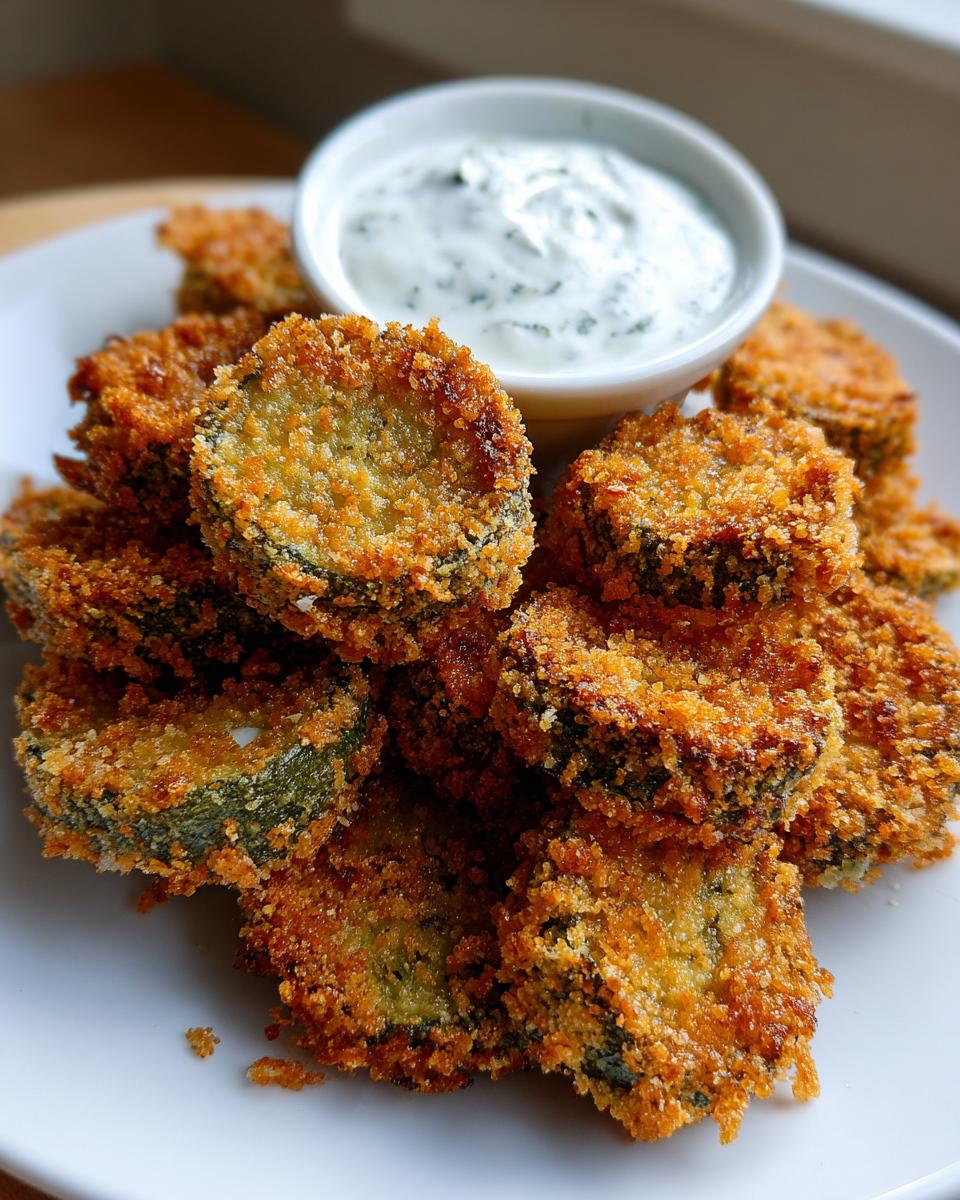
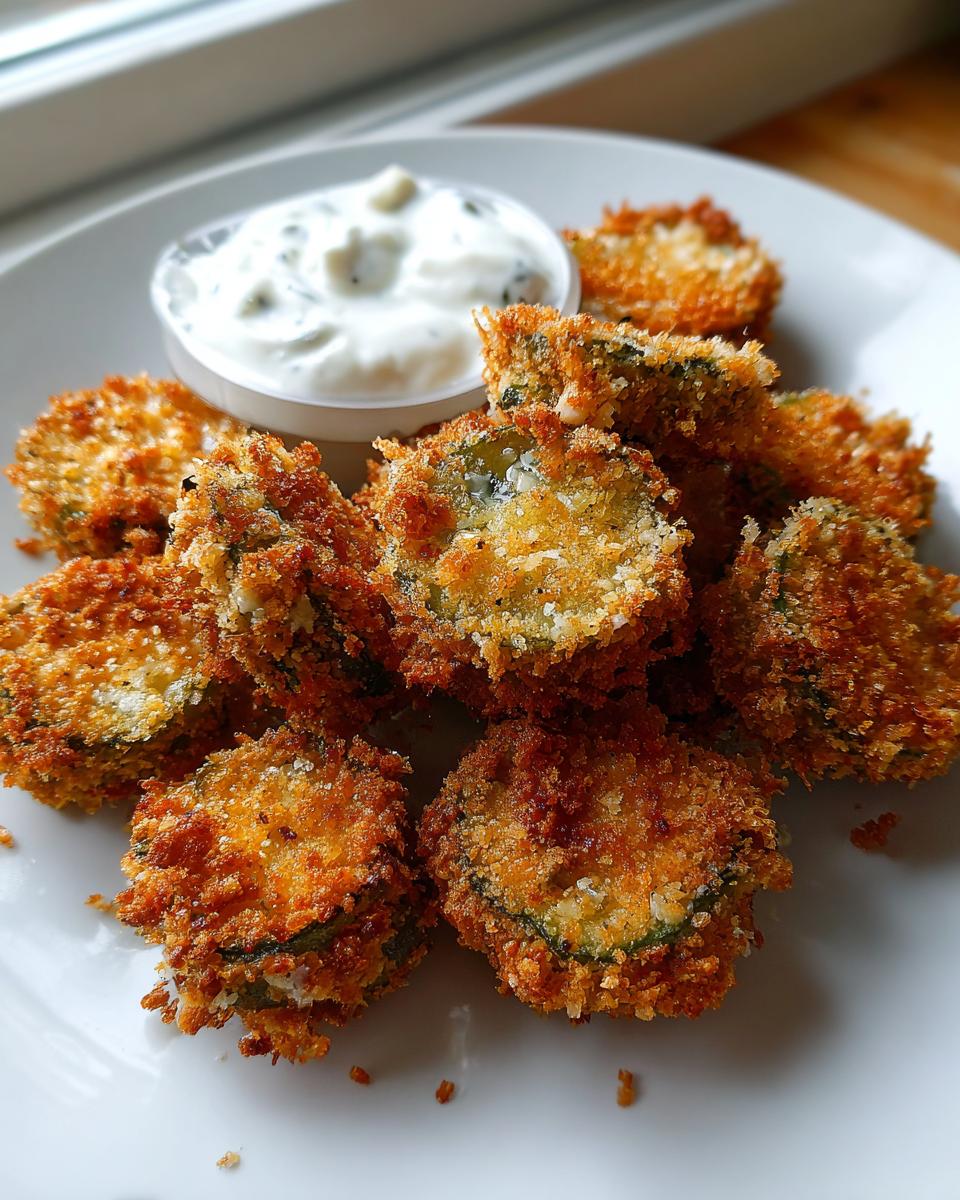
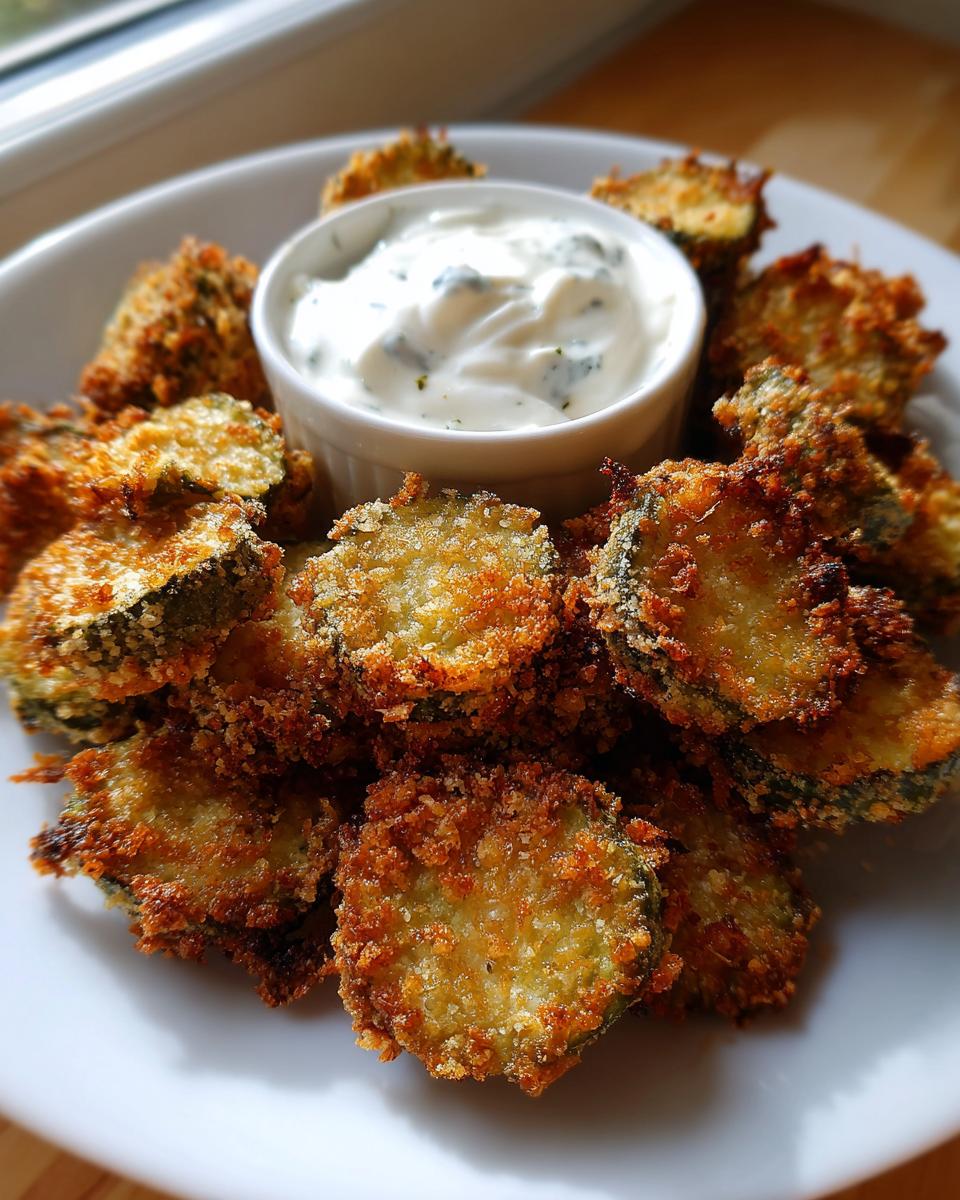
Are you tired of snack food that promises crunch but delivers mush? Me too! That’s why I dedicated weeks to perfecting these Fried Pickles. Forget the floppy, sad versions you get sometimes; my goal—and my promise to you—is achieving that shatteringly crisp texture every single time. I know life is busy, and I wouldn’t put a recipe in my little kitchen diary unless it was truly practical and tasted phenomenal. That signature crunch comes from what I call the triple dredge method. Trust me, once you master this, you’ll never look at bar snacks the same way again. It’s the perfect appetizer for a cozy night or a huge game day spread. Speaking of appetizers, if you need another crowd-pleaser, you have to check out my recipe for classic cheese ball!
- Why This Is the Best Fried Pickles Recipe You Will Make
- Ingredients for Ultimate Crispy Fried Pickles
- How to Prepare Restaurant Style Fried Pickles
- Tips for Making Better Than Takeout Fried Pickles
- Serving Suggestions for Your Fried Pickles
- Storage & Reheating Instructions for Leftover Fried Pickles
- Frequently Asked Questions About Fried Pickles
- Nutritional Estimates for Homemade Fried Pickles
- Share Your Salty Crunchy Bites
Why This Is the Best Fried Pickles Recipe You Will Make
I honestly think these are the Best Fried Pickles Recipe out there for the home cook. Why? Because we are ditching soggy excuses for snacks! We are aiming for Restaurant Style Fried Pickles that shatter when you bite into them. This method I perfected in my kitchen diary proves you don’t need a commercial deep fryer to get incredible results. You just need the right technique, which I’ll walk you through step by step.
Once you try these, they are definitely going straight onto your list for easy game day favorites!
Achieving Ultra-Crispy Fried Pickles
The secret, which I hammered home in the first section, is making sure those dill pickle chips are bone dry. Seriously, pat them like you mean it! Then, we layer on the breading using the Triple Dredge Pickle Technique. It might feel like an extra step, but that double coat of flour and panko creates a shield against the oil, locking out sogginess forever. That’s what gives you the perfect Crispy Fried Pickles experience.
Perfect for Game Day Appetizers
These don’t hang around waiting for guests, let me tell you. They are fast! From drying the pickles to serving them hot out of the oil, we are talking under 30 minutes total. They are the ultimate Party Finger Foods because everyone grabs them the second they hit the counter. They stay perfectly hot and crunchy just long enough for everyone to enjoy a few salty, tangy bites.
Ingredients for Ultimate Crispy Fried Pickles
Okay, let’s talk about what you need to pull this miracle off. Don’t worry, everything here is easy to grab at any grocery store. The key components are the star, the wet stuff, and the crunch factor. We are going to get the pickles ready first—and I mean *really* ready. You need a 16-ounce jar of dill pickle chips, and you must drain those little guys thoroughly. Then, grab a paper towel stack because we need them totally dry before they see any coating mixture. That extra moisture is the enemy of crunch, remember that!
The real magic in getting those Fried Pickles to look like they came straight from my kitchen diary comes down to Panko breadcrumbs. They are fluffier and hold up better than regular stuff. Grab those, your flour, your eggs, and milk for the wash. And because no crunchy snack is complete without something creamy to dip it in, we are whipping up a zesty ranch. If you are looking for other great party snacks, check out my buffalo chicken sliders recipe!
For the Seasoned Breading for Pickles
This is the dry mix that builds the first layer of armor. You need one full cup of all-purpose flour for that initial dredge so the egg wash has something to stick to. Then we load it up with flavor for that great Seasoned Breading for Pickles! Mix in one teaspoon each of salt, black pepper, garlic powder, and onion powder. Don’t forget half a teaspoon of simple paprika—it gives us that beautiful golden color. Mix that flour and those spices until they look like one beautiful, savory blend.
For the Zesty Ranch Dip
Seriously, these pickles need ranch, and I’m not going to tell you to buy a boring bottle. We are taking regular buttermilk ranch dressing—about a cup of it—and giving it a little kick. Stir in one tablespoon of fresh chives, which smell amazing, and just one teaspoon of hot sauce. That tiny bit of heat cuts right through the rich flavor of the fried batter and makes the whole thing sing. This is the ultimate pairing for your Fried Pickles with Ranch Dip.
How to Prepare Restaurant Style Fried Pickles
Okay, this is where the magic happens, and honestly, where you can mess it up if you rush! Achieving that Restaurant Style Fried Pickles quality is all about control. A crucial note from my kitchen diary: If you have five extra minutes, after you coat these, lay them on a dry plate and pop them in the fridge for 15 minutes. That chilling time helps the crust set up beautifully before it hits the oil. If you’re short on time, don’t stress, but know the chill step is a little insurance policy against sogginess!
Get your oil ready now. In a heavy pot, you need about two inches of vegetable oil heated up to exactly 375 degrees F. Seriously, if you don’t have a thermometer, you need one for frying—it makes all the difference between crunchy and greasy. If you’re looking for a great basic recipe for stabilizing your sweets, I have a great vanilla buttercream recipe that uses precise measurements!
The Triple Dredge Pickle Technique
Set up your three bowls—the seasoned flour, the whisked egg and milk wash, and finally, the Panko breadcrumbs. Grab one of those super-dry pickle chips. First, coat it completely in the seasoned flour and shake off the dusty extra bits. Next, dip it into the wet egg wash, just letting the excess drip off for a second. The final, most important dip is the Panko! Press the pickle firmly into the breadcrumbs. I mean, really push it in there so you have a thick, even layer. This is how you guarantee that satisfying crunchness for your Homemade Fried Pickles.
Deep Fried Pickles Secret: Frying for Crunch
When your oil hits 375°F, it’s dipping time! Work in small batches only. If you dump too many in, the oil temperature drops immediately, and you get those sad, oily results we are trying to avoid. Carefully lower your coated pickles in. They cook fast—we are talking about 1 to 2 minutes per side, tops. You want deep golden brown, not dark brown! Once golden, use a slotted spoon to lift them out. Do not put them on paper towels! Place them on a wire rack over a baking sheet so the air can circulate. A tiny sprinkle of salt right after they come out seals the deal. They need to be eaten immediately for the best experience!
Tips for Making Better Than Takeout Fried Pickles
Look, I love deep frying—who doesn’t love that amazing sizzle?—but sometimes you want that incredible crunch without making a whole oil mess. I totally get it, especially when trying to keep things quick for a weeknight snack. So, I tested the Air Fryer Fried Pickles method extensively to make sure it lives up to the deep-fried standard. It’s a little different, but oh so rewarding if you’re looking for a lighter approach to this Tangy Fried Snack.
Also, if you’re gearing up for a party and need something a bit classier than snacks, you absolutely have to try my recipe for an easy lemon drop martini. It’s bright, fun, and super simple!
Making Crispy Fried Pickles in the Air Fryer
If you’re using your air fryer, you need to treat the coating a little differently since there’s no hot bath to seal it instantly. After you finish that perfect Triple Dredge Pickle Technique, you need to give them a light spray with cooking spray. Don’t skip this! It helps them brown up instead of just drying out.
Set your air fryer basket for 400 degrees F (that’s about 200 degrees C for my friends using metric!). Pop your coated pickles in, making sure they aren’t touching too much because we need that air circulation. Cook them for 8 to 10 minutes total. But here’s the trick: pull the basket out around the 5-minute mark and flip them all over gently. This ensures both sides get that golden, crunchy shell you deserve.
Ingredient Selection for Tangy Fried Snack
While the coating makes the crunch, the pickle itself sets the flavor foundation. For this recipe, I swear by the standard dill pickle chips. They are the perfect size—not too thick, not too flimsy—and you get that perfect salty, briny flavor that balances the richness of the batter. They really hit that sweet spot we are aiming for with our Crunchy Pickle Snack.
But hey, if you only have spears or larger rounds, go for it! They will just take a minute or two longer to heat through the center during frying. Just make sure whatever pickle you choose is patted dry. That’s the rule that never changes in my kitchen, whether I’m making deep-fried delights or lighter air-fried versions!
Serving Suggestions for Your Fried Pickles
So, you’ve nailed the crunch, the pickles are shimmering golden brown, and they’ve got that perfect salty punch. Awesome! While my zesty ranch dip is my go-to—it cuts the richness beautifully—I know sometimes you need a few more options, especially if you’re setting these out for a big party or just watching a tense game. Variety on the appetizer platter is always a win in my book!
You asked about other dips, and I’ve got a few favorites that absolutely transform these crispy bites. If you’re looking for something creamy but a bit different from ranch, you have to try making a whipped ricotta dip. It’s so light and fluffy, and it balances the tanginess of the pickle without competing with it at all. It feels fancy but takes practically no time.
And what about something smoky? I’ve seen some folks at parties pairing these amazing Salty Crunchy Bites with a good, thick BBQ sauce. Think about it: tangy pickle, savory coating, and then a sweet, smoky BBQ finish. What’s not to love? I even saw a pin that suggested trying a great BBQ sauce for dipping, and honestly, it was a game changer for a smoky flavor profile.
If you’re making a few different types of Party Finger Foods, make sure you keep small dipping bowls separate so the flavors don’t mix up! You can serve them alongside anything, really—they are a fantastic addition to any spread of game day appetizers you might be putting together. Just grab a batch, keep them hot, and watch them disappear!
Storage & Reheating Instructions for Leftover Fried Pickles
There’s a hard truth about anything deep-fried, and that includes our delicious, perfectly crunchy Fried Pickles: they are absolutely best eaten the second after they come out of the oil. The second they cool down, that lovely crisp crust starts to get a little lonely and begins absorbing moisture, which is totally natural. That’s why I always try to make just what we plan to eat in one sitting! These are meant to be fresh, immediate snacks, not something you pack up in a container for lunch the next day.
But hey, life happens, right? Maybe you made a huge batch for a party and suddenly you have a few crispy survivors tucked away. If you have leftovers, the rules change slightly because we have to fight that moisture head-on. First, if you need to store them, put them in a single layer on a plate, let them cool completely to room temperature, and then store them in an airtight container. Don’t cram them tight into the fridge; that’s just inviting sogginess.
The Best Way to Reheat for a Crunchy Pickle Snack
If you try to microwave them, you are on a fast track to greasy disappointment—so please, don’t even try it! The microwave is the enemy of crispiness. We need dry, circulating heat to wake that crust back up. So, grab your oven or, even better, your air fryer.
For the oven, spread the pickles across a wire rack set on a baking sheet. Slide that into an oven preheated to about 350 degrees F. We are just looking to heat them through and crisp up the batter again. This usually takes about 5 to 7 minutes. Check them often!
If you are using the air fryer (which, let’s be honest, is probably easier), just toss them in a single layer at 375 degrees F for about 3 minutes. That quick blast of hot air is usually enough to remind the Panko crust how crunchy it’s supposed to be. Honestly, they won’t be 100% as good as fresh, but it’s the closest you’ll get! After trying this reheating method, you might want to check out my recipe for no-bake granola bars for another snack that actually *is* better the next day!
Frequently Asked Questions About Fried Pickles
I get so many questions about perfecting my Fried Pickles, and I absolutely love that you want to get this recipe just right! It shows you’re serious about making the best Crunchy Pickle Snack possible. Here are a few things I hear most often when people are trying this out in their own kitchens.
Can I make these Fried Pickles ahead of time?
I’m going to steer you straight here: no, not really, if you want that incredible, shatteringly crisp texture. These need to be served immediately after draining for the best experience. However, you can absolutely prep! You can make the zesty ranch dip the day before—it actually tastes better that way—and you can also do your entire triple dredge coating setup. Just keep those breaded pickles separated on parchment in the fridge for up to an hour *before* frying. But when it’s game time, you need to fry them fresh. Remember, keeping things fresh is key for great Party Finger Foods!
What is the secret to making the best Fried Pickles recipe?
If I had to pick just one secret for the absolute Best Fried Pickles Recipe, it’s a two-parter. First, the breading process: you must use that Triple Dredge Pickle Technique. That extra layer of Panko breadcrumbs is non-negotiable for that deep-fried crunch we all crave! Second, and this is arguably more important, is oil temperature. You must maintain that oil at 375°F. When the oil is hot enough, the crust cooks instantly and seals itself, kicking moisture out. If the oil is too cool, the coating soaks up oil before it can set, and you end up with greasy, soggy snacks. Keep that thermometer handy!
If you’re looking for another amazing appetizer that comes together fast, you have to try my easy baked street corn dip. Seriously good stuff!
Nutritional Estimates for Homemade Fried Pickles
Okay, let’s talk numbers for a minute. I know we aren’t making these Fried Pickles because they are health food, right? They are a treat, a glorious, salty, crunchy treat meant for celebration or an amazing game day appetizer. But because I believe in sharing everything from my little kitchen diary, here are the estimates based on searing them up the way I wrote in the recipe.
Keep in mind that these figures are just an approximation. How dry you get those pickles, the exact brand of ranch dressing you use for the dip, and how much oil they hold onto will definitely shift these numbers. Use this as a general guide for your perfectly golden, crispy snacks!
I usually serve four people, so these estimates are based on a quarter of the batch:
- Calories: About 350 per serving
- Fat: Around 22 grams (That’s where the deep-frying goodness lives!)
- Protein: About 8 grams
- Carbohydrates: Roughly 30 grams
- Sodium: This is the wild one, clocking in around 850mg. Pickles are salty, folks!
- Sugar: Just 3 grams, which is great because we aren’t adding much sweetness to the dredge.
Speaking of salty and savory, if you want another flavor bomb that is a little less fried, you absolutely must try my recipe for dill pickle chicken salad. It hits that salty/tangy note in a totally different, lunch-friendly way!
For what it’s worth, the ranch dip adds a good chunk of that fat content, so using a lighter ranch or swapping to a vinegar-based dipping sauce will naturally lower the numbers down a bit if you are watching intake!
Share Your Salty Crunchy Bites
Now the hard part is over—you’ve made the best Fried Pickles of your life! Seriously, I can almost hear that satisfying *crunch* from here. I poured my heart into sharing every single secret I found in my kitchen diary, especially that game-changing Triple Dredge Pickle Technique. But honestly, a recipe isn’t truly finished until someone else tries it, loves it, and shares the joy!
Did you manage that shatteringly crisp crust? Did your family devour them before you could even get the dip ready? I want to hear all about it! Please, leave a rating or a comment down below. Let me know how your batch turned out, especially if you tried the air fryer method or decided to use a different sauce. Your feedback helps me make sure I am sharing clear, useful recipes for busy people like us.
And please, if you’re sharing pictures of your perfect, golden-brown Salty Crunchy Bites on Instagram or Facebook, tag me! Seeing your results is the absolute best part of running Little Kitchen Diary. It proves that simple, home-cooked happiness is absolutely achievable, even when time is short. If you ever need to get in touch with me directly, maybe to share a tip or ask a burning question, you can use the contact form on my site. Happy snacking!
PrintUltimate Crispy Fried Dill Pickles with Zesty Ranch Dip
Make restaurant-style crispy fried dill pickles at home. This recipe uses a triple dredge technique for an ultra-crunchy crust, perfect as a game day appetizer or snack. Serve hot with a homemade zesty ranch dip.
- Prep Time: 15 min
- Cook Time: 15 min
- Total Time: 30 min
- Yield: 4 servings 1x
- Category: Appetizer
- Method: Deep Frying
- Cuisine: American
- Diet: Vegetarian
Ingredients
- 1 (16 ounce) jar dill pickle chips, drained well
- 1 cup all-purpose flour
- 1 teaspoon salt
- 1 teaspoon black pepper
- 1 teaspoon garlic powder
- 1 teaspoon onion powder
- 1/2 teaspoon paprika
- 2 large eggs
- 1/4 cup milk
- 1 cup panko breadcrumbs
- 1/2 cup all-purpose flour (for dredging)
- Vegetable oil, for frying
- For the Zesty Ranch Dip: 1 cup buttermilk ranch dressing, 1 tablespoon fresh chives, chopped, 1 teaspoon hot sauce
Instructions
- Pat the drained dill pickle chips completely dry using paper towels. This step is key for crispiness.
- Set up your triple dredge station: Place the 1 cup flour, salt, pepper, garlic powder, onion powder, and paprika in a shallow dish and mix well. Place the eggs and milk in a second shallow dish and whisk until combined. Place the panko breadcrumbs in a third shallow dish.
- Dredge the dry pickles: Take a pickle chip and coat it thoroughly in the seasoned flour mixture, shaking off excess. Dip the floured chip into the egg wash, letting excess drip off. Finally, press the chip firmly into the panko breadcrumbs, ensuring full coverage. Place the coated pickles on a clean, dry plate.
- Heat the oil: Pour vegetable oil into a deep, heavy-bottomed pot or deep fryer to a depth of about 2 inches. Heat the oil to 375 degrees F (190 degrees C). Use a thermometer to monitor the temperature.
- Fry the pickles: Working in small batches to avoid overcrowding the pot, carefully lower the breaded pickles into the hot oil. Fry for 1 to 2 minutes per side, until they are golden brown and shatteringly crisp. Do not overcook.
- Drain: Remove the fried pickles with a slotted spoon and place them on a wire rack set over a baking sheet to drain excess oil. Sprinkle lightly with a pinch of salt immediately after frying.
- Prepare the dip: In a small bowl, combine the ranch dressing, chopped chives, and hot sauce. Stir until mixed.
- Serve immediately while hot with the zesty ranch dip.
Notes
- For extra crispiness, chill the dredged pickles on the baking sheet for 15 minutes before frying.
- If you prefer an air fryer method, spray the coated pickles lightly with cooking spray and air fry at 400 degrees F (200 degrees C) for 8 to 10 minutes, flipping halfway through.
- You can substitute dill pickle spears or rounds for chips if you prefer.
Nutrition
- Serving Size: 1/4 of recipe
- Calories: 350
- Sugar: 3
- Sodium: 850
- Fat: 22
- Saturated Fat: 4
- Unsaturated Fat: 18
- Trans Fat: 0
- Carbohydrates: 30
- Fiber: 2
- Protein: 8
- Cholesterol: 75