
If there’s one food that immediately feels like a hug from the inside, it’s absolutely perfect fried chicken. I remember when my world got too fast, and I stopped making time for real cooking. That’s why focusing on this recipe—my Ultra-Crispy Buttermilk Southern Fried Chicken—is so important to me now. It’s not just about dinner; it’s about slowing down long enough to nail that impossible trio: ultra-crispy exterior, unbelievably juicy interior, all thanks to a signature buttermilk soak. This isn’t some fussy restaurant technique; this is honest, soul-satisfying comfort food you can master right in your own kitchen. If you’re ready to reclaim some simple joy and create the best batch of crispy chicken you’ve ever had, let’s get started! I’ve learned so much about bringing joy back to my meals, and you can read more about that mission over at my About Page.
- Why This Buttermilk Southern Fried Chicken Recipe Delivers Juicy and Crispy Chicken
- Gathering Ingredients for Perfect Fried Chicken
- How To Make Fried Chicken: Step-by-Step Instructions
- Tips for Foolproof Fried Chicken Success
- Variations on Classic Fried Chicken
- Serving Suggestions for Your Savory Chicken Dinner Ideas
- Storage and Reheating Instructions for Leftover Fried Chicken
- Estimated Nutritional Data for This Fried Chicken
- Frequently Asked Questions About Making Great Fried Chicken
Why This Buttermilk Southern Fried Chicken Recipe Delivers Juicy and Crispy Chicken
Look, making truly stellar fried chicken isn’t luck; it’s mostly science and a little bit of knowing those old-school tricks. When I started documenting recipes for this diary, I wanted to find the foolproof way to get that gorgeous golden crust without turning the inside dry as a bone. This method, relying heavily on that long soak, is my absolute gold standard.
- Guaranteed Juicy Interior: Thanks to that beautiful, long buttermilk bath.
- Restaurant-Quality Texture: That super-craggy, flaky crunch you expect from classic Southern cooking.
- Deep Flavor: The spices penetrate past the skin and into the meat itself.
The Magic of Buttermilk Brined Chicken
Buttermilk is straight-up magic for chicken, trust me. The mild acids in the culture gently break down the proteins in the meat. This process tenderizes everything beautifully, ensuring that when the chicken hits the hot oil, you get maximum moisture retention. It’s why this buttermilk brined chicken stays so wonderfully juicy, even if you fry it slightly longer.
Achieving the Crunchy Chicken Coating
The flour mixture isn’t just flour, oh no! We sneak in cornstarch for incredible crispness and a dash of baking powder. When these hit the hot oil, they create those little air pockets that crisp up into that craggy, wonderfully crunchy coating everyone chases. That’s the secret to making this the best homemade fried chicken you’ve ever tasted.
Gathering Ingredients for Perfect Fried Chicken
Okay, preparing for fried chicken requires a little bit of structure, mainly because you have two distinct components: the soak and the crust. We need high-quality ingredients here because that’s what turns a standard outcome into those spectacular ‘Savory Chicken Dinner Ideas’ we’re dreaming about. Don’t skimp on the chicken quality; bone-in, skin-on pieces are the way to go for supreme juiciness!
Chicken and Marinade Components
First, grab about 3 lbs of bone-in chicken pieces—I love a mix of thighs and drumsticks for the best experience. For the marinade, you’ll need 2 cups of rich buttermilk, which is the star here. Don’t forget 1 tablespoon of your favorite hot sauce! Then, we toss in the flavor foundation: 2 teaspoons of kosher salt, 1 teaspoon each of black pepper, paprika, garlic powder, and onion powder. Mix this all up until it looks invitingly creamy.
The Dry Dredge Mix for Crispy Fried Chicken
This is where we build the armor! In a separate dish—and make sure it’s shallow—you’re combining 2 cups of all-purpose flour, a hefty 1/2 cup of cornstarch, and 1 teaspoon of baking powder. Trust me on this cornstarch addition; it’s the key to that super crunchy coating on your fried chicken. This mix has to be whisked real well before the chicken swimming in buttermilk ever touches it!
How To Make Fried Chicken: Step-by-Step Instructions
Alright, now that we have our chicken pampered in the buttermilk and our dredging station all set up, it’s time for the action—the actual cooking of this amazing fried chicken! Remember, the difference between good chicken and legendary chicken is all about timing and temperature control. Don’t rush this part; precision here means you get that perfect seal on the crust.
Marinating the Chicken for Tenderness
The marinade isn’t just for flavor; it’s for ensuring maximum tenderness. You absolutely must let your chicken hang out in that spiced buttermilk for at least four hours. I personally aim for overnight—like 12 to 24 hours if I can manage it. The longer it soaks, the more tender that meat gets. Think of it as giving the salt and spices plenty of time to do their tenderizing work inside the meat before we start frying.
The Double-Dredge Technique for Extra Crunch
Here’s where we build that beautiful, craggy crust! Pull each piece out of the buttermilk, let the heavy excess drip back into the bowl for just a second—don’t shake it dry! Then, press it firmly into your flour mixture. For that extra, ultra-crispy result, dip it *quickly* back into the wet buttermilk, and then immediately back into the flour again. Press that second coating on hard. Those little ridges and edges are what get extra crunchy!
Frying at the Correct Temperature
This is non-negotiable for beautiful deep fried chicken: Your oil needs to hit 325 degrees Fahrenheit (that’s the sweet spot). You need that heat to set the coating instantly. Use a thermometer; don’t guess! Carefully lower your floured chicken pieces into the hot oil, but only do a few at a time so you don’t drop that temperature drastically. We’re looking for about 6 to 8 minutes per side until it’s dark golden brown. If you overcrowd the pan, the crust gets soggy, and we sure aren’t having that!
If you have any questions at all while you’re working through these steps, don’t hesitate to reach out through my Contact Page. I love hearing about your cooking adventures!
Tips for Foolproof Fried Chicken Success
I’ve burned enough batches of fried chicken over the years to know exactly what goes wrong when you try to rush things. The biggest pitfall, honestly, is paying all that attention to the marinade and crust, only to ruin the texture right at the end! We’re aiming for that shatteringly crisp bite here, so temperature management is going to be your absolute best friend throughout the frying process.
Skillet Choice and Oil Depth
You can’t use just any flimsy pan! If you want truly even cooking, grab your heaviest skillet—I’m partial to my favorite cast iron, as it holds the heat so beautifully. You need enough oil to truly submerge the chicken pieces, so make sure you’ve got a good 2 to 3 inches of vegetable oil or shortening heated up. If the oil isn’t deep enough, the bottom side cooks way faster than the top!
Avoiding a Soggy Crust When Draining
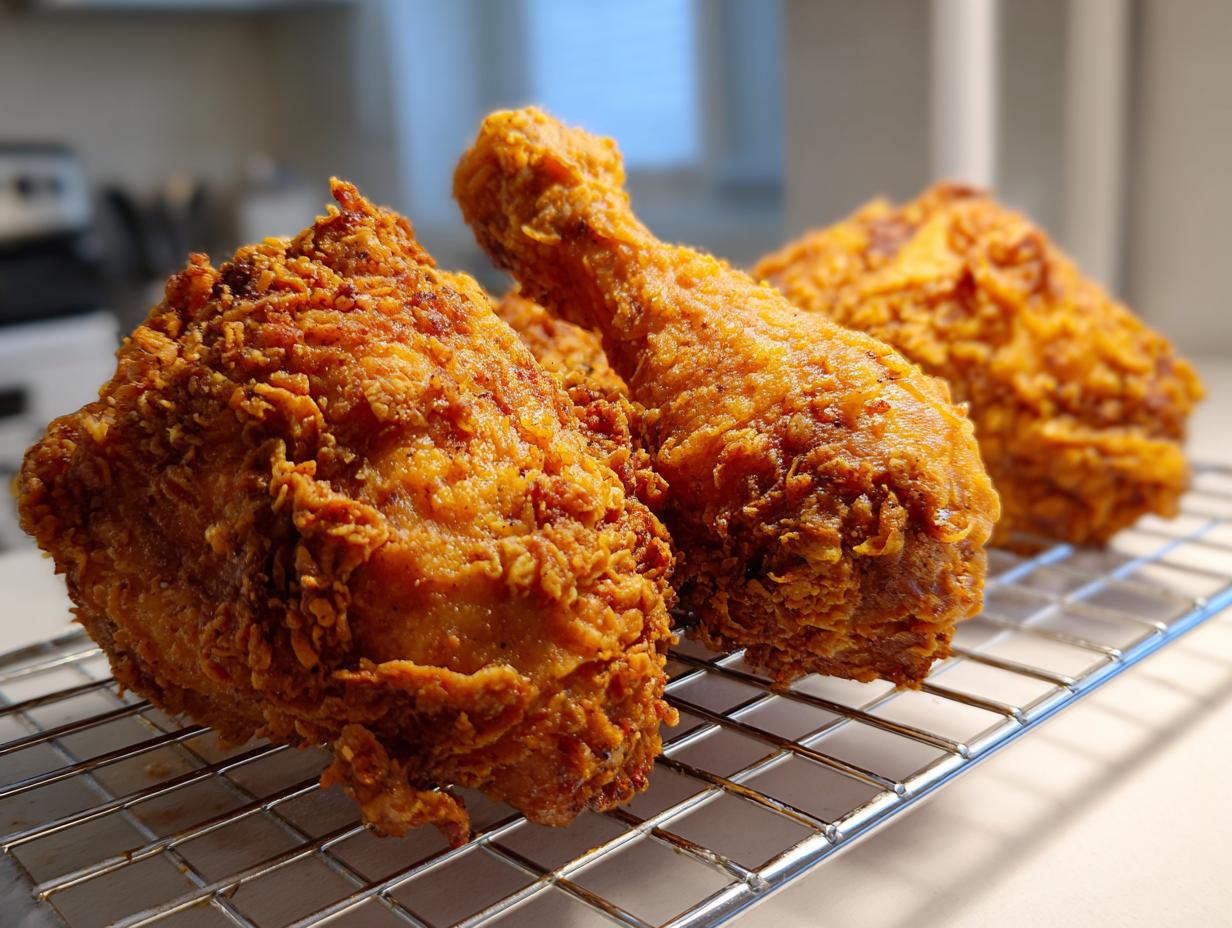
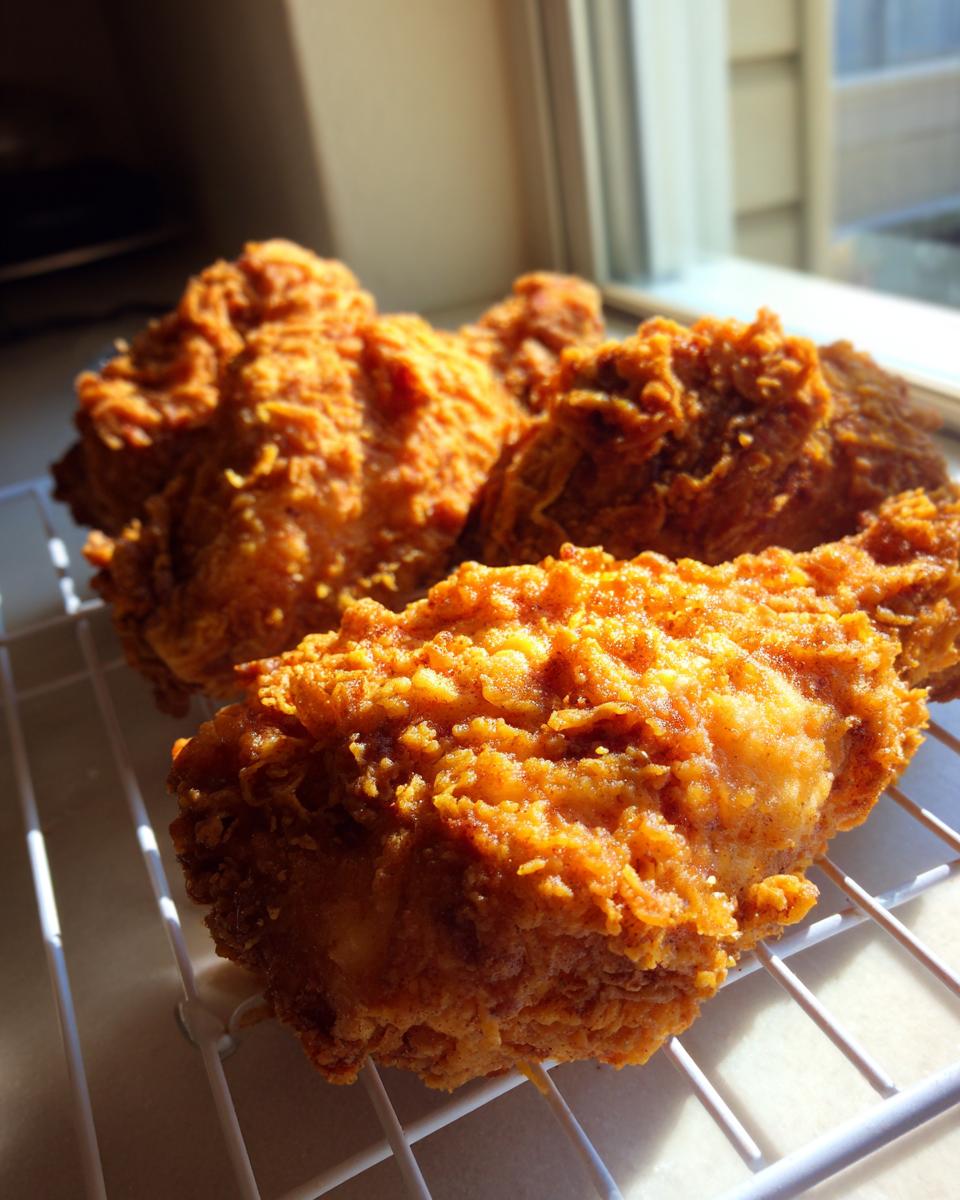
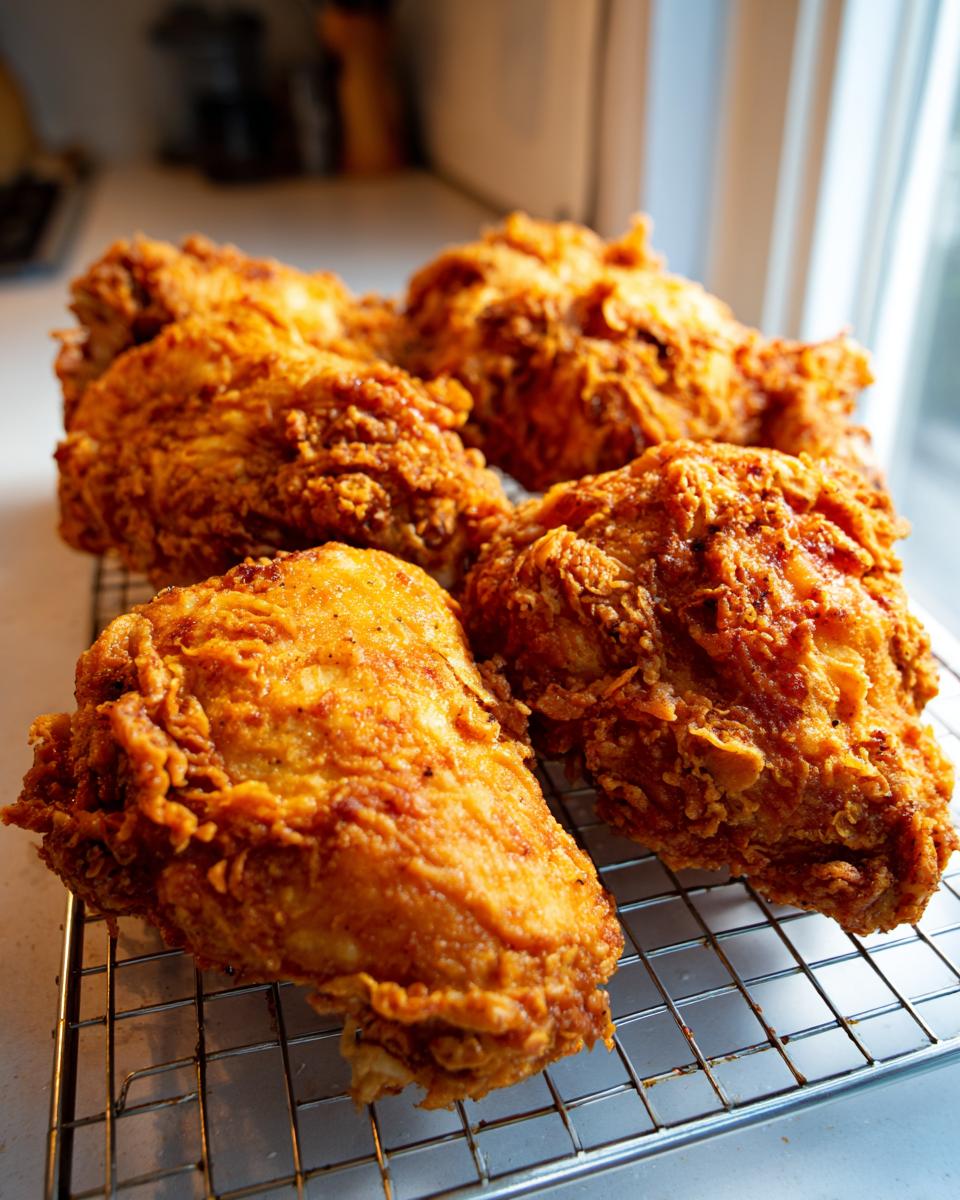
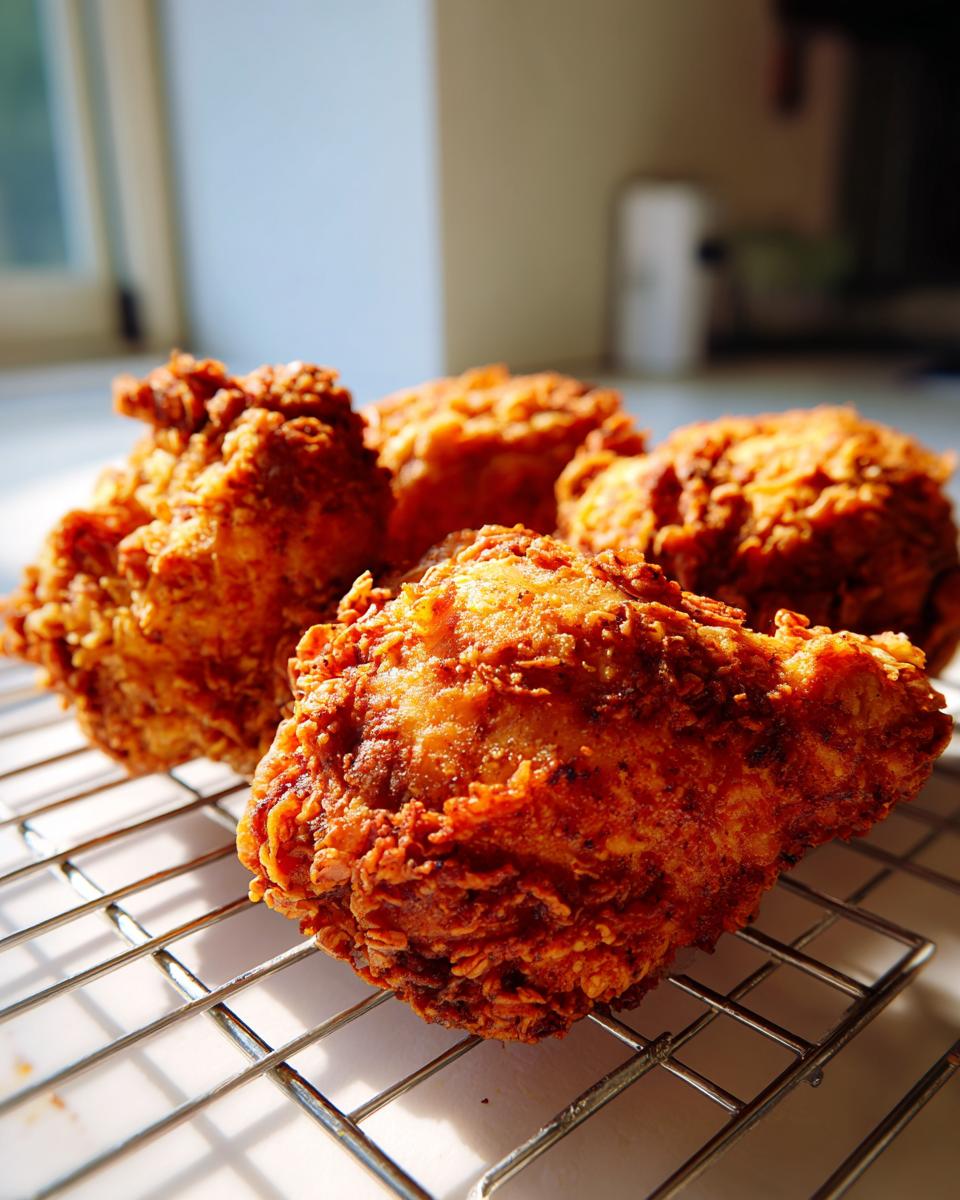
This is the most common rookie mistake I see, and it drives me crazy! When you pull the chicken out of the oil, resist the urge to set it straight onto paper towels. Paper towels trap the steam rising off the hot crust, and that steam turns your beautifully crunchy coating instantly sad and soggy. Nope! Always, always place your cooked fried chicken on a wire rack set over a baking sheet. That lets the air circulate all the way around so the crust stays perfectly defined.

Variations on Classic Fried Chicken
While our buttermilk-soaked recipe is rooted in classic Southern style, I love how easy it is to tweak things when you need a little something different for dinner. Sometimes you want a massive kick, and other times you’re working with whatever you have on hand. The base structure here is so solid that it handles modifications like a champ. If you’re feeling adventurous and want to dive into a famous tasting experience, check out this incredible copycat recipe for inspiration!
Spice Level Adjustments
If you’re craving a bit more fire, don’t just sprinkle pepper on top at the end! You need to incorporate the heat directly into the dredge. I usually add about half a teaspoon of cayenne pepper right into that flour mixture. If you prefer depth over raw heat, try swapping the regular paprika for smoked paprika in the marinade; it gives the crust a wonderful, warm background note.
Alternative Cuts
This soaking method works beautifully no matter what you’re using! If you are making a quick weeknight dinner and you only have boneless breasts, go for it, but watch the thermometer closely, because they cook fast and can dry out. This technique is fantastic for those tender Chicken Thighs Fried Recipe variations as well. Just remember, thinner cuts mean less time in that hot oil!
Serving Suggestions for Your Savory Chicken Dinner Ideas
You’ve done the hard part making this amazing, juicy, and crispy fried chicken. Now, for the best part—what are we eating it with? You can’t just pull a piece of perfectly cooked chicken out of the oil and eat it alone! For the ultimate comfort food experience, stick to the classics.
I always pair this with creamy mashed potatoes drowning in simple white gravy, a vinegar-based coleslaw to cut the richness, and maybe some buttery corn on the cob. Those pairings complete the true Southern fried chicken experience every single time. It’s impossible to be sad when you have a plate full of these flavors!
Storage and Reheating Instructions for Leftover Fried Chicken
If you’re lucky enough to have any leftover fried chicken—which is rare in my house—the goal is always to bring back that shatteringly crisp crust. Please, don’t just microwave it; that’s a recipe for rubbery disappointment! The best way to store it is in a single layer inside an airtight container in the fridge, but only once it has cooled down completely.
To wake it back up, skip the microwave entirely. You want dry heat! Pop the pieces onto a wire rack set over a baking sheet and bake them in a moderate oven (about 350°F) for about 10 to 15 minutes. This heats the meat through while crisping up that gorgeous coating again. It truly works wonders!
Estimated Nutritional Data for This Fried Chicken
Okay, so we’re talking about deep-fried, buttermilk-soaked, incredibly satisfying fried chicken here. That means we aren’t aiming for a salad, right? When I calculated the breakdown for this recipe, I used the standard serving size of one piece, assuming a mix of thighs and drumsticks coated with the full dredge.
I want to be super clear: this nutrition label is just my best estimate based on standard ingredient values. Since we are deep frying, the exact fat absorption can change things depending on your oil and how long you fry. So please take these numbers as a guide for this delicious comfort food dinner, not as strict medical fact!
- Serving Size: 1 piece
- Calories: 450
- Fat: 28g
- Protein: 32g
- Carbohydrates: 15g
See? Worth every single bite! This is what makes our classic fried chicken such a winner—huge flavor, massive satisfaction. If you want to check out some of my lighter home cooking inspiration, sometimes I post quicker weeknight attempts over on my Privacy Policy page (though that’s not where the ‘how-to’ guides actually live!).
Frequently Asked Questions About Making Great Fried Chicken
I get so many messages after people try this recipe, and I love seeing everyone succeed! Whether you’re aiming for the best homemade fried chicken or just trying to master that perfect crispy fried chicken recipe for the first time, confusion happens. Here are a few things folks always ask when getting ready to make this spectacular batch of fried chicken.
Can I use chicken breasts instead of thighs for this fried chicken?
You absolutely can use breasts, sure! Breasts are just much leaner than thighs, so you have to be extra careful that you don’t overcook them. If you use breasts, I’d recommend pounding them just a touch so they are an even thickness, and you’ll need to watch that frying time closely. Dial it back by a minute or two per side so they don’t dry out while you’re waiting for the crust to finish turning golden brown.
What is the best oil to use for the crispiest fried chicken?
If you want that incredible, shatteringly crisp crust, you need an oil that can handle high heat without breaking down or smoking everywhere. For me, high smoke point oils like vegetable oil, canola oil, or peanut oil are the top choices. Those are the ones that let you keep that 325°F steady temperature we talked about earlier, which is the secret weapon for a great crust!
How do I know when my fried chicken is done cooking?
Color is a liar sometimes! Yes, golden brown is what we see, but that doesn’t guarantee you’ve cooked the inside safely. The only way to know for sure if your fried chicken is done is by using an instant-read meat thermometer. You need that internal temperature to hit 165 degrees Fahrenheit, folks. Don’t pull it out based on color alone; trust the thermometer for a juicy and safe result!
If you decide to adjust my recipe or try out a different technique, I always ask folks to let me know how it went on my Contact Page! Happy cooking!
PrintUltra-Crispy Buttermilk Southern Fried Chicken

Follow this simple recipe to make juicy, ultra-crispy Southern fried chicken with a golden, crunchy coating using a buttermilk soak.
- Prep Time: 20 min
- Cook Time: 30 min
- Total Time: 4 hours 50 min
- Yield: 4 servings 1x
- Category: Dinner
- Method: Deep Frying
- Cuisine: Southern American
- Diet: None
Ingredients
- 3 lbs bone-in, skin-on chicken pieces (thighs and drumsticks work well)
- 2 cups buttermilk
- 1 tablespoon hot sauce
- 2 teaspoons kosher salt
- 1 teaspoon black pepper
- 1 teaspoon paprika
- 1 teaspoon garlic powder
- 1 teaspoon onion powder
- 2 cups all-purpose flour
- 1/2 cup cornstarch
- 1 teaspoon baking powder
- Vegetable oil or shortening for frying
Instructions
- Combine the buttermilk, hot sauce, salt, pepper, paprika, garlic powder, and onion powder in a large bowl. Add the chicken pieces, ensuring they are fully submerged. Cover the bowl and refrigerate for at least 4 hours, or preferably overnight, for the best results.
- In a separate shallow dish, whisk together the flour, cornstarch, and baking powder. This mixture creates the extra crispy coating.
- Remove the chicken from the buttermilk marinade, letting excess drip off, but do not wipe it dry.
- Dredge each piece of chicken thoroughly in the flour mixture, pressing the flour onto the chicken to create a thick, craggy crust. For an extra crispy crust, dip the floured chicken back into the remaining buttermilk for a second, quick dip, and then coat it again in the flour mixture.
- Heat 2 to 3 inches of oil in a large, heavy-bottomed skillet or Dutch oven to 325 degrees Fahrenheit. Use a thermometer to monitor the temperature; maintaining this heat is key for juicy chicken.
- Carefully place the chicken pieces into the hot oil, ensuring you do not overcrowd the pan. Work in batches.
- Fry the chicken for about 6 to 8 minutes per side, turning occasionally, until it reaches a deep golden brown color and the internal temperature reaches 165 degrees Fahrenheit. Thicker pieces may require slightly longer cooking times.
- Remove the cooked fried chicken from the oil and place it on a wire rack set over a baking sheet to drain excess oil. Do not place it directly on paper towels, as this can steam the crust and make it soggy.
- Serve your crispy fried chicken immediately as a classic comfort food dinner.
Notes
- For the best flavor and tenderness, allow the chicken to marinate in the buttermilk for a full 12 to 24 hours.
- Use a cast iron skillet for the most even heat distribution while frying.
- If the oil temperature drops too low, the chicken will absorb too much oil and become greasy. If it gets too high, the crust will burn before the inside cooks.
Nutrition
- Serving Size: 1 piece
- Calories: 450
- Sugar: 1
- Sodium: 650
- Fat: 28
- Saturated Fat: 8
- Unsaturated Fat: 20
- Trans Fat: 0
- Carbohydrates: 15
- Fiber: 0
- Protein: 32
- Cholesterol: 110