
If you’ve ever looked at a picture of a beautiful pie and thought, “Yes, I want that,” but then immediately thought, “No, I absolutely do not want to wrestle with crimping edges,” then I have good news!
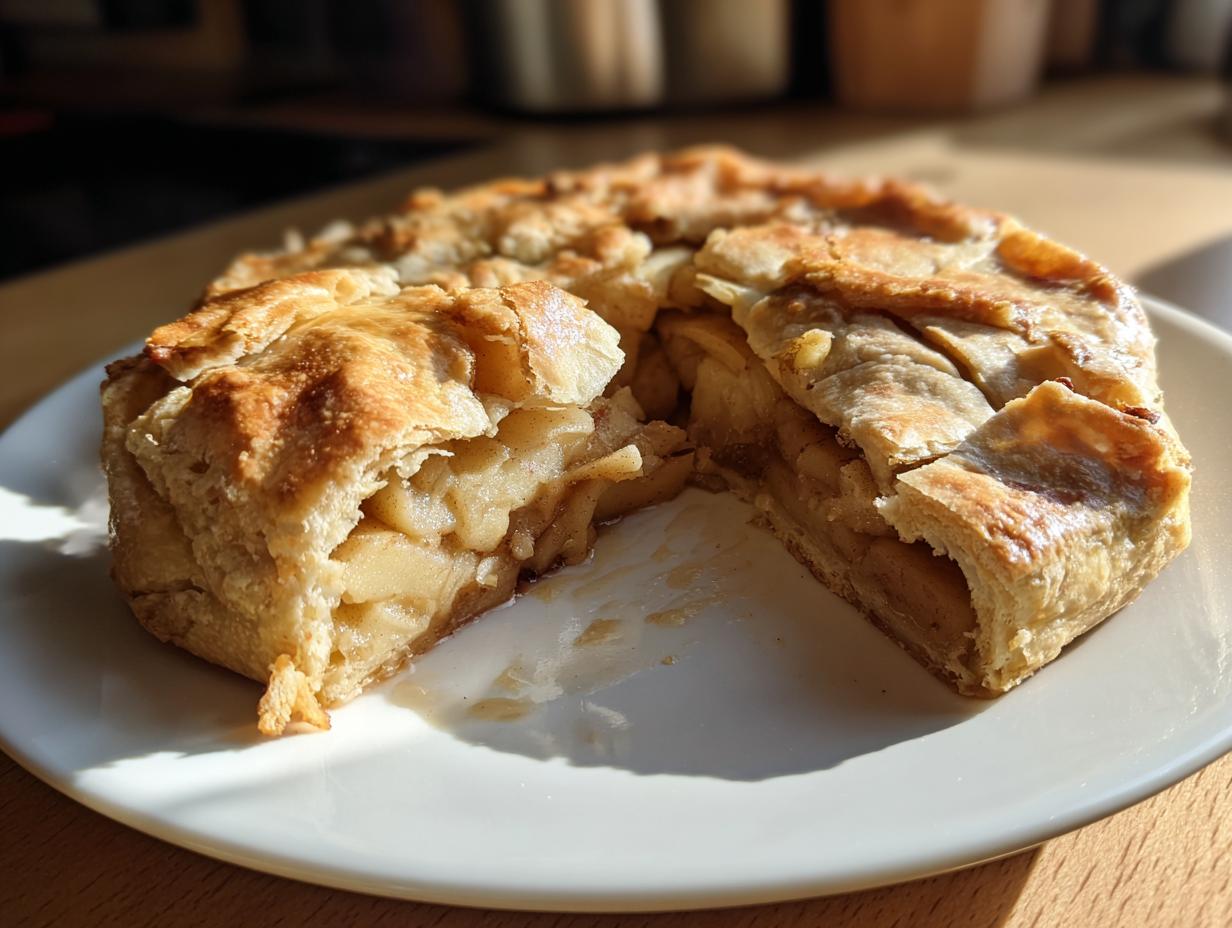
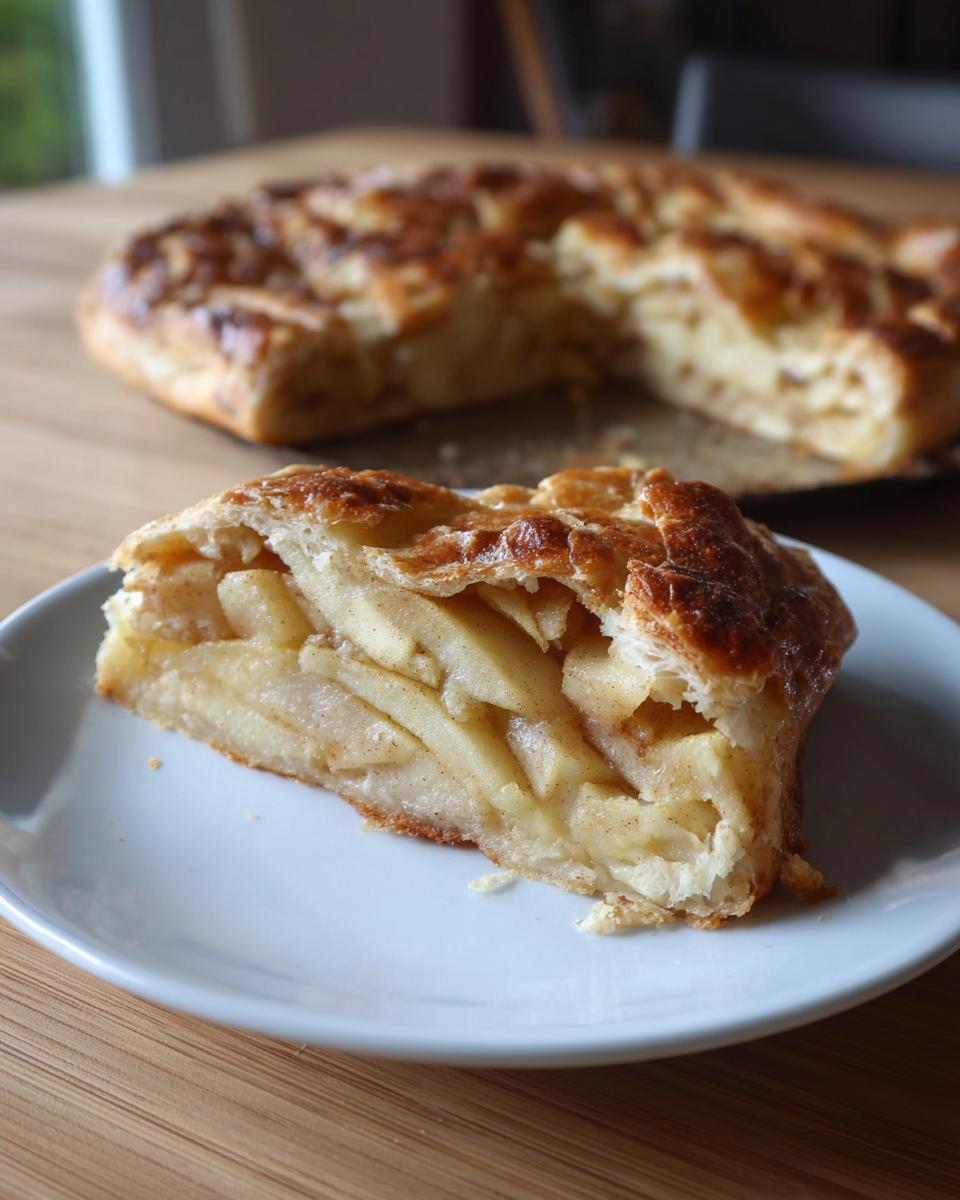
Welcome to the world of the apple galette. This is my absolute favorite way to bake in the fall. It’s that gorgeous, rustic French dessert that tastes like apple pie’s more relaxed, cooler cousin. You get all the buttery crust and warm spice flavor you crave, but you just fold the edges over any way you like. That’s the Little Kitchen Diary philosophy in a nutshell: amazing results without the stress. We focus on practical, delicious home cooking here, and this simple apple galette is pure proof we can nail that perfect cozy flavor without turning your kitchen into a war zone.
- Why This Easy Apple Galette Recipe Belongs in Your Collection
- Ingredients for Your Buttery Crust Galette
- Mastering the Homemade Pastry for Your Apple Galette
- Step-by-Step Instructions for This Simple Apple Tart
- Ingredient Notes and Substitutions for Your Apple Galette
- Tips for Success When Making an Easy Apple Galette
- Storage and Reheating Instructions for Leftover Apple Galette
- Frequently Asked Questions About This Rustic Dessert
- Estimated Nutritional Data for One Serving of Apple Galette
- Share Your Experience Baking This Apple Galette
Why This Easy Apple Galette Recipe Belongs in Your Collection
I always tell people that if you’re scared of pie dough, this is your gateway recipe. Seriously, it delivers that amazing flavor with almost zero geometry required. I use this constantly when I need something quick for entertaining.
- This is one of the best easy fall desserts you can make when you want that apple cinnamon flavor in a hurry.
- Because it’s a free form pie, you don’t own the right pan to make it work; everything goes onto a simple baking sheet!
- The resulting texture is incredible, and you can easily tweak the spices inside. If you prefer a more traditional approach, check out my thoughts on a classic homemade apple pie, but for speed, the galette wins.
The Appeal of the Rustic Apple Tart
The beauty of a rustic apple tart is in its imperfection. Nobody cares if the folds are uneven; that just proves you made it yourself! This style uses the same foundational flavors as any beautiful French dessert, but it cuts out all the fuss. It’s perfect for those busy weekends when you want to use fresh apples but don’t have hours for intricate pastry work. When you see that crust turn golden brown, you’ll see why I love this apple galette recipe so much for casual fall baking recipes.
Ingredients for Your Buttery Crust Galette
When we’re aiming for that top-tier flavor and texture in a buttery crust galette, exactness matters—especially when the butter and water are involved! I layout everything before I even turn on the oven. It just makes that whole process so much smoother, and trust me, having everything measured out is the first step toward avoiding kitchen stress. This recipe is simple, but the quality of the components really shines through because it’s such a straightforward homemade pastry design. If you want to see how I achieve fantastic texture in my other crust recipes, check out my guide on fluffy Southern buttermilk biscuits.
For the Flaky Pie Crust Recipe
Remember, the key here is COLD. Everything needs to be cold for that beautiful flakiness we want in our apple galette. Don’t let these ingredients warm up!
- 1 1/2 cups all-purpose flour
- 1/2 teaspoon salt
- 1 tablespoon granulated sugar
- 1/2 cup (1 stick) cold unsalted butter, cut into small cubes
- 4 tablespoons ice water
For the Apple and Cinnamon Dessert Filling
For the filling, I lean toward apples that hold their shape well, like Granny Smith for that little bit of tartness or Honeycrisp if you like them sweeter. Thin slicing is essential so they cook through evenly in that open-face tart.
- 5 medium apples (like Granny Smith or Honeycrisp), peeled, cored, and thinly sliced
- 1/4 cup packed light brown sugar
- 1 teaspoon ground cinnamon
- 1/4 teaspoon ground nutmeg
- 1 tablespoon lemon juice
- 1 large egg, beaten (for egg wash)
- 1 tablespoon coarse sugar for sprinkling
Mastering the Homemade Pastry for Your Apple Galette
Okay, let’s talk business: the dough. This is where most people get nervous, but I promise, this flaky pie crust recipe is incredibly straightforward once you know the visual cues. If you want that classic, shatteringly crisp exterior that holds up perfectly to the juicy apples, you have to respect the cold ingredients.
I know some folks go the grocery store route, and that’s fine sometimes, but for the true flavor explosion that makes this simple fruit tart memorable, nothing beats starting with a beautiful, fresh shell. If you’re wrestling with sticky dough, check out my tips for making fluffy vanilla buttercream—the principles of keeping things cool are actually very similar!
Cutting in Butter: The Key to a Flaky Apple Galette
When you’re mixing the flour and the butter cubes, forget about making a uniform powder. We are aiming for texture! You need to cut that cold butter in until the mixture looks like coarse crumbs, but listen closely: you must still see bits of butter that are about the size of little peas. Those pea-sized pieces are the secret weapon! When they hit the heat of the oven, they melt and create steam pockets, which is exactly how you get those glorious, flaky layers. If you’re using a food processor (which I sometimes do when I’m rushing!), pulse it only until that coarse crumb stage appears. Stop immediately!
Chilling Time for the Perfect Dough
Once you get the dough barely to hold together with just enough ice water—and I mean *just enough*—flatten it into a disk, wrap it tight, and forget about it for at least an hour in the fridge. This chilling time is non-negotiable, my friends. Why? Because it lets those flour particles relax. When you try to roll it out later, if the gluten hasn’t rested, it fights you back and shrinks. Resting it ensures your dough is pliable and easy to roll into that rough circle needed for your easy apple galette without tearing.
Step-by-Step Instructions for This Simple Apple Tart
Now for the really fun part—putting it all together! Since this is designed to be a beginner baking recipe, don’t stress the measurements on the rolling part. If you’re making this for a weekend baking project, the assembly is fast, but preheating needs time! We start by getting that oven ready for action.
First things first: Preheat your oven to 400 degrees Fahrenheit (200 degrees Celsius). That high heat is what sets the crust fast. While that warms up, line a sturdy baking sheet with parchment paper. I learned the hard way that trying to move a juicy galette without parchment is a recipe for disaster, so don’t skip that step! For more on that classic cinnamon apple flavor profile, you can check out what they are doing over at Cinnamon Apple Galette—your cozy French dessert.
Assembling the Free Form Pie Shape
Time to roll! Take your chilled dough out and place it on a lightly floured surface. Roll it out into a rough circle that’s about 12 inches across. And I mean ROUGH. The magic of this rustic dessert idea is that being messy is encouraged! You aren’t trying to fit it into a fussy pie plate.
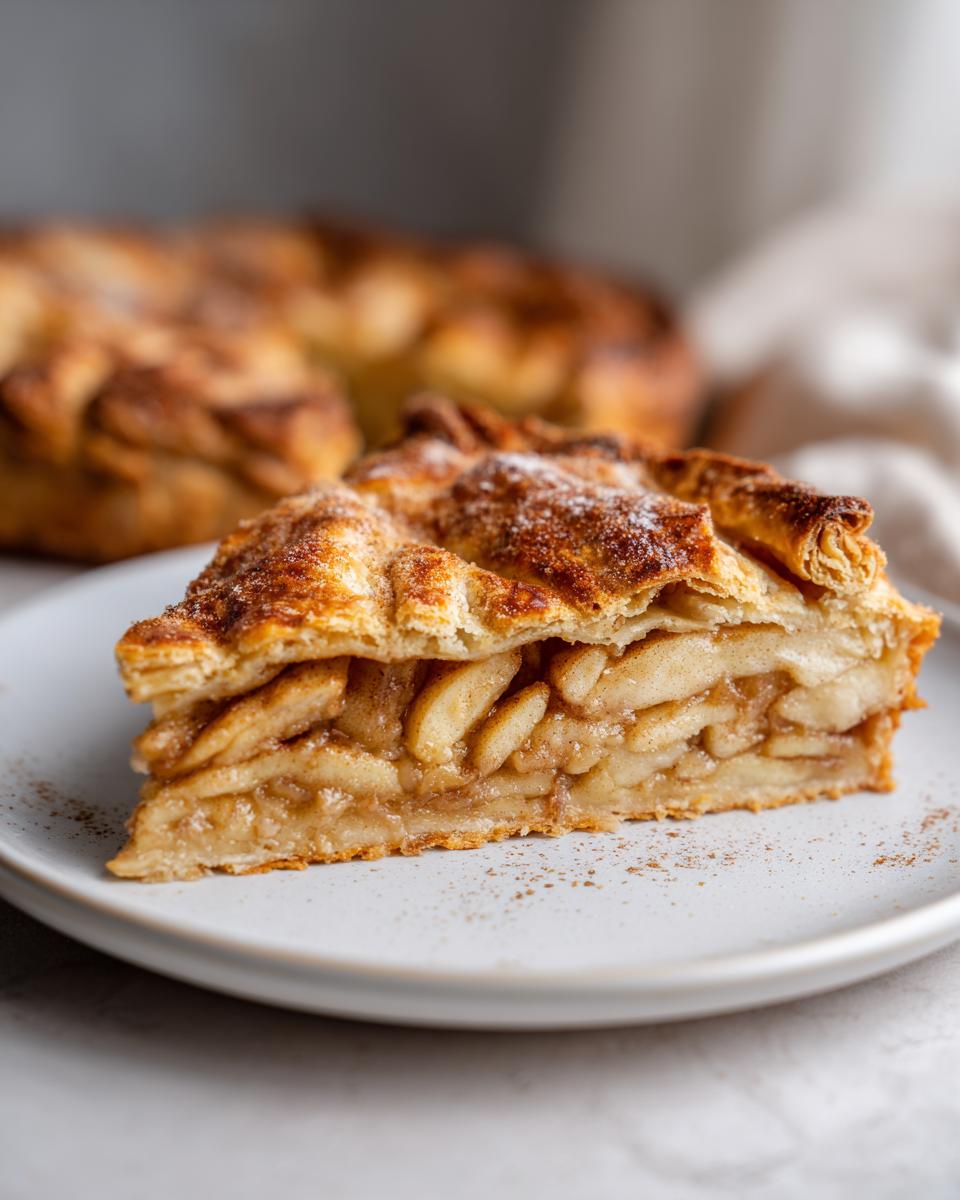
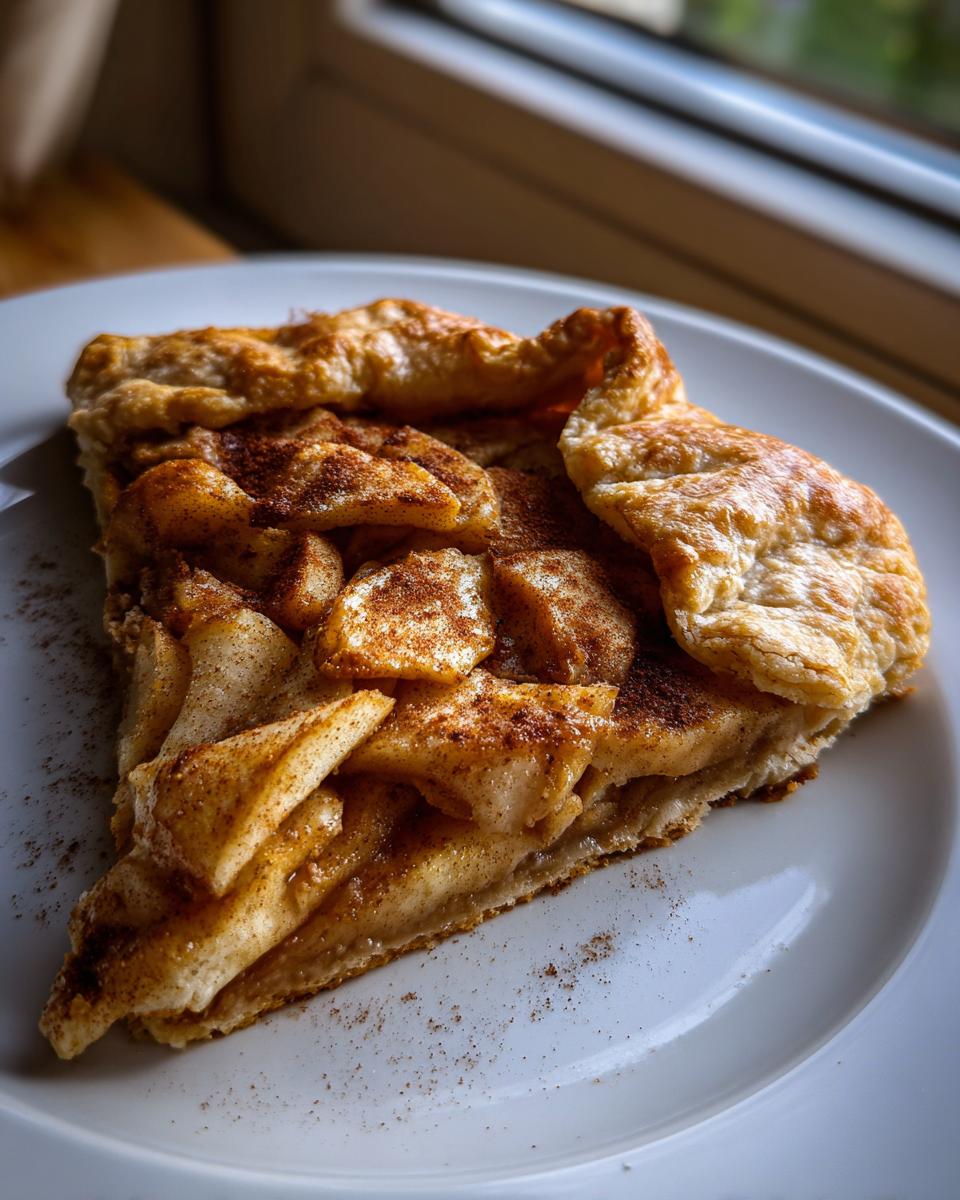
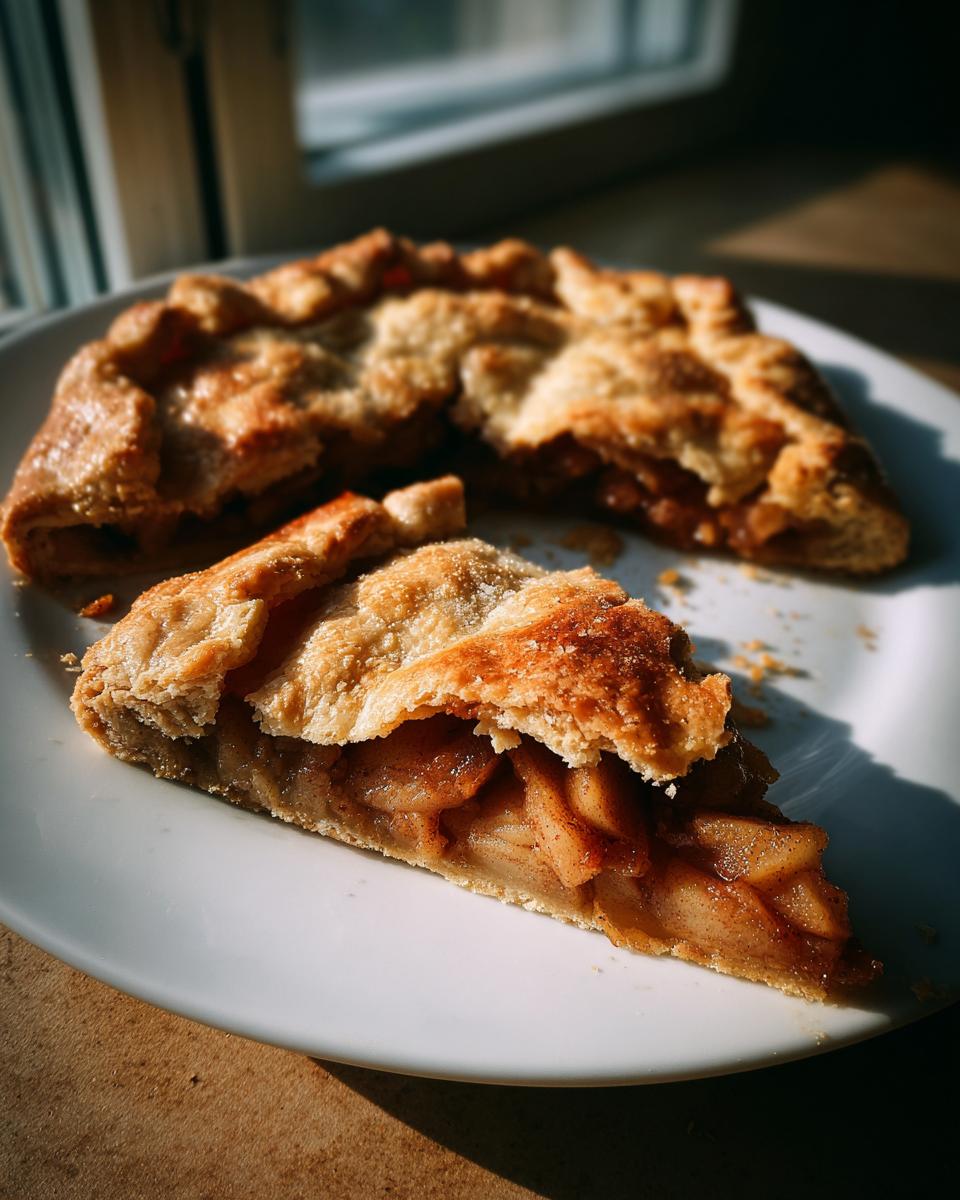
Once you have your rough circle, carefully transfer that whole thing onto your prepared baking sheet. Now, pile those beautiful cinnamon-spiced apples right in the middle, saving about two inches around the edge bare. Take your time folding those dough edges up and over the apples. Just fold a bit, press lightly, fold the next bit, and create pleats as you go around. The center stays gloriously open, showing off that filling!
Baking Your Apple Galette to Golden Perfection
For that professional, shiny finish everyone expects from a beautiful treat like this french apple dessert, brush those folded crust edges generously with your beaten egg wash. Then, sprinkle that coarse sugar all over the crust. This is critical for texture and sparkle!
Slide that baking sheet into the hot oven and bake it for about 35 to 45 minutes. You’ll know it’s done when the crust is deep golden brown and those apples underneath are softened and bubbling happily. I always check underneath the apples with a fork to make sure they are tender. Patience now—let it cool on the baking sheet for at least 15 minutes before you even think about cutting into it. If you’re looking for more baking tips on managing dough temperature, take a peek at my guide on quick Irish soda bread; the principles are surprisingly similar!
Ingredient Notes and Substitutions for Your Apple Galette
I always keep a few tricks up my sleeve for customizing this recipe without ruining that perfect, flaky shell. Since this is such a straightforward bake, swapping out one or two things can really change the experience!
If you happen to be out of all-purpose flour, but you have cornmeal lying around, go for it! In the notes, I mentioned you can swap out about a quarter cup of the flour for cornmeal. This gives you a delightfully hearty, slightly gritty texture that really emphasizes the rustic dessert feel. It makes the crust extra crisp against the soft apples—a favorite tweak of mine for a weekend baking project.
Also, if you are making this for a big crowd and are worried about the dough handling well, remember that chilling time we talked about! If you want to see how I handle using store-bought dough beautifully, I have a whole section on using puff pastry when I make my apple strudel. It’s a different texture, but still delicious!
Tips for Success When Making an Easy Apple Galette
Even with an easy apple galette recipe, we all worry about that dreaded soggy bottom. Nobody wants a beautiful presentation ruined by wet pastry! To avoid that, after you arrange your apples, let them sit in the bowl for about five minutes while you preheat the oven. This lets any excess juice pool at the bottom of the mixing bowl, not on your crust.
When you transfer the filling to the dough, try to leave as much of that liquid behind as possible; only scoop the apples onto the pastry. Also, I sometimes lightly dust the dough surface *inside* the apple border with a tiny bit of flour or almond flour right before piling the fruit on. This acts like a tiny sponge against any moisture trying to seep through. It’s a small trick, but it makes a huge difference in getting that crispness we love! To see how I get my apple fritters crispy, take a look at my tips for frying apple fritters—the principle of quickly setting the outside is similar.
If you bake it and the crust edges are browning too fast but the center still looks underdone, just loosely tent a piece of aluminum foil over the edges. It happens! My goal is always that perfectly baked center, just like the amazing flavor profile described in this easy, proven rustic French dessert guide.
Storage and Reheating Instructions for Leftover Apple Galette
This cinnamon apple dessert tastes incredible warm, but sometimes we have leftovers—which is a shocker, I know! If you have any remaining rustic apple tart, just cover it loosely with plastic wrap or foil and keep it on the counter. It usually holds up well for about a day thanks to the sugars.
When you want to reheat it to get that crust back to its buttery, flaky perfection, skip the microwave! That heat just softens everything up. Instead, pop a slice back into a 350-degree oven for about 8 to 10 minutes. That short blast of dry heat brings back the crispness beautifully. It’s almost like it was just baked, fresh from the oven!
Frequently Asked Questions About This Rustic Dessert
I get so many great questions every time I post about my apple galette recipe! It’s so simple, but I know baking can still feel intimidating sometimes. Here are some of the things I hear most often when people try this easy fall dessert for the first time.
Can I use store-bought pie crust for this easy apple galette?
Yes, absolutely! I preach about homemade pastry, but life happens. If you are pressed for time and just need a quick rustic dessert idea, using one sheet of high-quality store-bought puff pastry or pie dough works beautifully for a speedy simple apple tart. Just make sure you still use lots of cold toppings like lemon juice to keep the filling tasting fresh!
What apples are best for an apple galette?
This is the biggest question! For the best results in a cinnamon apple dessert that won’t turn into mush, you need a mix of tart and firm. I always go with Granny Smith paired with Honeycrisp or Fuji. This combination ensures you get that lovely flavor balance and the apples hold their shape nicely during the 40-minute bake time. If you are ever looking for cocktail pairings for your baking projects, I have a fun guide on an easy lemon drop martini recipe!
Can this simple French apple dessert be made ahead of time?
You can prepare the dough completely ahead of time—keep it wrapped in the fridge for up to two days. But honestly, the filling should be mixed right before assembly. For serving, it’s always best served the same day you bake it, but if you need to prep early, follow the storage advice in the previous section, and then reheat it. You can see more serving ideas on Easy Apple Galette (Rustic & Gorgeous!).
Estimated Nutritional Data for One Serving of Apple Galette
I always feel a little nervous sharing this part, because truly, when you’re making something this comforting, you shouldn’t be worrying about labels! But since we are documenting everything here in the Little Kitchen Diary, I want to give you a rough idea of what you’re looking at for one slice of this incredible buttery crust galette.
Keep in mind this is just an estimate based on the ingredients I used—if you use extra sugar on top or add a scoop of ice cream, that tally changes instantly! This recipe is inherently rich because of that beautiful pastry dough, but it feels totally worth it for a truly satisfying homemade apple pie alternative.
- Serving Size: 1 slice
- Calories: 350
- Fat: 18g
- Carbohydrates: 45g
- Sugar: 25g
- Protein: 4g
This is a rich cinnamon apple dessert, so enjoy it mindfully! It’s designed to be satisfying, not lightened up. Remember, these numbers are estimates based strictly on the ingredients listed for the pastry and filling we used in this batch.
Share Your Experience Baking This Apple Galette
Now that you’ve tried making this beautiful, rustic apple tart, I genuinely want to hear how it went! Honestly, opening up my comments section to see your successes is one of the best parts of running the Little Kitchen Diary.
Did your flaky pie crust recipe turn out perfectly crisp right to the edge? Was rolling it into that rough circle easier or harder than you expected? Don’t hold back! Let me know in the comments below. Your feedback helps me tweak my instructions for the next home cook who tries this easy apple galette.
And please, if you took a picture—and I hope you did, because they are always gorgeous—tag me on social media! Seeing your cozy, cinnamon-spiced creations really brightens my day. If you liked this recipe, you might also want to check out some of my other go-to treats, like my no-chill chocolate chip cookies, which are another staple for busy weeknights.
We’re building this community together, one delicious, approachable recipe at a time. You can also see how others rated this wonderful dessert over at Easy Rustic Apple Galette with Flaky Cornmeal Crust to see what others thought!
PrintEasy Rustic Apple Galette with Flaky Butter Crust
Make this simple apple galette, a rustic French dessert alternative to pie. It features sweet, cinnamon-spiced apples baked inside a flaky, buttery crust. This free-form tart is easy to prepare and perfect for fall baking.
- Prep Time: 30 min
- Cook Time: 40 min
- Total Time: 1 hour 40 min
- Yield: 6 servings 1x
- Category: Dessert
- Method: Baking
- Cuisine: French
- Diet: Vegetarian
Ingredients
- 1 1/2 cups all-purpose flour
- 1/2 teaspoon salt
- 1 tablespoon granulated sugar
- 1/2 cup (1 stick) cold unsalted butter, cut into small cubes
- 4 tablespoons ice water
- 5 medium apples (like Granny Smith or Honeycrisp), peeled, cored, and thinly sliced
- 1/4 cup packed light brown sugar
- 1 teaspoon ground cinnamon
- 1/4 teaspoon ground nutmeg
- 1 tablespoon lemon juice
- 1 large egg, beaten (for egg wash)
- 1 tablespoon coarse sugar for sprinkling
Instructions
- Prepare the crust: In a large bowl, whisk together the flour, salt, and 1 tablespoon of granulated sugar. Cut in the cold butter using a pastry blender or your fingers until the mixture resembles coarse crumbs with some pea-sized pieces of butter remaining.
- Add the ice water one tablespoon at a time, mixing until the dough just comes together. Do not overmix. Form the dough into a flat disk, wrap it in plastic wrap, and chill in the refrigerator for at least 1 hour.
- Prepare the filling: In a separate bowl, gently toss the sliced apples with the brown sugar, cinnamon, nutmeg, and lemon juice until the apples are evenly coated.
- Preheat your oven to 400 degrees Fahrenheit (200 degrees Celsius). Line a baking sheet with parchment paper.
- On a lightly floured surface, roll the chilled dough into a rough 12-inch circle. It does not need to be perfect; the rustic look is part of the appeal. Carefully transfer the dough to the prepared baking sheet.
- Arrange the apple slices in the center of the dough, leaving a 2-inch border around the edge. You can overlap the apples slightly for a nice presentation.
- Fold the edges of the dough up and over the apples, creating pleats as you go. The center of the galette will remain open.
- Brush the folded crust edges with the beaten egg wash and sprinkle generously with coarse sugar.
- Bake for 35 to 45 minutes, or until the crust is golden brown and the apples are tender and bubbling.
- Let the apple galette cool on the baking sheet for at least 15 minutes before slicing and serving.
Notes
- For an extra flaky crust, use a food processor to cut the butter into the flour mixture, pulsing until coarse crumbs form.
- If you want a richer flavor, substitute 1/4 cup of the flour with cornmeal for a rustic texture.
- Serve warm with vanilla ice cream or a dollop of whipped cream for a classic finish.
Nutrition
- Serving Size: 1 slice
- Calories: 350
- Sugar: 25g
- Sodium: 150mg
- Fat: 18g
- Saturated Fat: 11g
- Unsaturated Fat: 7g
- Trans Fat: 0g
- Carbohydrates: 45g
- Fiber: 3g
- Protein: 4g
- Cholesterol: 55mg