
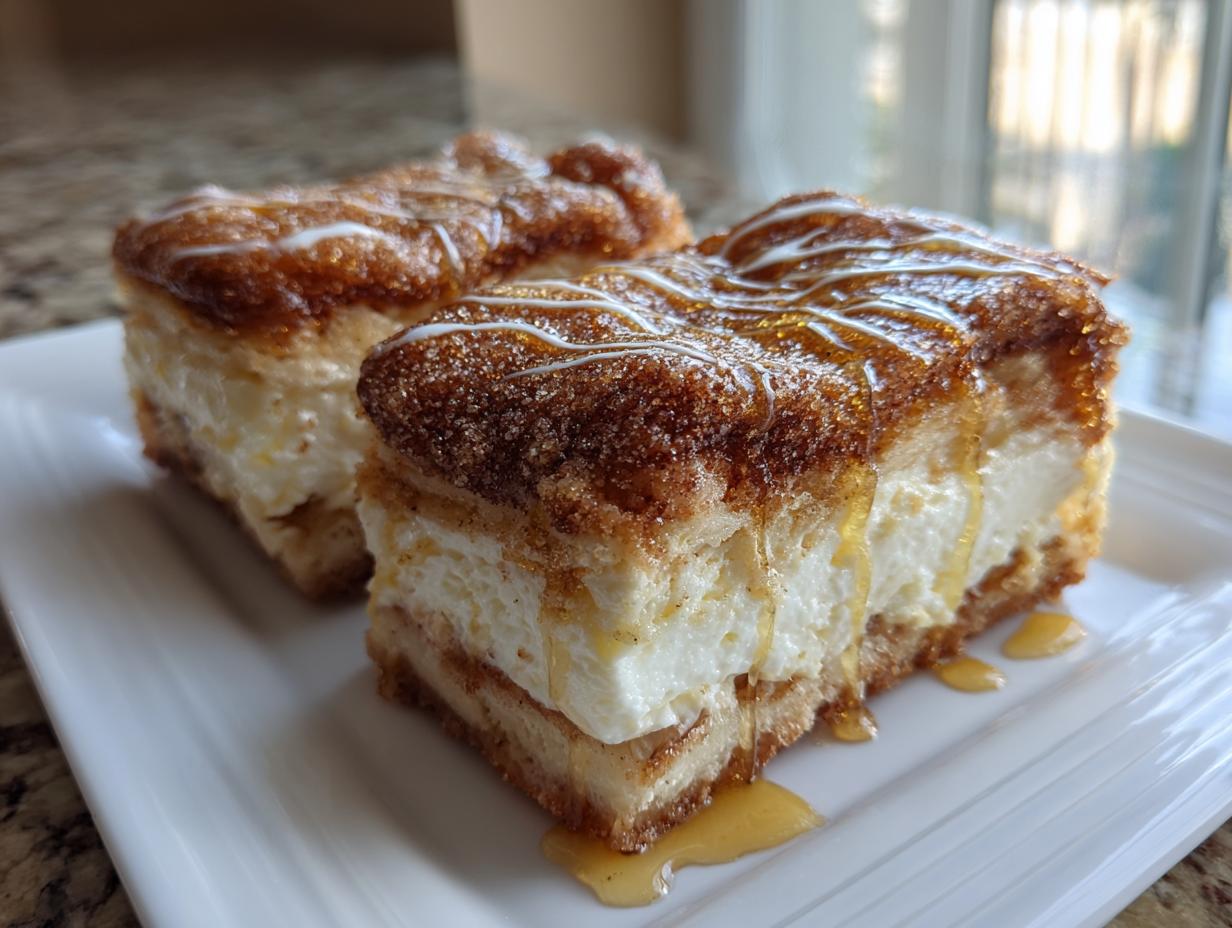
Oh my goodness, you have stumbled upon the absolute BEST thing you could possibly put in your oven today! If you’re anything like me—someone who loves a truly decadent, over-the-top dessert but doesn’t have hours to spend fussing in the kitchen—then prepare to meet your new obsession. We’re talking about the legendary sopapilla cheesecake. Seriously, imagine your favorite flaky, buttery pastry hugging the creamiest cheesecake filing, all drenched in cinnamon sugar. It’s basically a churro and a cheesecake had a delicious, Tex-Mex inspired baby!
When I first started Little Kitchen Diary, I wanted recipes that felt like a hug, not a chore. This recipe is proof positive of that goal. I rely on simple things, like those handy tins of crescent rolls, to get that incredible, satisfying flavor without spending all day working complex doughs. Trust me, this is comfort food dessert perfection, and it’s ready before you know it!
- Why This Easy Sopapilla Cheesecake Recipe is a Must-Try
- Gathering Your Ingredients for Sopapilla Cheesecake Bars
- Step-by-Step Instructions for Perfect Sopapilla Cheesecake
- Tips for the Best Ever Sopapilla Cheesecake
- Making Your Sopapilla Cheesecake Ahead of Time
- Serving Suggestions for This Creamy Dessert Bars
- Storage and Reheating Instructions for Leftover Sopapilla Cheesecake
- Frequently Asked Questions About Sopapilla Cheesecake
- Estimated Nutritional Snapshot of Sopapilla Cheesecake
Why This Easy Sopapilla Cheesecake Recipe is a Must-Try
I get asked all the time why I chose this recipe to feature so prominently on the diary. Honestly, it’s because it delivers incredible flavor for almost zero stress. You see those huge save counts on the internet for this dessert? People *love* this stuff, and once you make it my way, you’ll understand why. It’s just pure magic.
- It’s the Ultimate Crowd-Pleaser: Seriously, I’ve never brought these bars to a potluck or holiday gathering where they lasted more than ten minutes. If you need a dessert that guarantees happy faces, this is it. Forget fiddly pies; these are simple, sliceable creamy dessert bars.
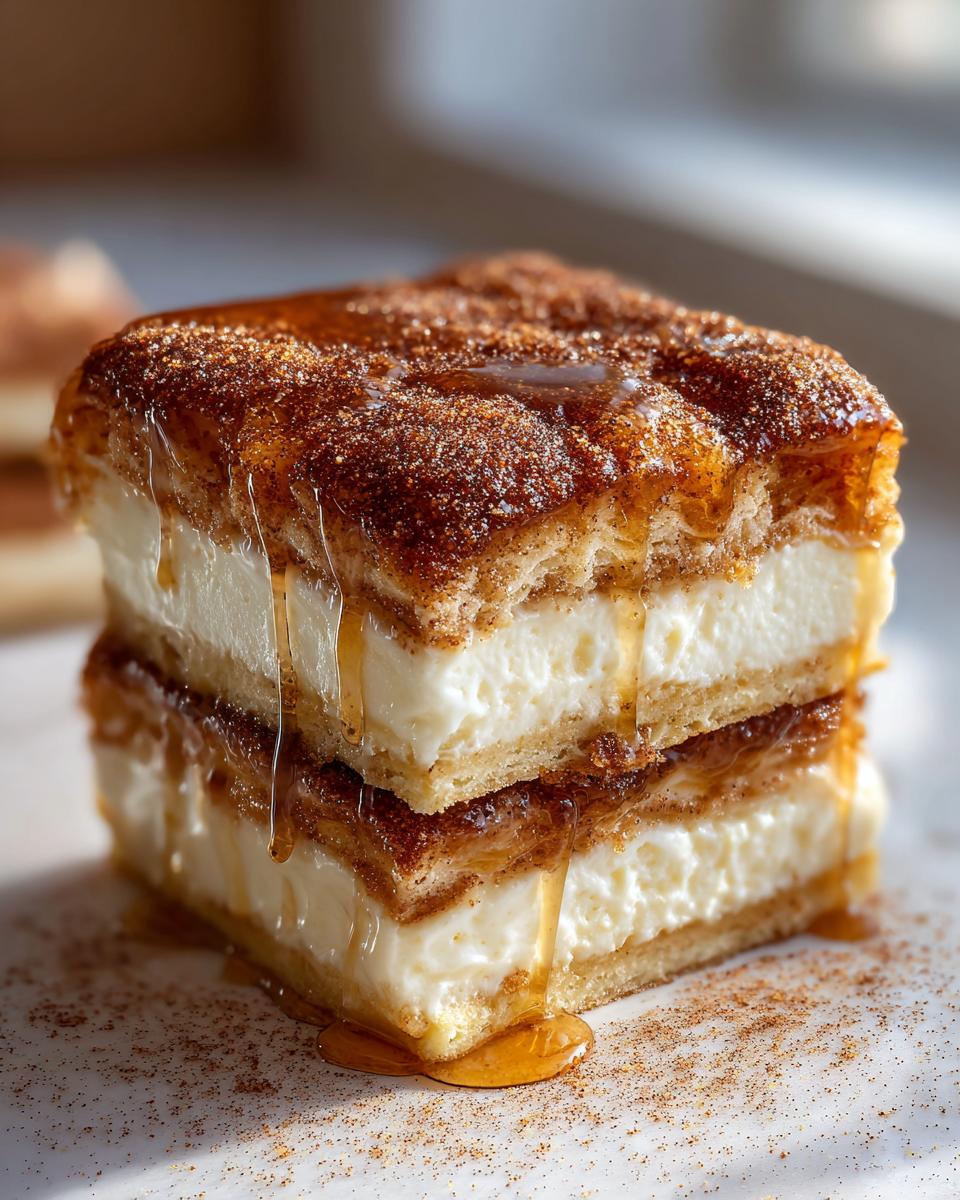
- That Texture Contrast is Everything: This is what makes it a true melt in your mouth dessert. You get that slight crunch and flakiness from the buttery crescent layers, then BAM—it collapses into that cool, smooth cream cheese center. It’s heaven!
- Shockingly Quick Prep: I know things get hectic, which is why I champion recipes with fast prep times. You whip up the filling while the oven preheats, press the dough, and toss it in. We’re talking ready-to-bake in about fifteen minutes flat.
- Uses Pantry Staples: You don’t need any specialty flours or ingredients you’ll only use once. Cream cheese, crescent rolls, sugar, cinnamon—I bet you have half of that stuff already sitting there waiting.
- Flexible for Any Occasion: Whether you’re looking for holiday dessert ideas or just need a weeknight treat, these bars adapt so well. Bake them in a 9×13 for a crowd, or use a springform pan if you need something a little fancier. If you want other quick ideas, check out my no-bake mini cheesecake recipe too!
Gathering Your Ingredients for Sopapilla Cheesecake Bars
Okay, this is perhaps the best part about this whole recipe: you don’t need a specialized shopping list. When I was trying to bring home cooking back into my life, I needed straightforward ingredients—things I could grab at any local grocery store when I had a spare five minutes. This recipe for sopapilla cheesecake is built on those simple staples, which is why it became my go-to!
We’re using two main components here: the crust/top layered with dough, and the creamy filling that sets everything together. It’s so satisfying knowing you can whip this up on a Tuesday night!
For the Flaky Pastry and Filling
For the base and the luscious center, you’ll need the following. Make sure that cream cheese is actually softened—take it out about an hour before you plan to mix, or zap it for 15 seconds if you forgot, but don’t let it get oily!
- 2 cans (8 ounces each) refrigerated crescent roll dough. (Yes, the kind that comes in that standard tube!)
- 1 package (8 ounces) cream cheese, softened
- 1 cup granulated sugar (This goes right into the filling!)
- 1 large egg
- 1 teaspoon vanilla extract
For the Signature Cinnamon Sugar Topping of Sopapilla Cheesecake
Now we get to the part that makes this a true cinnamon sugar dessert! The topping is what gives you that crunchy, browned, utterly addictive top layer that tastes just like those fried fairground treats. And don’t forget the secret weapon on the side!
- 1/2 cup (1 stick) unsalted butter, melted
- 3/4 cup granulated sugar
- 2 teaspoons ground cinnamon
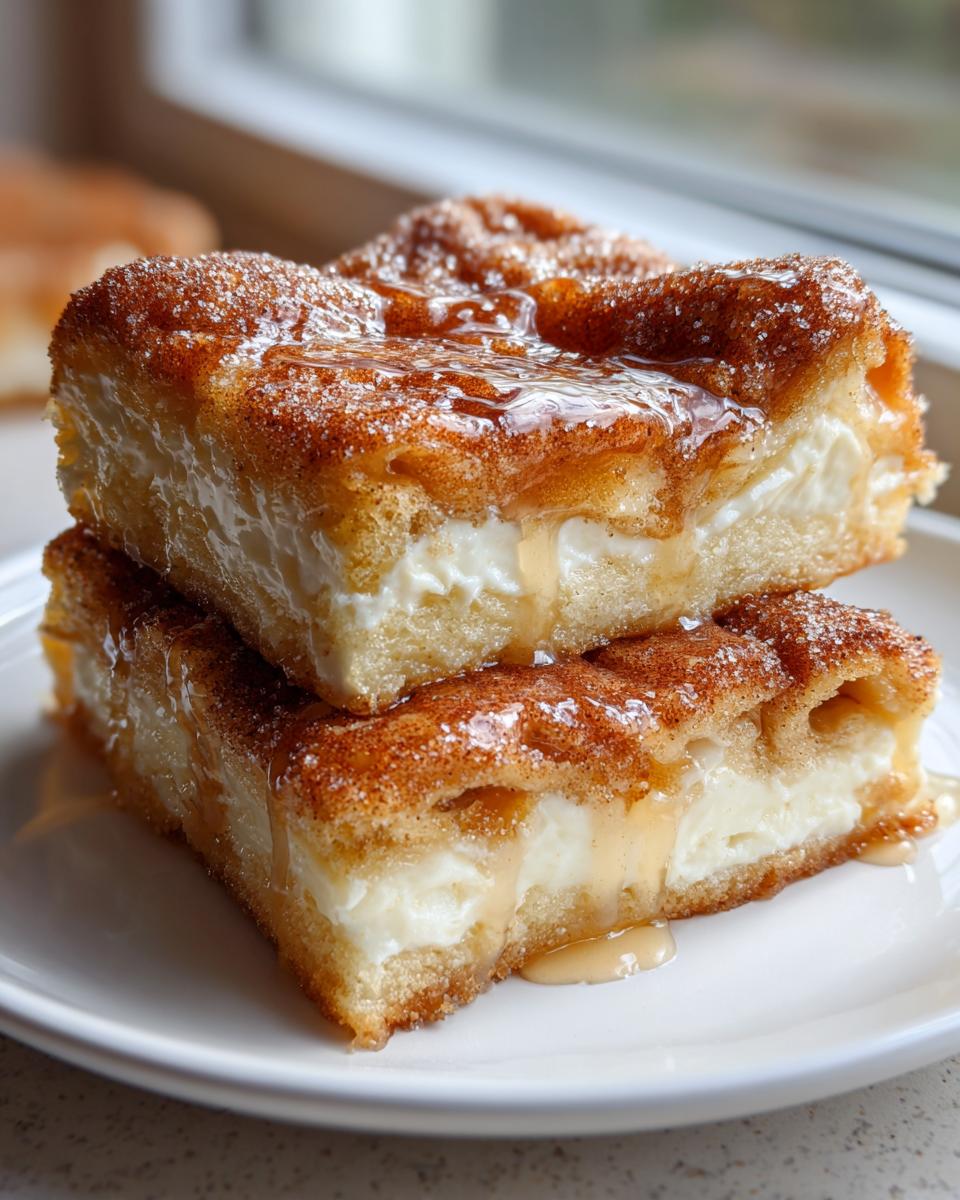
- Optional: Honey, for drizzling (Seriously, try the optional honey drizzle—it takes it right over the top!)
Step-by-Step Instructions for Perfect Sopapilla Cheesecake
Listen, I know instructions can sometimes feel like reading a technical manual, but I promise you, making this sopapilla cheesecake is incredibly intuitive. We are working with simple layers here. Just follow these steps closely, and you’ll end up with those perfect, creamy, flaky bars every single time. It’s all about layering smartly and trusting the oven!
I’ve included a link to my recipe for crescent roll apple dumplings because if you love using refrigerated dough, that recipe is another weeknight hero you need in your rotation!
Preparing the Base and Cream Cheese Layer
First things first, we need the oven ready to go. Preheat your oven to 350 degrees Fahrenheit. This temperature is crucial—we want it hot enough to brown the top nicely but gentle enough so the cheesecake filling sets without cracking or scorching the delicate dough underneath.
Grab your 9×13 inch baking dish and give it a quick spray or light grease. Now, take one tube of the crescent roll dough. Unroll it carefully and press that entire sheet right into the bottom of the pan. Make sure you cover the whole bottom evenly; it’s your foundation!
Next up is the creamy center. In your mixing bowl, beat that softened cream cheese until it’s silky smooth. Then, mix in the 1 cup of sugar, the single egg, and the vanilla extract. Don’t rush this part! You want it lump-free because nobody wants a pocket of unmixed cream cheese in their easy cheesecake recipe. Once it’s perfectly smooth, just spread that creamy goodness evenly over the dough base.
Assembling and Topping Your Sopapilla Cheesecake
This is where things really start looking like a true cinnamon sugar dessert! Open your second tube of crescent roll dough. This piece is the lid, so handle it gently. Carefully lay it right over the cream cheese filling. My biggest tip here is to take a second and pinch all the edges where the two sheets of dough meet. You need to seal those seams! If you leave gaps, the filling might sneak out while baking, and we want all that creamy goodness trapped inside.
Grab that stick of butter and melt it down—about 20 seconds in the microwave does the trick. In a separate small bowl, whisk together your remaining 3/4 cup of sugar and 2 teaspoons of cinnamon until you have a nice, uniform mixture. This is the flavor backbone of the entire dessert!
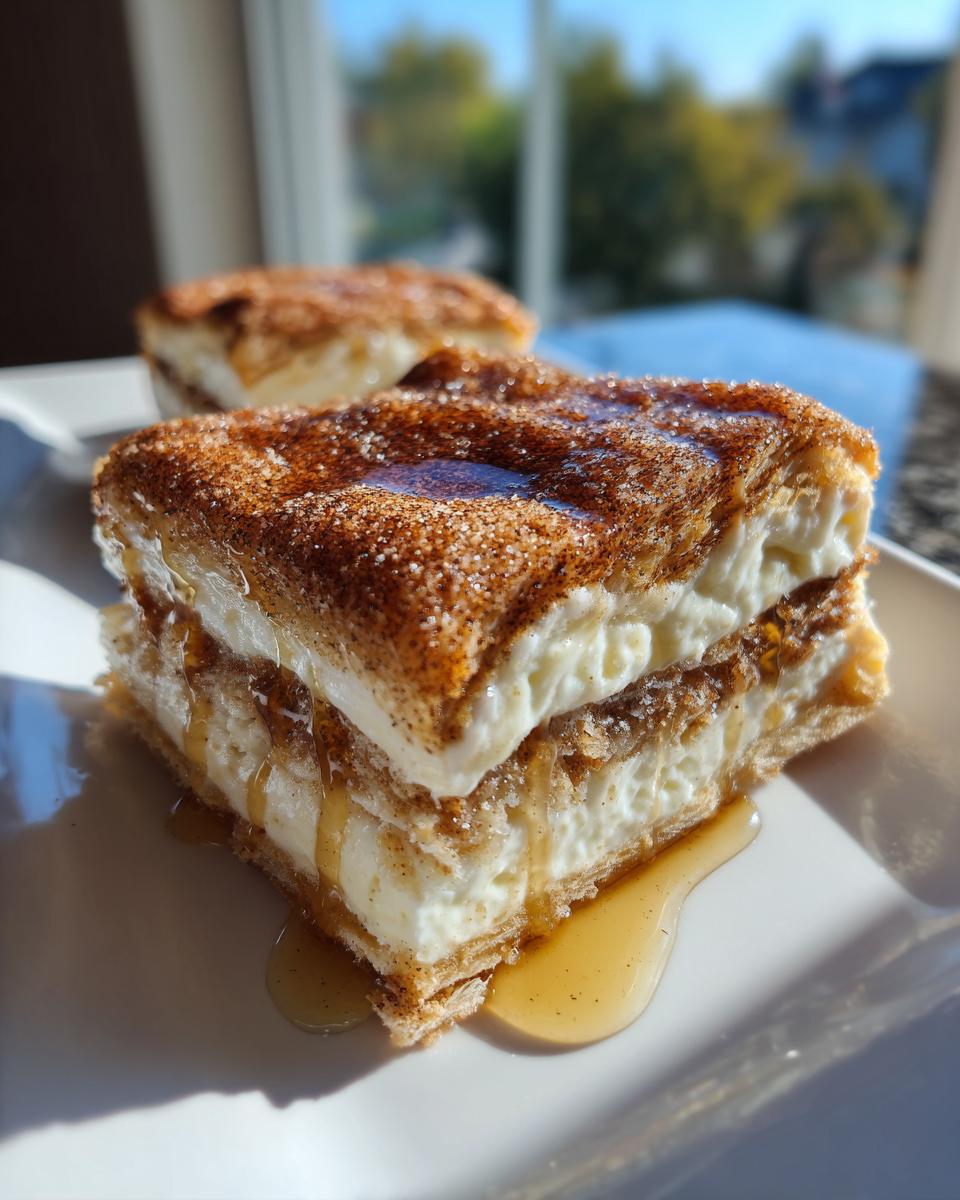
Brush that melted butter all over the top layer of dough—get those corners! Then, sprinkle that gorgeous cinnamon-sugar mix liberally right over the top. Don’t be shy; that butter helps it melt just enough to create that signature crispy crust.

Baking and Cooling Times
Pop the dish into that 350°F oven. It needs to bake for about 25 to 30 minutes. Keep an eye on it after the 25-minute mark! You’re looking for a deep golden brown color on top and a filling that looks set—no jiggly center allowed!
This is the hardest part, I know, but you cannot cut these too soon! Once they come out, let them cool in the pan for a good 30 minutes. If you try to slice them warm, they will run everywhere, and you won’t get those beautiful, clean bars. If you’re adding that optional honey drizzle, now is the perfect time to do it while they are still slightly warm so it melts just a touch into that cinnamon top!
Tips for the Best Ever Sopapilla Cheesecake
If you want your sopapilla cheesecake to go from “good” to “I need the recipe immediately,” you have to listen to these few little secrets I picked up along the way. I learned most of these the hard way, usually involving scraping a slightly sad-looking dessert out of the pan. Don’t make my mistakes; heed this advice for perfect, creamy dessert bars!
When I first started baking this, I tried cutting corners on the cream cheese because I was trying to save a few pennies. Big mistake! That recipe resulted in a filling that was just a little too runny, and it seeped into the crust. Since then, I never compromise.
- Go Full-Fat Cream Cheese—Always! Seriously, if you want that rich, decadent texture that gives this dessert its name, stick to the full-fat block cream cheese. The low-fat versions just don’t set up the same way, and frankly, they taste flatter. If you love rich cream cheese flavor in other pastries, you should absolutely check out my pumpkin cream cheese bread recipe for another winner!
- Don’t Skip the 30-Minute Rest: I mentioned this in the instructions, but it bears repeating. If you cut this dessert while it’s piping hot, you get soup. That 30 minutes of cooling time lets the structure firm up just enough so that when you slice it, you get those beautiful, intact layers of flaky pastry next to the set filling. Patience equals pretty bars!
- Pan Swaps Require Time Adjustments: Sometimes my 9×13 pan is in use, so I’ll throw this into a 9-inch springform pan instead. If you do switch pans, remember that deeper pans need longer baking times as the heat struggles to reach the center. If you use a springform, check it around the 35-minute mark. If you’re looking for inspiration on baked goods for a specific event, I saw a great version of this over on the Backyard Eden site, which might give you some ideas for presentation after you bake your sopapilla cheesecake there.
- Butter Your Topping Generously: That melted butter coat before the cinnamon sugar is what helps the topping crisp up beautifully and sticks the cinnamon sugar in place. Don’t just drizzle it—use a pastry brush and make sure every piece of the top dough sheet is covered before you sprinkle on the magic mix.
Making Your Sopapilla Cheesecake Ahead of Time
I absolutely adore make ahead dessert bars, and thankfully, this sopapilla cheesecake recipe is perfect for planning ahead! Sometimes, the day of the party or big potluck, you just don’t have time for the baking step, and that’s totally okay. You can do about 90% of the work a day before, and still pull out a piping hot, amazing dessert when your guests arrive.
For those busy days, here’s exactly how I handle prepping these bars in advance. It means less stress for me and more time enjoying the company, which is the whole point of cooking in the first place, right?
Assembling Ahead of Baking
You can easily assemble the entire bar structure a day before you plan to bake it. Follow the recipe all the way through Step 6—that means you press the bottom crust, spread the cream cheese filling, add the top dough layer, pinch those seams tight, brush with butter, and sprinkle with cinnamon sugar.
Here is the key part for prepping ahead: once it’s fully assembled in the 9×13 dish, cover the whole thing really tightly with plastic wrap. Make sure the plastic isn’t touching the cinnamon sugar topping if you can help it! Pop it into your refrigerator. It can hang out happily in the fridge for up to 24 hours.
When you are ready to bake, just pull it straight out of the fridge. You might need to add about 5 to 8 extra minutes to the total baking time since the dough starts off cold. So, plan for maybe 30 to 38 minutes total, but definitely check for that golden brown perfection!
Storing Leftovers After Baking
If, by some sheer miracle, you have any of this easy cheesecake recipe left over (it never happens at my house!), storage is super easy. Don’t go slicing into it until it has cooled for at least 30 minutes, or you’ll end up with a gooey mess you can’t easily store. Once cooled, cover the pan tightly with foil or transfer the bars to an airtight container.
In the refrigerator, these stay wonderfully fresh for about four or five days. I actually think the flavor deepens a little overnight, making them perfect for packed lunches the next day! If you want more tips on using my tried-and-true make-ahead recipes, take a peek at my guide to make ahead dessert bars.
If you realize you made too much and need to store them longer, definitely freeze them! Just make sure they are completely cooled first. Wrap the entire dish tightly in plastic wrap, then maybe add a layer of aluminum foil for good measure to keep freezer burn away. They freeze beautifully for about two months!
Serving Suggestions for This Creamy Dessert Bars
Okay, we’ve baked these gorgeous sopapilla cheesecake bars, and they’ve cooled just enough that they are ready to slice. But, how do you serve them up to truly blow your guests away? This dessert, with its rich Tex-Mex inspired sweets vibe, is incredibly versatile, making it a brilliant addition to any holiday dessert ideas spread.
I’ve found the way you serve them actually changes the whole experience. It’s the little touches that turn a simple tray of bars into something truly special, Ethan Carter style! Trust me, these pairings elevate the experience from just a snack to a genuine dessert moment.
Serving Temperature Matters!
You have two main choices here, and both work beautifully, but for totally different reasons. If you let these cool for the requisite 30 minutes but serve them slightly warm—say, within an hour of coming out of the oven—you get a much gooier texture. The cream cheese filling is softer, and the cinnamon sugar top is still slightly tacky. This is the ultimate comfort food dessert experience!
However, if you chill these bars completely in the fridge for a couple of hours before slicing, you get the cleanest cuts and the firmest cheesecake layer. These “cold bars” are refreshing, especially in warmer weather, and they hold together perfectly if you’re stacking them up for a party platter. I lean toward serving them slightly warm if I’m having them for a cozy night in.
The Honey Drizzle Debate
I put the honey drizzle in the ingredients as optional, but honestly, I rarely skip it anymore! Sopapillas traditionally come with honey on the side in New Mexico, and this bridges that gap perfectly. A light drizzle over the top of each piece just before serving adds a floral sweetness that fights beautifully against the spicy cinnamon.
If you’re not big on honey, another wonderful option is a tiny dollop of vanilla ice cream. The coldness of the ice cream against the warmth of the bar is just divine. It makes it feel that much more indulgent!
Pairing with Coffee and Holiday Flavors
Because this is so rich and sweet, it pairs wonderfully with something that cuts through the creaminess. A strong, freshly brewed black coffee is my go-to in the afternoon. It balances the sweetness perfectly.
If you’re serving these up for a holiday gathering—and they are fantastic holiday dessert ideas—try adding a little twist to the topping next time! You can substitute just half a teaspoon of the ground cinnamon in the topping with ground cardamom or even a tiny pinch of nutmeg. It gives the whole dish a slightly more complex, spiced edge, perfect for Christmas or Thanksgiving gatherings. If you love warming spices in your desserts, you have to try my Christmas tree cinnamon rolls!
Storage and Reheating Instructions for Leftover Sopapilla Cheesecake
Okay, so you managed to have leftovers? Good job! That means you have more of this amazing sopapilla cheesecake to enjoy tomorrow! When it comes to storing these bars, the secret is keeping that lovely crescent dough from getting soggy while protecting the creamy filling. I’ve perfected my method for keeping these bars tasting almost as good the next day, whether they’re in the fridge or tucked away in the freezer.
Because this is essentially a chilled easy cheesecake recipe layered with pastry, temperature control is your best friend. Here’s exactly what I do to keep them tasting fresh and delicious for days on end.
Refrigerating for Next-Day Enjoyment
If you know you are going to eat the rest of your batch within a few days, the fridge is the spot. Remember what I said before? Don’t cut them until they’ve cooled completely—that first 30 minutes on the counter, followed by keeping them in the pan for an hour or two, helps them set up perfectly. Once they are totally cool, cover that 9×13 dish tightly. If you don’t have the lid, use plastic wrap right on top, but try to avoid it touching the gooey center if possible. Just press the wrap down lightly over the cinnamon sugar topping before sealing the edges.
These bars will keep beautifully in the refrigerator for up to five days. Trust me, they are wonderful cold right out of the fridge the next morning for breakfast… or maybe that’s just me! The filling firms right up, and the pastry maintains a good chewiness.
Freezing for Future Treats
If you want to stash some away for a potluck next month or just know you won’t get to them soon, freezing is the way to go. Again, they must be completely cooled after baking, or you’ll end up with a solid block of ice cream! Once cool, cut the bars into individual serving squares first. This makes thawing so much easier later on.
Wrap each individual square tightly in plastic wrap. After they are individually wrapped, group them all into a large freezer-safe, airtight container or a heavy-duty zip-top bag. I always add an extra layer of aluminum foil around the whole package just to block any freezer odors. They last great for about two months this way!
Reheating to Bring Back the Flake
This is important: If you eat these bars cold or even room temperature, they are fantastic. But if you want that fresh-baked, buttery, slightly melty vibe again, you need to reheat gently. This is especially true if you are eating the frozen ones!
To reheat refrigerated bars, pop a square or two onto a microwave-safe plate. Microwave on 50% power for about 15–20 seconds. You just want to warm the filling slightly. If you use full power, you risk making the dough tough or the filling too runny.
For frozen bars, pull them out of the freezer the night before and let them thaw in the fridge. Then, pop the thawed square in the microwave for 15 seconds on 50% power. That little blast of heat reactivates the butter in the crust, making them taste almost freshly baked all over again. It works like a charm!
Frequently Asked Questions About Sopapilla Cheesecake
I gathered a few questions that I get all the time about baking this dessert. Some people wonder about substitutions, and others just want to know the best way to get that signature texture of these fantastic creamy dessert bars. Don’t worry if you have questions—that’s why I jot things down in my diary!
Can I use puff pastry instead of crescent rolls?
That’s a great question about substitutions! While you absolutely *could* use puff pastry, you won’t get the exact same result as a true sopapilla cheesecake. Crescent roll dough is thinner and has that buttery, slightly bread-like chew when baked, which is what contrasts so nicely with the creamy filling.
Puff pastry is much flakier and often has more layers to begin with. It might rise too much under the weight of the filling, or the layers might separate too much during baking. My best advice is to stick with the crescent rolls for that classic experience, but if you’re determined, treat the puff pastry like a thicker bottom crust and maybe bake the top layer slightly longer to ensure it browns through.
What happens if I skip the optional honey drizzle?
Nothing bad happens at all! If you skip the honey, you still have an absolutely phenomenal cinnamon sugar dessert. The honey just adds a touch of extra moisture and that floral sweetness that nods back to traditional sopapillas. If you aren’t big on sticky toppings, just dust the entire cooled bar with a little extra powdered sugar instead. It still looks beautiful!
If you’re looking for other dessert ideas that rely less on syrup, remember you can always check out my guide to easy cheesecake recipes for versions that rely more on fruit toppings!
Do I have to use a 9×13 pan? What about a springform pan?
The 9×13 pan is my favorite choice because it truly creates the perfect bar shape and thickness. It gives you that great ratio of flaky pastry to creamy filling. However, yes, you can absolutely use a 9-inch springform pan!
If you use the springform, you need to adjust your baking time a bit. Since the sides are taller, the heat takes longer to penetrate the center, so you might need an extra 5 to 10 minutes in the oven. Make sure you grease that pan really well or line the bottom with parchment paper, just like I described in the tips section, so that gooey center doesn’t stick to the sides!
How can I make this taste more like a churro cheesecake?
That’s what I love about this fusion! To really lean into the churro cheesecake flavor, you need to amp up the cinnamon factor in the topping, of course. But here’s a little trick I learned: mix a tiny pinch of ground cardamom into your cinnamon-sugar topping mixture before you sprinkle it on.
Cardamom gives a warm, slightly citrusy depth that mimics the complexity of spice you find in authentic churro coatings. It really makes people scratch their heads trying to figure out what that extra layer of flavor is! If you end up with leftovers, you can see how I handle storage over on my sopapilla cheesecake link, though I doubt they’ll last long!
Estimated Nutritional Snapshot of Sopapilla Cheesecake
Now, I always include this section because while we are definitely indulging here—this is truly a fantastic comfort food dessert—it’s helpful to know what you’re serving up! I want you to feel good about making these amazing sopapilla cheesecake bars, and knowing the stats helps me plan my week better, too.
Keep in mind that since we are working with refrigerated dough and specific brands of cream cheese, these numbers are my best estimates based on the core ingredients. Results can change based on the exact products you use, so consider this your general guide rather than a certified guarantee!
Here is the breakdown for one generous bar:
- Serving Size: 1 bar
- Calories: 350
- Sugar: 25g (Yep, that’s where the deliciousness comes from!)
- Fat: 20g
- Saturated Fat: 10g
- Carbohydrates: 35g
- Protein: 5g
- Cholesterol: 45mg
It’s important to remember that desserts like this are treats, pure and simple—and they are worth every single bite! They are designed to bring joy and connection, not to fit into a strict daily quota. This is about enjoying the process and sharing something delicious with the people you care about. If you’re looking for other recipes that might be slightly lighter but still scratch that sweet itch, check out my guide on easy cheesecake recipes for some lighter inspiration!
PrintEasy Crescent Roll Sopapilla Cheesecake Bars with Honey Drizzle

Make these Sopapilla Cheesecake Bars for a dessert that combines flaky crescent dough, creamy cheesecake filling, and a buttery cinnamon sugar topping. This recipe is simple to prepare and tastes like a blend of churro and cheesecake.
- Prep Time: 15 min
- Cook Time: 30 min
- Total Time: 45 min
- Yield: 12 bars 1x
- Category: Dessert
- Method: Baking
- Cuisine: Tex-Mex Inspired
- Diet: Vegetarian
Ingredients
- 2 cans (8 ounces each) refrigerated crescent roll dough
- 1 package (8 ounces) cream cheese, softened
- 1 cup granulated sugar
- 1 large egg
- 1 teaspoon vanilla extract
- 1/2 cup (1 stick) unsalted butter, melted
- 3/4 cup granulated sugar
- 2 teaspoons ground cinnamon
- Optional: Honey, for drizzling
Instructions
- Preheat your oven to 350 degrees Fahrenheit. Lightly grease a 9×13 inch baking dish.
- Unroll one package of crescent roll dough and press it into the bottom of the prepared baking dish, forming the bottom crust.
- In a medium bowl, beat the softened cream cheese, 1 cup of sugar, egg, and vanilla extract until the mixture is smooth and creamy. Spread this cream cheese filling evenly over the bottom layer of dough.
- Unroll the second package of crescent roll dough and carefully place it over the cream cheese layer. Pinch the seams together to seal the edges.
- In a small bowl, mix the remaining 3/4 cup of sugar and 2 teaspoons of cinnamon together.
- Brush the top layer of dough evenly with the melted butter. Sprinkle the cinnamon-sugar mixture over the buttered top layer.
- Bake for 25 to 30 minutes, or until the top is golden brown and the filling is set.
- Let the bars cool in the pan for at least 30 minutes before cutting. If you are using honey, drizzle it lightly over the bars before serving.
Notes
- You can use a standard 9-inch springform pan instead of a 9×13 dish; adjust baking time slightly if needed.
- For a richer flavor, use full-fat cream cheese.
- If you prefer a thinner topping, use only 1/4 cup of butter and mix it with the cinnamon sugar before sprinkling.
Nutrition
- Serving Size: 1 bar
- Calories: 350
- Sugar: 25g
- Sodium: 250mg
- Fat: 20g
- Saturated Fat: 10g
- Unsaturated Fat: 10g
- Trans Fat: 0g
- Carbohydrates: 35g
- Fiber: 1g
- Protein: 5g
- Cholesterol: 45mg