

Oh, that smell! There is absolutely nothing that screams ‘home’ louder than the incredible aroma of fresh, crusty bread filling your kitchen. I still remember when my career got hectic, and that wonderful smell was replaced by microwave dinners—it just felt wrong! That’s exactly why I started keeping this little kitchen diary. I needed recipes that were real, tasted amazing, and didn’t take all day. Trust me when I say this italian bread recipe is the one that brought me back to baking. It’s my go-to, bakery-style loaf that’s surprisingly easy, perfect for anyone new to yeast, and always delivers that gorgeous, crunchy exterior hugging a soft, perfectly chewy inside. It’s real-life cooking that works! If you want to know more about why I started sharing these practical recipes, you can check out my story over at Little Kitchen Diary.
- Why This Easy Crusty Homemade Italian Bread Recipe Works (Soft Inside Crusty Outside Bread)
- Ingredients for Your Homemade Italian Bread Recipe
- Essential Equipment for Baking Italian Bread
- How to Prepare Your Simple Sandwich Bread: Step-by-Step Italian Bread Instructions
- Tips for Success When Baking Crusty Italian Bread at Home
- Serving Suggestions for Your Fresh Baked Bread Aromas
- Storage & Reheating Instructions for Leftover Italian Bread
- Frequently Asked Questions About This Quick Italian Bread Tutorial
- Estimating Nutritional Data for Classic Italian Baking
- Share Your Homemade Italian Bread Success
Why This Easy Crusty Homemade Italian Bread Recipe Works (Soft Inside Crusty Outside Bread)
When you’re aiming for that perfect rustic loaf, you want results without the fuss, right? This Homemade Italian Bread Recipe cuts out all the unnecessary steps. It’s truly built for the home cook who just wants real, delicious bread without wrestling dough for an hour.
Here’s why this recipe stands out from the crowd and gives you that highly desired texture:
- It uses only basic pantry ingredients—flour, water, yeast, oil, salt, and a tiny bit of sugar. No weird additives here!
- The rise times are surprisingly manageable, making it perfect for a weekend bake or even a quick weeknight side dish.
- You get that fantastic contrast: a deep, golden brown crust that cracks just right, surrounding a wonderfully soft and chewy interior.
Achieving the Bakery Style Italian Loaf Texture
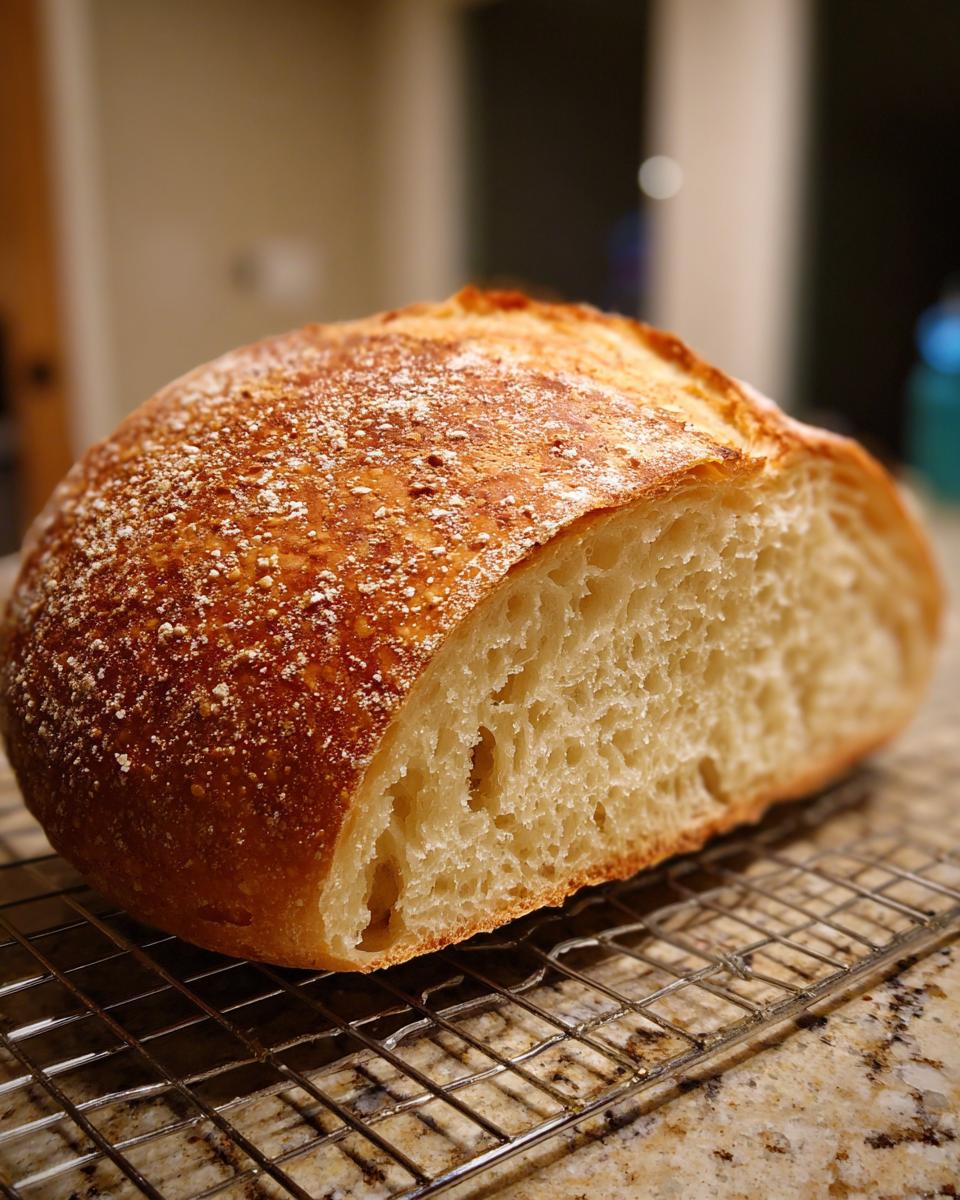
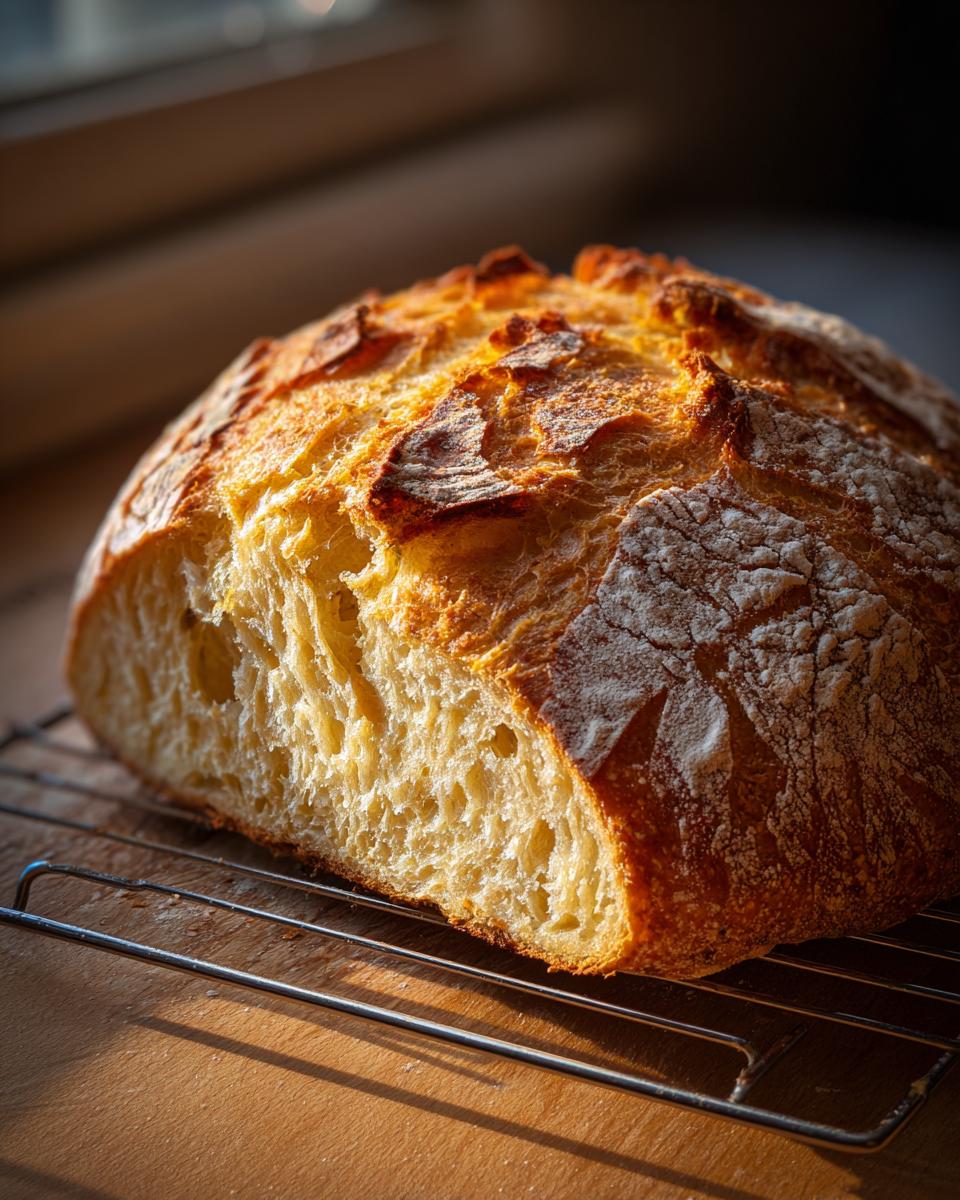
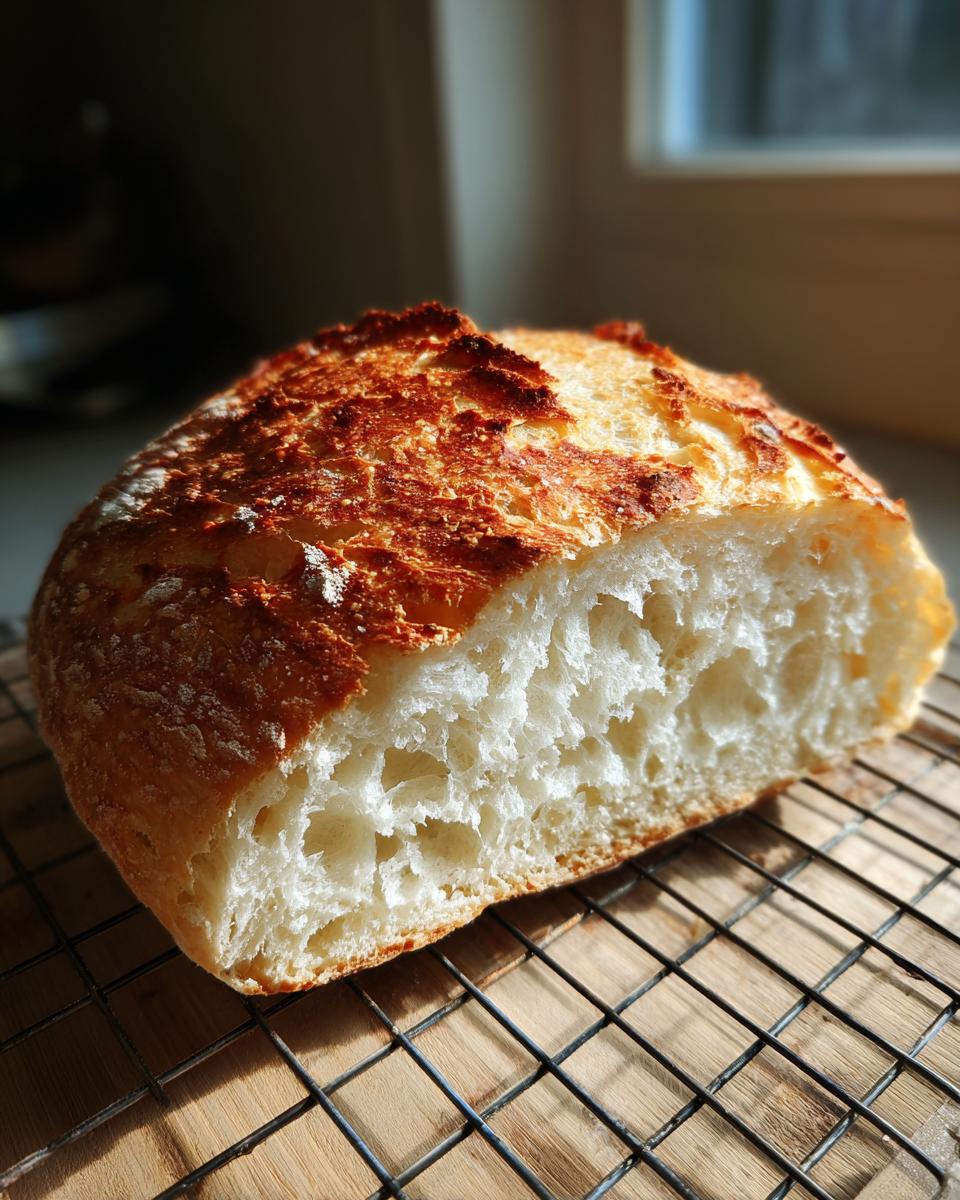
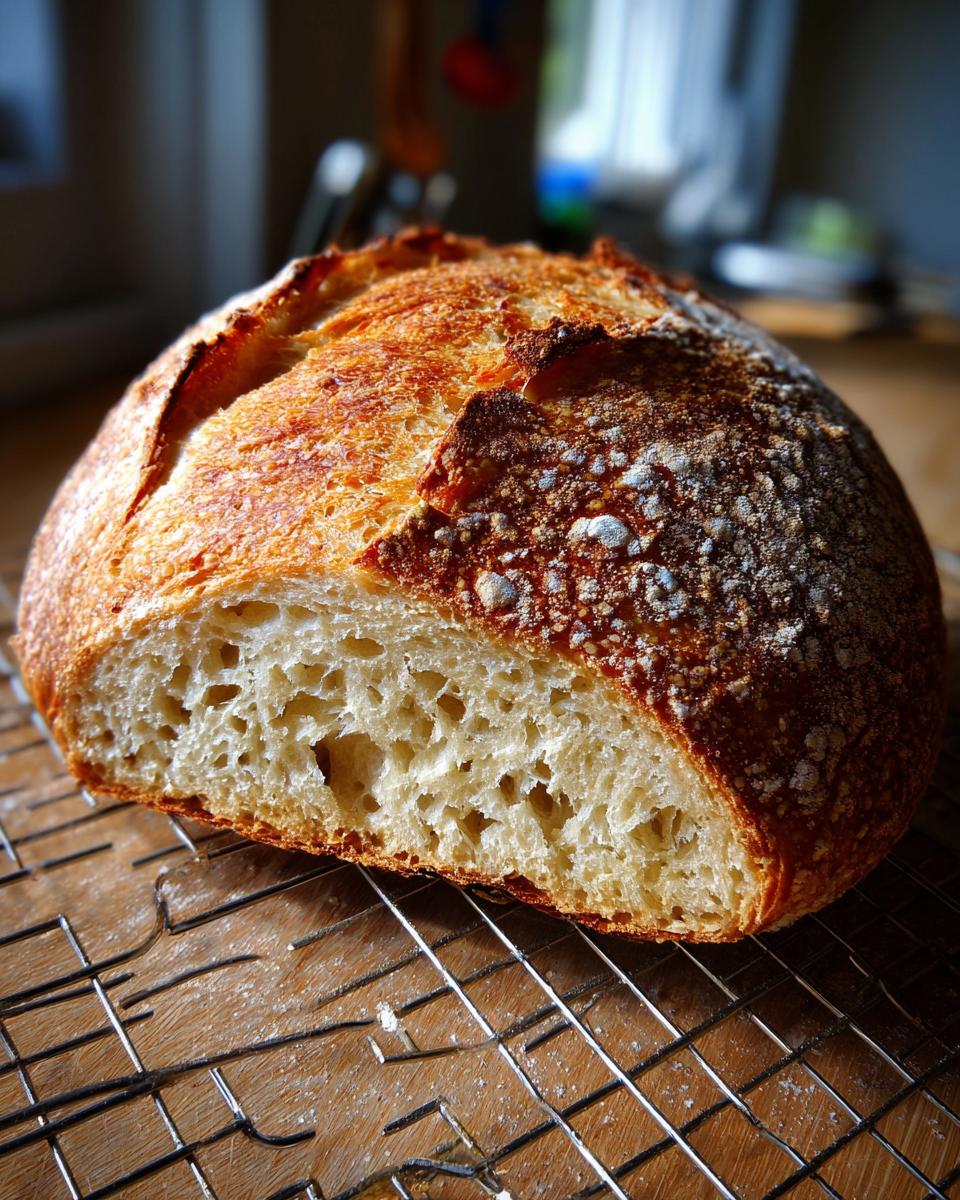
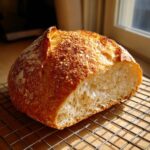
The secret to that amazing shatter on the crust isn’t complicated at all; it’s steam! When you bake this Bakery Style Italian Loaf, adding steam to the oven environment stops the outside of the dough from setting too quickly. This allows the bread to expand fully before the crust hardens, giving you maximum oven spring and that thin, crispy texture we all crave. It’s simple science, and it works every time!
Ingredients for Your Homemade Italian Bread Recipe
When you look at this list, you’ll feel relieved. This is pure, honest baking. You don’t need fancy bread flour or a sourdough starter for wonderful **italian bread**—just pantry staples! I always measure my ingredients out first; it keeps things moving smoothly when the yeast starts doing its job. Here is exactly what you’ll need to make one perfect loaf:
- 3 1/2 cups all-purpose flour
- 1 1/2 teaspoons salt
- 1 teaspoon granulated sugar
- 2 1/4 teaspoons active dry yeast (that’s usually one full packet, by the way!)
- 1 1/2 cups warm water (aim for about 105-115°F; test it—it should feel comfortably warm, not hot!)
- 2 tablespoons olive oil, plus extra for oiling the bowl
See? Nothing scary there. This simplicity is why I rely on this recipe for last-minute dinner guests!
Essential Equipment for Baking Italian Bread
You don’t need a fancy stand mixer for this recipe; that’s the beauty of keeping things simple! This is truly a **Beginner Bread Making** success story because the tools are pretty standard. Having these things ready before you start mixing means you won’t be scrambling later when the dough needs attention.
Make sure you have these items gathered on your counter:
- A large mixing bowl—big enough to let that dough nearly double in size!
- A standard baking sheet.
- Parchment paper. Trust me, skip the dustings of flour on the pan; parchment paper is the non-stick champion for easy transfer and cleanup.
- A sharp knife or a blade (a lame, if you have one, but any very sharp knife works) for scoring the top of the loaf. This helps the bread expand neatly.
That’s it! No complicated Dutch ovens or stone required for this lovely loaf.
How to Prepare Your Simple Sandwich Bread: Step-by-Step Italian Bread Instructions
Okay, let’s get our hands dusted with flour! Baking this italian bread is a two-part rising process, but really, most of that time is hands-off, so don’t freak out about the timeline. Keep your mind on that warm, chewy center for the entire process. If you ever have a question or just want to send me a picture of your dough, feel free to reach out here!
Mixing and First Rise for Your Italian Bread
We start by getting our dry ingredients—flour, salt, and sugar—mixed up in that big bowl. Next is the yeast test; this is key. Make sure your water is warm, not searing hot, dissolve the yeast, and let it sit for about 5 minutes. If it gets foamy on top, that yeast is alive and happy—yay! Pour the foamy yeast water and the olive oil into your dry stuff. Mix it all up with a wooden spoon until it gets shaggy. Then, it’s time to knead! Punch it out onto the counter and work it for 8 to 10 minutes until it feels smooth. This builds the gluten structure we need for a great chewy loaf.
Once it’s elastic, oil your bowl up, place the dough inside, let it spin around so it’s coated, cover it up, and leave it alone for 1 to 1.5 hours until it’s doubled. Patience now, friend!
Shaping and Second Rise for the Perfect Italian Bread Loaf
When that dough is puffy, gently punch the air out—don’t beat it up, just deflate it! Now we shape. I like to roll mine into a long, round oval, kind of like a football, which bakers call a bâtard. Place this shaped dough onto your parchment-lined sheet. Cover it loosely again with a towel. This second rise only takes 30 to 45 minutes, but this is a good time to get your oven ready!
Baking Tips for a Golden Brown Crust Bread
About halfway through that second rise, crank your oven up to 400°F (200°C). Here’s the trick for that incredible **Golden Brown Crust Bread**: place a shallow pan on the very bottom rack while it preheats. When you slide your bread in, carefully pour about a cup of hot water into that pan to make steam. This keeps the crust soft initially so the bread can puff up. Before baking, brush the top lightly and use a sharp knife to make 3 or 4 diagonal cuts—that’s scoring! Bake until it’s deep golden brown and when you tap the bottom, it should sound satisfyingly hollow.
Tips for Success When Baking Crusty Italian Bread at Home
Now that you have the basic steps down for making this fantastic Easy Crusty Bread Baking masterpiece, let me give you a couple of my favorite little tricks I picked up to guarantee that bakery-quality crust. You know I’m all about making things easy, but sometimes a little extra step makes all the difference in the world!
Rule number one: You must let the bread cool completely on a wire rack! If you try to slice your loaf while it’s hot, you’ll trap steam inside, and that beautiful crisp crust you worked so hard for will turn soft and gummy. Don’t ruin it at the last minute!
For serious crunch, try this: once the loaf is in the oven with that water pan, carefully spritz the walls of the oven 3 times during the first 10 minutes of baking. That blast of extra moisture is magic for achieving that crackly, golden exterior. I also saw a great tip on Pinterest about serving it warm with olive oil for dipping; it seriously elevates any meal! If you want to read about how others have perfected this crust, check out this article on achieving that perfect crust.
Serving Suggestions for Your Fresh Baked Bread Aromas
Okay, the loaf is cooled—take a deep breath, because that smell is intoxicating! Now comes the best part: actually eating your amazing **italian bread**! Honestly, with a crust this good, it barely needs anything else, but I have a few favorite ways to make sure it shines on the table.
If you’re having a casual evening, you absolutely have to serve it with high-quality olive oil for dipping. Just drizzle a little extra virgin olive oil right onto a small serving plate, maybe sprinkle a tiny pinch of coarse salt or some dried oregano on top. Dunking that heavenly, chewy crumb into the oil? Seriously unmatched.
This bread is also the perfect dinner side, obviously. It’s sturdy enough to stand up to your heartiest dishes. Don’t you hate when thin bread falls apart trying to soak up spaghetti sauce? Not with this loaf! It’s wonderful next to a big bowl of lasagna or any rich, tomato-based sauce. It’s also fantastic cut into thick slices and toasted for bruschetta the next day. Really, anything that needs a comforting companion, this bread is there for you.
Storage & Reheating Instructions for Leftover Italian Bread
I know, I know, there usually aren’t leftovers when you pull a fresh loaf of **italian bread** out of the oven, but life happens! The key to keeping that crust crisp is making sure you cool it completely first—that means leaving it on a wire rack until it’s totally room temperature. Don’t wrap it while it’s warm, or you’ll steam the crust right off!
If you have any left the next day, skip the microwave—it turns things rubbery, fast. Instead, pop a slice or a quarter of the loaf directly onto the oven rack at about 350°F for about five to seven minutes. It comes out piping hot, and that crust comes right back to life! It’s the perfect way to refresh your **Simple Sandwich Bread** base for lunch.
Frequently Asked Questions About This Quick Italian Bread Tutorial
I get so many questions anytime I post about this recipe—it’s clearly a hit! Most folks are asking about saving time or swapping ingredients in this **Quick Italian Bread Tutorial**. Since you really want that perfect texture, I wanted to tackle the most common issues right here so you feel totally confident before you start mixing!
Can I use instant yeast instead of active dry yeast?
Yes, you absolutely can! Honestly, if I’m running late, I often go for instant yeast myself. The only change you need to make for this **Homemade Italian Bread Recipe** is that you can skip dissolving it in the warm water first. Just whisk the instant yeast right into your dry ingredients (flour, salt, sugar) along with everything else in step 4. Cut the rise times slightly if you feel like it, but usually, it will rise just fine!
Can I skip the steam process for a crispy crust?
If you’re dead-set against putting water in the oven for steam, you *can* skip it. But—and this is a big but—you won’t get that incredible, crackly, bakery-style crust that we are aiming for. Without steam, the outside sets too fast, and your loaf ends up looking more pale and tasting a bit tougher. If you skip the water pan, you might get a **Simple Sandwich Bread** texture instead of that artisan crust. I really, really recommend the water pan!
How can I speed up the rising time?
Baking is really about respecting time, my friend, especially with yeast! If you want a slightly faster result for your **Chewy Italian Loaf**, the key is a warmer proofing spot. Don’t use a hot oven—that kills yeast! Instead, try turning your oven light on (and make sure the oven door is off). This creates a lovely, gentle warmth. If your kitchen is chilly, placing the covered dough bowl inside the turned-off oven with just the light on can shave about 15 to 20 minutes off that first rise. Remember to always check for ‘double in size’ rather than watching the clock too closely, though!
Is this a good recipe for making rolls instead of a loaf?
It works fantastically well for rolls! If you want smaller portions, just take the dough after the first rise, gently punch it down, and divide it into 10 or 12 equal pieces. Roll each piece into a small ball—this creates little dinner rolls perfect for dipping. You will need way less baking time, probably only about 18 to 20 minutes at 400°F. Keep an eye on that color for your **Dinner Side Bread Recipes**!
If you’re ever unsure about terms or my general approach here, take a peek at my Terms of Use page! Happy baking!
Estimating Nutritional Data for Classic Italian Baking
Food is always about joy and connection here at Little Kitchen Diary, but I know sometimes folks are curious about what exactly is in that beautiful loaf of **Homemade Italian Bread Recipe** we just pulled out of the oven. So, based on the standard measurements in the recipe (and remembering that nutrition facts can swing wildly depending on the flour brand you grab!), I’ve crunched the numbers for one slice.
Please remember, this is just an *estimate* for one slice of the whole loaf. The actual numbers can shift slightly based on how thick you cut it or the exact brand of olive oil you used. But this gives you a good baseline for enjoying your **Classic Italian Baking** creation!
Here is a rough look at what’s estimated per serving:
- Calories: Around 150
- Total Fat: About 1.5 grams
- Carbohydrates: Approximately 30 grams
- Protein: Roughly 5 grams
- Sugar: Very low, around 0.5 grams
I always feel better knowing that the simple ingredients in our **Easy Crusty Bread Baking** recipe lead to something satisfying without overloading on the stuff we try to watch, like sugar. Go ahead, enjoy that first slice!
Share Your Homemade Italian Bread Success
Well, friends, that’s it! You have successfully navigated the journey from yeast activation to that glorious moment when you tap the bottom of your loaf and hear that hollow, perfect sound. I truly hope your kitchen smells just as amazing as mine does right now!
This is the part where I ask you to stick around! I am so eager to hear what you think. Did you master that flaky, **crusty exterior**? Did it come out soft and chewy on the inside like we planned? Don’t keep that success—or any little lesson you learned—to yourself!
Please take a moment to rate this recipe right below this section. It helps other folks who might be nervous about tackling their first **Artisan Bread at Home** project to feel confident diving in. Your feedback, especially about the crust, is gold to me and helps build this whole Little Kitchen Diary community.
If you took a picture of your loaf—maybe you’re already tearing off a piece for dipping in olive oil, or maybe it’s waiting to become the best base for your dinner tonight—I would love to see it! Tag me or drop a link in the comments if you can. Seriously, seeing your beautiful bakes is the best part of my day. If you’re looking for another great recipe to use up that crusty loaf, check out some inspiration over here: you might find a new favorite dipping side!
Thank you so much for baking with me today. Happy eating!
PrintEasy Crusty Homemade Italian Bread: Bakery Style Loaf
Follow this simple recipe to bake a bakery-style Italian bread with a golden, crunchy crust and a soft, chewy interior. This recipe uses basic pantry ingredients and is perfect for beginners.
- Prep Time: 20 min
- Cook Time: 35 min
- Total Time: 2 hours 35 min
- Yield: 1 loaf 1x
- Category: Baking
- Method: Baking
- Cuisine: Italian
- Diet: Vegetarian
Ingredients
- 3 1/2 cups all-purpose flour
- 1 1/2 teaspoons salt
- 1 teaspoon granulated sugar
- 2 1/4 teaspoons active dry yeast (1 packet)
- 1 1/2 cups warm water (about 105-115°F)
- 2 tablespoons olive oil, plus more for the bowl
Instructions
- In a large bowl, mix the flour, salt, and sugar.
- In a separate small bowl, dissolve the yeast in the warm water and let it sit for 5 minutes until foamy.
- Pour the yeast mixture and the 2 tablespoons of olive oil into the dry ingredients. Mix with a wooden spoon until a shaggy dough forms.
- Turn the dough out onto a lightly floured surface. Knead the dough for 8 to 10 minutes until it becomes smooth and elastic.
- Lightly oil a large bowl. Place the dough in the bowl, turning to coat. Cover the bowl with plastic wrap or a clean kitchen towel.
- Let the dough rise in a warm place for 1 to 1.5 hours, or until it has doubled in size. This is your first rise.
- Gently punch down the dough. Shape it into a long, round loaf (a bâtard shape).
- Place the shaped loaf on a baking sheet lined with parchment paper or in a prepared loaf pan. Cover loosely.
- Let the dough rise again for 30 to 45 minutes, or until it looks puffy. This is your second rise.
- Preheat your oven to 400°F (200°C). If you want extra steam for a crispier crust, place a shallow pan of water on the bottom rack while preheating.
- Lightly brush the top of the loaf with water or a little olive oil. Use a sharp knife to make 3 to 4 diagonal slashes across the top of the dough.
- Bake for 30 to 35 minutes, or until the crust is deep golden brown and sounds hollow when tapped on the bottom.
- Transfer the loaf to a wire rack to cool completely before slicing.
Notes
- For an extra crispy crust, spray the inside walls of the oven with water 3 times during the first 10 minutes of baking.
- If you are serving this bread with olive oil for dipping, a little extra virgin olive oil drizzled on top before serving improves the flavor.
- This bread is excellent for making hearty sandwiches the next day.
Nutrition
- Serving Size: 1 slice
- Calories: 150
- Sugar: 0.5
- Sodium: 300
- Fat: 1.5
- Saturated Fat: 0.2
- Unsaturated Fat: 1.3
- Trans Fat: 0
- Carbohydrates: 30
- Fiber: 1.5
- Protein: 5
- Cholesterol: 0