
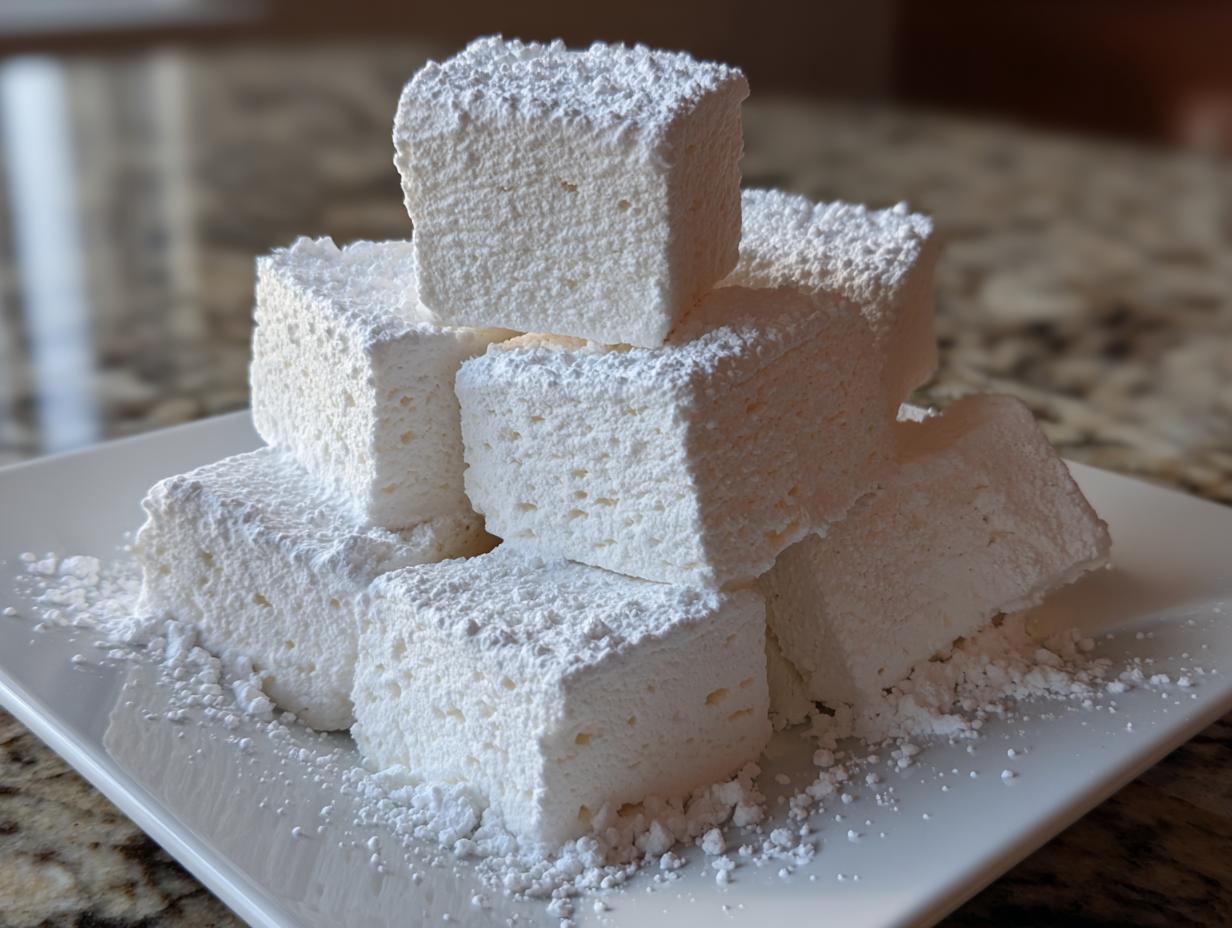
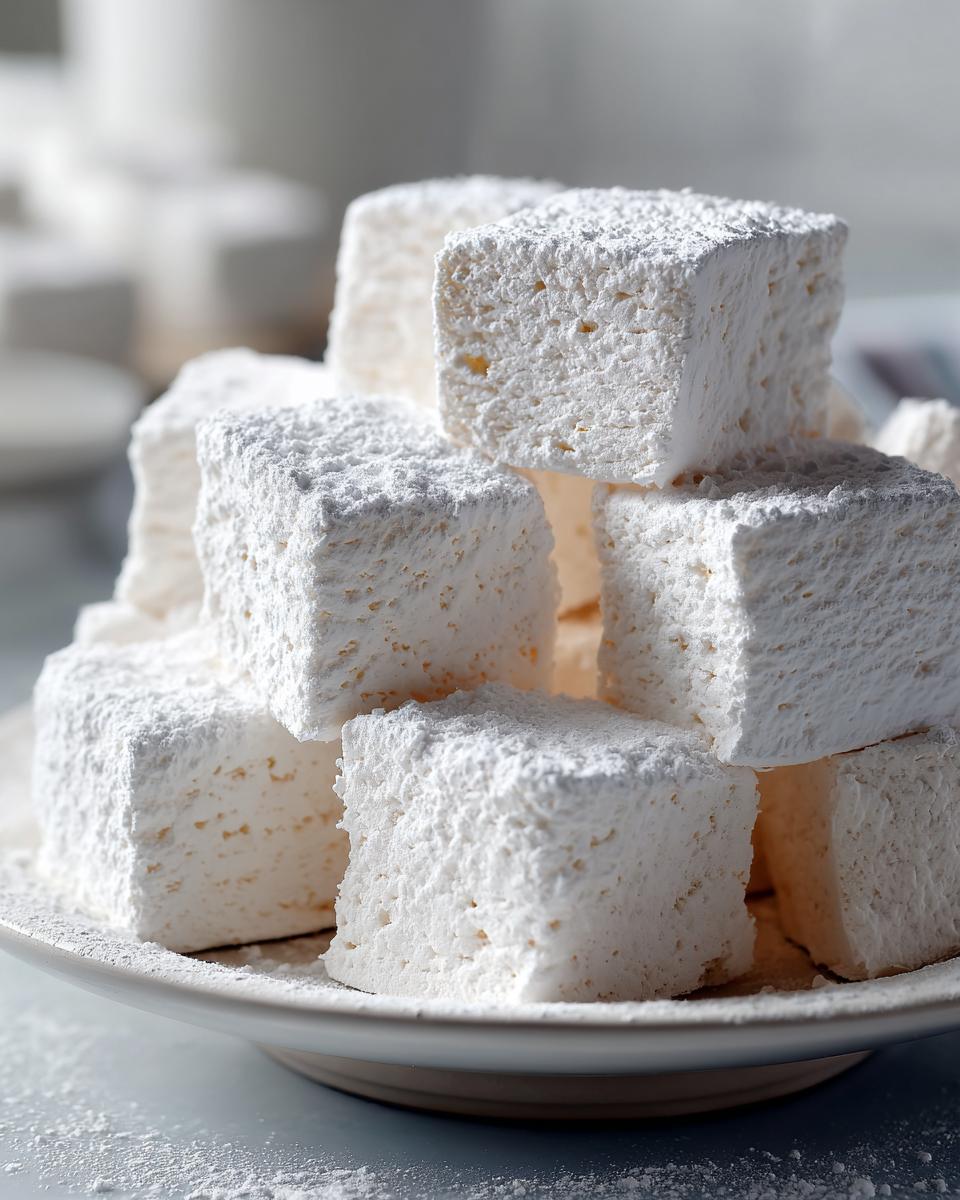
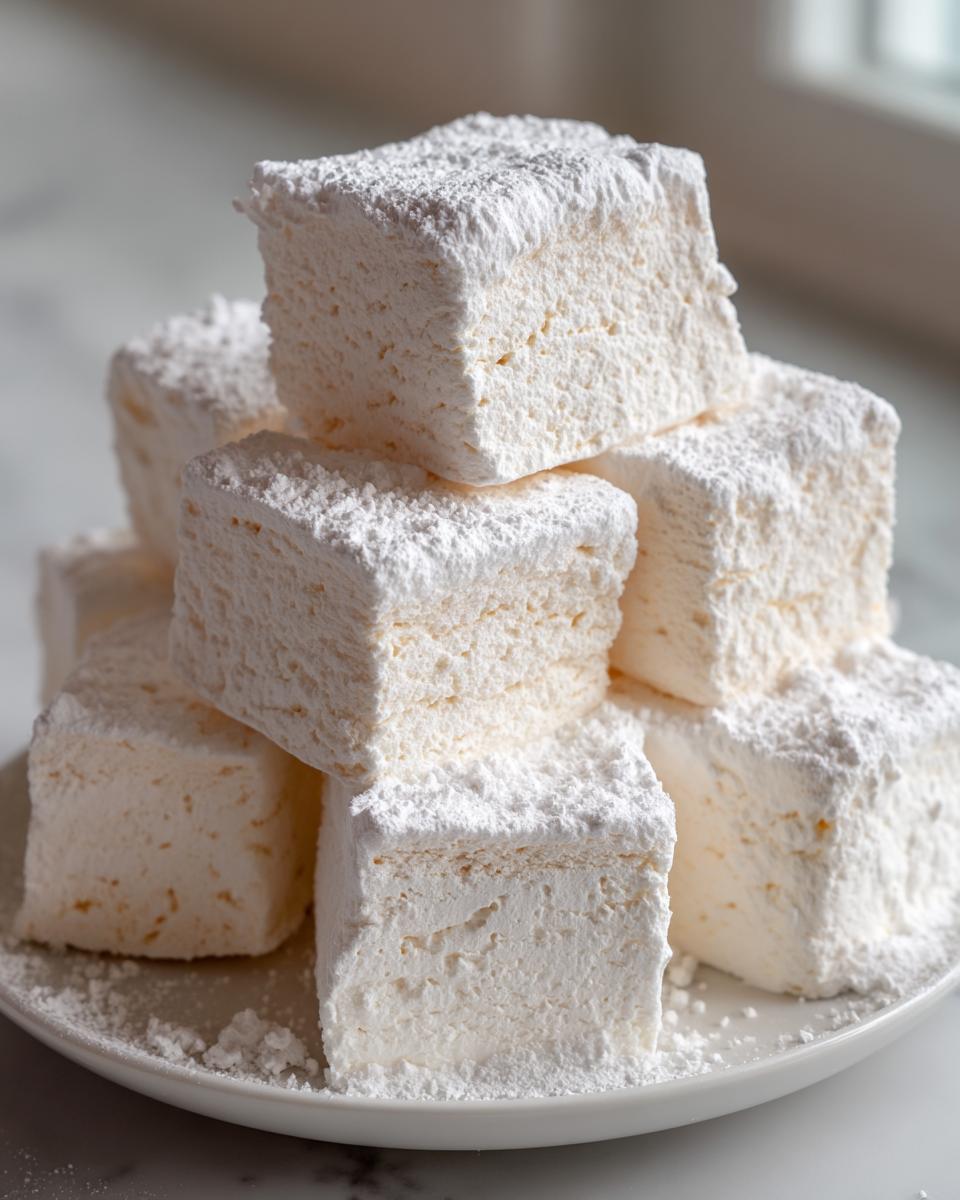
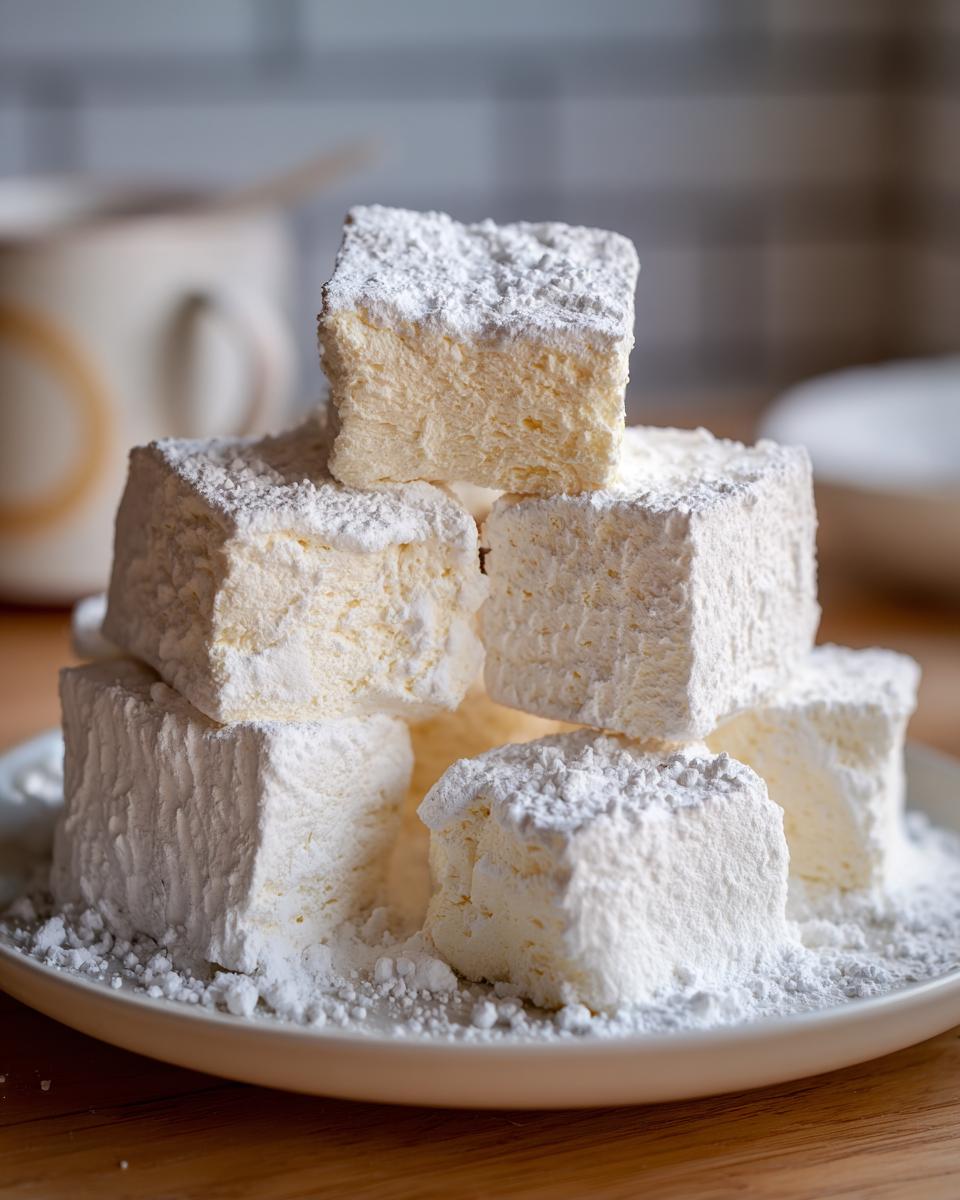
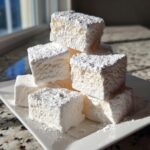
If you’ve only ever had the stuff that comes in plastic bags, then you haven’t really lived! There is zero comparison between the bouncy, flavorless supermarket kind and what you’re about to make. I’m showing you the easiest, fluffiest **homemade marshmallows** recipe you will ever find. When I started Little Kitchen Diary, it was all about making food feel joyful again, even when life was crazy busy. And what’s more joyful than pulling a tray of warm, sweet vanilla fluff out of your own oven? I actually detailed my whole mission to reclaim that kitchen connection over on the About Page. Trust me on this one—this project brings back that quiet, happy kitchen connection we all miss. Ready to make some cloud-like treats?
- Why You Will Love This Easy Marshmallows From Scratch Recipe
- Gathering Ingredients for Homemade Vanilla Marshmallows
- Equipment Needed for Your Homemade Candy Recipes
- How To Make Marshmallows: Step-by-Step Instructions
- Tips for Success When Making Homemade Marshmallows
- Storage & Reheating Instructions for Homemade Candy Recipes
- Serving Suggestions: Marshmallows for Hot Cocoa and Best Smores Ingredients
- Frequently Asked Questions About Homemade Marshmallows
- Understanding the Nutrition in Your Homemade Vanilla Treats
Why You Will Love This Easy Marshmallows From Scratch Recipe
Skip the store-bought boxes, seriously. These **homemade marshmallows** are ridiculously easy, and the payoff is huge. You get that incredible, fresh vanilla flavor and a texture that just melts away. They’re perfect for just about anything! Here’s what makes this recipe essential for your kitchen rotation:
- They are shockingly simple, even as a first-time candy maker.
- They are supremely versatile—hello, gourmet treats!
- The final product is pillowy soft and unbelievably fresh.
Achieving Cloud-Like Fluffy Marshmallows DIY Texture
The secret to that light, cloud-like texture isn’t magic; it’s time in the mixer. You simply cannot rush the whipping process. You need to let that hot syrup and gelatin mix on high speed for a full 12 to 15 minutes. That long whip time is what incorporates the air and gives you that soft marshmallow texture guide that store-bought stuff just can’t touch. It feels like forever, but stick with it!

Gathering Ingredients for Homemade Vanilla Marshmallows
Okay, setting up the ingredients is almost as fun as eating them! This isn’t some fussy recipe requiring twenty steps to find things. We’re using relatively standard pantry ingredients to create these gorgeous **vanilla marshmallow treats**.
You will need your gelatin, sugar, corn syrup, water, and that lovely vanilla extract. I’ve also listed the crucial dusting mixture—don’t eyeball this part! It keeps the finished squares from sticking to everything you own. If you’re trying to avoid corn syrup, I have a great work-around that keeps the texture just as fluffy, so don’t panic if that bottle isn’t in your pantry.
Ingredient Notes and No Corn Syrup Marshmallows Substitution
Let’s talk quality here. For the gelatin, make sure you grab the unflavored powder—no Jello! Also, since we’re making candy, the gelatin needs a few minutes to “bloom” in cold water before anything heats up. That resting time is non-negotiable for the best results.
If you are making **no corn syrup marshmallows**, here’s the simple switch: In the saucepan, swap the 1 cup of light corn syrup for an extra 1 cup of granulated sugar PLUS an extra 1/2 cup of water. Toss all that into the pot instead of the original syrup. It works out perfectly because the extra sugar basically mimics the liquid structure the syrup provides. It’s a fantastic pantry solution!
Equipment Needed for Your Homemade Candy Recipes
Making candy at home always feels a little bit special, right? We’re not just baking here; we’re getting scientific, which means we need the right gear for the job. Don’t worry if your kitchen isn’t stocked like a professional pastry shop, but there are two items I absolutely insist you use.
First up, you need a stand mixer with a whisk attachment. While the recipe notes mention that a hand mixer *might* work, I’m telling you, you need the horsepower of a stand mixer for this one. That 12 to 15 minutes beating time is intense, and a hand mixer will just quit on you halfway through, leaving you with gooey soup instead of fluffy peaks.
Second, and this is critical for safety and success: a reliable candy thermometer. Syrup needs to hit a specific temperature—the soft-ball stage—which is 240 degrees Fahrenheit. If you guess, you risk either not dissolving the sugar properly or accidentally making rock candy instead of soft squares. Always clip that thermometer right onto the pot before you start heating the sugar mixture. Getting these two pieces of equipment ready makes the whole process smooth sailing!
You’ll also want a 9×13 inch baking pan, a medium saucepan, and a good, flexible spatula for spreading everything out quickly.
How To Make Marshmallows: Step-by-Step Instructions
Alright, let’s dive into the actual making process! When you commit to making **homemade marshmallows**, you’re committing to about 25 minutes of active work, followed by waiting patiently. Don’t worry; the waiting is the hardest part. I have linked our privacy policy just in case you ever wondered what we do with emails, but let’s focus on the delicious sugar science right now! You can check out our privacy commitment here.
Blooming Gelatin and Preparing the Syrup for Homemade Marshmallows
First things first: get your pan ready! Lightly grease a 9×13 inch pan and dust it really well with that powdered sugar/cornstarch mix we prepped. This is your non-stick insurance policy. While you’re doing that, sprinkle your gelatin over 1/2 cup of cold water in your stand mixer bowl and let it sit undisturbed for at least five minutes—that’s the blooming part. This ensures no dry pockets later! This resting time is crucial for that Soft Marshmallow Texture Guide we are aiming for.
Next, get your sugar syrup going on the stove over medium heat. Combine the sugar, corn syrup (or your substitute), and the remaining water. Stir it only until the sugar dissolves. Once it dissolves, you stop stirring! Clip on that candy thermometer and watch it climb. We need it to hit exactly 240 degrees Fahrenheit. This precise temperature is the key to success; go hotter and it gets chewy, too cool and it won’t set right.
Whipping and Setting Your Fluffy Marshmallows DIY
Once that syrup hits 240°F, pull it off the heat immediately. Turn your mixer on LOW, and carefully drizzle that blindingly hot syrup down the side of the bowl—don’t pour it right onto the whisk! Once it’s all in, ramp that mixer up to high speed. Start your timer. You need to whip this mixture for a solid 12 to 15 minutes. You’ll see it transform from thin and bubbly to thick, intensely glossy, and it should look like thick, white paint.
When the bowl feels only slightly warm to the touch, turn the mixer down, throw in the vanilla extract, and give it one last churn. Work fast now! Scrape that thick, glorious batter into your prepared pan and use an oiled spatula to smooth the top. Generously dust the top with the extra sugar mix. Now, you must let it sit, completely undisturbed, for at least four hours, but honestly? Overnight is always better for the best **Fluffy Marshmallows DIY** set.
Tips for Success When Making Homemade Marshmallows
Look, even with a simple recipe, things can go sideways, right? That’s how we learn! I remember my very first batch—I got scared during the whipping stage, stopped it too early, and ended up with a slightly sticky, delicious, but definitely flat mess that didn’t cut well at all. We’ve all been there!
The biggest hurdle after whipping is the cutting process, because sticky marshmallow is *everywhere*. You need a game plan before you even think about taking the slab out of the pan.
- Oil Everything: Before you invert the marshmallow slab, generously dust your cutting surface with that powder mix. Then, lightly brush your sharp knife or pizza cutter with a neutral oil—vegetable or avocado works fine. The oil helps the blade glide through the sticky structure without dragging the marshmallow up with it.
- Don’t Refrigerate: This is a big no-no for texture! Cold air makes homemade candy contract funny and can ruin that perfect soft marshmallow texture guide we worked so hard to achieve. Keep these at cool room temperature, away from humidity.
- Cut Large Squares: If you are planning on using these for a recipe later, like tossing them into hot chocolate or using them for **best s’mores ingredients**, cut them bigger than you think you need. They tend to shrink just a bit once they are fully settled and dusted.
My final tip for avoiding stickiness on the cut edges? Once you’ve sliced the squares, toss them gently in a fresh batch of the powdered sugar and cornstarch dusting mix. It coats every side and seals them up nicely so they don’t fuse together in your storage container.
Storage & Reheating Instructions for Homemade Candy Recipes
The waiting is over, and you have a beautiful slab of **homemade vanilla treats**! Now we need to make sure they last long enough for you to enjoy every single fluffy square. You’ve put in the work, so let’s not mess up the storage!
The absolute most important rule here is: keep them out of the fridge! I know it sounds weird for a sweet treat, but cold temperatures make marshmallows sweat. When they sweat, they get sticky, and then they all start clinging together into one giant sticky block. We worked so hard for that perfect, slightly dry, perfectly cut exterior, so we don’t want to drown it in condensation.
Store your cut squares in a truly airtight container at cool room temperature. Make sure they are fully dusted with that starch mixture we used earlier—that powder is your main defense against sticking! If you stored them well, they should stay fresh and soft for up to two weeks. I promise, though, they rarely last that long!
As for reheating? Well, if you’re making **marshmallows for hot cocoa**, you don’t really reheat them; you just let the hot liquid do the work. If you managed to accidentally let them dry out, take a few squares and microwave them for about 5 to 8 seconds. This just gently melts the outside sugar layer and brings back a little of that initial melt-in-your-mouth feeling. Perfect for a quick gourmet treat!
Serving Suggestions: Marshmallows for Hot Cocoa and Best Smores Ingredients
Now that you’ve mastered the **Homemade Marshmallow Recipe**, the real fun begins: deciding how to use them! Honestly, eating them straight away is my preferred method, but I know you probably want to use these clouds in other ways. They elevate simple drinks and campfire snacks into something truly special.
For your next campfire or cozy night in, these qualify as the absolute **best s’mores ingredients** you can buy or make. When you toast a freshly crafted marshmallow, it puffs up beautifully and caramelizes perfectly. A key tip here: cut your squares a little larger than you think you need! They’ll shrink when the heat hits them, so a bigger square guarantees that gooey, molten center you crave between the graham cracker and chocolate.
Of course, the classic use is dropping them into mugs of hot chocolate. These homemade beauties float beautifully and melt slower than the store-bought ones, making your **marshmallows for hot cocoa** experience last longer. If you’re thinking about **edible gifts from scratch**, a nice jar of these tied with a ribbon is always a winner around the holidays!
Gourmet Marshmallow Treats: Simple Marshmallow Variations
The base **vanilla marshmallow recipe** is so stable that you can easily tweak it for different flavors! This is where you can really impress people with your **gourmet marshmallow treats**. You don’t need a complicated second recipe for this; just change what you add right at the very end of the whipping process.
Try these simple **marshmallow variations** in the last minute of beating:
- Peppermint Swirl: Add 1/2 teaspoon of peppermint extract along with the vanilla. Dust the outside with crushed candy canes instead of plain sugar for the holidays.
- Chocolate Kick: Sift in about 2 tablespoons of high-quality unsweetened cocoa powder right when you add the vanilla. Whip just long enough to incorporate it fully. These are heavenly!
- Zesty Lemon: Add the zest from one lemon right at the end. This creates a wonderfully bright, unexpected marshmallow flavor that pairs well with graham crackers.
Remember to contact me if you run into any issues using these ideas! You can always reach out via the Contact Page. If you’re looking for more inspiration on how others are using amazing homemade batches, check out this great post on other marshmallow recipes for some extra ideas!
Frequently Asked Questions About Homemade Marshmallows
I get asked the same few questions all the time when people try making candy from scratch! It’s totally normal to have questions, especially when high heat and sticky syrup get involved. Here are the things that trip up most beginner marshmallow makers, so you can avoid my early mistakes.
Why are my homemade marshmallows sticky no matter what I do?
Stickiness usually comes down to two main culprits, and both are fixable! First, if the surface sugar dusting (that cornstarch/powdered sugar mix) wasn’t generous enough before cutting, they will definitely stick to each other and your hands. Second, and this is huge: refrigeration. If you put them in the fridge, the atmospheric moisture condenses, and they get wet! Keep them airtight at room temperature. If you need a refresher on the dusting technique, you can always check out extra tips, like the ones shared over at Two Sugar”,“Bugs.”
Can I really skip the corn syrup in this recipe?
Yes, absolutely! That’s one of the best parts of this **Homemade Marshmallow Recipe** being so flexible. As detailed above, you can substitute the 1 cup of corn syrup with an extra 1 cup of granulated sugar PLUS an extra 1/2 cup of water that you cook up with the original syrup ingredients. It requires boiling just a touch more water out, but it works like a charm for avoiding corn syrup. The texture is nearly identical because you’re replacing the invert sugars that the syrup provides.
How long do homemade marshmallows actually take to set up?
While the active cooking time is quick—under 15 minutes on the stove—the setting time is a test of patience. I tell everyone to allow a full four hours minimum before even thinking about cutting them. That being said, the absolute best texture, the one that gives you those perfect, clean cuts for **gourmet marshmallow treats**, happens when you let them set overnight. Don’t rush that cooling and structural firming—it’s vital!
Why is the candy thermometer so important for this recipe?
I cannot stress this enough: if you are making candy, you need a thermometer. The sugar syrup needs to reach 240°F (the soft-ball stage) because that specific heat level guarantees that your sugar structure is set right for the gelatin to incorporate properly. If you are under 235°F, the mixture won’t whip up correctly into the fluffy marshmallow body. If you go way over, you might burn the sugar or crystallize it too fast. It’s precision cooking for that perfect texture!
Understanding the Nutrition in Your Homemade Vanilla Treats
If you’re curious about what goes into these delicious **homemade vanilla treats**, here is the estimated nutritional breakdown per serving. Keep in mind that this is based on approximate amounts for 40 squares, and exact numbers can change based on exact ingredient measurements or if you use the no-corn-syrup option.
For context, these values are based on a serving size of four squares:
- Calories: 150
- Sugar: 35g
- Fat: 0g
- Protein: 2g
Remember, making these yourself means you control the quality, and you can always adjust ingredients—that’s the beauty of **kitchen projects homemade**! If you have concerns about usage or data, please feel free to review our Terms of Use policy.
PrintEasy, Fluffy Homemade Vanilla Marshmallows From Scratch
Make soft, fluffy vanilla marshmallows at home. This recipe uses simple ingredients and provides clear steps for achieving a cloud-like texture perfect for hot cocoa or s’mores.
- Prep Time: 20 min
- Cook Time: 10 min
- Total Time: 4 hr 30 min
- Yield: About 40 large marshmallows 1x
- Category: Dessert
- Method: Candy Making
- Cuisine: American
- Diet: Vegetarian
Ingredients
- 3 tablespoons unflavored gelatin powder
- 1 cup cold water, divided
- 1 cup granulated sugar
- 1 cup light corn syrup (or substitute with 1 cup granulated sugar + 1/2 cup water for no corn syrup option)
- 1/4 cup water
- 1 teaspoon vanilla extract
- 1/2 cup powdered sugar, for dusting
- 1/2 cup cornstarch, for dusting
Instructions
- Lightly grease a 9×13 inch baking pan. Mix the powdered sugar and cornstarch together in a small bowl. Dust the prepared pan generously with this mixture, shaking out any excess. Set aside.
- In the bowl of a stand mixer fitted with the whisk attachment, sprinkle the gelatin over 1/2 cup of the cold water. Let it sit for 5 to 10 minutes to bloom.
- In a medium saucepan, combine the granulated sugar, corn syrup (or sugar/water substitute), the remaining 1/2 cup of cold water, and the 1/4 cup of water. Heat over medium heat, stirring until the sugar dissolves.
- Attach a candy thermometer to the side of the saucepan. Bring the mixture to a boil without stirring. Cook until the syrup reaches 240 degrees Fahrenheit (soft-ball stage). Remove immediately from heat.
- Turn the stand mixer on low speed. Slowly and carefully pour the hot syrup down the side of the bowl into the bloomed gelatin mixture. Avoid pouring directly onto the whisk.
- Increase the mixer speed to high. Beat for 12 to 15 minutes until the mixture is very thick, glossy, and has cooled significantly. It should hold stiff peaks. Beat in the vanilla extract during the last minute.
- Working quickly, scrape the marshmallow mixture into the prepared pan. Use a lightly oiled spatula to spread it evenly into the pan.
- Dust the top surface generously with the remaining powdered sugar and cornstarch mixture.
- Let the marshmallows set uncovered at room temperature for at least 4 hours, or preferably overnight.
- Once set, dust a cutting board with more of the sugar/starch mixture. Invert the marshmallow slab onto the board. Dust the sticky sides. Use a sharp, oiled knife or pizza cutter to cut into squares. Toss the cut sides in the remaining mixture to prevent sticking.
Notes
- For a no corn syrup marshmallow, replace the 1 cup of light corn syrup with an additional 1 cup of granulated sugar and 1/2 cup of water added to the saucepan in Step 3.
- Use a stand mixer for the best results; hand mixers may struggle with the long whipping time required for proper texture.
- If you plan to use these for s’mores, cut them slightly larger, as they will shrink a little when toasted.
Nutrition
- Serving Size: 4 squares
- Calories: 150
- Sugar: 35g
- Sodium: 5mg
- Fat: 0g
- Saturated Fat: 0g
- Unsaturated Fat: 0g
- Trans Fat: 0g
- Carbohydrates: 38g
- Fiber: 0g
- Protein: 2g
- Cholesterol: 0mg