
If you’re like me and you’re always searching for those perfect easy party appetizers that require almost zero effort but deliver massive flavor, then listen up! I’ve found the ultimate weeknight win and the easiest game day food ideas: Italian grinder sliders right on soft Hawaiian rolls. Seriously, these grab-and-go sandwiches capture all that amazing, savory deli flavor without needing an hour at the stove. It is exactly the kind of practical, delicious comfort food that inspired Little Kitchen Diary in the first place. You won’t believe how fast the oven does all the heavy lifting for you!
- Why These Italian Grinder Sliders Are Your New Go-To Crowd Pleaser Recipes
- Essential Ingredients for Perfect Grinder Sliders
- Step-by-Step Guide to Making Baked Sliders Recipe
- Expert Tips for Success with Mini Grinder Sandwiches
- Variations for Your Deli Meat Slider Recipes
- Serving Suggestions for Comfort Food Sliders
- Storage and Reheating Instructions for Grinder Sliders
- Frequently Asked Questions About Grinder Sliders
- Estimated Nutritional Data for This Recipe
Why These Italian Grinder Sliders Are Your New Go-To Crowd Pleaser Recipes
I swear, anytime I make these grinder sliders, they vanish before the game even starts! They hit that perfect intersection of ease and incredible taste, which is what we’re always aiming for here at the Diary. When you use those sweet Hawaiian rolls, you know you’ve already won half the battle when it comes to texture.
The best part is how versatile they are. Need a quick quick weeknight dinner sliders that the kids will actually eat? Done. Hosting a bunch of people for a tailgate? These are your MVP. Here is why these baked sliders recipe has earned a permanent slot in my rotation:
- Speed Demon Assembly: You can layer the meats and cheeses in under 15 minutes. Seriously! They slide right into the oven, giving you plenty of time to set out the rest of your easy party appetizers spread.
- True Italian Flavor, Mini-Sized: We are capturing that classic Italian sandwich taste—the salty meats, the tangy cheese—but in a perfectly bite-sized, messy-in-a-good-way format.
- The Magic of the Bake: Baking these sliders keeps them hot and gooey, melting that cheese beautifully into the soft roll. Forget cold sandwiches! These are *hot* sandwiches for gatherings, exactly as they should be.
- The Unbeatable Roll: Using Hawaiian rolls means you get that necessary sweetness to balance the savory, salty meats. Plus, they hold up beautifully under all that garlic butter glaze, so they don’t turn soggy too fast.
Essential Ingredients for Perfect Grinder Sliders
You really can’t skimp on your ingredients when you’re making these deli meat slider recipes. Since this recipe is so straightforward, every single component has to pull its weight! Forget trying to use up random leftovers; this is the time to treat yourself to good quality deli cuts. That’s what takes these from just cheesy rolls to true mini grinder sandwiches.
Here is the exact list of what you’ll need to pull a platter of these beauties out of the oven. Trust me, the ratios here are magic:
- One (12 count) package of the softest Hawaiian sweet rolls you can find—they are critical!
- Half a cup of unsalted butter, melted down for us.
- The seasonings: 1 tablespoon Italian seasoning, 1 teaspoon garlic powder, half a teaspoon onion powder, plus salt and pepper.
- Half a pound each of thinly sliced ham, salami, and turkey.
- Eight slices of provolone cheese and four slices of Swiss cheese.
- A quarter cup of sliced pepperoncini peppers if you like that tiny zip!
Meat and Cheese Selection for Hot Italian Sliders
When building your flavor profile for these hot Italian sliders, I rely on a three-meat stack. The ham brings the salt, the salami brings the deep, savory punch, and the turkey keeps things balanced. Don’t feel like you need fancy cured meats; just get them thinly sliced at your deli counter.
For the cheese, Provolone is non-negotiable for that classic Italian flavor, but I love mixing in a little bit of Swiss. Why? Because two cheeses melt differently! The Swiss gets super creamy under the heat, binding everything together nicely, while the provolone offers that classic tangy pull. It’s a beautiful partnership under the broiler, I promise!
Step-by-Step Guide to Making Baked Sliders Recipe
Okay, friend, this is where the magic happens! The whole point of these incredible baked sliders recipe is keeping everything connected until the very last minute. You want that structure to hold up against all those savory fillings. First things first, get your oven warmed up to 350°F and give your baking dish a light grease—we don’t want any sticking!
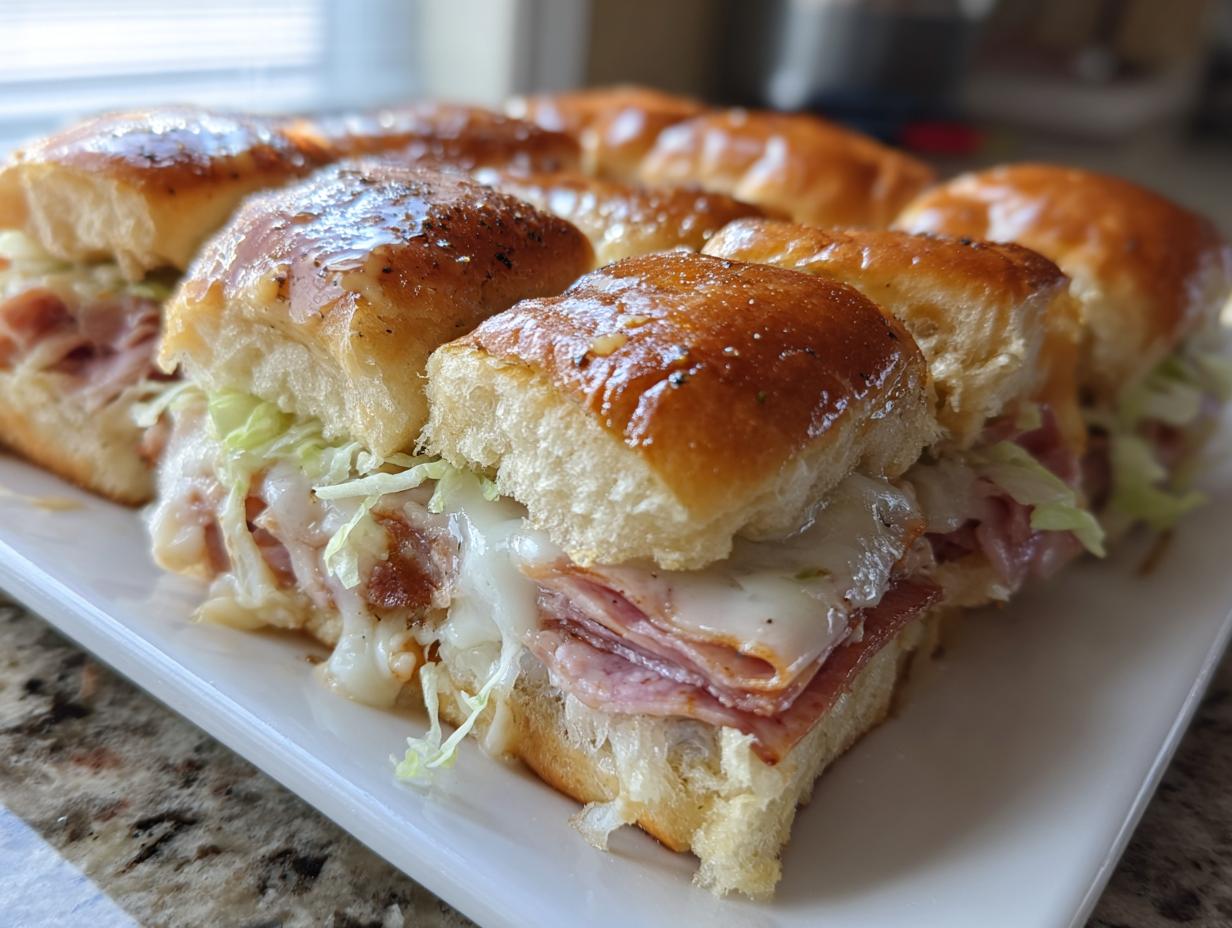
Now, grab that whole package of Hawaiian rolls. My absolute must-do technique is slicing the entire block horizontally in one go, like you’re making one giant, layered sandwich. Place the bottom half gently into your prepared dish. That’s your foundation for these amazing grinder sliders!

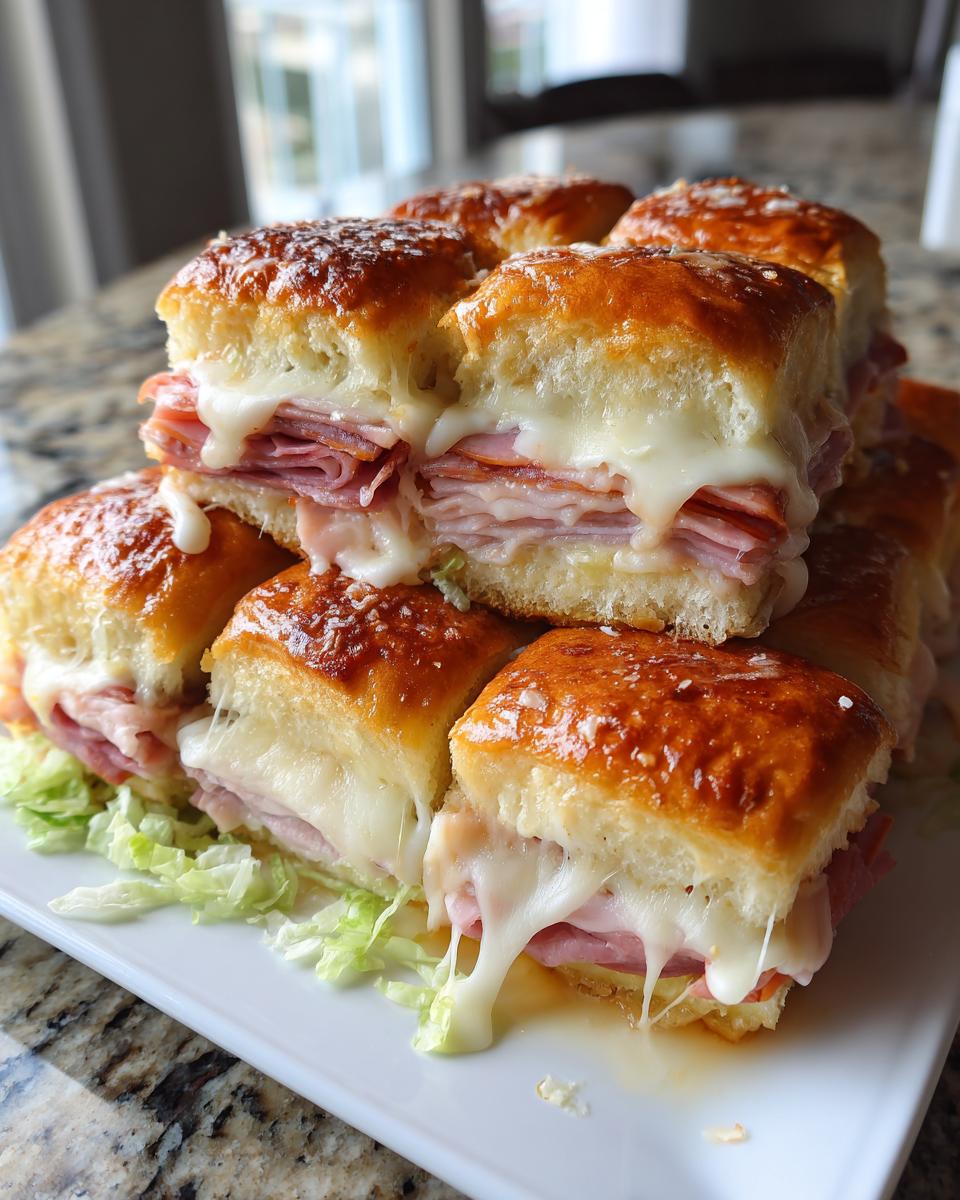
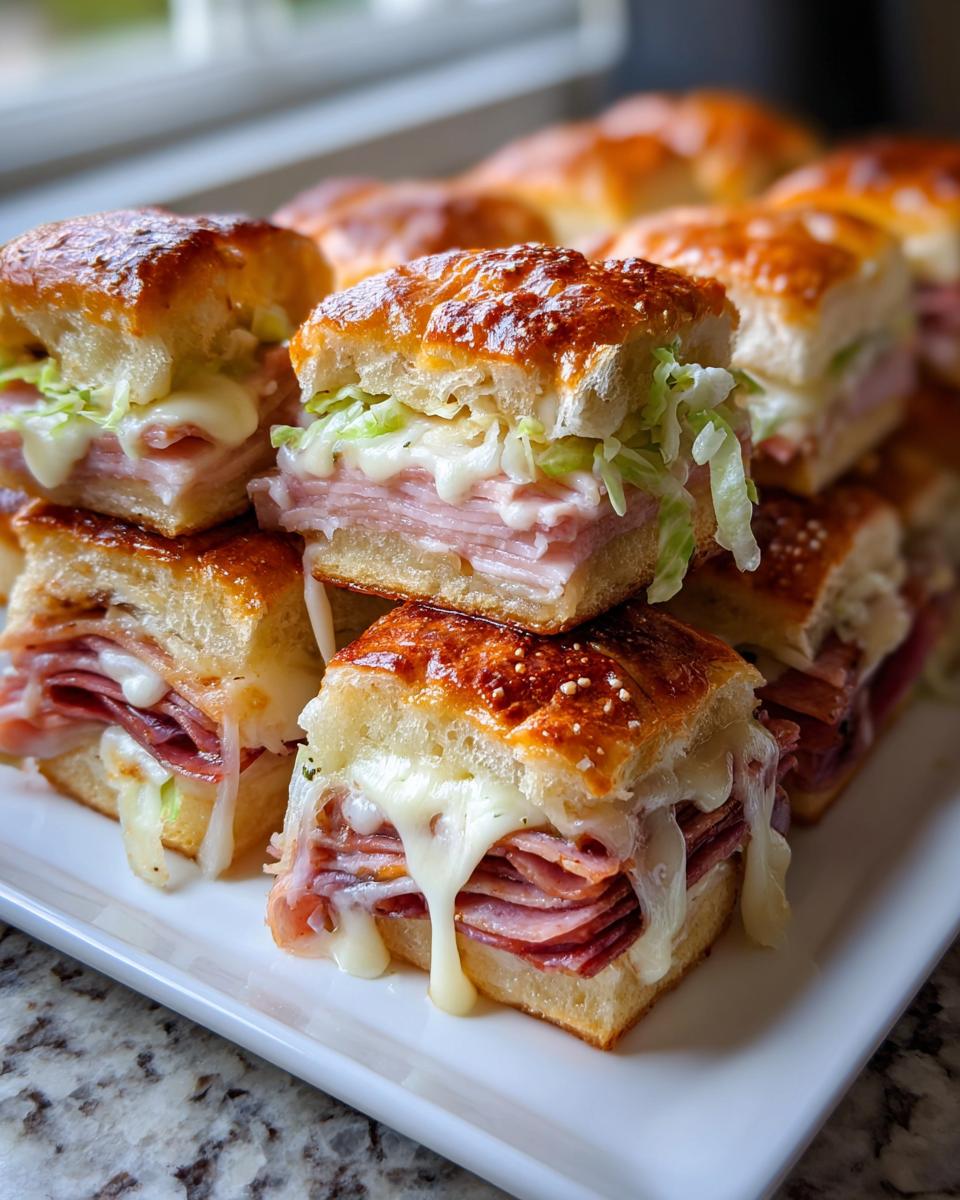
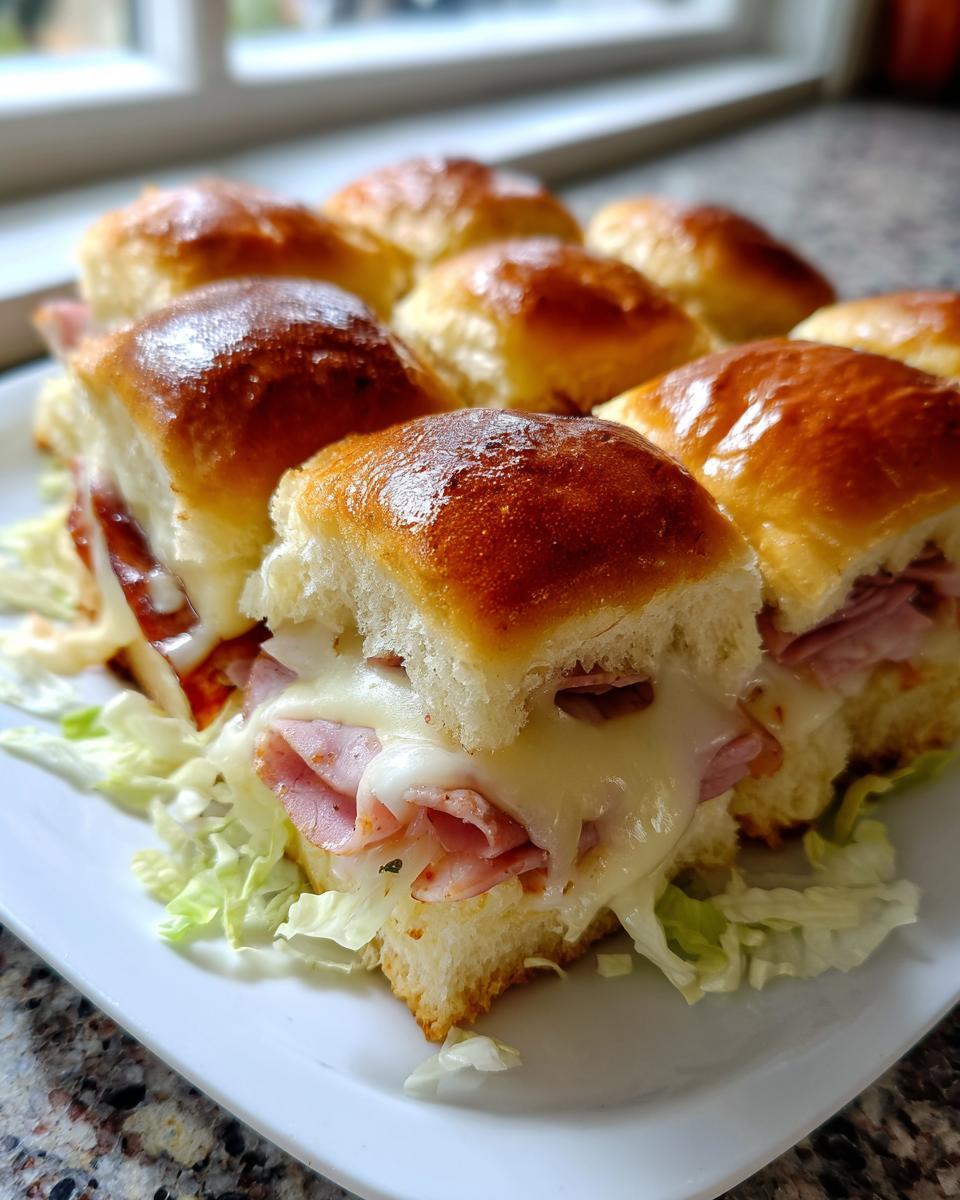
Next, layer it up! Ham, salami, turkey, then the provolone, then the Swiss. If you’re using those little pepperoncini bits, scatter them on top of the cheese layer now. Place the top half of the rolls right back on top. It looks funny all connected, but trust the process!
Creating the Savory Glaze for Your Grinder Sliders
This glaze is what separates a good sandwich from an *epic* one. Grab a small bowl and whisk together your melted butter with all those seasonings: the Italian seasoning, garlic powder, onion powder, salt, and pepper. You have to whisk this like you mean it! If you leave clumps of seasoning in there, you’ll end up with pockets of salt bombs instead of even flavor—and we want everything tasting delicious.
Once it’s smooth, pour that beautiful, garlicky mixture evenly over the top of the rolls. Use a little pastry brush to gently work the butter mixture down into all the little crevices between the buns. This is how the tops get that perfect texture. Don’t skip brushing the sides if you can reach them, either!
Baking Time and Achieving Golden Brown Hawaiian Roll Sandwiches
We bake these in two stages to ensure everything heats through without drying out. First, cover that dish tightly with foil. Pop it in the oven for a solid 15 minutes. This gets the steam going and melts that gorgeous cheese!
After 15 minutes, yank that foil off! Let them go for another 5 to 10 minutes. You’re looking for two things: the cheese should be completely melted and gooey, and the tops of these Hawaiian roll sandwiches need to be golden brown and just the slightest bit crispy at the edges. Pull them out when they look exactly how you wish a perfect party appetizer looked!
Expert Tips for Success with Mini Grinder Sandwiches
Even though these mini grinder sandwiches feel incredibly simple—and they are!—a couple of little secrets will make them absolute perfection, especially if you are prepping for a big game day crowd. The biggest thing I learned from my early attempts is timing.
If you can, assemble the entire meat and cheese stack ahead of time, maybe even the night before! Cover that whole thing tightly and stash it in the fridge. The key, though, is waiting until right before baking to pour on that garlic butter glaze. If you glaze them too early, the rolls start getting soggy before they even hit the oven.
Remember to use a heavy hand with that butter mixer, brushing it into every nook and cranny. It seems like a lot of butter, but that’s the only way to get those gorgeous, slightly crisp tops we want! For more genius hosting advice, check out what my friends are making over at Health Little Peach for more slider inspiration.
Variations for Your Deli Meat Slider Recipes
While the classic ham, salami, and turkey combo is what makes these the ultimate grinder sliders, you absolutely should feel free to play around once you’ve mastered the base. This recipe is honestly just a delicious foundation for whatever your favorite cured meats are!
If you want to switch up the cheese game, don’t hesitate! I’ve done this for neighbors who prefer a milder flavor, and swapping the Swiss for a good melting Mozzarella is fantastic. It gets silkier, almost stretchy, which I love. If you’re feeling bold and want to lean harder into that true Italian deli vibe—the kind where everything is slightly zesty—you need to grab some Giardiniera.
Giardiniera is that amazing pickled vegetable mix, and it brings serious heat and tang. Chop it up pretty fine and mix just a tablespoon or two right into your garlic butter glaze. Wow. That little kick cuts through the richness of the melted cheese and the sweetness of the Hawaiian rolls perfectly. It transforms these from simple deli meat slider recipes into something truly memorable. It’s all about making the recipe fit your personality, right?
Serving Suggestions for Comfort Food Sliders
We all know these comfort food sliders are satisfying all on their own, but what’s a fantastic party platter without a few supporting players, right? Because these grinder sliders are so rich—all that meat, cheese, and garlicky butter—you want sides that offer a little contrast in texture or acidity.
My absolute favorite thing to pair them with is something crunchy and salty. A big bowl of kettle-cooked potato chips is always a hit. Or, if the gathering is happening outside in the sun, you can’t go wrong with simple, crisp dill pickle spears. They just cut right through that richness beautifully!
For something a little more involved, a light, bright pasta salad—maybe one tossed with lemon vinaigrette and lots of fresh herbs like parsley—works wonderfully. It acts like a palate cleanser between those cheesy bites.
Now, about that final topping: remember how we layered shredded lettuce and a drizzle of Italian dressing right before serving? That step is crucial for texture! If you try to serve leftovers that have already been dressed, the lettuce wilts instantly and you lose that fresh, crisp snap. Always wait until you are pulling these hot sliders out of the oven and slicing them up before adding that final salad layer. It keeps these amazing sandwiches tasting fresh even after they’ve cooled down a bit!
Storage and Reheating Instructions for Grinder Sliders
Even though these grinder sliders are usually gobbled up instantly (I mean, who can blame people?), sometimes you get lucky and have a few leftovers. Don’t worry! They’re still great the next day, but you need to treat them right to keep that buttery crust intact. Leftovers definitely change texture once refrigerated, mainly because the rolls absorb all that amazing garlic butter.
The absolute key here is this: you must remove the fresh lettuce and the drizzle of Italian dressing before you store anything!
If you leave that final layer on, you are just asking for soggy bread by morning. Store the leftover rolls, meat, and cheese layers together in a really good airtight container. I learned the hard way that if they aren’t sealed well, they dry out fast in the fridge.
When you are ready for round two, skip the microwave! I know it’s fast, but nuking these just turns the rolls spongy. You want to reheat them in the oven. A 350°F oven works perfectly. Wrap the remaining comfort food sliders loosely back in foil—just enough to keep the moisture in but let the tops crisp up a bit—and bake them for about 8 to 10 minutes. You want that cheese gooey again and the tops warm and slightly crusty. Then, and only then, add a tiny bit more lettuce for that fresh crunch!
Frequently Asked Questions About Grinder Sliders
I know you probably have a few last-minute questions before you dive into making these incredibly easy grinder sliders! That’s totally normal, especially when baking with Hawaiian roll sandwiches. People often ask about swapping out the rolls, which you can technically do, but trust me, the sweetness is part of the fun! If you use standard slider rolls, you miss out on that signature sweet-and-savory balance, so grab the King’s Hawaiian brand if you can. It makes such a difference in these mini grinder sandwiches.
Another common query for these hot Italian sliders is slicing. You absolutely must slice the whole block horizontally in one go! Trying to layer individual buns is a nightmare, and you lose that beautiful cohesive structure. Slice them, fill them, glaze them, bake them, and then slice them into individual portions right before you put them on the platter. It keeps everything contained until the moment of truth!
If you’re planning for a big event, you might wonder about making them earlier. For the best possible result, you should try to assemble them the day before, but hold off on the glaze. For more ideas on game day scenarios, check out this great link from Ariana’s Recipes for timing inspiration! These really are the best best slider recipes for parties!
Can I make these grinder sliders ahead of time?
Yes, but with a caveat! As I mentioned in the notes, you can totally prep the layers ahead of time—stack the rolls, layer all your meats and cheeses, cover the whole thing, and chill it overnight. That makes game day morning so much less stressful! However, you MUST wait until you are ready to bake before pouring on that garlic butter glaze. If you glaze the rolls too early, they get waterlogged sitting in the fridge, and you won’t get the golden top we are aiming for on these cheesy baked sandwiches.
Estimated Nutritional Data for This Recipe
Now, before you completely inhale all twelve of these delicious grinder sliders in one go, it’s only fair to look at the numbers! I want to be super clear here: since we are working with soft rolls, a mix of deli meats, and melted cheese, these figures are always going to be estimates based on the exact ingredients I listed.
This recipe is definitely a step up from a plain lunch wrap, leaning into that hearty comfort food territory, but they are perfectly portioned at one slider per serving, which really helps with mindful eating—though that’s tough advice when they taste this good! Here is the breakdown we calculated:
- Serving Size: 1 slider
- Calories: Around 350 calories
- Fat: About 18g total fat, with 8g being saturated fat. That’s where the butter and cheeses come from!
- Carbohydrates: Roughly 28g, thanks mostly to the sweet Hawaiian rolls.
- Protein: A solid 18g of protein, which really keeps you satisfied through the afternoon!
- Sugar: Around 8g. Again, that’s the sweetness from the rolls shining through.
- Sodium: Keep an eye on this one—it comes in around 850mg because we are using flavorful, salty deli meats.
Remember, if you swap out the ham for leaner turkey, or decide to skip the pepperoncini, those numbers will shift a little. But these are solid estimates for enjoying these amazing hot sandwiches for gatherings!
PrintEasy Italian Grinder Sliders on Hawaiian Rolls

Make these simple Italian Grinder Sliders using soft Hawaiian rolls, deli meats, and cheese. Bake them with a savory garlic butter glaze for a crowd-pleasing appetizer or quick dinner.
- Prep Time: 15 min
- Cook Time: 25 min
- Total Time: 40 min
- Yield: 12 servings 1x
- Category: Lunch
- Method: Baking
- Cuisine: American
- Diet: Vegetarian
Ingredients
- 1 (12 count) package Hawaiian sweet rolls
- 1/2 cup unsalted butter, melted
- 1 tablespoon dried Italian seasoning
- 1 teaspoon garlic powder
- 1/2 teaspoon onion powder
- 1/4 teaspoon salt
- 1/4 teaspoon black pepper
- 1/2 pound thinly sliced ham
- 1/2 pound thinly sliced salami
- 1/2 pound thinly sliced turkey
- 8 slices provolone cheese
- 4 slices Swiss cheese
- 1/4 cup sliced pepperoncini peppers (optional)
- 1/4 cup shredded lettuce (for topping after baking)
- 2 tablespoons Italian dressing (for topping after baking)
Instructions
- Preheat your oven to 350 degrees Fahrenheit. Lightly grease a 9×13 inch baking dish.
- Slice the entire package of Hawaiian rolls horizontally, keeping the rolls connected in one piece. Place the bottom half of the rolls into the prepared baking dish.
- Layer the meats and cheeses over the bottom half of the rolls. Start with the ham, then the salami, then the turkey. Top the meat layers with the provolone and Swiss cheese slices. If using, scatter the pepperoncini peppers over the cheese.
- Place the top half of the rolls over the fillings.
- In a small bowl, whisk together the melted butter, Italian seasoning, garlic powder, onion powder, salt, and pepper to create the savory glaze.
- Pour the butter mixture evenly over the top of the assembled sliders. Use a pastry brush to spread the glaze across all the rolls.
- Cover the baking dish tightly with aluminum foil.
- Bake for 15 minutes. Remove the foil and bake for another 5 to 10 minutes, or until the cheese is fully melted and the tops of the rolls are golden brown.
- Carefully remove the sliders from the oven. Lift the top half of the rolls, sprinkle with shredded lettuce, drizzle lightly with Italian dressing, and replace the top half.
- Slice the sliders into individual portions and serve warm immediately.
Notes
- You can prepare the meat and cheese layers and the butter glaze ahead of time. Assemble the sliders just before baking for the best results.
- For a spicier kick, add a layer of sliced banana peppers or a dash of crushed red pepper flakes to the butter glaze.
- These sliders are excellent served with a side of chips or a simple green salad for a complete meal.
Nutrition
- Serving Size: 1 slider
- Calories: 350
- Sugar: 8
- Sodium: 850
- Fat: 18
- Saturated Fat: 8
- Unsaturated Fat: 10
- Trans Fat: 0.5
- Carbohydrates: 28
- Fiber: 1
- Protein: 18
- Cholesterol: 55