
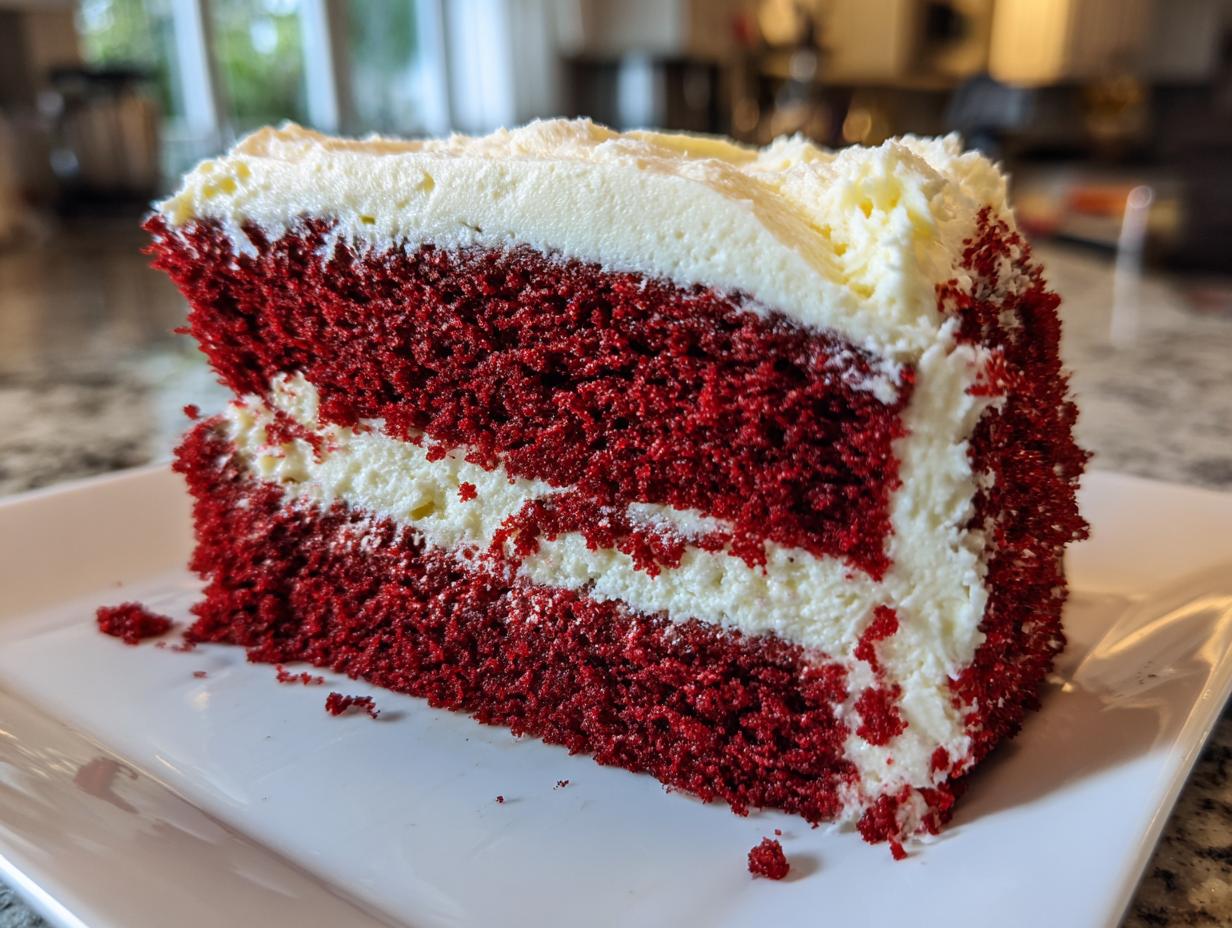
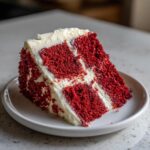
When I think about Southern baking, I immediately think of showstopping desserts perfect for big celebrations—birthdays, holidays, or just a Tuesday that needs some excitement. For me, the absolute pinnacle of that tradition is a perfectly executed red velvet cake. Forget those dry, overly sweet imitations you find sometimes; we are making the real deal here. This recipe is my trusted guide for achieving the best Southern Style Moist Red Velvet Cake from Scratch, topped with the richest Classic Cream Cheese Frosting you can imagine. It’s surprisingly straightforward, and trust me, the results are pure, velvety joy. If you want to hear more about why I started sharing my kitchen journey, check out my story on the About page.
- Why This is the Best Red Velvet Cake from Scratch You Will Ever Make
- Ingredients for Your Moist Red Velvet Cake Recipe
- How to Prepare Your Red Velvet Layer Cake from Scratch
- Tips for a Vibrant Red Velvet Cake Tutorial
- Storage & Reheating Instructions for Your Red Velvet Cake
- Serving Suggestions for This Red Velvet Layer Cake
- Frequently Asked Questions About Making Red Velvet Cake
- Estimated Nutritional Data for This Red Velvet Cake
- Share Your Baking Success with This Red Velvet Cake
Why This is the Best Red Velvet Cake from Scratch You Will Ever Make
Okay, listen up, because getting that perfect texture is the difference between a good cake and a legendary one. This isn’t just about dumping red dye into a box mix. My goal with this moist red velvet cake recipe is to give you that melt-in-your-mouth crumb we all dream about. I spent ages fiddling with the ratios until I hit that sweet spot where the cake is impossibly soft but still sturdy enough to stack high.
When I finally nailed the balance of acidity and fat, the crumb just sang—it was so light and fluffy! Honestly, once you get this balance down, you realize why people obsess over homemade cakes. It’s just superior, folks.
Achieving the Authentic Southern Red Velvet Flavor Profile
Here’s the secret handshake of all true authentic southern red velvet baking: it is *not* chocolate cake painted red. That little bit of cocoa powder we use? It reacts with the vinegar and the buttermilk. That interaction is what tenderizes the flour and gives the cake its signature subtle tang and incredibly velvety texture. You need that buttermilk; it’s non-negotiable for the authentic taste profile!
Ingredients for Your Moist Red Velvet Cake Recipe
Okay, so planning is half the battle, right? Before you even think about preheating the oven, you need to gather your troops. When you’re aiming for that incredibly moist red velvet cake recipe that people talk about for years, ingredient quality and temperature matter a ton. Don’t rush this part! I’ve broken it down so it’s super clear—cake first, the amazing frosting second.
Cake Ingredients
The key here is letting things sit out until they are truly room temperature. Especially that buttermilk! It needs to be happy and warm so it can react perfectly with the baking soda and vinegar. Trust me, cold buttermilk spells disaster for a light crumb.
- 2 1/2 cups all-purpose flour
- 1 teaspoon baking soda
- 1 teaspoon cocoa powder (just a little!)
- 1 teaspoon salt
- 1 cup unsalted butter, softened just right
- 2 cups granulated sugar
- 2 large eggs
- 1 teaspoon vanilla extract
- 1 cup buttermilk, room temperature (don’t skip letting this warm up!)
- 1 tablespoon white vinegar
- 1 to 2 bottles (1 ounce each) red food coloring (we want that deep red velvet color!)
Best Cream Cheese Frosting Recipe Components
This frosting is the ultimate partner to the cake layers. For this to be the best cream cheese frosting recipe you’ve ever made, the butter and cream cheese MUST be softened. I mean soft enough that you can poke them easily, but not melted or greasy. That’s the secret to getting that super smooth, picture-perfect finish.
- 1 cup cream cheese, softened
- 1/2 cup unsalted butter, softened
- 4 cups powdered sugar, sifted (sifting prevents lumps, a must-do step!)
- 1 teaspoon vanilla extract
- 1/4 teaspoon salt
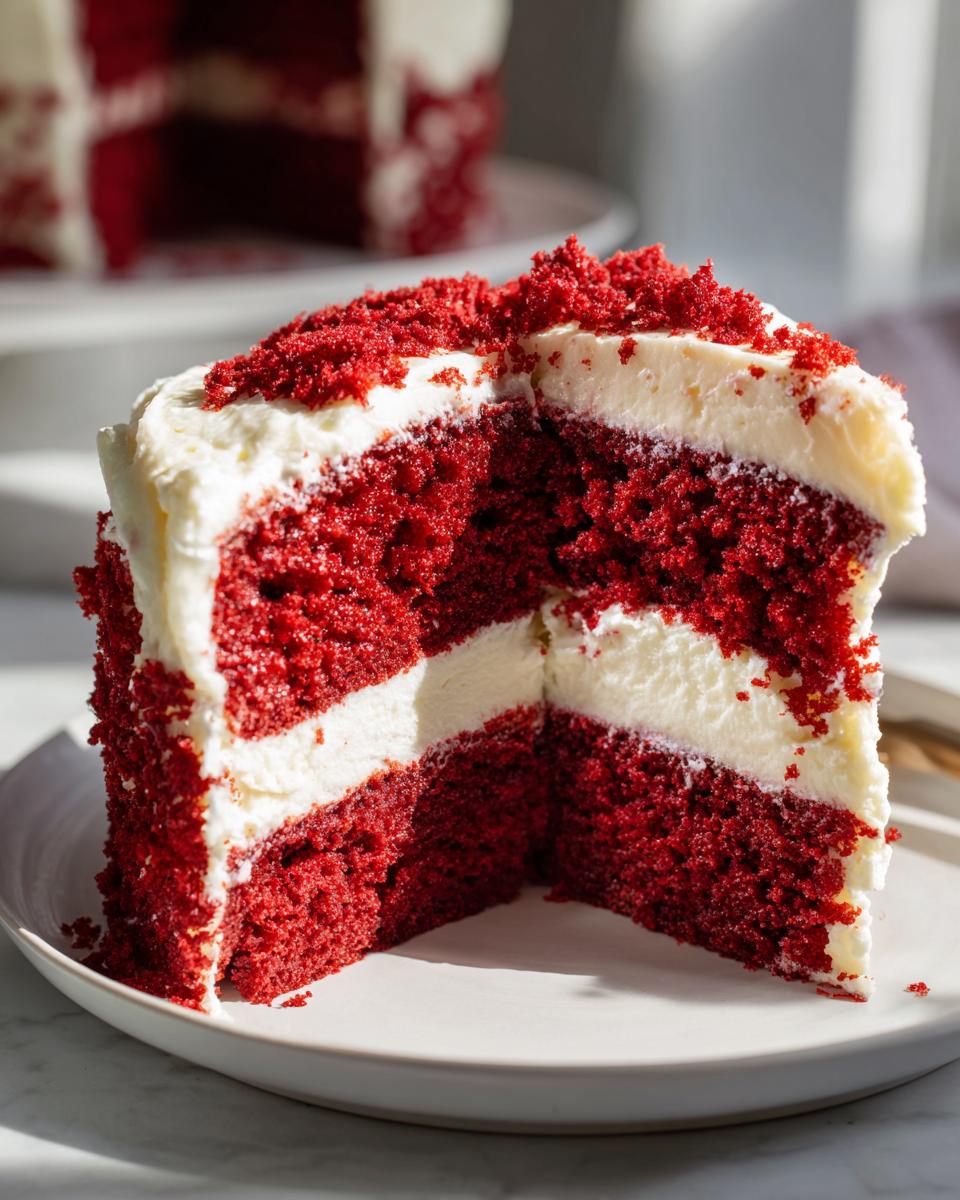
How to Prepare Your Red Velvet Layer Cake from Scratch
This is where the magic really starts! Preparing this red velvet cake from scratch seems like a lot of steps, but it just comes down to organization. First things first: get your oven humming at 350°F (175°C) and make sure those two 9-inch cake pans are greased and floured up perfectly. We want zero sticking drama later on, trust me.
If you want to see someone else walk through a great method, check out this guide on general cake building here, but follow my specific steps for that signature red velvet texture below!
Mixing the Fluffy Red Velvet Cake Batter
Start by whisking your dry ingredients—flour, cocoa, soda, salt—in a medium bowl. Set that aside. Now, grab your big bowl and cream that softened butter and sugar until it’s honestly light and fluffy. I’m talking pale yellow, looking airy! Then, beat in the eggs one by one, getting them incorporated before you go any further. Now comes the balancing act—you’ll alternate adding the dry mix and that gorgeous red buttermilk mixture, starting and ending with the dry stuff. Stop mixing the second everything comes together. Overmixing makes things dense, and we are aiming for a soft homemade cake here!
Baking and Cooling for Perfect Layers
Pour that beautiful batter evenly into your pans and pop them into the 350°F oven. They usually take between 30 to 35 minutes. Don’t just trust the timer; you have to test! Slide a wooden pick right into the center; if it whispers back with moist crumbs clinging to it, they are done. Crucially, let those layers cool in the pans for about 10 minutes. If you try to pull them out immediately, they might collapse. After 10 minutes, gently flip them onto a wire rack to cool *completely*. Do not frost warm cake; it’s a recipe for soup!

Making the Classic Cream Cheese Frosting
While the cakes cool down—patience is key!—we whip up the frosting. Beat that softened cream cheese and the second batch of soft butter together until they are completely smooth and have no lumps. Smooth fat equals smooth frosting, simple as that. Then, turn your mixer down low and slowly add ALL that sifted powdered sugar. Once it’s all mixed in, crank that speed up high and beat it until it’s incredibly fluffy. That final high-speed whipping introduces the air that makes this the best cream cheese frosting recipe.
Tips for a Vibrant Red Velvet Cake Tutorial
We’ve mixed it, we’ve baked it, and now let’s talk about how to make sure your cake looks exactly like the stunning, deep red version you see in magazines! Building trust in the kitchen means sharing the insider knowledge, right? Achieving that signature color and making sure we keep that moisture locked in are my top priorities when anyone asks for a vibrant red velvet cake tutorial.
I’ve seen people get nervous about the color and dump in half a bottle of liquid coloring, which just waters down the batter. Don’t be that person! A little technique goes a long way here, and it keeps this in the realm of easy baking recipes, not chemistry experiments.
Ingredient Notes and Substitutions for Red Velvet Cake
Let’s clear up the two biggest sticking points right away: the color and the buttermilk. You absolutely need that tangy liquid—it’s what works with the baking soda to give you that beautiful, soft homemade cake structure. If you forgot to buy buttermilk, please don’t use regular milk! Make a quick substitute: take one cup of whole milk (full fat is best, honestly) and stir in one tablespoon of white vinegar or lemon juice. Let it sit on the counter for about five minutes. When it curdles just a little bit, that’s your perfectly soured replacement, ready to go!
Now for the intense color. Liquid food coloring works, but it requires so much volume that you end up messing with the batter’s chemistry. If you want that truly show-stopping, electric red hue, I strongly suggest investing in gel food coloring. You only need a tiny toothpick dip or a small dot, and the color is concentrated so it doesn’t dilute your batter. It’s a game-changer for making this cake perfect for Valentine’s Day desserts or any big celebration. You can read an article that goes deeper into color techniques right here.
And please, always remember to use room temperature eggs and butter! This ensures the fat and liquid emulsify properly when you are mixing. When the ingredients are room temperature, they trap air better during the creaming stage, which is vital for that fluffy red velvet cake lift. If your ingredients are cold, the batter will look curdled, and you’ll immediately lose that lovely, even texture.
Storage & Reheating Instructions for Your Red Velvet Cake
You’ve made this stunning, moist red velvet cake recipe, and now the hard part: not eating the entire thing in one go! We need a plan for leftovers, especially since that rich cream cheese frosting is involved. I always stress that proper storage keeps this cake tasting like it just came out of the oven.
Because we used that beautiful, tangy cream cheese frosting, this cake absolutely needs refrigeration if you aren’t going to eat it within a few hours. Room temperature is fine for serving, but for actual storage, keep it covered tightly in the fridge. Wrap it up well or use a cake carrier to stop it from soaking up any weird fridge smells. It should stay wonderfully moist in the fridge for about four or five days. If stored properly, it’s great for holiday cake recipes you need to prep ahead!
Now, here’s a little secret about serving cake that has been chilled: cold cake is rarely the best texture. About an hour before you plan to serve it, pull that red velvet layer cake out of the fridge and let it sit on the counter. Letting it come closer to room temperature unlocks all those butter and cream cheese flavors again, and that crumb regains a bit of its softness.
Reheating? Honestly, I rarely bother with a slice of this red velvet cake from scratch. It tastes so great cool or at room temp! But if you absolutely must, and you’re eating it plain (no frosting), you can microwave a single slice for just 5 to 10 seconds. Anything longer and you risk drying out those beautiful layers. Usually, though, this cake disappears way too fast for us to ever need reheating instructions!
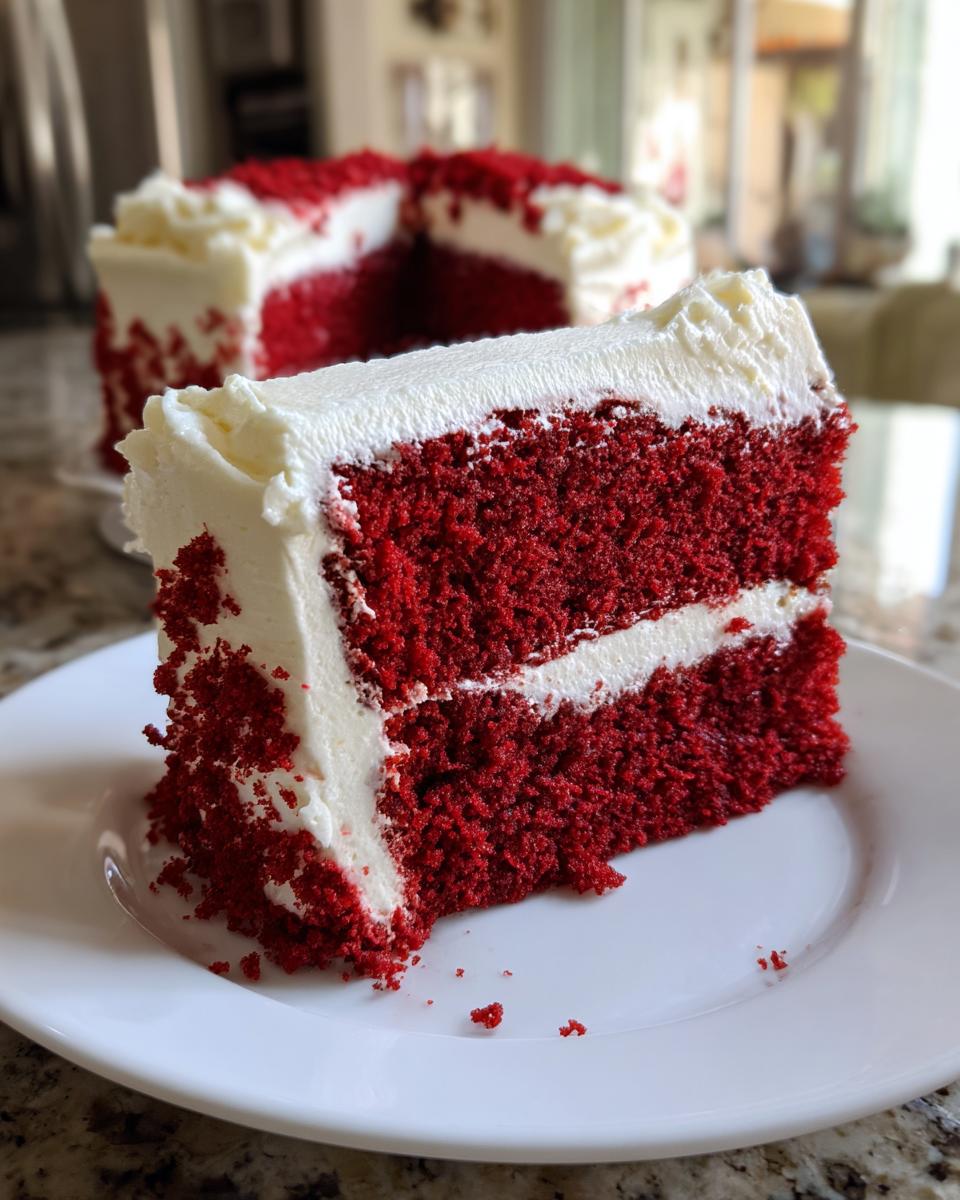
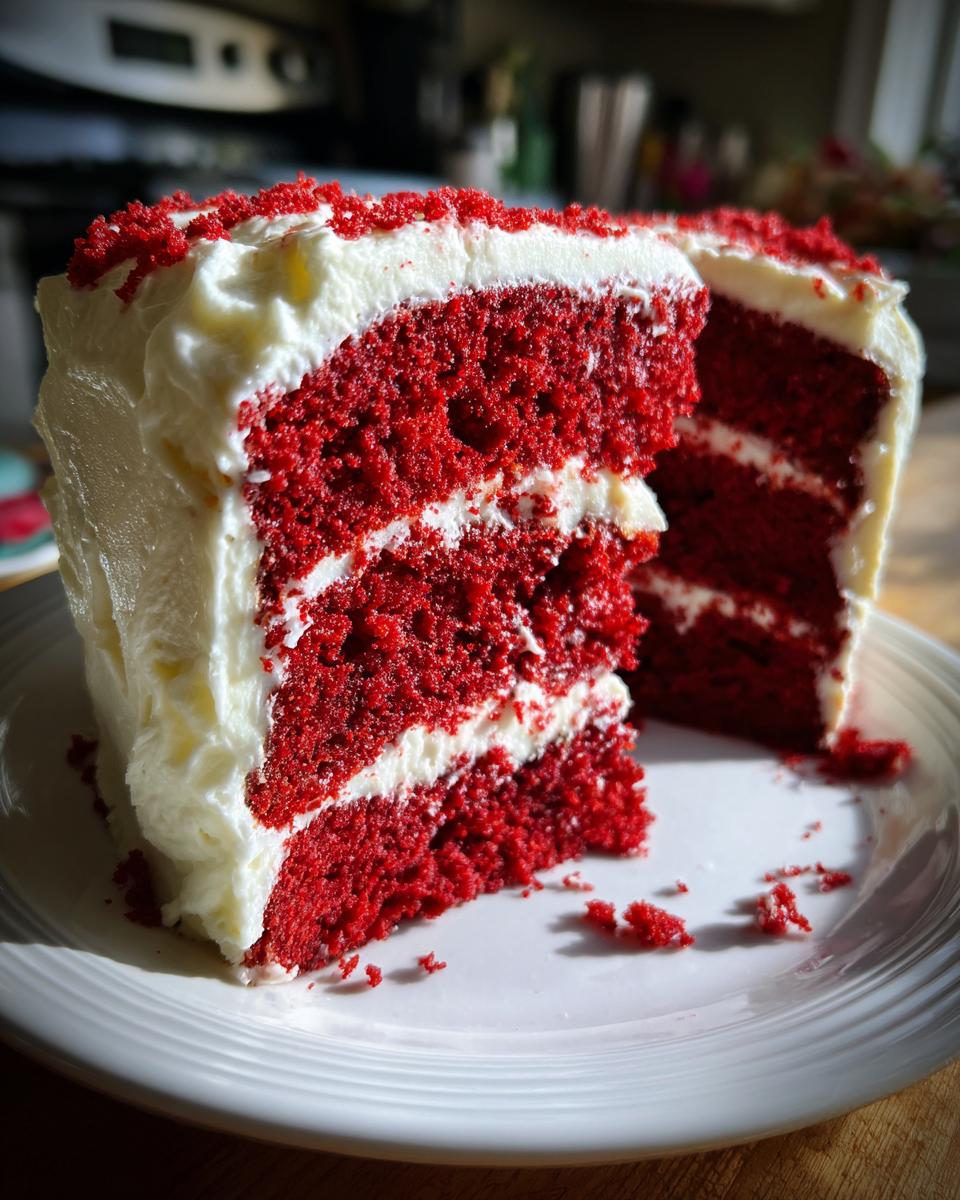
Serving Suggestions for This Red Velvet Layer Cake
This cake is a showstopper all on its own, but every great centerpiece deserves the perfect supporting cast! Since we’ve worked so hard to get this moist red velvet cake recipe perfect, we want to make sure it shines when we serve it. This isn’t just a quick after-dinner treat; this is worthy of a major feature on your dessert table.
For parties, I always keep things simple so the focus stays on the cake itself. This cake is absolutely phenomenal for major birthday cake ideas—the red color just screams celebration. It’s also a go-to when I’m looking for stunning holiday cake recipes, especially around Christmastime or Valentine’s Day.
When serving slices, consider these easy additions that complement the cocoa tang and the rich frosting:
- Pairing with a robust, hot cup of black coffee. The slight bitterness cuts through the sweetness of the cream cheese frosting perfectly.
- A cold glass of whole milk is classic, especially for the kids!
- If you want to get fancy, a light scattering of toasted pecans around the base can add a lovely, subtle crunch that contrasts with the fluffy red velvet cake texture.
Remember, presentation is everything when you’ve made a red velvet cake from scratch like this. Just a few simple garnishes around a clean slice on a white plate is often all you need to make it look like it came from a bakery window!
Frequently Asked Questions About Making Red Velvet Cake
I know you might have a few questions bubbling up—baking traditions are serious business, especially when it comes to Southern classics! Based on what I hear from everyone in the comments, I wanted to tackle the most common hurdles. Don’t worry if you’re new to this. This recipe is designed to be an easy red velvet cake, but sometimes the little details trip people up.
Why is my red velvet cake not red enough?
This is the number one question! If you’re aiming for that iconic, deep color, you have to be deliberate about your coloring. If you used liquid food coloring, you needed way too much to get saturation, and that extra liquid actually messed up your texture. For a truly vibrant red velvet cake, you need to use concentrated gel food coloring. Just a small dot mixed into your activated buttermilk/vinegar mixture will give you the intense hue without changing the chemistry of your moist red velvet cake recipe. It should look almost alarmingly red before it hits the oven!
What is the difference between this and chocolate cake?
This is where we reinforce the authentic southern red velvet basics! A regular chocolate cake relies almost entirely on cocoa for flavor. In our recipe, we use just a teaspoon of cocoa powder largely for a subtle background flavor note, not as the main event. The real signature flavor comes from the acidic reaction between the buttermilk and vinegar mixing with the baking soda, which helps create that tenderness we call ‘velvet.’ If you use too much cocoa or skip the buttermilk, you just end up with a dyed chocolate cake, and we don’t want that!
Can I make this cake ahead of time?
Absolutely, and I often do! The flavors actually seem to marry and deepen overnight. For the best results, I bake the layers one day, wrap them tightly in plastic wrap once completely cool (once or twice is fine!), and store them on the counter or in the fridge overnight. The next day, you whip up the best cream cheese frosting recipe and assemble your red velvet layer cake. It makes hosting so much easier because the baking stress is already gone!
What if I don’t have buttermilk?
I’ve got you covered—I mentioned the trick above, but it’s worth repeating since it’s so crucial for that soft homemade cake texture. If you’re in a pinch, take one cup of whole milk and stir in one tablespoon of white vinegar or lemon juice. Let that sit on the counter for five to ten minutes until it looks slightly curdled. That magical mixture acts exactly like real buttermilk in the batter to activate the lift and maintain moisture. It’s one of my favorite ways to keep this an easy red velvet cake even if I run out of specialty items!
If you try this recipe and love the results, please leave a rating; it helps everyone know this recipe works! If you run into any trouble while baking, feel free to reach out to me directly at the contact page. Happy baking!
Estimated Nutritional Data for This Red Velvet Cake
Okay, let’s talk fuel. While this red velvet cake is firmly in the ‘celebration treat’ category and definitely not an everyday snack, I know people are curious about what they are serving up. Because we are doing this completely red velvet cake from scratch, the final numbers can swing a little based on the exact brands of butter or sugar you grab. Use these numbers as a good baseline for planning, but remember they are just my best estimates!
I pulled these figures based on a standard serving of the cake topped with the best cream cheese frosting recipe we made. It’s important to know what you’re working with, especially if you’re trying to keep things balanced.
- Serving Size: 1 slice
- Calories: 450
- Fat: 24g (That’s the butter and cream cheese doing their job!)
- Saturated Fat: 14g
- Carbohydrates: 60g
- Sugar: 55g (It’s a dessert, friends! Worth every gram for this soft homemade cake.)
- Protein: 5g
- Sodium: 350mg
- Cholesterol: 75mg
Please keep in mind these quantities are ballpark. If you use low-fat cream cheese, or if your slices are significantly bigger than a standard wedge, the values will change. This information is just here to give you a general idea so you can serve up this incredible moist red velvet cake recipe without any guessing games!
Share Your Baking Success with This Red Velvet Cake
Now, this is my favorite part of having this little kitchen diary online—hearing from you! I put my heart into making sure this red velvet cake from scratch works perfectly, whether you’re a seasoned pro or tackling your very first layer cake. Seriously, if you’re new to this, don’t be intimidated; this is one of the most rewarding beginner cake recipes you can master.
I would absolutely love it if you came back and left a star rating right down below the recipe card. That little bit of feedback tells me the recipe is still holding up and delivering that same tender, moist red velvet cake experience I get every time I bake it.
And please, please, if you make it for a special occasion—a birthday, Valentine’s Day, or just a regular Tuesday—snap a picture and tag me on social media! Seeing my recipe transformed into your centerpiece dessert is why I keep doing this. There’s nothing better than seeing that vibrant red peeking out from under the cream cheese frosting.
If you run into any snags during the process—maybe your buttermilk substitute didn’t quite work, or you’re wondering about swapping out the butter for the frosting—please don’t hesitate! Head over to the contact form, send me an email, and let’s troubleshoot together. My whole goal is to make sure every single person who tries this achieves that perfect, bakery-quality, fluffy red velvet cake!
Thanks for letting my kitchen story become part of yours. Happy baking, everyone!
PrintThe Best Southern Style Moist Red Velvet Cake from Scratch with Classic Cream Cheese Frosting
Make this authentic Southern Red Velvet Cake from scratch. This recipe yields a perfectly moist, soft, and fluffy layer cake with a hint of cocoa, paired with a rich, classic cream cheese frosting. It is an easy recipe for any celebration.
- Prep Time: 25 min
- Cook Time: 35 min
- Total Time: 60 min
- Yield: 12 servings 1x
- Category: Dessert
- Method: Baking
- Cuisine: American
- Diet: Vegetarian
Ingredients
- 2 1/2 cups all-purpose flour
- 1 teaspoon baking soda
- 1 teaspoon cocoa powder
- 1 teaspoon salt
- 1 cup unsalted butter, softened
- 2 cups granulated sugar
- 2 large eggs
- 1 teaspoon vanilla extract
- 1 cup buttermilk, room temperature
- 1 tablespoon white vinegar
- 1 to 2 bottles (1 ounce each) red food coloring (for vibrant red velvet cake)
- 1 cup cream cheese, softened
- 1/2 cup unsalted butter, softened
- 4 cups powdered sugar, sifted
- 1 teaspoon vanilla extract
- 1/4 teaspoon salt
Instructions
- Preheat your oven to 350°F (175°C). Grease and flour two 9-inch round cake pans.
- In a medium bowl, whisk together the flour, baking soda, cocoa powder, and salt. Set this dry mixture aside.
- In a large bowl, use an electric mixer to beat the 1 cup of softened butter and 2 cups of granulated sugar until the mixture is light and fluffy. This step helps create a soft homemade cake texture.
- Beat in the eggs one at a time, mixing well after each addition. Mix in the vanilla extract.
- In a separate small bowl, whisk together the buttermilk, vinegar, and red food coloring until you achieve a vibrant red color.
- Gradually add the dry ingredients to the wet ingredients, alternating with the buttermilk mixture, beginning and ending with the dry ingredients. Mix only until just combined; do not overmix the batter.
- Divide the batter evenly between the prepared cake pans.
- Bake for 30 to 35 minutes, or until a wooden pick inserted into the center comes out clean.
- Let the cakes cool in the pans for 10 minutes before inverting them onto a wire rack to cool completely.
- Prepare the cream cheese frosting: In a large bowl, beat the softened cream cheese and 1/2 cup softened butter until smooth.
- Gradually add the sifted powdered sugar, mixing on low speed until incorporated, then increase the speed to medium-high and beat until fluffy. Mix in the vanilla extract and salt.
- Once the cakes are completely cool, frost and stack the layers to create your red velvet layer cake.
Notes
- For the most authentic Southern red velvet flavor, use real buttermilk and a small amount of cocoa powder; this is not just chocolate cake with coloring.
- To get a truly vibrant red velvet cake color, use gel food coloring instead of liquid.
- If you do not have buttermilk, mix 1 cup of whole milk with 1 tablespoon of white vinegar or lemon juice and let it sit for 5 minutes before using.
Nutrition
- Serving Size: 1 slice
- Calories: 450
- Sugar: 55g
- Sodium: 350mg
- Fat: 24g
- Saturated Fat: 14g
- Unsaturated Fat: 10g
- Trans Fat: 0.5g
- Carbohydrates: 60g
- Fiber: 1g
- Protein: 5g
- Cholesterol: 75mg