
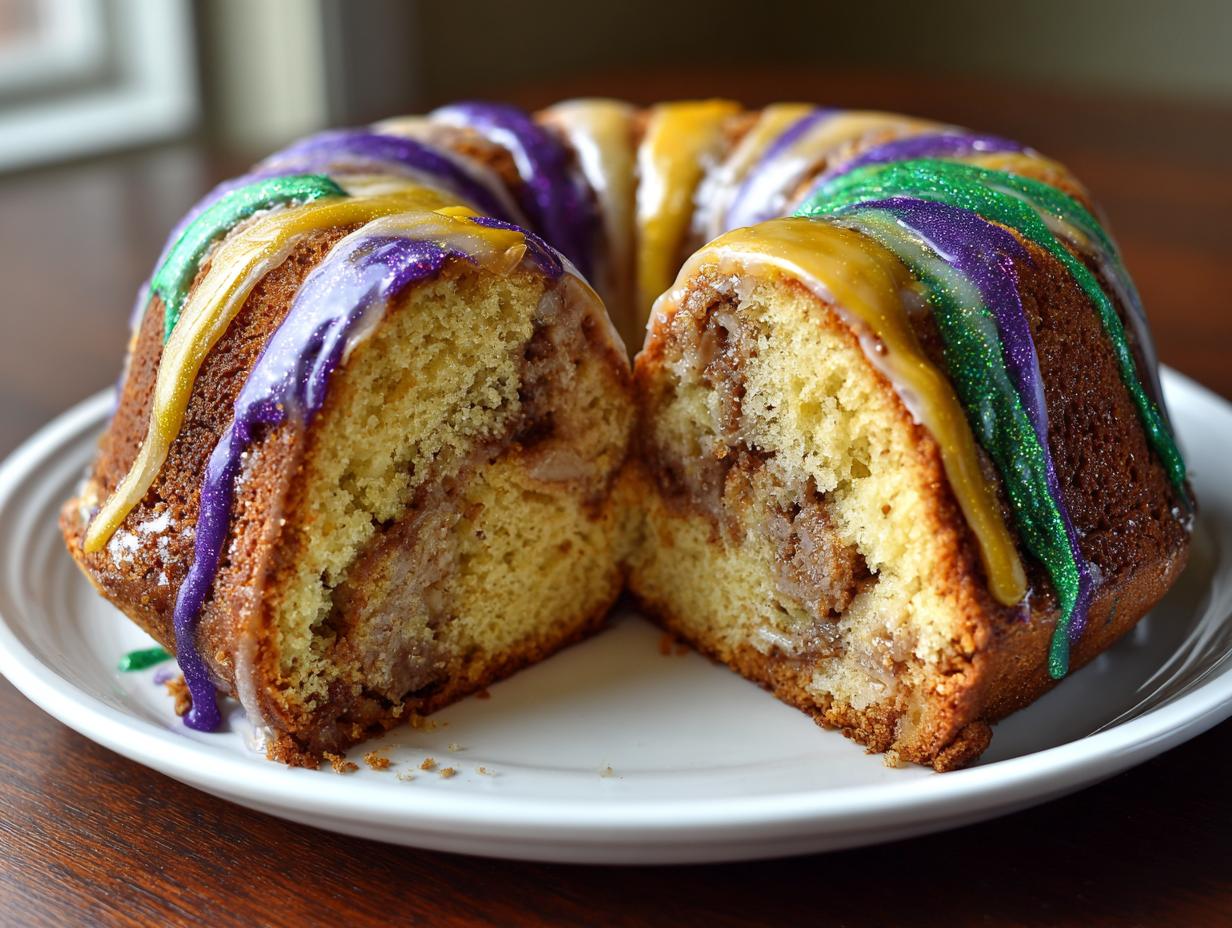
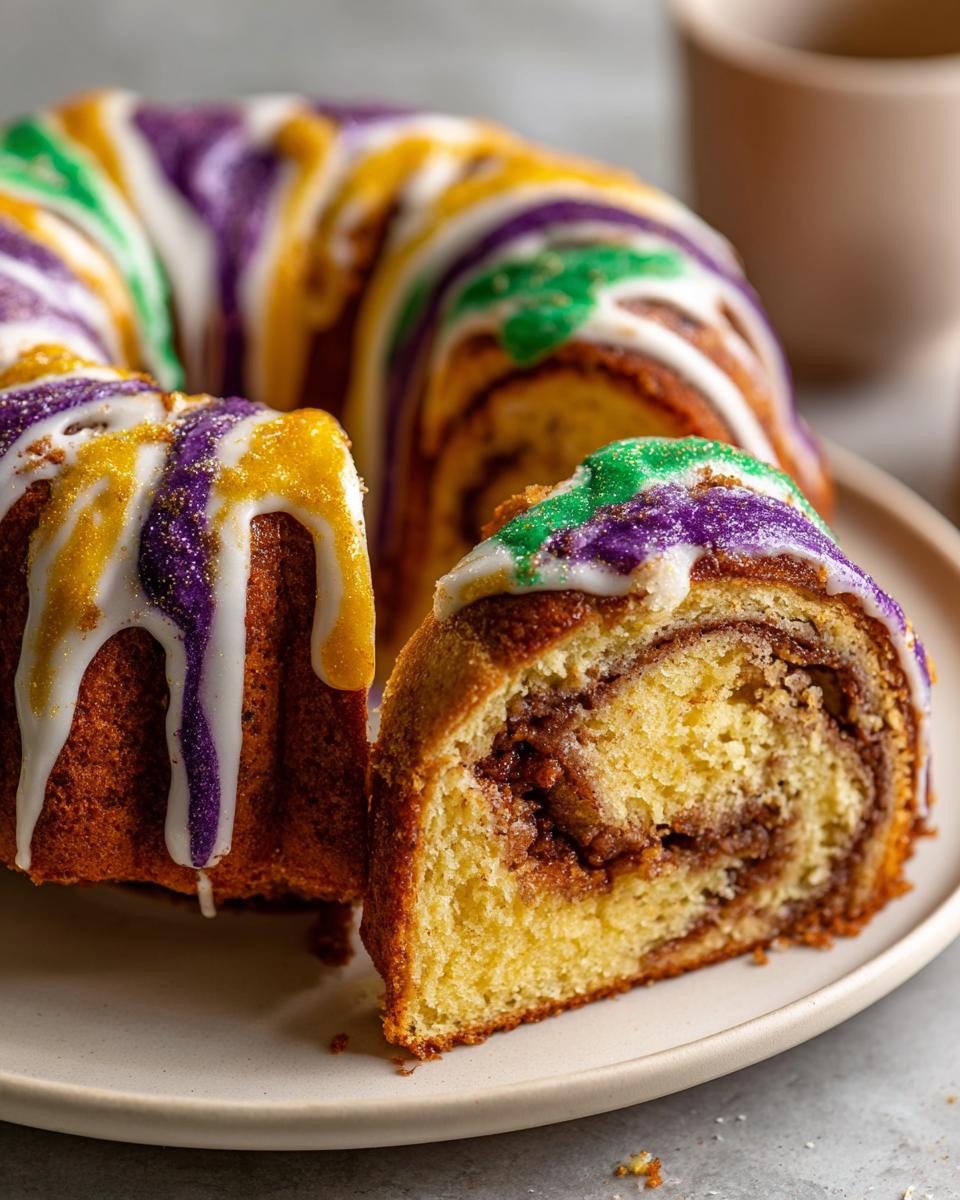
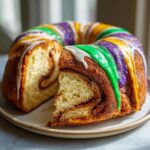
January is here, and that means it’s time to shake off those winter blues and start thinking about letting the good times roll! For me, nothing kicks off that festive feeling like pulling a beautiful, braided King Cake out of the oven. Forget those dry, tough versions you might have tried before. I spent ages perfecting this New Orleans Style King Cake because I needed one that was truly soft, wonderfully moist, packed with that rich cinnamon swirl, and topped with icing that actually stays put! As I learned when starting this Little Kitchen Diary, food is how we connect, and this cake is pure connection and celebration.
When life gets hectic, bringing simple traditions back to the table is so important. This recipe became my personal way to usher in the joy of Carnival season right here in my own kitchen. Trust me, this one guarantees a fun-filled gathering when you share it.
- Why You Will Love This Classic King Cake
- Essential Ingredients for Your New Orleans kingcake
- Step-by-Step Instructions for the Perfect King Cake
- Tips for Success When Making a Traditional King Cake
- Ingredient Notes and Substitutions for Your King Cake
- Storage and Reheating Instructions for Leftover King Cake
- Frequently Asked Questions About the Mardi Gras King Cake
- Share Your Vibrant, Fun King Cake Creation
Why You Will Love This Classic King Cake
I know finding the perfect Mardi Gras King Cake recipe can feel like a quest, but this one checks every single box you need for Carnival season. It’s truly the best blend of tradition and flavor.
- The brioche dough bakes up incredibly soft—we’re talking melt-in-your-mouth tender every time.
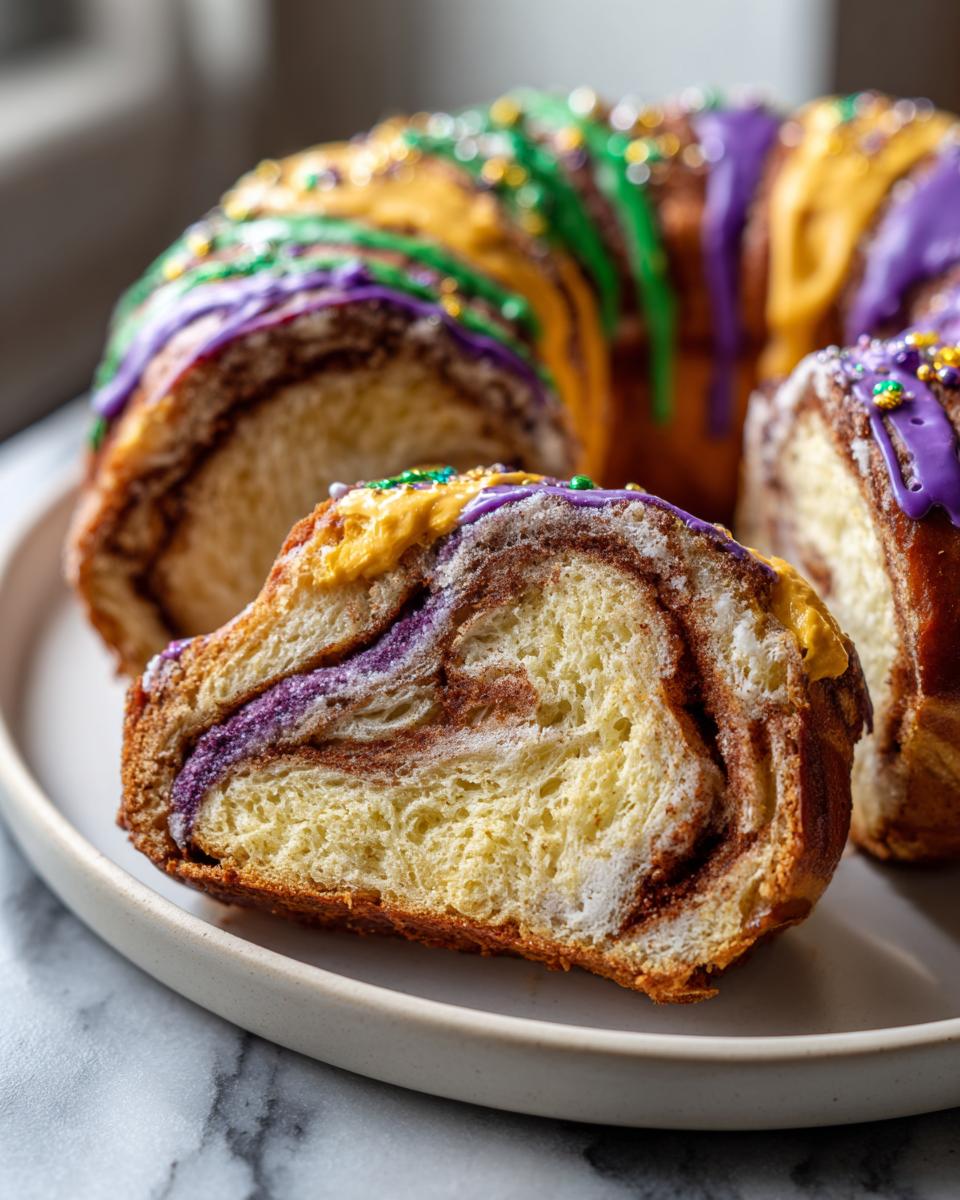
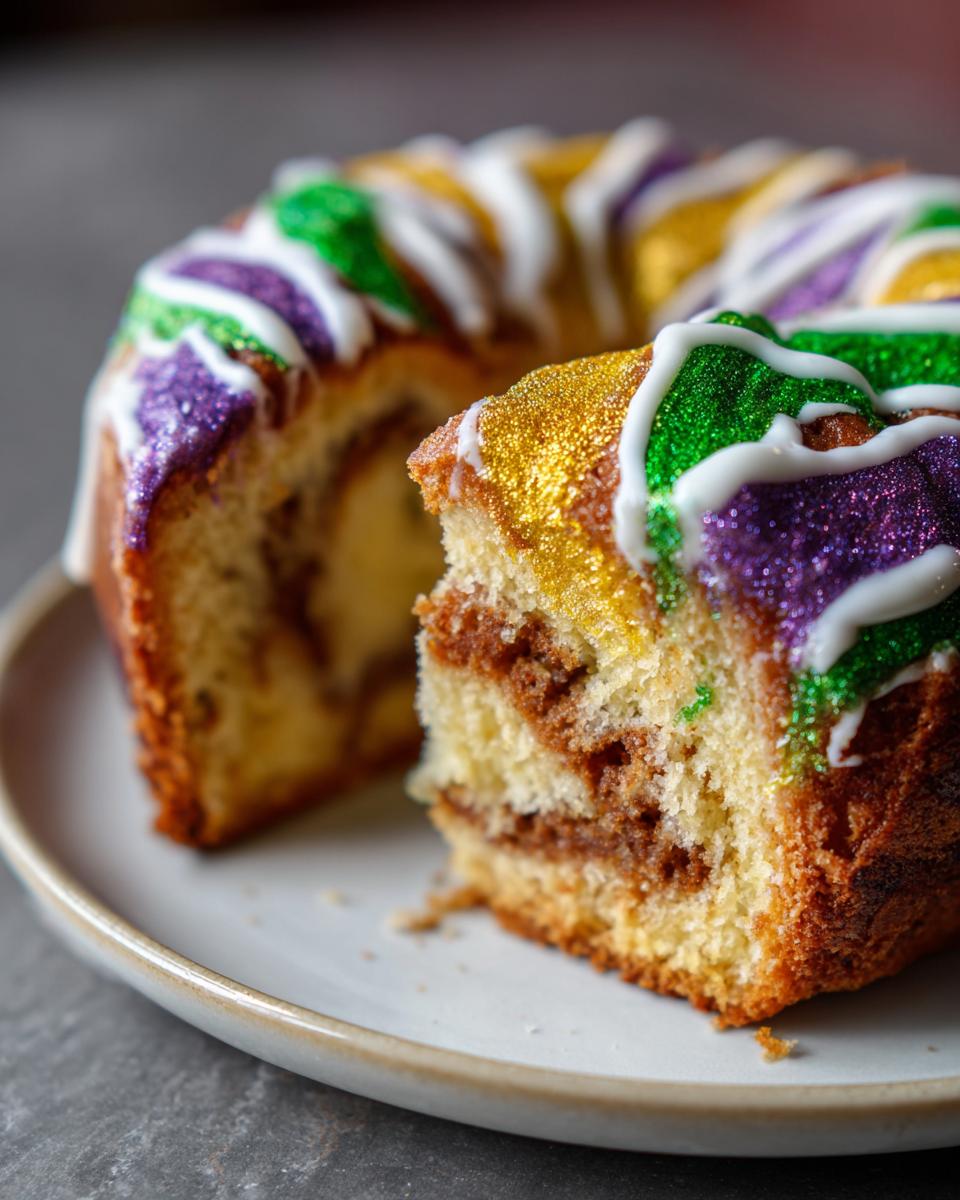
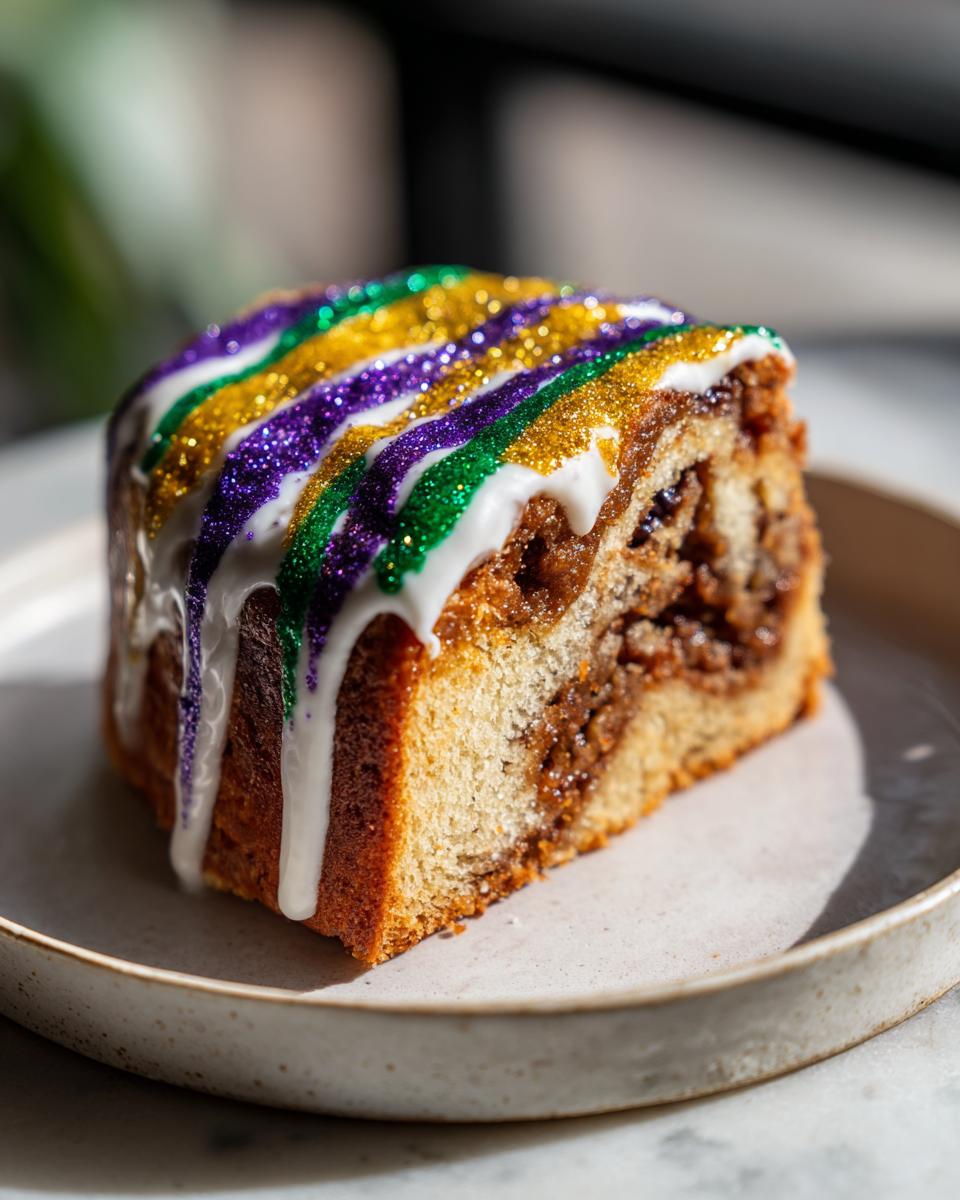
- That rich cinnamon swirl filling is packed in there, creating beautiful ribbons of flavor in every slice.
- My icing recipe is amazing because it sets up firm; no more runny glaze dripping down the sides!
- It perfectly captures the fun of tradition; whoever finds the baby gets bragging rights (and has to host next time, oops!).
Essential Ingredients for Your New Orleans kingcake
Okay, let’s talk about the key players here. For a truly great King Cake, the quality of your ingredients matters because this is an enriched dough, kind of like a fancier brioche. Don’t skimp on the butter!
For the Soft Brioche Dough
The richness starts right here. Remember, the eggs need to be at room temperature so they incorporate smoothly—this helps the dough rise beautifully.
- 1 cup warm milk (about 110°F)
- 2 1/4 teaspoons active dry yeast
- 1/2 cup granulated sugar, plus 1 teaspoon for yeast
- 1/2 cup unsalted butter, softened (Good butter is non-negotiable for soft texture!)
- 2 large eggs, room temperature
- 1 teaspoon salt
- 4 1/2 cups all-purpose flour, plus more for dusting
- 1 plastic baby (optional, but highly recommended for the party rules!)
For the Cinnamon Swirl Filling
This filling is what gives us that amazing ribbon texture when we slice it. Make sure that brown sugar is nice and packed down when measuring!
- 1/2 cup packed light brown sugar
- 2 tablespoons ground cinnamon
- 1/4 cup unsalted butter, melted
For the Purple Green Gold Cake Icing
The colors are half the fun! We want a glaze that hardens up slightly so the sugars don’t slide right off. For that classic sparkly finish, you need sanding sugars, not the fine granulated kind.
- 2 cups powdered sugar
- 3 tablespoons milk or water
- 1 teaspoon vanilla extract
- Purple, green, and gold sanding sugars
Step-by-Step Instructions for the Perfect King Cake
Alright, this is where the magic happens! Making a yeast dough can feel intimidating, but this King Cake is incredibly forgiving if you just treat it gently. I promise, following these steps will give you that amazing, soft texture we’re aiming for. The key is patience during the rising stages—let the yeast do the heavy lifting!
Activating Yeast and Mixing the King Cake Dough
First things first: we wake up the yeast. In a big bowl, combine your 1 cup of warm milk (it should feel warm, not hot, trust me); add that teaspoon of sugar and sprinkle the yeast right on top. Let it sit for about 5 to 10 minutes. If it gets foamy and bubbly, great! That means your yeast is alive and ready to party.
Next, toss in the rest of the sugar, the softened butter, eggs, and salt. Mix that up, then start adding the flour slowly until a soft dough starts coming together. If you have a stand mixer with a dough hook, this is where it shines, but my grandmother always did this by hand—it works just as well!
Kneading and First Rise for a Soft Cinnamon Swirl Bread Ring
Now, get ready for some arm work! Turn that shaggy dough out onto a lightly floured surface and knead it until it becomes smooth and elastic. You want it to feel springy when you poke it. That takes about 8 to 10 minutes of dedicated work.
Once done, pop it in a lightly oiled bowl, cover it up tight, and find the warmest, draft-free spot in your kitchen. You need patience here! Let it rise for a good hour to an hour and a half until it has completely doubled. This step is essential for that light, fluffy cinnamon swirl bread ring texture.
Shaping and Second Proofing the King Cake
Gently punch the air out of your risen dough. Roll it out into a big rectangle, maybe 12 by 18 inches if you can manage it. This is the canvas for our swirl! Brush every inch with that melted butter. Then, sprinkle that gorgeous brown sugar and cinnamon mix evenly over the top.
Starting from the long side, roll it up as tightly as you possibly can, like you’re rolling a jelly roll. Pinch that seam closed really well—we don’t want leaks! You can form it into a loop, bringing the ends together and pinching them securely, or just make a beautiful oval shape. Place it on parchment paper, cover it loosely again, and let it puff up for another 30 to 45 minutes. While it’s puffing, go ahead and preheat your oven to 375°F (190°C). Don’t forget!
Baking and Inserting the Baby into Your King Cake
Bake your pretty cake for about 25 to 30 minutes. What you’re looking for is a nice, deep golden brown color all over. When it comes out, let it cool just long enough for it to be warm to the touch—not screaming hot, but definitely warm. This is the moment to carefully insert your plastic baby if you’re playing the traditional game!
Achieving Non-Drip Icing and Decorating the Purple Green Gold Cake
The cake must be completely cool before we ice it, or the glaze will just melt right off! For the icing, whisk the powdered sugar, milk, and vanilla until it’s uniform. You want it thick—think like heavy glue, not thin syrup. If it seems too runny, add a little more powdered sugar until it holds its shape when drizzled.
Drizzle that thick glaze right over the top, doing those lovely overlapping ribbons. Work fast now! Immediately shower it with your purple green gold cake sugars while the icing is still wet so they stick perfectly. That sweet, glossy crunch is the best part!
Tips for Success When Making a Traditional King Cake
Baking a beautiful King Cake isn’t hard, but it takes a little finesse because we’re dealing with an enriched, buttery dough. My biggest tip that I learned through a lot of sticky messes? Pay attention to temperature!
Make sure your eggs and butter are truly softened or at room temperature, like I mentioned earlier. Cold ingredients will fight the yeast and make your dough stiff instead of soft and pliable. When the dough is rising, think like you’re babysitting a sourdough starter.
If your kitchen is chilly, turn your oven on for just one minute, then turn it OFF. Put the covered dough inside that slightly warm, dark space. This gentle heat encourages that second rise beautifully and ensures you get an even, light crumb. This attention to detail is what separates a good cake from one that screams Mardi Gras!
Ingredient Notes and Substitutions for Your King Cake
I always get questions about tweaking recipes, and that’s fair! While I love sticking close to tradition for our King Cake, sometimes you need a little swap or a special filling. The recipe notes I left tell you everything I learned about making this dough properly, especially when it comes to the yeast.
For the yeast, we’re using active dry yeast because it gives us that lovely, slow rise needed for an enriched dough like this brioche. Make sure you let it foam up first! If you skip that step, you risk having a dense, flat cake that just won’t have that light structure we want.
Now, if you’re feeling extra decadent and want to skip the cinnamon swirl just once, I highly recommend the cream cheese filling variation mentioned in my notes. You whip together 4 ounces of softened cream cheese with about a quarter cup of powdered sugar and a splash of vanilla. Spread that delicate sweetness on the dough instead of the cinnamon mix before you roll it up. It’s a totally different, but equally delicious, experience for your Mardi Gras King Cake!
Storage and Reheating Instructions for Leftover King Cake
I swear, even on day two, this brioche-style cake stays softer than most breads. To keep that beautiful moisture locked in, you need an airtight container. If you have any icing left, just brush a thin layer on any cut sides first before sealing it up.
It keeps great on the counter for three days. If you’re saving slices for longer, the fridge works, but I always aim to refresh it before eating leftovers. Pop a slice in the microwave for about 10 seconds, or if you have time, warm it in a low oven (about 300°F) wrapped in foil for 8 minutes. That little bit of warmth just wakes up the butter flavor again!
Frequently Asked Questions About the Mardi Gras King Cake
I know that when you dive into a big baking project like this, you’re going to have some questions! It’s totally normal. I’ve gathered the ones I get asked most often about this Mardi Gras King Cake recipe. Hopefully, these tips help you nail the texture and the whole festive vibe!
What is the tradition associated with finding the baby in the King Cake?
This is my favorite part of the whole tradition! When we bake this cake, we sneak a tiny plastic baby inside during the cooling phase. Whoever gets the slice with the little baby in it is elected the host for the next party or gathering. It’s a fun, slightly chaotic way to keep the celebrations going throughout the Carnival season!
Can I use instant yeast instead of active dry yeast in this King Cake recipe?
Yes, you absolutely can! I use active dry because I like to see the yeast proofing—it gives me an early visual cue that everything is working. But if you are short on time, you can swap in instant yeast. Just skip that initial 10-minute foaming step entirely! Add the instant yeast directly to the dry ingredients along with the flour, and then proceed with adding the wet ingredients later. It’s a great time-saver for a busy baker!
If you have more questions about this recipe or just want to share how your purple green gold cake turned out, please reach out to me over at my contact page. I’d love to hear about your Carnival baking!
Share Your Vibrant, Fun King Cake Creation
Now that you’ve got my secrets for that perfectly soft, cinnamon-swirled masterpiece, the best part is sharing it! There’s truly nothing better than slicing into this beautiful King Cake and seeing those colors and that rich swirl. I really hope this recipe brings a little burst of sunshine and fun to whatever gathering you’re planning.
I put my heart into making sure the instructions for the dough and that non-drip icing make sense for every home cook. So please, after you’ve decorated your beautiful purple green gold cake and discovered who gets to host the next shindig, come back here! I would absolutely love it if you left a rating below. Tell me how the brioche texture turned out for you, or if you chose the cream cheese filling!
Seeing your creations is what makes running this little diary so rewarding. Don’t be shy—share your King Cake successes with the Little Kitchen Diary community. Happy Mardi Gras, y’all!
PrintNew Orleans Style King Cake with Cinnamon Swirl
Bake a soft, moist Mardi Gras King Cake featuring a rich cinnamon swirl filling and classic purple, green, and gold icing. This recipe brings the joy of Carnival season to your kitchen.
- Prep Time: 45 min
- Cook Time: 30 min
- Total Time: 2 hours 45 min
- Yield: 1 large cake 1x
- Category: Dessert
- Method: Baking
- Cuisine: American (New Orleans)
- Diet: Vegetarian
Ingredients
- 1 cup warm milk (about 110°F)
- 2 1/4 teaspoons active dry yeast
- 1/2 cup granulated sugar, plus 1 teaspoon for yeast
- 1/2 cup unsalted butter, softened
- 2 large eggs, room temperature
- 1 teaspoon salt
- 4 1/2 cups all-purpose flour, plus more for dusting
- 1 plastic baby (optional)
- For the Filling:
- 1/2 cup packed light brown sugar
- 2 tablespoons ground cinnamon
- 1/4 cup unsalted butter, melted
- For the Icing and Sugars:
- 2 cups powdered sugar
- 3 tablespoons milk or water
- 1 teaspoon vanilla extract
- Purple, green, and gold sanding sugars
Instructions
- Activate the yeast: In a large bowl, combine the warm milk, 1 teaspoon of sugar, and the yeast. Let stand for 5 to 10 minutes until foamy.
- Mix the dough: Add the remaining 1/2 cup sugar, softened butter, eggs, and salt to the yeast mixture. Mix well. Gradually add the flour, mixing until a soft dough forms.
- Knead the dough: Turn the dough out onto a lightly floured surface. Knead for 8 to 10 minutes until the dough is smooth and elastic. Place the dough in a lightly oiled bowl, turning to coat. Cover and let rise in a warm place for 1 to 1.5 hours, or until doubled in size.
- Prepare the filling: While the dough rises, mix the brown sugar and cinnamon in a small bowl. Melt the 1/4 cup butter.
- Shape the cake: Punch down the risen dough. On a lightly floured surface, roll the dough into a large rectangle, about 12 by 18 inches. Brush the entire surface with the melted butter. Sprinkle the cinnamon-sugar mixture evenly over the buttered dough.
- Create the swirl: Tightly roll the dough up lengthwise into a log. Pinch the seam closed. You can form a ring or an oval shape. If making a ring, bring the ends together and pinch to seal. Place the shaped dough on a baking sheet lined with parchment paper. Cover loosely and let rise for 30 to 45 minutes, or until puffy.
- Bake the cake: Preheat your oven to 375°F (190°C). Bake for 25 to 30 minutes, or until golden brown. If using the plastic baby, insert it into the cake after baking while it is still warm. Let the cake cool completely on a wire rack.
- Make the icing: Whisk together the powdered sugar, milk, and vanilla extract until smooth. Adjust liquid for desired consistency; you want a thick glaze that sets, not one that runs off completely.
- Decorate: Drizzle the icing over the cooled cake. Immediately sprinkle generously with the purple, green, and gold sanding sugars.
Notes
- For a richer flavor, use heavy cream instead of milk when activating the yeast.
- If you prefer a cream cheese filling, mix 4 ounces softened cream cheese with 1/4 cup powdered sugar and a splash of vanilla, then spread this over the dough before sprinkling with cinnamon sugar.
- The person who finds the plastic baby in their slice hosts the next Mardi Gras party.
Nutrition
- Serving Size: 1 slice
- Calories: 350
- Sugar: 35g
- Sodium: 200mg
- Fat: 15g
- Saturated Fat: 9g
- Unsaturated Fat: 6g
- Trans Fat: 0g
- Carbohydrates: 50g
- Fiber: 1g
- Protein: 5g
- Cholesterol: 50mg