

There’s just nothing in the world that smells quite like home the way fresh bread does, right? It pulls me right back to sitting around the table, waiting for my mom to pull something golden out of the oven. If you’ve been relying on those sad, often dry things from the store, that stops today. I’ve spent hours in my kitchen perfecting this recipe to bring you the absolute best **dinner rolls** you can make from scratch—they are unbelievably soft, incredibly fluffy, and drenched in butter.
For me, reclaiming the simple joy of baking these rolls was part of getting back to basics when life got too hectic. As I shared in my story over at Little Kitchen Diary, this recipe is proof that you don’t need to spend all day kneading to get perfection. We focus on maximizing that fluffy texture with minimal fuss, making it practical enough for a weeknight or absolutely essential for your next big holiday spread. Trust me, once you smell these rising, you won’t look back!
- Why These Are The Best Soft Dinner Rolls Recipe You Will Ever Make
- Gathering Ingredients for Fluffy Homemade Bread
- Step-by-Step Instructions for Perfect Dinner Rolls
- The Buttery Finish: Making Texas Roadhouse Style Rolls Copycat
- Tips for Success with Your Dinner Rolls
- Dinner Roll Variations for Holiday Side Dish Baking
- Storing and Reheating Your Homemade Rolls
- Frequently Asked Questions About Making Dinner Rolls
- Share Your Comfort Food Baking Success
Why These Are The Best Soft Dinner Rolls Recipe You Will Ever Make
This isn’t just another recipe; this is *the* **Soft Dinner Rolls Recipe** for that cloud-like chewiness we all dream about. I promise you, these end up being the **Best Homemade Rolls** you’ve ever pulled from your oven. The secret to that melt-in-your-mouth tenderness comes down to two things we nail down early: using warm milk for the yeast to create a perfect rise, and making sure we knead by hand long enough for the dough to get beautifully smooth and elastic.
You get that incredible texture that store-bought just can’t touch, yet the hands-on effort is super low. We aren’t making complicated bread here; we’re making buttery comfort food that earns its spot on your holiday table or your Tuesday night dinner plate.
Quick Overview: Prep, Rise, and Bake Times
I know when you’re planning dinner, timing is everything. While these definitely need time to rise—that’s non-negotiable for fluffy yeast rolls—the actual work you do is fast! Think of this as minimal effort for a huge payoff.
- Prep Time: About 25 minutes
- Cook Time: 15 to 18 minutes
- Total Time: Just under 2 hours (but most of that is resting time!)
See? If you start these mid-afternoon, you’ll have warm rolls ready by dinner time without feeling chained to the counter. It’s a great **Weeknight Bread Recipe** if you plan ahead a little!
Gathering Ingredients for Fluffy Homemade Bread
Alright, let’s get real about ingredients. You don’t need fancy stuff for these **Buttery Yeast Rolls**, just good quality basics handled correctly. I’ve listed everything we need below. Grab everything before you start mixing, that’s my number one rule for stress-free baking!
- 1 cup warm milk (must be between 105°F to 115°F—I always check with a thermometer!)
- 2 1/4 teaspoons active dry yeast (standard packet size)
- 1/4 cup granulated sugar
- 1 large egg, and this one absolutely needs to be room temperature
- 1/4 cup unsalted butter, melted (for mixing into the dough)
- 3 1/2 cups all-purpose flour, plus extra for dusting the countertop
- 1 teaspoon salt
- 1/2 cup (that’s one full stick) unsalted butter, softened, reserved strictly for brushing later
- 1 tablespoon honey (this is totally optional, but gosh, it makes them taste like the restaurant kind!)
Ingredient Notes and Substitution Guidance
Getting the temperature right on your milk is the first major trust-builder in this recipe. If the milk is too hot—say, above 120°F—you’ll kill your yeast, and then you’ll have sad, flat dough. Trust me, I’ve learned that the hard way! We need that warm milk to wake up the yeast so it starts bubbling happily.
Also, don’t skip the room temperature egg tip. When an egg is cold, it cools down your dough mixture, which can slow down the yeast’s work. A room temperature egg mixes in smoother and helps keep the dough temperature stable so we get that perfect, fast rise for our **Fluffy Homemade Bread**.
When it comes to the butter, we use two types! Melted butter goes *in* the dough for richness, and the softened butter is what we brush right on top when they come out of the oven to seal in that moisture and create that amazing buttery crust.
Step-by-Step Instructions for Perfect Dinner Rolls
Okay, here is where the magic happens! We are moving from ingredients to actual, tangible, beautiful bread. Follow these steps closely, and you’ll have the most glorious, soft, homemade yeast rolls on your table. Don’t rush the resting times—that’s when the yeast does its important work to give us those **Perfectly Risen Rolls**.
Activating Yeast and Mixing the Buttery Yeast Rolls Dough
First things first: we need to wake up that yeast. Take your warm milk (remember, 105°F to 115°F—not hot!) and throw in that yeast and the sugar. Give it a little stir and just let it sit there for about five minutes. If it gets foamy and bubbly on top, congratulations, your yeast is alive and ready to party! If it’s flat, toss it out and start over with warmer milk.
Once your yeast is happy, whisk in that room temperature egg and the melted butter. In a separate bowl, make sure your dry ingredients—the flour and salt—are combined, then start adding that flour mixture into your wet stuff in stages, mixing until it looks kind of shaggy. That means we are ready for the hands-on part!
Kneading and Achieving That Perfectly Risen Rolls Texture
This is my favorite part because you stop needing a machine and start using your hands! Turn that shaggy mess onto a lightly floured surface. We need to knead this dough for a solid 6 to 8 minutes. You’re looking for a dough that feels soft, smooth, and springs back a little when you poke it.
Keep adding that extra half-cup of flour just a little bit at a time, only if the dough is sticking horribly. The goal isn’t a super stiff dough; it should remain quite soft. Once it looks smooth and feels wonderfully elastic, you’re done kneading. Pop it into an oiled bowl, cover it up tight, and let it hang out in a warm spot until it doubles in size—usually about an hour and a half.
Shaping and Second Rise for Fluffy Homemade Bread
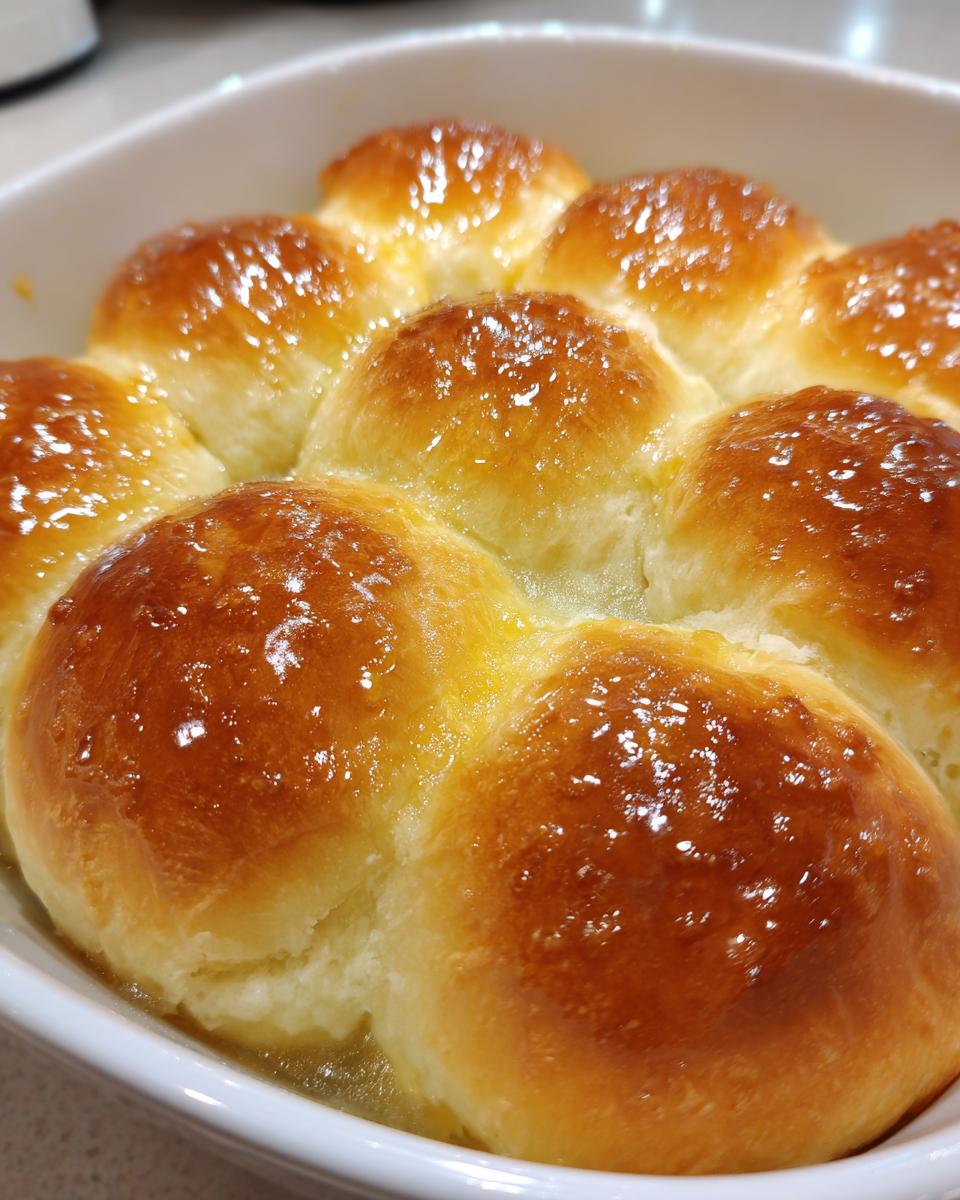
After that first big rise, gently punch the air out—don’t work it too much, we want to keep those air pockets we just built! Divide that beautiful dough into exactly 12 equal pieces. Roll each piece into a tight little ball. I like to make them super smooth; it helps them bake evenly.
Then, arrange them in your greased 9×13 inch pan, making sure they just touch at the edges. Cover them again and let them sit for another 30 to 45 minutes. This second rise is crucial for making sure your **Fluffy Homemade Bread** puffs up nicely in the oven. While they are getting puffy, get that oven heated up to 375°F!
Oh, and here’s where you can review our privacy commitment while you wait, knowing our site is built on trust just like your dough!
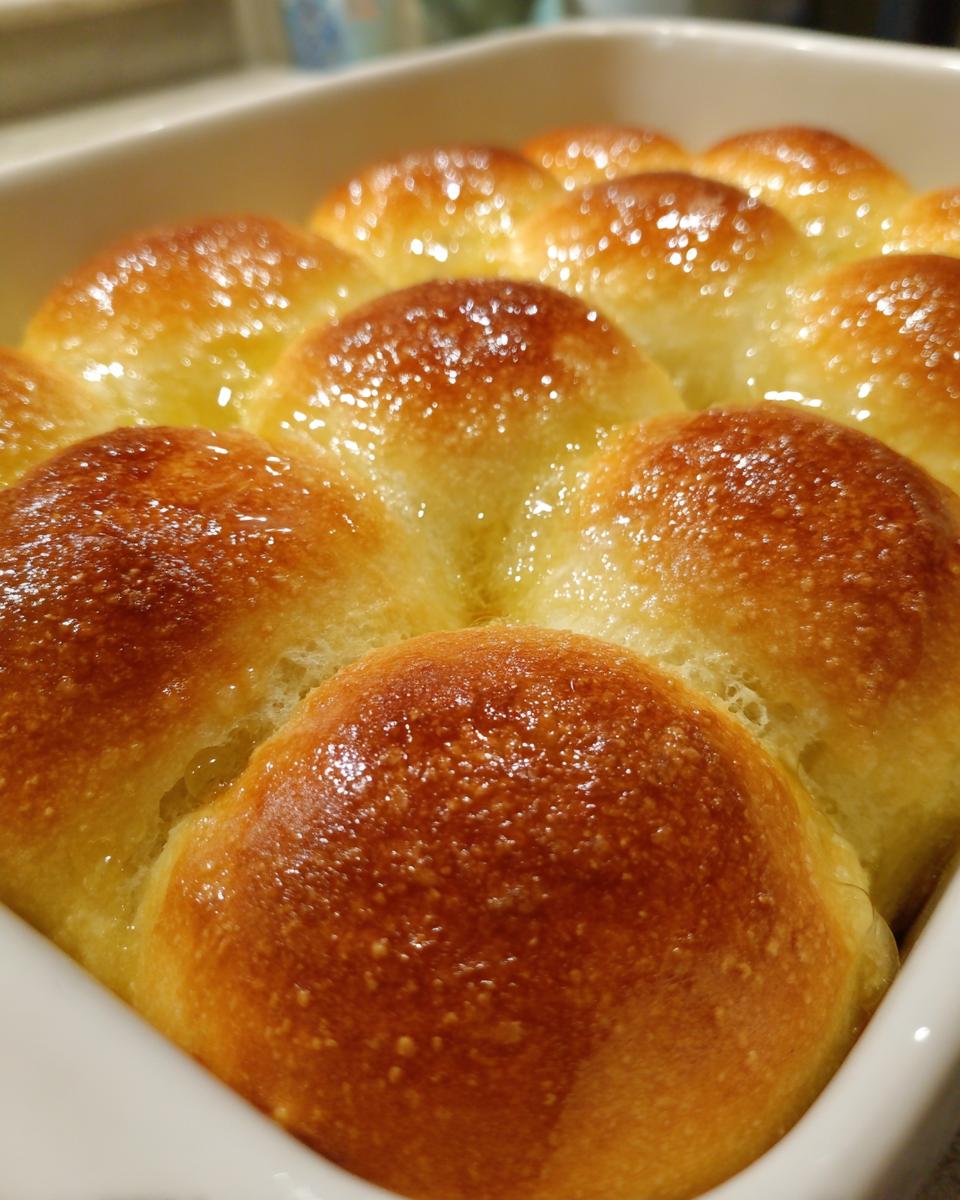
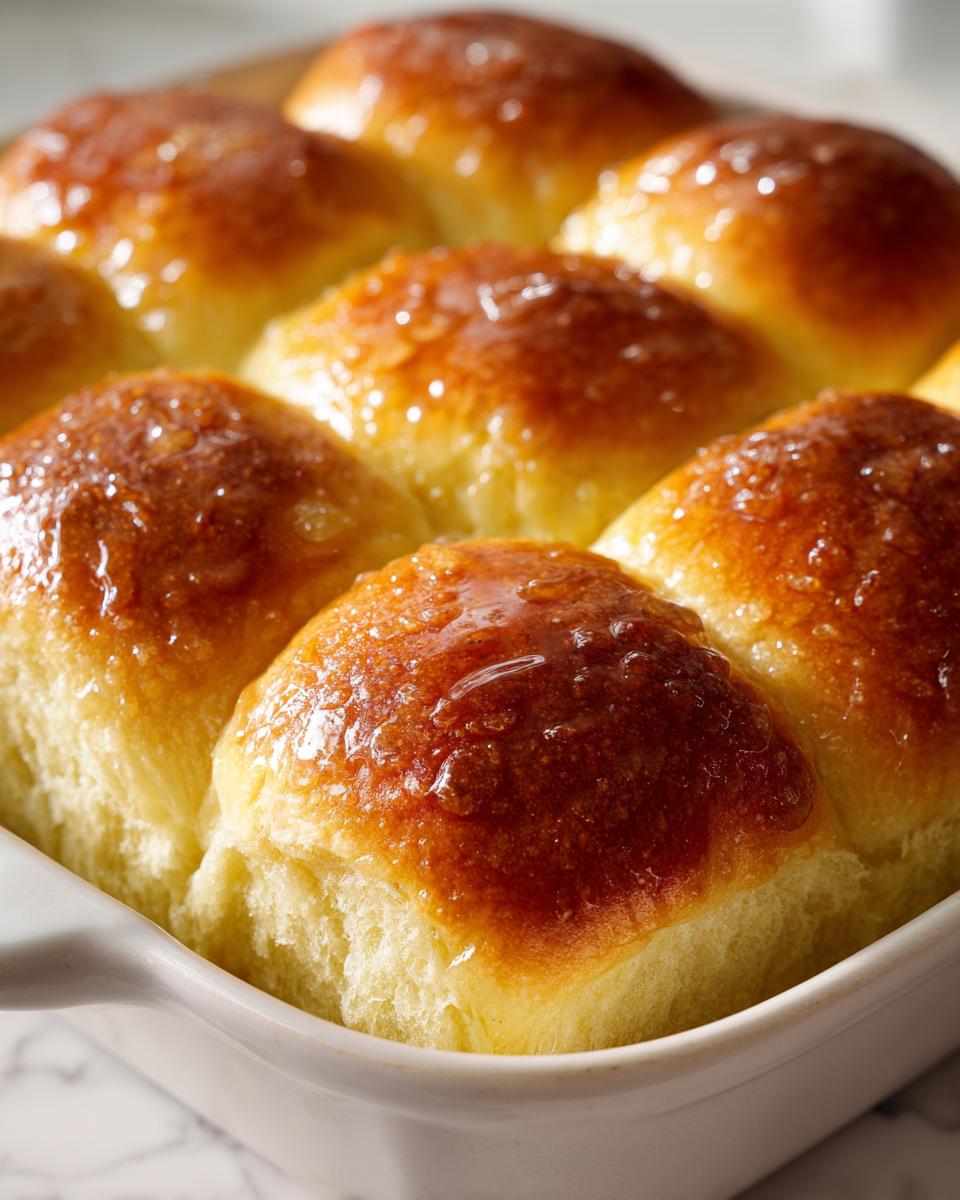
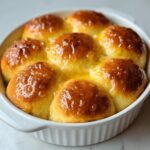
The Buttery Finish: Making Texas Roadhouse Style Rolls Copycat
The rolls are baked—golden brown and beautiful—and the whole house smells like heaven. But we are not done yet! This final step is non-negotiable, and it’s what separates your lovely homemade rolls from truly legendary ones. This is where we nail down that famous restaurant quality and give you the best **Texas Roadhouse Style Rolls Copycat** you can imagine.
As soon as they come out of the oven, you need the reserved half-cup of softened butter ready to go. You have to work fast here because the rolls need to be piping hot so they drink up all that richness. I remember the very first time I made these; I was terrified to touch the rolls right out of the oven, but I slathered that butter on anyway, and when it melted into those crevices? Wow! It was a total game-changer for how I treated every yeast roll recipe after that.
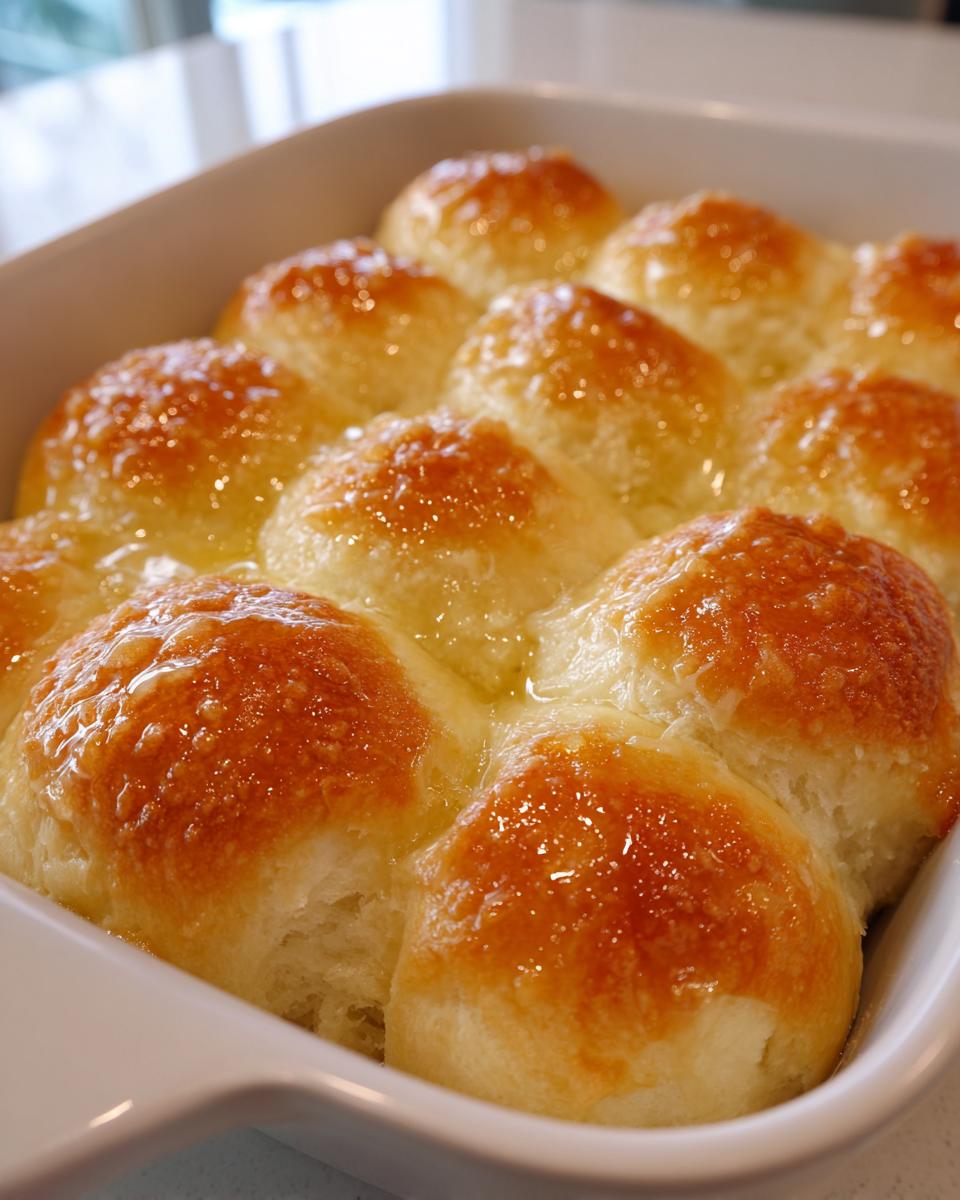
For the classic buttery finish, melt down that butter and just brush it generously over every single hot roll until they are glistening. If you want that slightly sweet profile those restaurant favorites have, stir in that tablespoon of honey right into the melted butter before you brush it on. That honey-butter mix seals in the moisture, gives them that gorgeous sheen, and seriously boosts the flavor. You can even see some folks getting fancy by brushing them again five minutes later!
For those wanting to see another take on this style, folks often search for detailed versions, and I came across a great example for inspiration on their finishing technique here. Seriously, take the time to brush them thoroughly. This step is the difference between a good roll and the kind someone begs you for the recipe to!
Tips for Success with Your Dinner Rolls
Baking really is all about details, isn’t it? Even with this straightforward **Easy Dinner Roll Recipe**, a few little tricks can make sure you hit that peak fluffiness every single time. I’ve gathered the best guidance from my little diary notes here to help you troubleshoot or prepare ahead of time.
- For Texas Roadhouse Style Rolls Copycat: If you want that subtle sweetness, remember to stir in that tablespoon of honey directly into your melted butter before you brush the rolls piping hot out of the oven. It adds such a nice balance to all that savory butter!
- Handling Temperature Issues: Quick yeast bread is sensitive to the environment. If your kitchen is cold, your rises will take ages. If you’re struggling, try turning your oven on the lowest setting for about one minute, then turn it OFF. Place your covered dough bowl inside this slightly warm, dark space. That little bit of residual heat gives your yeast a perfect boost to get those **Perfectly Risen Rolls**.
- Making Ahead Dinner Rolls: Yes, you can totally make these ahead, especially if you are tackling a big holiday meal! After you shape the dough balls in the pan, cover them tightly with plastic wrap and pop the whole pan into the refrigerator overnight. They are fantastic **Make Ahead Dinner Rolls**. Just pull them out the next morning, let them sit on the counter for about 30 minutes until they look puffy again, and then bake them as directed.
- Don’t Skip the Cover: Whether it’s the first rise or the second, make sure your dough is covered. If the dough dries out on top, it forms a skin, and that skin stops the dough from rising properly, which means flatter, less soft rolls. A light coating of oil on the plastic wrap helps keep it from sticking to the dough, too!
Dinner Roll Variations for Holiday Side Dish Baking
Once you’ve mastered our base recipe for soft **dinner rolls**, you might want to switch things up depending on what main course you’re serving. These rolls are so friendly; they take on added flavors beautifully! Seriously, you can adapt this same dough a dozen ways to suit any meal, making it a staple in your **Holiday Side Dish Baking** arsenal.
Don’t feel locked into just the plain butter finish. A little tweak to that buttery coating after they come out of the oven can transform them completely. I love experimenting, especially when I’m making something spicy or savory.
Go Savory: The Garlic Butter Rolls Recipe Twist
This is my absolute favorite savory variation, perfect for pairing with soup or pasta dishes. Right before the rolls come out of the oven, prepare your topping. Instead of just melted butter, melt about a half-cup of butter and mix in 2 teaspoons of garlic powder and 1 teaspoon of dried parsley. You can also sneak in a pinch of salt if you like. You want enough garlic flavor to really make an impact!
As soon as the rolls finish baking, brush that glorious garlic butter all over them. The heat draws the garlic flavor right into the crust. They come out smelling like a bakery, and everyone digs in immediately. If you’re really going all out, check out how some folks layer on the flavor when they create a dedicated garlic butter bread rolls recipe; it gives you great ideas for boosting the garlic.
Making Sweet Dinner Rolls for Breakfast or Dessert
If you realize you have some leftover rolls the next morning, or if you just prefer a **Sweet Dinner Rolls** vibe for your meal, this change is simple. When you are mixing up your wet ingredients (Step 2 in the main instructions), bump that granulated sugar up from 1/4 cup to 1/3 cup. That small addition makes the finished rolls taste distinctly sweeter!
Then, when they come out of the oven, you have two options for that buttery brush. Either use the honey-butter mix mentioned in the Texas Roadhouse section, or skip the honey and just brush with melted butter, then immediately dust them lightly with cinnamon sugar while they are hot. That warm spice makes them perfect for breakfast alongside coffee!
Adding Herbs for an Old Fashioned Dinner Rolls Feel
For a more robust, earthy flavor that feels very much like **Old Fashioned Dinner Rolls**, try adding 1 teaspoon of dried rosemary or thyme right into the flour mixture (Step 3) along with the salt. When you knead the dough, you’ll crush those herbs a little more, releasing their oils. This works incredibly well if you’re serving roasted meats where you want those earthy, savory notes coming through!
Storing and Reheating Your Homemade Rolls
Oh, I truly wish we could say these **dinner rolls** always disappear on Baking Day, but sometimes life happens! While there is absolutely no substitute for biting into one of these golden, fresh-from-the-oven wonders, we can get pretty close when it comes to leftovers. Seriously though, my personal, honest opinion is that these **Soft Dinner Rolls Recipe** beauties are at their peak happiness within the first four hours of leaving the oven.
If you do end up with extras, we need to treat them kindly so they don’t turn into hockey pucks overnight. The best way to store them is in an airtight container or a zip-top bag on the counter. Do *not* put them in the fridge! Cold air is the enemy of soft bread and will suck all the moisture right out, making them stale way faster.
Now, for the glorious part: reheating them to bring back that fresh, **fluffy homemade bread** texture. This isn’t fancy science, just quick warmth!
Bringing Back the Fluff with Warmth
If you have just a few rolls left, I do this low-tech method that works like a charm. Wrap the rolls loosely in a damp paper towel—just enough moisture to steam them slightly—and pop them into the microwave for about 10 to 15 seconds on medium power. They get steamy, soft, and taste almost completely fresh-baked again. Watch them carefully, though, because 20 seconds is usually when they get tough!
If you’re reheating the whole batch—maybe for leftovers the next day—the oven is your friend. Preheat your oven to a very gentle 300°F. Place the rolls, still in their covered pan or a baking dish, into the warm oven for about 8 to 10 minutes. This slow, dry heat warms them all the way through without drying them out.
When they are piping hot, pull them out and give the tops one last quick swipe of melted butter. You don’t even need the honey if you’re just reheating. That final layer of butter melts in, mimicking that glorious first brush, and makes them taste just as tender and satisfying as they did straight out of the oven the night before. It’s the best way to enjoy these **Comfort Food Baking** staples day after day!
Frequently Asked Questions About Making Dinner Rolls
I know when you’re tackling a new yeast recipe, you’re going to have questions pop up. That’s totally normal for any **Yeast Roll Recipe**! I’ve collected some of the things I get asked most often about these **dinner rolls** so you can get that perfect result without even reaching out! If you still need help, feel free to drop a note over on my contact page, but I think these tips will cover most things!
Can I make these Quick Dinner Rolls without waiting for two long rises?
I totally get the rush. Who doesn’t want **Quick Dinner Rolls** on a busy night? Here’s the deal: the long, slow first rise is where a lot of the deep, lovely flavor in yeast bread gets built. If you skip that, you’re likely going to miss out on some complexity, even if they look fine.
Can you speed it up? Sure! You can set your dough in a slightly warm oven (turned off!) with a pan of hot water beneath it, which cuts the first rise time down significantly. But achieving true **One Hour Dinner Rolls** usually means sacrificing that airy, fluffy texture we are chasing. We really need that time! You can, however, use the make-ahead refrigeration trick, which lets you skip the early part of the wait, making the morning process super fast.
What is the best way to ensure my rolls are Old Fashioned Dinner Rolls soft?
This is all about managing moisture and gluten, the two big enemies of softness! First, during kneading, try your absolute best not to add too much extra flour. If the dough feels slightly sticky on your hands (but not sticking to the counter), that’s better than adding too much flour. Over-flouring is the number one way people accidentally turn soft dough into stiff buns.
Second, and this is crucial for that pillowy mouthfeel: brush them with butter the second they come out of the oven. Do not wait! That hot steam trapped inside needs that buttery blanket to keep it soft. The butter melts right in, and as they cool, that crust stays tender. That’s the secret handshake for **Old Fashioned Dinner Rolls** perfection!
Share Your Comfort Food Baking Success
Well, we’ve done it! We’ve gone from warm milk and yeast to a pan full of incredible, buttery, **dinner rolls**. I truly hope your kitchen smells just as amazing as mine does right now. Baking should be a cycle of joy, and I honestly can’t wait to hear about your success!
If these rolls made your family dinner special—whether it was Thanksgiving or just a Tuesday night—please take a moment to leave a star rating right here on the recipe card. It really helps other folks know that this is the **Best Homemade Rolls** recipe they should be trusting!
And if you snapped a picture of your beautifully risen, golden brown batch, I would absolutely love to see them! Tag me on social media or leave a comment below sharing how you served your **Buttery Yeast Rolls**. Seeing your creations is the best part of running Little Kitchen Diary. We’re all just busy people trying to make simple, good food, and sharing that journey is what builds our trust and community.
Before you head off to devour that basket of warm bread, just a quick nod to keeping things clean and legal around here; you can review my Terms of Use if you ever need to check in on policies regarding sharing recipes or content. Now go forth and butter those babies up!
PrintThe Ultimate Soft and Fluffy Homemade Dinner Rolls (Classic Buttery Recipe)
Make soft, fluffy, and buttery dinner rolls from scratch. This easy recipe delivers warm, tender rolls that taste much better than store-bought versions, perfect for any family meal or holiday side dish.
- Prep Time: 25 min
- Cook Time: 18 min
- Total Time: 1 hour 58 min
- Yield: 12 rolls 1x
- Category: Side Dish
- Method: Baking
- Cuisine: American
- Diet: Vegetarian
Ingredients
- 1 cup warm milk (105°F to 115°F)
- 2 1/4 teaspoons active dry yeast
- 1/4 cup granulated sugar
- 1 large egg, room temperature
- 1/4 cup unsalted butter, melted
- 3 1/2 cups all-purpose flour, plus more for dusting
- 1 teaspoon salt
- 1/2 cup (1 stick) unsalted butter, softened, for brushing
- 1 tablespoon honey (optional, for Texas Roadhouse style finish)
Instructions
- Activate the yeast: In a large bowl, combine the warm milk and yeast. Let it stand for 5 minutes until foamy.
- Add the sugar, egg, and melted butter to the yeast mixture. Whisk briefly to combine.
- In a separate bowl, whisk together 3 cups of the flour and the salt.
- Gradually add the flour mixture to the wet ingredients, mixing until a shaggy dough forms.
- Turn the dough out onto a lightly floured surface. Knead for 6 to 8 minutes, adding the remaining 1/2 cup of flour as needed until the dough is smooth and elastic. It should be soft.
- Place the dough in a lightly oiled bowl, turning to coat. Cover the bowl with plastic wrap or a clean towel. Let the dough rise in a warm place for 1 to 1.5 hours, or until doubled in size.
- Gently punch down the risen dough. Divide the dough into 12 equal pieces. Roll each piece into a smooth ball.
- Arrange the dough balls in a greased 9×13 inch baking pan, leaving a small space between them for rising.
- Cover the pan and let the rolls rise again for 30 to 45 minutes, or until puffy.
- Preheat your oven to 375°F (190°C).
- Bake the rolls for 15 to 18 minutes, or until they are golden brown on top.
- While the rolls are still hot, melt the 1/2 cup of softened butter. If making the Texas Roadhouse style, stir the honey into the melted butter.
- Brush the tops of the hot rolls generously with the butter mixture. Serve warm.
Notes
- For Texas Roadhouse Style Rolls: After brushing with butter, sprinkle a small amount of cinnamon sugar (1 teaspoon cinnamon mixed with 2 tablespoons sugar) over the tops while they are still hot.
- If you are short on time, you can use this recipe for a quick rise by placing the dough in a slightly warm oven (turned off) with a pan of hot water on the rack below it.
- You can make these rolls ahead. After the first rise, shape them, place them in the pan, cover, and refrigerate overnight. In the morning, let them warm up on the counter for 30 minutes before baking as directed.
Nutrition
- Serving Size: 1 roll
- Calories: 210
- Sugar: 5
- Sodium: 250
- Fat: 9
- Saturated Fat: 5
- Unsaturated Fat: 4
- Trans Fat: 0
- Carbohydrates: 30
- Fiber: 1
- Protein: 5
- Cholesterol: 25