
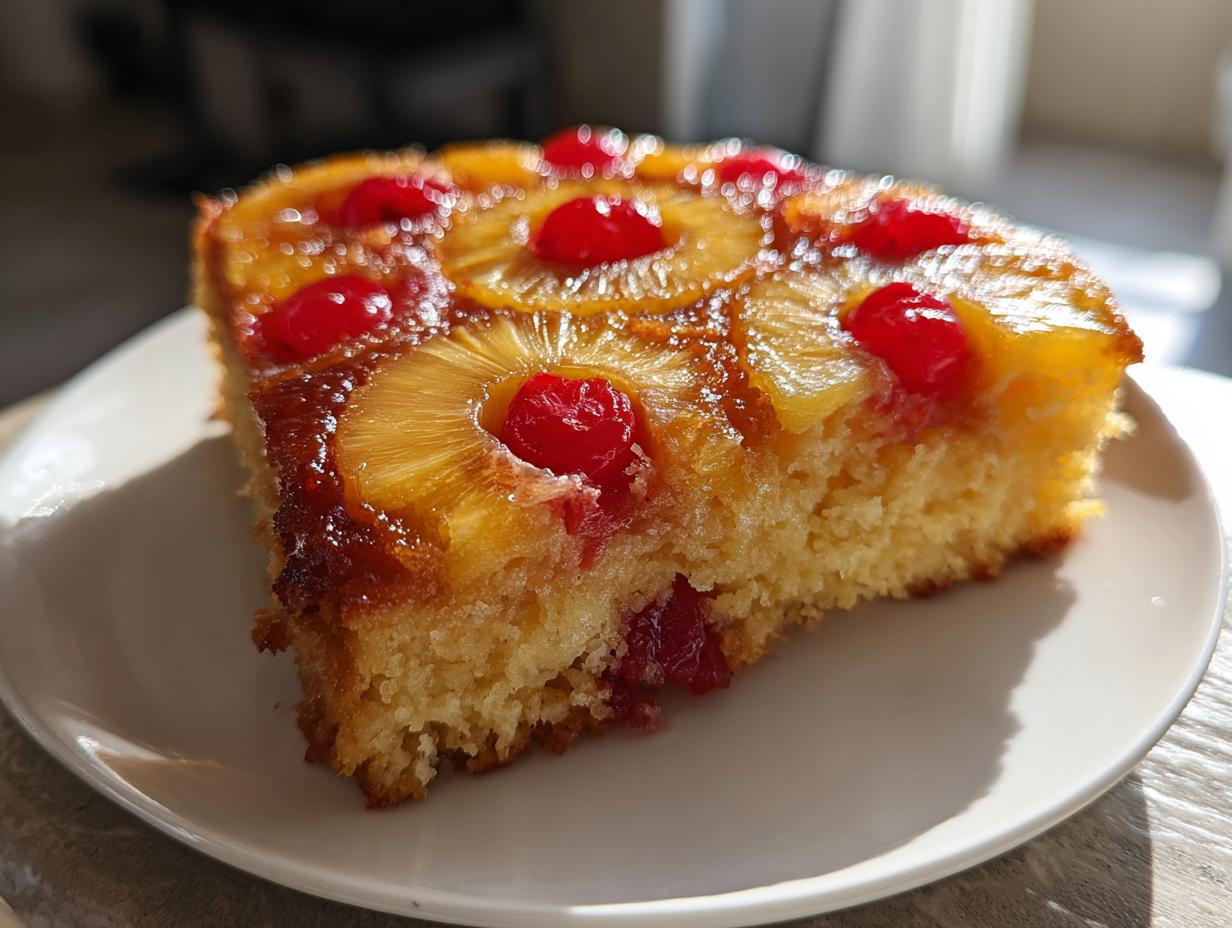
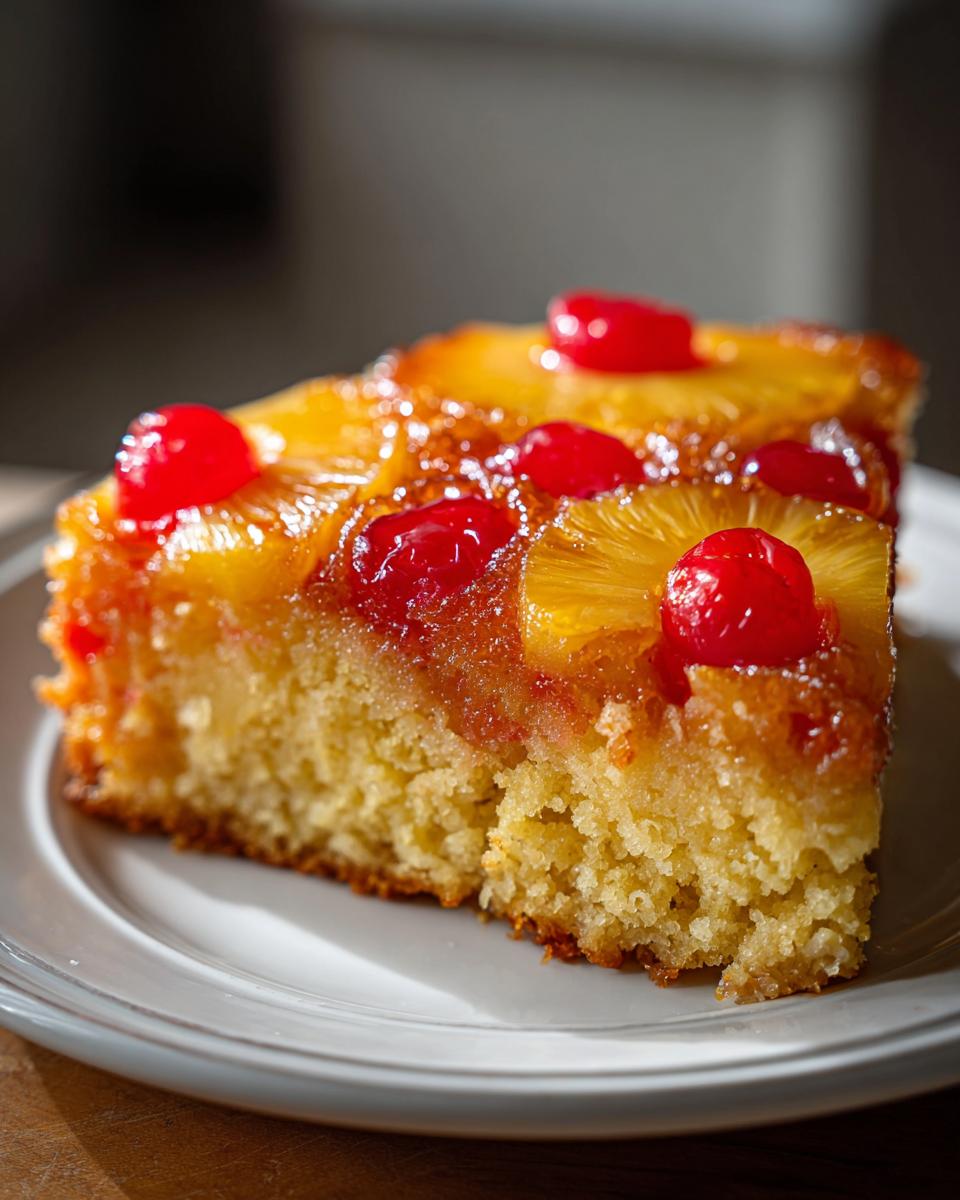
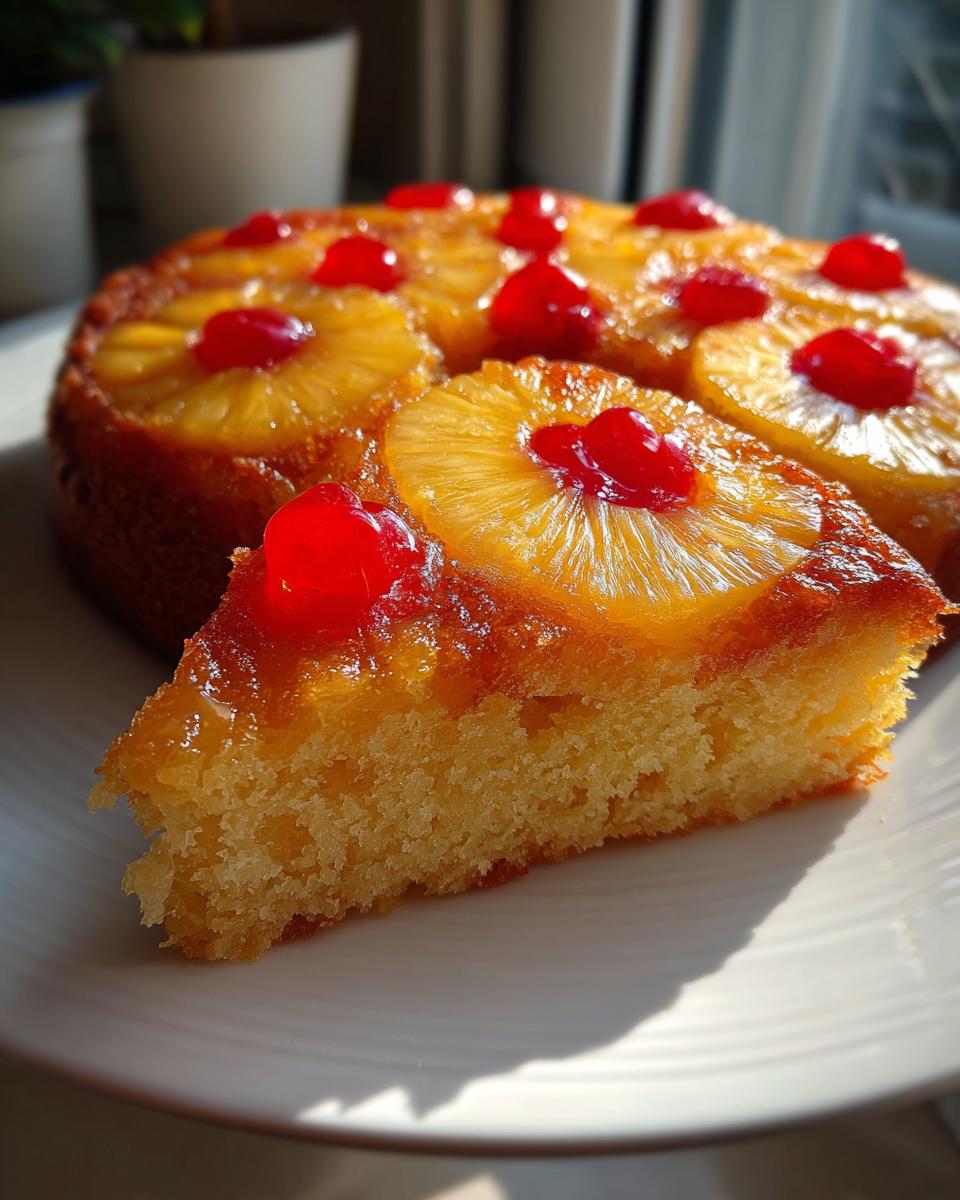
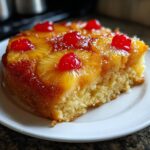
There’s just something about those retro dessert recipes that hits you right in the heart, isn’t there? Maybe it’s the sunshine color or the sticky, sweet topping that makes you think of childhood gatherings. I spent a long time trying to recreate that perfect bite, and I finally nailed it. Forget fussy baking; this is truly the ultimate classic and easy pineapple upside down cake recipe you’ll keep coming back to. It gives you that beautifully moist, buttery cake base wrapped under deeply caramelized pineapple rings, and honestly, it’s so straightforward, it fits right into my busy schedule now. As I found my way back to cooking after getting swamped with work, that journey inspired everything we do here at Little Kitchen Diary in our own kitchen. I realized the best food doesn’t have to be complicated. This cake proves that wonderfully comforting food is always within reach.
- Why This Classic Pineapple Upside Down Cake Recipe Works Every Time
- Ingredients for Your Homemade Pineapple Cake
- Step-by-Step Instructions for the Best Pineapple Upside Down Cake
- Tips for Success When Making Your Pineapple Upside Down Cake
- Variations: From Bundt Cake to Mini Pineapple Upside Down Cakes
- Serving Suggestions for This Easy Pineapple Dessert
- Storage and Reheating Instructions
- Frequently Asked Questions About Pineapple Upside Down Cake
- Share Your Classic Pineapple Upside Down Cake Experience
Why This Classic Pineapple Upside Down Cake Recipe Works Every Time
I know there are a million recipes out there, but this one just works, plain and simple. People write to me all the time saying this is the first time their topping didn’t burn or stick, and that’s because we are focusing on a few key, trustworthy steps. This pineapple upside down cake recipe is pure nostalgia but engineered for success. It’s the best way to get that show-stopping visual everyone loves without the stress!
Achieving the Perfect Buttery Pineapple Glaze
The secret to those gorgeous, glistening pineapple rings is that bottom layer we build—it’s not just decoration, it’s the sauce!
- We use melted butter combined with brown sugar right in the pan. As the cake bakes, this mixture melts down straight into the batter, essentially basting the fruit from below.
- This combination creates the signature caramelized pineapple rings that are sticky, deep in color, and flavor the crust perfectly. Don’t skip the brown sugar; it’s what gives you that rich molasses note.
Tips for a Super Moist Pineapple Cake
Moisture is key, especially when you’re dealing with a baked fruit topping. If the cake is dry, it’s just not the same!
- We use the reserved pineapple juice in the batter along with the milk. That little bit of fruit acid helps tenderize the crumb immensely.
- Also, remember what I said about not overmixing? That’s the other half of the battle for a moist pineapple cake. Once you add the flour, mix only until you don’t see streaks anymore. Trust me on this one!
Ingredients for Your Homemade Pineapple Cake
One of my biggest goals for Little Kitchen Diary is that you should be able to make these treats without a wild scavenger hunt for specialty items. This homemade pineapple cake uses pantry staples! Seriously, grab a 9-inch round pan and let’s get everything ready. I use canned pineapple because it’s already perfectly tender and gives that classic, nostalgic flavor we want. Trying to use fresh pineapple often means you have to slice it really thin and sometimes it doesn’t caramelize right, and who has time for that?
Here’s what you’ll need for the topping and the batter:
- 1/2 cup unsalted butter, melted (for the bottom layer)
- 1 cup packed light brown sugar (packed firmly!)
- 1 (20 ounce) can pineapple slices in juice, drained (make sure you keep that juice!)
- 8 maraschino cherries
- 1 1/2 cups all-purpose flour
- 1 1/2 teaspoons baking powder
- 1/2 teaspoon salt
- 1/2 cup unsalted butter, softened (for the cake batter)
- 3/4 cup granulated sugar
- 2 large eggs (room temperature is best, just set them out a bit early)
- 1 teaspoon vanilla extract
- 1/2 cup milk
- 1/4 cup reserved pineapple juice
Ingredient Notes and Substitutions
Canned pineapple is absolutely the way to go here for convenience and that signature gooey factor. If you did use fresh pineapple, make sure you blot all the moisture off any rings you place in the pan, otherwise, the sugar won’t set up properly.
And the cherries? They are pure fun. They are classic for a reason, fitting right in with these retro dessert recipes. If you happen to be out of maraschino, you can skip them, but you lose a little bit of that sweet, bright pop of color. Don’t substitute them with fresh cherries unless you pit them and dry them well—we want that buttery caramel to shine, not water down!
Step-by-Step Instructions for the Best Pineapple Upside Down Cake
Okay, now that we have all our components ready, this is where the magic really happens. Don’t let the layering intimidate you; it’s actually the easiest part of making this pineapple upside down cake. We are building flavor from the bottom up, which is how you guarantee that perfectly decadent, slightly sticky texture that everyone raves about. Just follow these steps closely, especially that little cooling window at the end, and you’ll have a showstopper on your hands.
Preparing the Caramelized Topping Layer
First things first, get your oven preheated to 350°F (175°C) and have your 9-inch round pan ready. We treat the bottom of this pan like a sauce pan!
- Pour that 1/2 cup of melted butter right into the very bottom of your pan. Spread it around gently to coat everything nicely.
- Sprinkle that packed light brown sugar evenly over the butter. Don’t just dump it; we want a solid blanket of sugar!
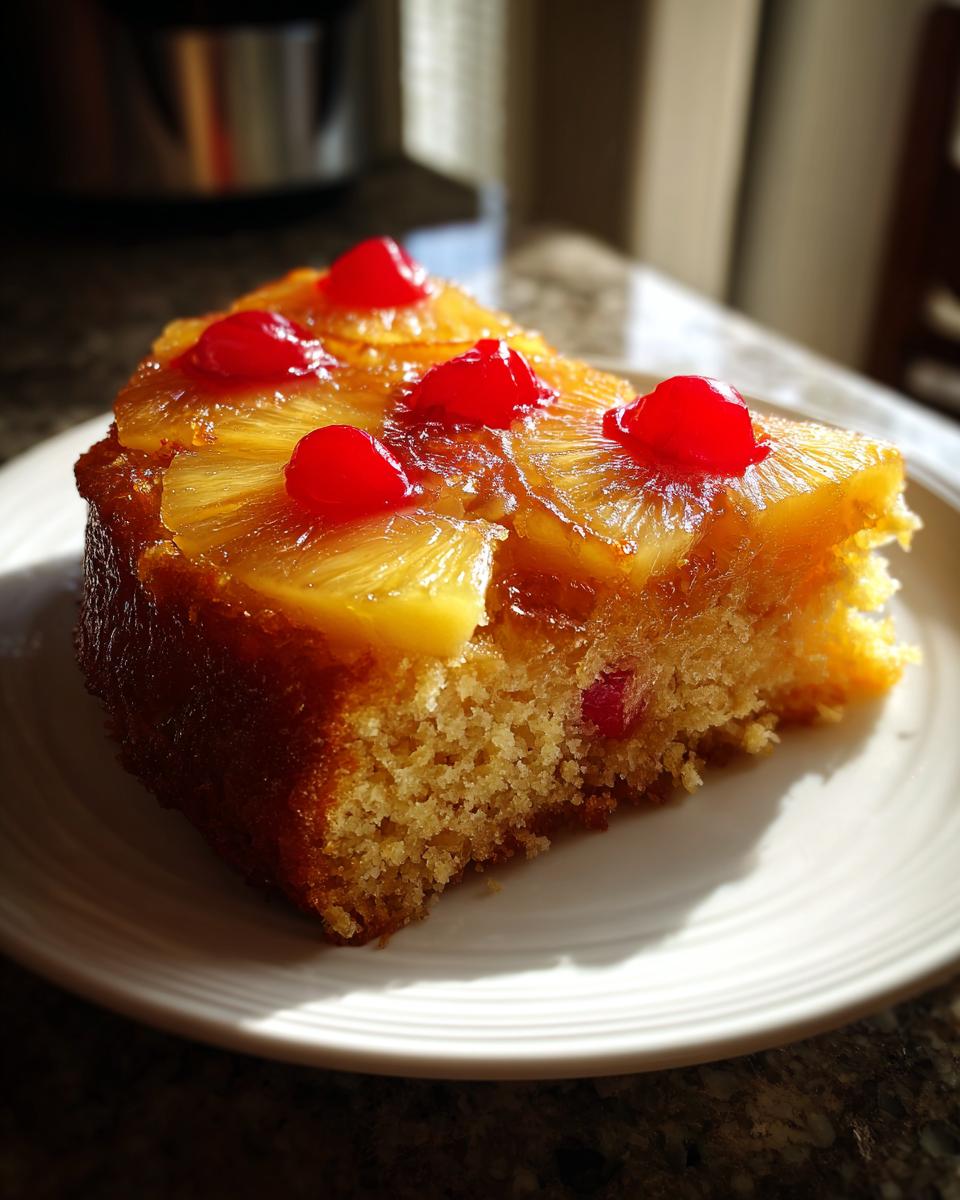
- Now, take your drained pineapple slices and arrange them artistically over that sugar. I usually place one, sometimes two, slices per section. Then, pop a single maraschino cherry right into the middle hole of each ring. Look how pretty that already is!
Mixing the Moist Cake Batter for the Pineapple Upside Down Cake
While that topping is sitting pretty, we whip up the batter. Remember our moisture mantra: don’t overmix!
- Whisk your dry ingredients—the flour, baking powder, and salt—in a bowl and set that aside.
- In a separate big bowl, cream together the softened butter and granulated sugar until it looks pale and fluffy. This traps the air, giving us that wonderful cake structure.
- Beat in your eggs one at a time, mixing well after each one. Add the vanilla.
- Now, we alternate! Add about a third of your dry mix, then half of your milk/juice liquid mix, mixing on low until just barely combined. Repeat that pattern—dry, liquid, dry—finishing with the last of the dry ingredients. Stop mixing the second the last bit of flour disappears. Seriously, stop!
- Gently pour this beautiful, thick batter straight over the fruit layer in the pan. Use a spatula to spread it gently so you don’t bump any of your pretty pineapple designs out of place.
Baking and Inverting Your Classic Pineapple Cake
Time to bake this beauty until it’s golden brown and smells like pure heaven. This usually takes about 35 to 40 minutes at 350°F. You want a wooden pick inserted into the middle to come out clean, meaning the cake itself is done.
This next part is crucial for keeping your topping intact. Let the cake rest in the pan on a wire rack for exactly 10 minutes. If you flip it too soon, the topping is too runny and will slide right off. If you wait too long, the caramel sets up like cement! If you were making a larger cake, like a Pineapple Bundt Cake, you’d check out tips like the ones over here, but for this round pan, 10 minutes is the sweet spot.
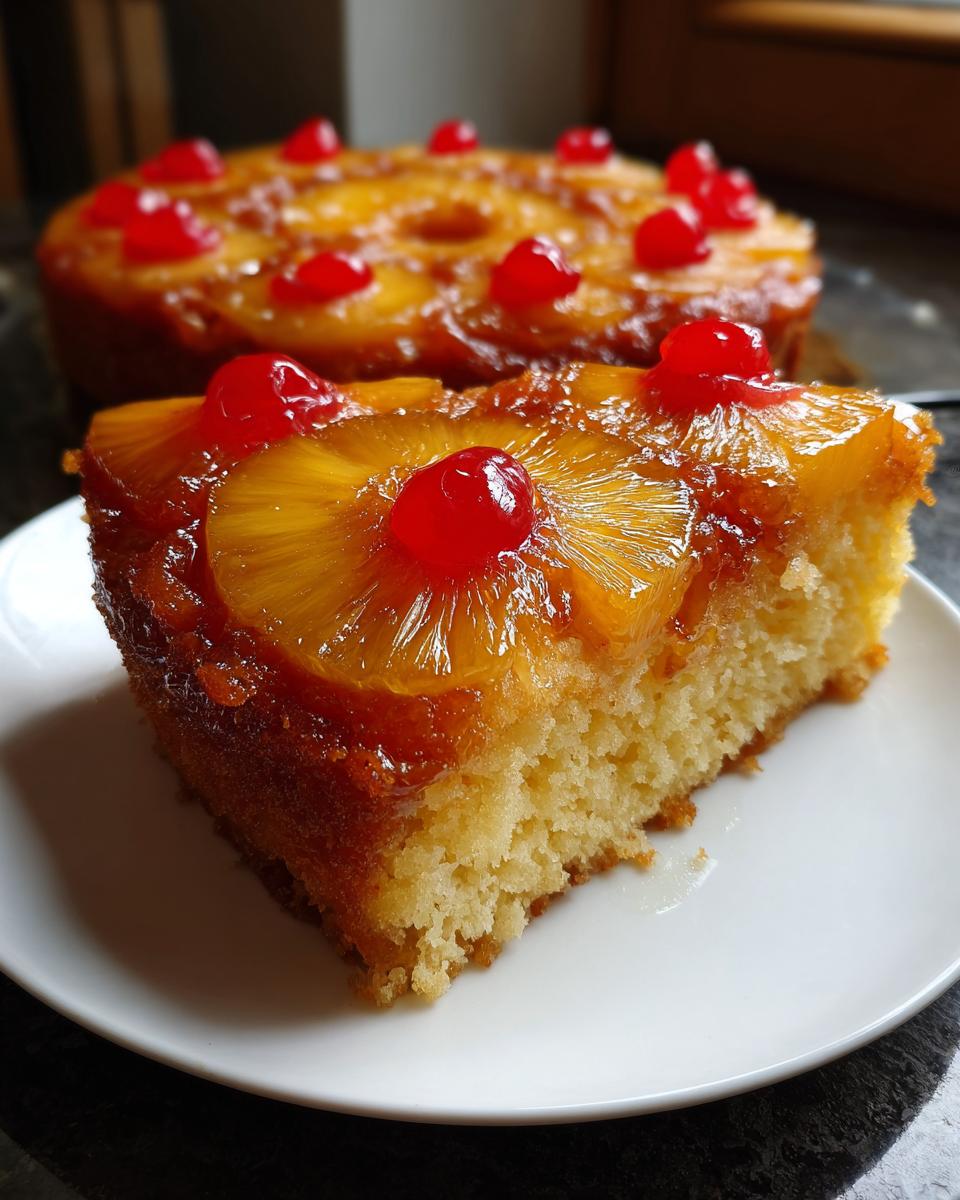
After 10 minutes, place a serving plate upside down over the pan. Holding the plate and the pan tightly together (use oven mitts, it’s still hot!), quickly flip the whole thing over. Lift the pan off slowly. If a stray bit of fruit wants to cling to the pan, just gently coax it back onto the cake. Ta-da! You’ve got the perfect classic pineapple cake.
Tips for Success When Making Your Pineapple Upside Down Cake
I’ve made this pineapple upside down cake so many times now that I can feel when something’s off just by the sound of the batter mixing. The biggest headache people always seem to run into is that sticky caramel layer refusing to release from the pan. It’s heartbreaking when you go through all that effort arranging the fruit!
Troubleshooting Common Issues
If you panic when you flip the cake and the bottom seems stuck, don’t throw in the towel just yet! The crucial moment is that 10-minute cool-down period we talked about. If you waited too long, the caramel cooled too much and bonded to the metal.
Try this quick fix: Place the pan back on the warm (but turned off) burner for about 30 seconds, just to slightly loosen the edges of the caramel layer. Get your serving plate ready again, hold it tight, and flip it quickly. If a piece is stubbornly clinging, grab a clean offset spatula or a thin knife and carefully loosen the edges while the pan is upside down. You can gently nudge the loose pineapple or cherry back into place. It still tastes amazing, even if the pattern isn’t magazine-perfect!
Variations: From Bundt Cake to Mini Pineapple Upside Down Cakes
I love that this recipe is so sturdy and forgiving! While the 9-inch round pan gives us that perfect traditional look, sometimes you need a different shape depending on what you’re serving or who you’re serving it to. Never fear, this simple tropical dessert is endlessly adaptable.
Baking it in different vessels doesn’t complicate things too much, but you do need to be a little more attentive to the greasing step, especially if you are trying to make a show-stopping Pineapple Bundt Cake.
For a Bundt pan—which really showcases those beautiful caramelized rings—you need to grease and flour it really, really well. I mean, use that homemade cake goop or make sure you get into every single nook and cranny. Because the batter is slightly more liquid than a standard pound cake, it loves to stick in those deep crevices. For the baking time, expect it to take about 10 to 15 minutes longer than the 9-inch round, so start checking it around the 45-minute mark.
Now, if you’re heading to a big party or just want a cute, easy grab-and-go treat, you absolutely have to try making Mini Pineapple Upside Down Cakes. This is such a fun way to serve them; they look adorable with just one pineapple ring and a single cherry on top of each muffin cup. You can use a standard 12-cup muffin tin. Just grease it very well, and layer the topping in each cup before pouring the batter over.
When you make these individual portions, the baking time drops dramatically! They usually only need about 18 to 22 minutes. You’ll know they are done when the edges are set. Because they are small, let them cool just for about 5 minutes before gently running a small knife around the edge of each one and inverting them. You can check out some great ideas for making mini versions right here if you want visual guidance!
Serving Suggestions for This Easy Pineapple Dessert
This easy pineapple dessert is fantastic all by itself, honestly. The rich caramel and buttery cake are honestly perfect enough for Sunday dinner. But if you want to take it up just one notch, serve it warm! When that caramel layer is soft and gooey, it’s just unbeatable.
Since the cake is so sweet and dense, I usually pair it with something cold or slightly sharp to cut through that richness. A big dollop of vanilla bean ice cream, maybe something slightly melting down the side, is my go-to. If you aren’t an ice cream person, a little bowl of unsweetened whipped cream mixed with a tiny squeeze of fresh lime juice works like a charm. That little bit of zest really brightens up all that tropical sweetness!
Storage and Reheating Instructions
I know we want to eat the whole thing right away, but if, by some miracle, you have leftovers of this amazing dessert, don’t stress about storage! Because of that beautiful buttery topping, this cake does best stored simply at room temperature. Just cover the cake tightly with plastic wrap or put it in an airtight container. Keep it out of the fridge so that the caramel doesn’t get hard and stiff overnight.
If you do need to reheat a slice—and I recommend this, because warm pineapple is the best pineapple—microwave it for just 10 to 15 seconds. That quick zap brings the butter back to life and makes that buttery pineapple glaze melty again. It’s brilliant for stretching out the joy!
Frequently Asked Questions About Pineapple Upside Down Cake
I get so many questions coming through my inbox about this classic! I pulled together the ones I hear most often, mostly centered around getting that perfect flip and keeping things moist. If you have a question that isn’t covered here, feel free to reach out on my contact page. Happy baking!
Can I make this pineapple upside down cake ahead of time?
You totally can, but timing is everything with the caramel topping. This cake is best served the same day you bake it because that brown sugar and butter mixture is incredibly gooey and vibrant when warm. It keeps fine at room temperature for a day or two under a cover, but if you plan too far ahead, that sticky, shiny texture starts to set up and firm up too much. For the absolute best experience of this pineapple upside down cake, bake it the morning you plan to serve it!
What is the best way to invert the cake without breaking it?
This is the moment of truth, right? The most important rule here is patience during the cool-down. You must let the cake rest in the pan for exactly 10 minutes after you pull it out of the oven. Not 5, not 15—10 minutes! This gives the sugar time to slightly re-harden around the fruit but not fuse completely to the pan metal. Use a serving plate that’s slightly larger than your cake pan, hold it tightly, and flip it over in one swift, confident motion. Remember, confidence is key here!
Share Your Classic Pineapple Upside Down Cake Experience
Now that you’ve got the recipe and hopefully have had a chance to taste this slice of sunshine, I would absolutely love to hear about it! This is where our Little Kitchen Diary becomes a real conversation.
Did you try the Pineapple Bundt Cake variation? Or maybe you went all in on the Mini Pineapple Upside Down Cakes for a party? Tell me what worked for you! Drop a comment below and let me know how it turned out. A rating helps other folks know they can trust this recipe, too!
And please, if you snapped a picture of your masterpiece with that gorgeous, sticky caramel top, tag me on social media! I love seeing your successes. There’s nothing better than seeing a simple, joyous dessert like this end up on your table. Get cooking, and be sure to come back and share!
PrintThe Ultimate Classic & Easy Pineapple Upside Down Cake (Moist & Caramelized)
This classic Pineapple Upside Down Cake recipe delivers a moist, buttery cake base topped with perfectly caramelized pineapple rings and cherries. It is simple to make and perfect for family gatherings or any occasion needing a nostalgic dessert.
- Prep Time: 15 min
- Cook Time: 40 min
- Total Time: 55 min
- Yield: 8 servings 1x
- Category: Dessert
- Method: Baking
- Cuisine: American
- Diet: Vegetarian
Ingredients
- 1/2 cup unsalted butter, melted
- 1 cup packed light brown sugar
- 1 (20 ounce) can pineapple slices in juice, drained (reserve juice)
- 8 maraschino cherries
- 1 1/2 cups all-purpose flour
- 1 1/2 teaspoons baking powder
- 1/2 teaspoon salt
- 1/2 cup unsalted butter, softened
- 3/4 cup granulated sugar
- 2 large eggs
- 1 teaspoon vanilla extract
- 1/2 cup milk
- 1/4 cup reserved pineapple juice
Instructions
- Preheat your oven to 350°F (175°C). You will need a 9-inch round cake pan.
- Prepare the topping: Pour the 1/2 cup of melted butter into the bottom of the cake pan. Sprinkle the brown sugar evenly over the butter.
- Arrange the pineapple slices over the sugar mixture. Place one maraschino cherry in the center of each pineapple ring.
- Prepare the cake batter: In a medium bowl, whisk together the flour, baking powder, and salt. Set this aside.
- In a large bowl, cream together the 1/2 cup softened butter and granulated sugar until light and fluffy.
- Beat in the eggs one at a time, mixing well after each addition. Stir in the vanilla extract.
- Gradually add the dry ingredients to the wet ingredients, alternating with the milk and reserved pineapple juice. Mix until just combined; do not overmix.
- Carefully pour the cake batter over the pineapple and cherry layer in the pan. Spread the batter evenly.
- Bake for 35 to 40 minutes, or until a wooden pick inserted into the center comes out clean.
- Let the cake cool in the pan on a wire rack for 10 minutes.
- Place a serving plate upside down over the cake pan. Carefully invert the pan and plate together. Lift the pan off the cake. If any topping sticks, gently place the pineapple or cherry back onto the cake.
- Serve warm or at room temperature.
Notes
- For a Bundt cake variation, grease and flour the Bundt pan well before adding the topping mixture. Baking time may increase slightly.
- If you want a quick hack, you can substitute the dry ingredients and wet ingredients (except juice) with one box of yellow cake mix prepared according to package directions, but use the reserved pineapple juice instead of the liquid specified on the box.
- This cake keeps well covered at room temperature for up to two days.
Nutrition
- Serving Size: 1 slice
- Calories: 380
- Sugar: 35g
- Sodium: 250mg
- Fat: 18g
- Saturated Fat: 11g
- Unsaturated Fat: 7g
- Trans Fat: 0.5g
- Carbohydrates: 53g
- Fiber: 1g
- Protein: 4g
- Cholesterol: 85mg